
Introduction
Thank you for purchasing the Klip Xtreme BluWave II KWS-616 2.1 Channel Stereo System. This system is designed to provide a rich audio experience for music, games, and movies. It features Bluetooth connectivity, USB and SD card playback, and an auxiliary input for versatile audio sources. Please read this manual thoroughly before operating the device to ensure proper use and to maximize your listening experience.
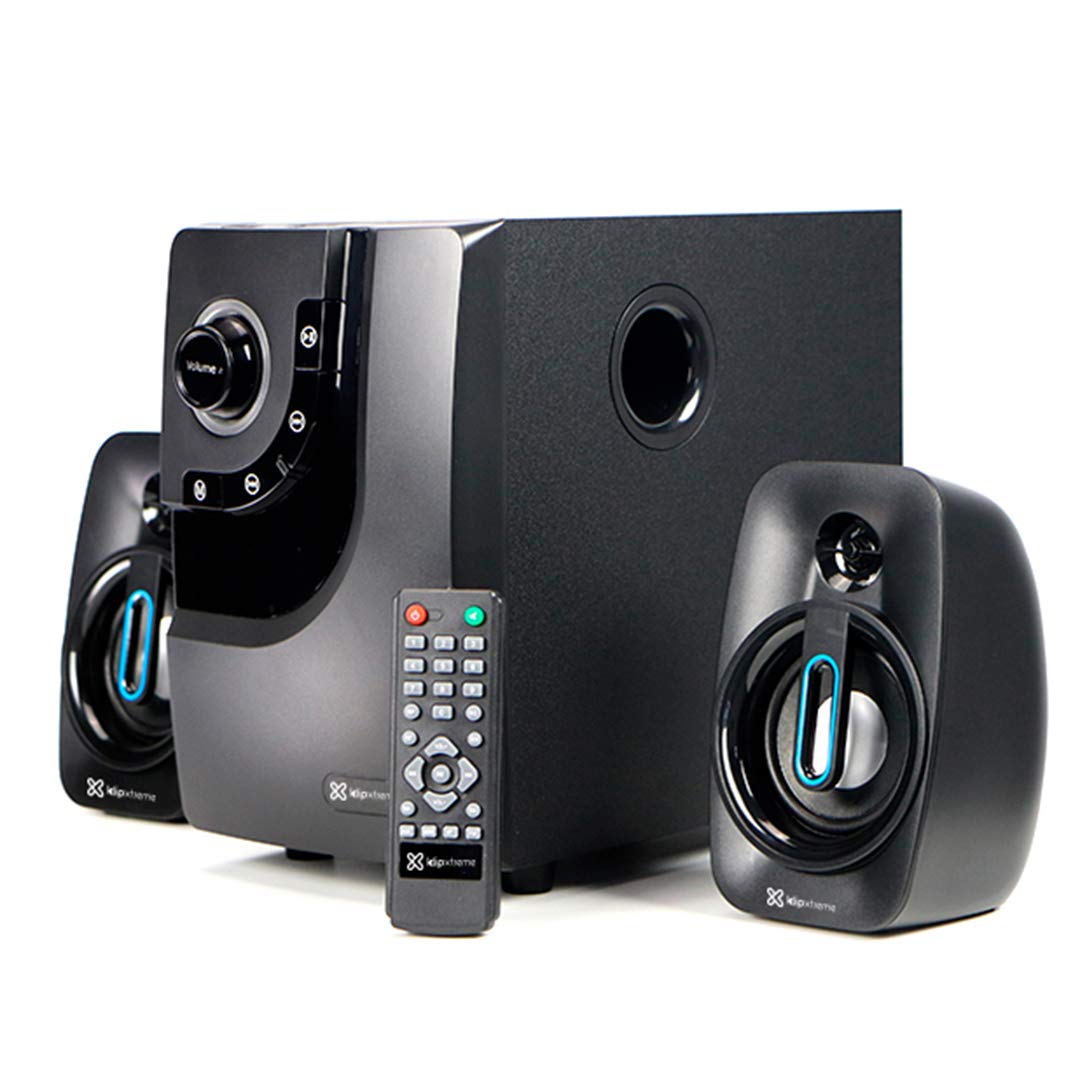
Image: The Klip Xtreme BluWave II KWS-616 system, including the subwoofer, two satellite speakers, and remote control, shown with its packaging and connecting cables.
Package Contents
Please ensure all items are present in the package:
- Subwoofer Unit
- Satellite Speakers (x2)
- Remote Control
- 3.5mm Audio Cable
- User Manual (this document)

Image: The Klip Xtreme BluWave II KWS-616 system components, including the subwoofer, satellite speakers, remote, and cables, displayed alongside its retail packaging.
Product Overview
Subwoofer Front Panel Controls

Image: A detailed view of the subwoofer's front panel, showing the volume knob with blue LED illumination, mode button, playback controls, and digital display.
- Volume Knob: Rotate to adjust the master volume. Press to change input mode (Bluetooth, USB, SD, AUX).
- Bass Knob: Adjusts the bass level.
- Playback Controls: Play/Pause, Previous Track, Next Track.
- Digital Display: Shows current mode, track number, or volume level.
Subwoofer Rear Panel Connections

Image: The rear panel of the subwoofer, displaying input and output ports, power switch, and AC power input.
- Input (R/L): RCA stereo input for connecting external audio sources.
- Output (R/L): Connects to the satellite speakers.
- USB Port: For USB flash drives.
- SD Card Slot: For SD memory cards.
- Power Switch: Turns the system ON or OFF.
- AC Input: Connects to the power cord.
Setup
1. Speaker Connection
- Connect the cables from the satellite speakers to the "Output (R/L)" ports on the rear panel of the subwoofer. Ensure correct polarity.
- Position the satellite speakers to the left and right of your listening area for optimal stereo separation. The subwoofer can be placed on the floor or a sturdy surface.
2. Power Connection
- Ensure the power switch on the rear of the subwoofer is in the OFF position.
- Connect the AC power cord to the "AC Input" on the subwoofer's rear panel.
- Plug the other end of the power cord into a standard wall outlet (110V/220V 60Hz/50Hz auto-sensing).
Operating Instructions
Power On/Off
Flip the power switch on the rear panel of the subwoofer to the ON position to power on the system. Flip it to the OFF position to power off.
Volume and Bass Control
- Volume: Rotate the large knob on the front of the subwoofer or use the volume buttons on the remote control to adjust the overall volume.
- Bass: Use the dedicated bass knob on the front of the subwoofer or the bass control buttons on the remote to adjust the bass intensity.
Input Modes
Press the Volume knob on the front panel or the "Mode" button on the remote control to cycle through available input modes: Bluetooth, USB, SD, and AUX.
Bluetooth Pairing
- Switch the system to Bluetooth mode. The digital display will show "BT" and an indicator light may flash, indicating it's in pairing mode.
- On your Bluetooth-enabled device (smartphone, tablet, computer), enable Bluetooth and search for available devices.
- Select "Klip Xtreme KWS-616" (or similar name) from the list of devices.
- Once paired, the system will confirm the connection, and you can begin playing audio from your device. The effective wireless range is approximately 33 feet (10 meters).
USB/SD Playback
- Insert a USB flash drive or an SD card containing audio files into the respective port on the subwoofer's rear panel.
- Switch the system to USB or SD mode. The system will automatically detect and begin playing audio files.
- Use the playback controls on the front panel or remote control to play, pause, skip tracks, or adjust volume.
AUX Connection
- Connect one end of the provided 3.5mm audio cable to the "Input (R/L)" RCA ports on the subwoofer (using an adapter if necessary).
- Connect the other end of the 3.5mm audio cable to the headphone jack or audio output of your external audio device (e.g., TV, DVD player, gaming console, MP3 player).
- Switch the system to AUX mode.
- Play audio from your connected device.
Remote Control Functions
The included remote control provides convenient access to all major functions:
- Power: Turns the system on/off (standby).
- Mode: Cycles through input sources (Bluetooth, USB, SD, AUX).
- Volume +/-: Adjusts master volume.
- Bass +/-: Adjusts bass level.
- Mute: Mutes/unmutes audio.
- Play/Pause: Controls playback for USB/SD/Bluetooth.
- Previous/Next: Skips tracks for USB/SD/Bluetooth.
Maintenance
- Keep the system away from direct sunlight, heat sources, and moisture.
- Clean the exterior surfaces with a soft, dry cloth. Do not use abrasive cleaners or solvents.
- Ensure proper ventilation around the subwoofer to prevent overheating.
- Do not block the subwoofer's bass port.
Troubleshooting
| Problem | Possible Solution |
|---|---|
| No power |
|
| No sound |
|
| Bluetooth pairing fails |
|
| Distorted sound |
|
Specifications

Image: The Klip Xtreme BluWave II KWS-616 subwoofer and satellite speakers displayed with rulers to indicate their physical dimensions.
| Device Type | 2.1 speaker system with Bluetooth technology |
| Maximum Power Output (RMS) | 40W (80W Peak Power) |
| AC Input | 110V/220V 60Hz/50Hz (autosensing) |
| Satellite Driver Unit | 3 inches (76mm) |
| Satellite RMS Power | 10W each (20W total) |
| Satellite Frequency Response | 120Hz-18kHz |
| Satellite Impedance | 8Ω |
| Subwoofer Driver Unit | 4 inches (102mm) |
| Subwoofer RMS Power | 20W |
| Subwoofer Frequency Response | 20Hz-150Hz |
| Subwoofer Impedance | 4Ω |
| Signal to Noise Ratio | 60dB |
| Connectivity | Bluetooth, SD, USB, 3.5mm (via RCA input) |
| Wireless Range | Up to 33 feet (10 meters) |
| Subwoofer Dimensions (WxHxD) | 6.1 x 9.8 x 10.8 inches (15.5 x 24.9 x 27.4 cm) |
| Satellite Dimensions (WxHxD) | 3.9 x 6.3 x 3.8 inches (9.9 x 16.0 x 9.7 cm) |
| Product Weight | 6.8 lbs (3.08 kg) |
| Cable Length | 4.9 feet (1.5 meters) |
| Model Number | KWS-616 |
Warranty and Support
The Klip Xtreme BluWave II KWS-616 system comes with a one-year limited warranty from the date of purchase. This warranty covers defects in materials and workmanship under normal use. It does not cover damage caused by misuse, accident, unauthorized modification, or external causes.
For technical support or warranty claims, please contact your local Klip Xtreme authorized dealer or visit the official Klip Xtreme website for contact information.
