
Walbro K20-WTA
Contents
Walbro K20-WTA Carburetor Rebuild Kit Instruction Manual
Model: K20-WTA | Brand: Walbro
Introduction
This manual provides detailed instructions for the installation, maintenance, and troubleshooting of the Walbro K20-WTA Carburetor Rebuild Kit. This kit is designed to restore the performance of Walbro carburetors commonly found in small engines, including those used in Poulan and Homelite equipment. Proper installation and maintenance are crucial for optimal engine function and longevity.
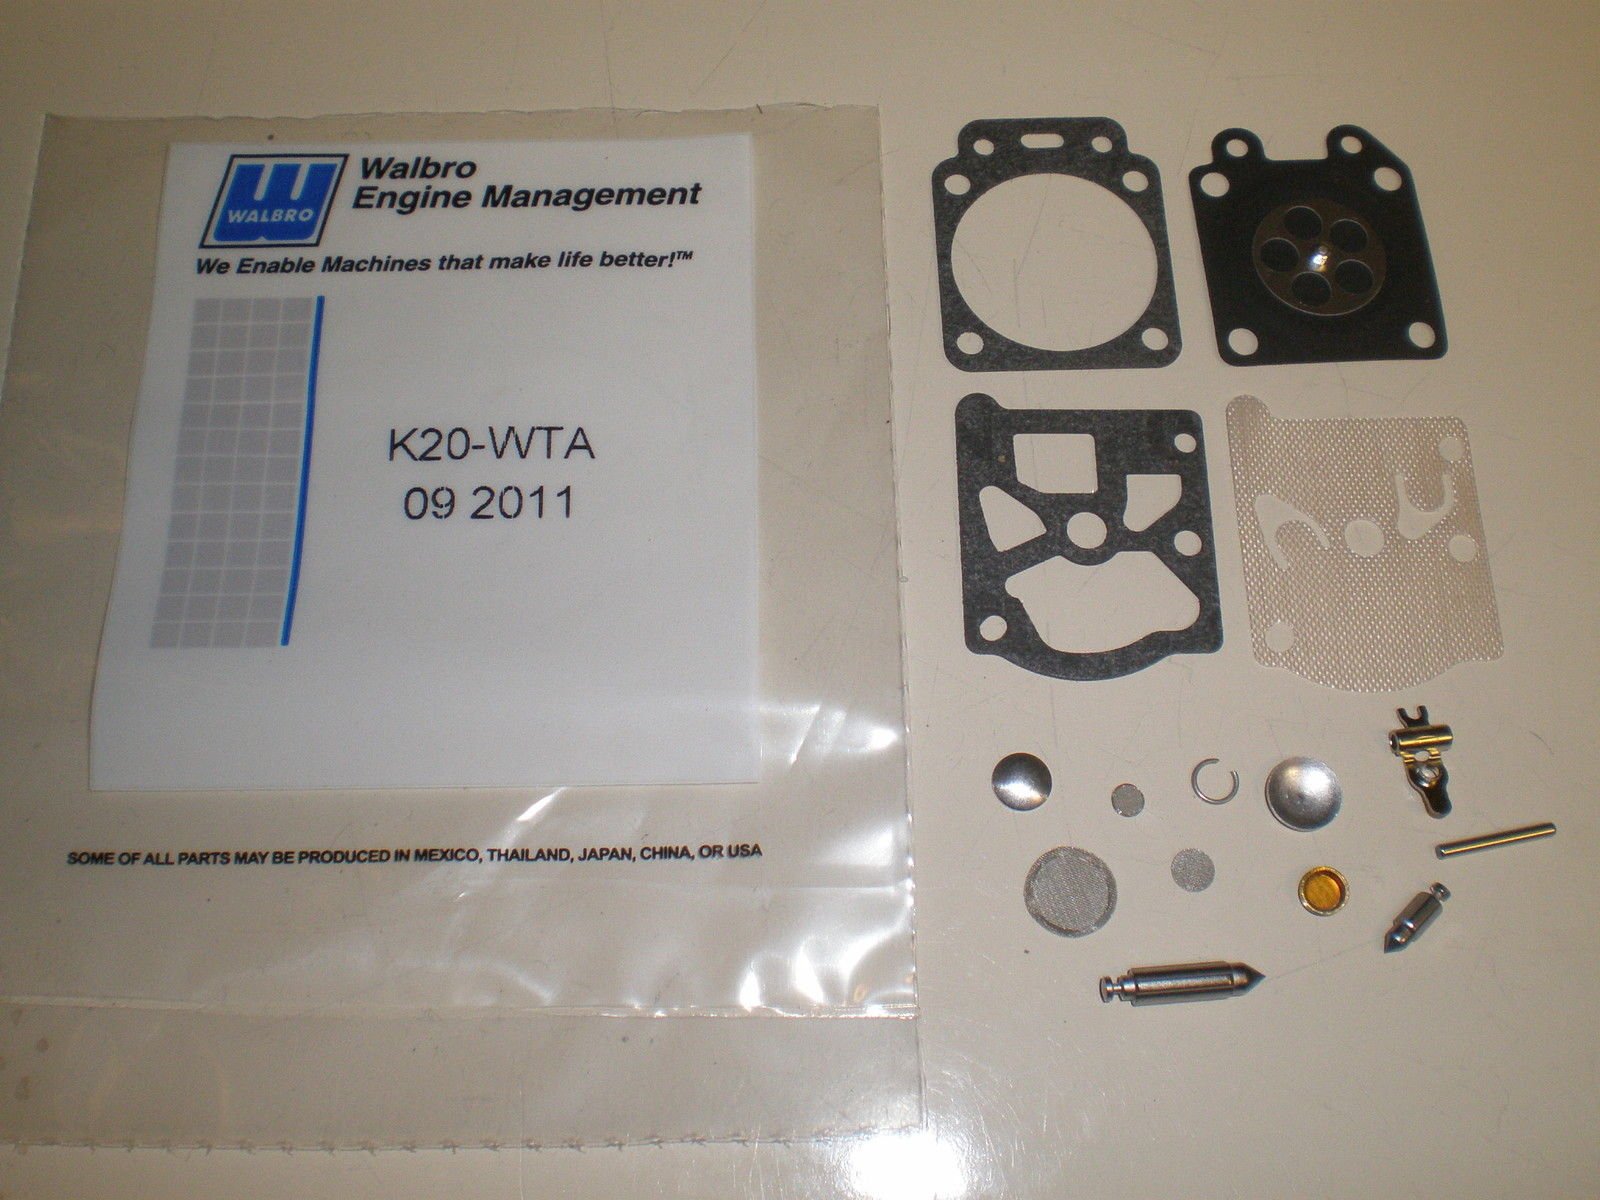
Image: Walbro K20-WTA Carburetor Rebuild Kit. This image displays the various gaskets, diaphragms, and other small components included in the Walbro K20-WTA carburetor rebuild kit, essential for restoring carburetor function.
Safety Information
Always prioritize safety when working with fuel systems and small engines. Failure to follow safety precautions can result in serious injury or property damage.
- Ensure the engine is turned off and cooled down before beginning any work.
- Disconnect the spark plug wire to prevent accidental starting.
- Work in a well-ventilated area to avoid inhaling fuel fumes.
- Wear appropriate personal protective equipment, including safety glasses and gloves.
- Handle fuel with extreme care. Keep away from open flames, sparks, and heat sources.
- Dispose of old fuel and parts responsibly according to local regulations.
- If unsure about any step, consult a qualified technician.
Package Contents
The Walbro K20-WTA Carburetor Rebuild Kit typically includes the following components. Verify all parts are present before beginning installation:
- Diaphragms (metering and pump)
- Gaskets (various sizes for carburetor body, fuel pump, etc.)
- Inlet needle and lever
- Screens and filters (if applicable to specific carburetor model)
- Other small components necessary for a complete rebuild.
Note: Specific contents may vary slightly based on the exact carburetor model the kit is intended for. Refer to your carburetor's service manual for a detailed parts diagram.
Setup and Installation
This section outlines the general procedure for rebuilding a Walbro carburetor using the K20-WTA kit. Specific steps may vary depending on your engine and carburetor model. It is recommended to consult your engine's service manual for detailed disassembly and reassembly instructions.
1. Carburetor Removal
- Drain the fuel tank or clamp the fuel line to prevent fuel leakage.
- Remove the air filter assembly.
- Carefully disconnect the fuel lines, throttle linkage, and choke linkage from the carburetor. Note their positions for reassembly.
- Unbolt the carburetor from the engine manifold.
2. Disassembly and Cleaning
- Place the carburetor on a clean workbench.
- Carefully remove all screws holding the carburetor halves together and separate them. Pay attention to the order and orientation of all gaskets and diaphragms.
- Remove the inlet needle, lever, and spring.
- Inspect all passages for blockages. Use carburetor cleaner and compressed air to thoroughly clean all internal components and passages. Ensure no debris remains.
- Do not use wire or hard objects to clean jets, as this can alter their calibration.
3. Kit Installation
- Install the new inlet needle, lever, and spring from the K20-WTA kit. Ensure the lever height is correctly set according to your carburetor's specifications (often flush with the carburetor body, but check your specific model's manual).
- Replace all old gaskets and diaphragms with the new ones from the kit. Ensure correct orientation and placement. The metering diaphragm typically goes against the carburetor body, followed by its gasket, and then the cover. The pump diaphragm usually has a gasket on both sides or a gasket then the diaphragm.
- Carefully reassemble the carburetor halves, ensuring all screws are tightened evenly to prevent warping. Do not overtighten.
4. Carburetor Reinstallation and Adjustment
- Reinstall the carburetor onto the engine manifold, ensuring new gaskets are used between the carburetor and the engine.
- Reconnect the fuel lines, throttle linkage, and choke linkage. Double-check all connections.
- Refill the fuel tank or unclamp the fuel line.
- Start the engine. It may require several pulls to prime the fuel system.
- Adjust the idle speed and mixture screws according to your engine's service manual. Typically, start with factory settings (often 1 to 1.5 turns out from lightly seated) and fine-tune for smooth operation and proper acceleration.
Operating Principles (Carburetor Function)
The carburetor's primary function is to mix air and fuel in the correct ratio for combustion in the engine. After rebuilding with the K20-WTA kit, the carburetor should efficiently perform the following:
- Fuel Delivery: The fuel pump diaphragm draws fuel from the tank.
- Metering: The metering diaphragm and inlet needle regulate the amount of fuel entering the mixing chamber based on engine vacuum.
- Atomization: Fuel is atomized into a fine mist and mixed with air as it passes through the venturi.
- Mixture Control: Adjustable screws (High and Low speed) allow for fine-tuning the air-fuel mixture for optimal performance at different engine speeds.
A properly rebuilt carburetor ensures consistent fuel delivery, leading to easier starting, stable idling, and responsive acceleration.
Maintenance
Regular maintenance helps prolong the life of your carburetor and ensures reliable engine performance.
- Fuel Quality: Always use fresh, clean fuel. Stale fuel or fuel containing ethanol can degrade carburetor components over time. Consider using a fuel stabilizer.
- Fuel Filter: Regularly check and replace the in-tank fuel filter to prevent debris from reaching the carburetor.
- Air Filter: Keep the air filter clean to ensure proper air-fuel mixture and prevent dirt from entering the carburetor.
- Storage: Before long-term storage, run the engine until it runs out of fuel, or drain the fuel system to prevent gumming and varnish buildup in the carburetor.
- Inspection: Periodically inspect fuel lines and carburetor gaskets for cracks or leaks.
Troubleshooting
If your engine experiences issues after rebuilding the carburetor, consider the following common problems and solutions:
| Problem | Possible Cause | Solution |
|---|---|---|
| Engine won't start or starts hard | Incorrect inlet needle height, clogged fuel filter, improperly installed diaphragms/gaskets, fuel lines reversed, incorrect mixture screw settings. | Check inlet needle setting, replace fuel filter, verify diaphragm/gasket orientation, ensure fuel lines are connected correctly, adjust mixture screws. |
| Engine idles rough or stalls | Low speed mixture screw incorrect, air leak (gaskets), clogged idle circuit. | Adjust low speed mixture screw, check for air leaks around carburetor and manifold gaskets, clean idle passages. |
| Engine lacks power or won't accelerate | High speed mixture screw incorrect, clogged main jet, fuel starvation. | Adjust high speed mixture screw, re-clean main jet, check fuel flow. |
| Fuel leaks from carburetor | Damaged or improperly seated gaskets/diaphragms, faulty inlet needle, loose screws. | Re-inspect and replace faulty gaskets/diaphragms, check inlet needle for proper seating, tighten carburetor screws evenly. |
Always refer to your engine's specific service manual for detailed troubleshooting steps and adjustment procedures.
Specifications
Key specifications for the Walbro K20-WTA Carburetor Rebuild Kit:
- Model: K20-WTA
- Compatibility: Designed for various Walbro carburetors, commonly found in Poulan and Homelite equipment. Refer to your specific carburetor model for exact compatibility.
- Package Dimensions: 4 x 4 x 2 inches
- Item Weight: 1 pound
- ASIN: B077343SW9
Note: This kit is a rebuild kit for an existing carburetor, not a complete carburetor unit.
Warranty and Support
For specific warranty information regarding the Walbro K20-WTA Carburetor Rebuild Kit, please refer to the documentation provided with your purchase or contact Walbro directly through their official website. For technical support or assistance with installation, it is recommended to consult a certified small engine technician or refer to the service manual for your specific engine and carburetor model.
Walbro Official Website: www.walbro.com
Documents and downloads
Ask a question about this manual
Ask about setup, troubleshooting, compatibility, parts, safety, or missing instructions. Manuals+ will review the question and use this page’s manual context to help answer it.