
1. Introduction
The Swann NVR-460 is a compact Micro Wi-Fi Network Video Recorder designed for wireless surveillance systems. It features a pre-installed 500GB hard drive for recording 720p high-definition video from up to four Wi-Fi cameras. This manual provides essential information for setting up, operating, and maintaining your NVR-460 system.
Package Contents:
- Swann NVR-460 Wireless Micro Network Video Recorder with 500GB hard drive pre-installed
- Setup Wizard Quick Start Guide
- Antenna
- Ethernet Cable
- HDMI Cable
- USB Mouse
- Power Adapter
- Theft Deterrent Stickers
2. Product Overview
The NVR-460 offers 720p high-definition live viewing and playback, with remote access capabilities via smartphone or tablet. It supports up to 4 Wi-Fi cameras and includes various ports for connectivity.
Front Panel Indicators:
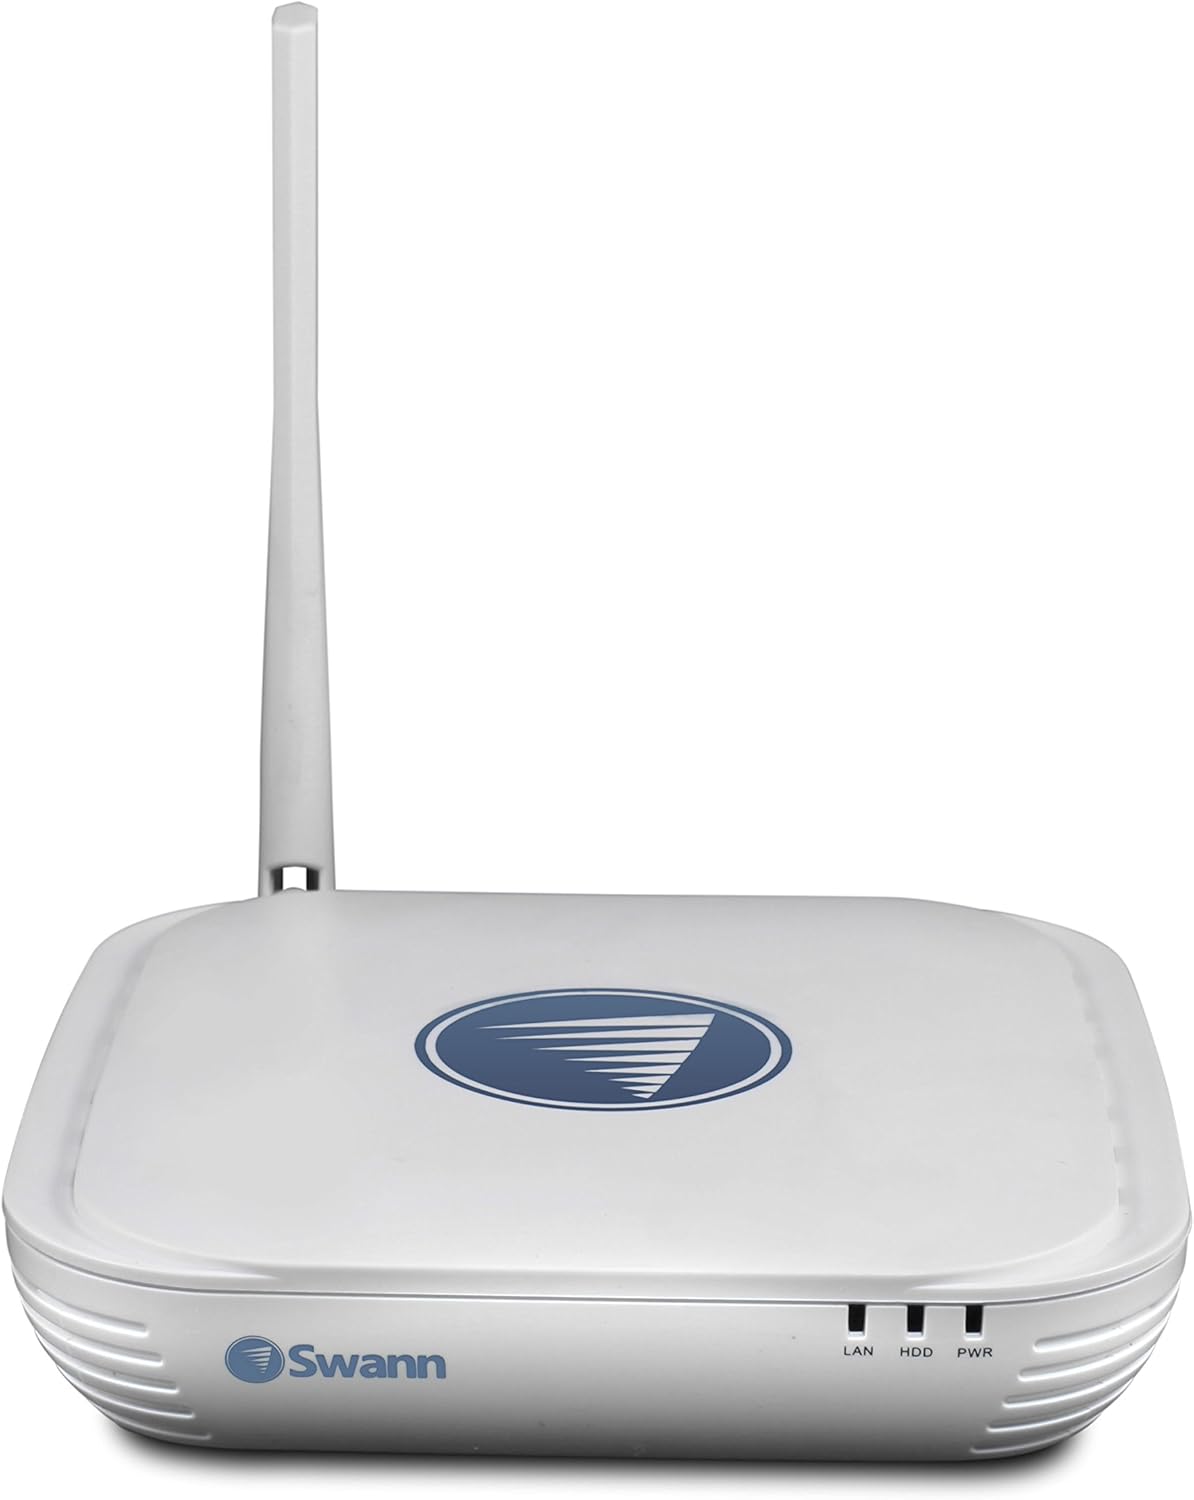
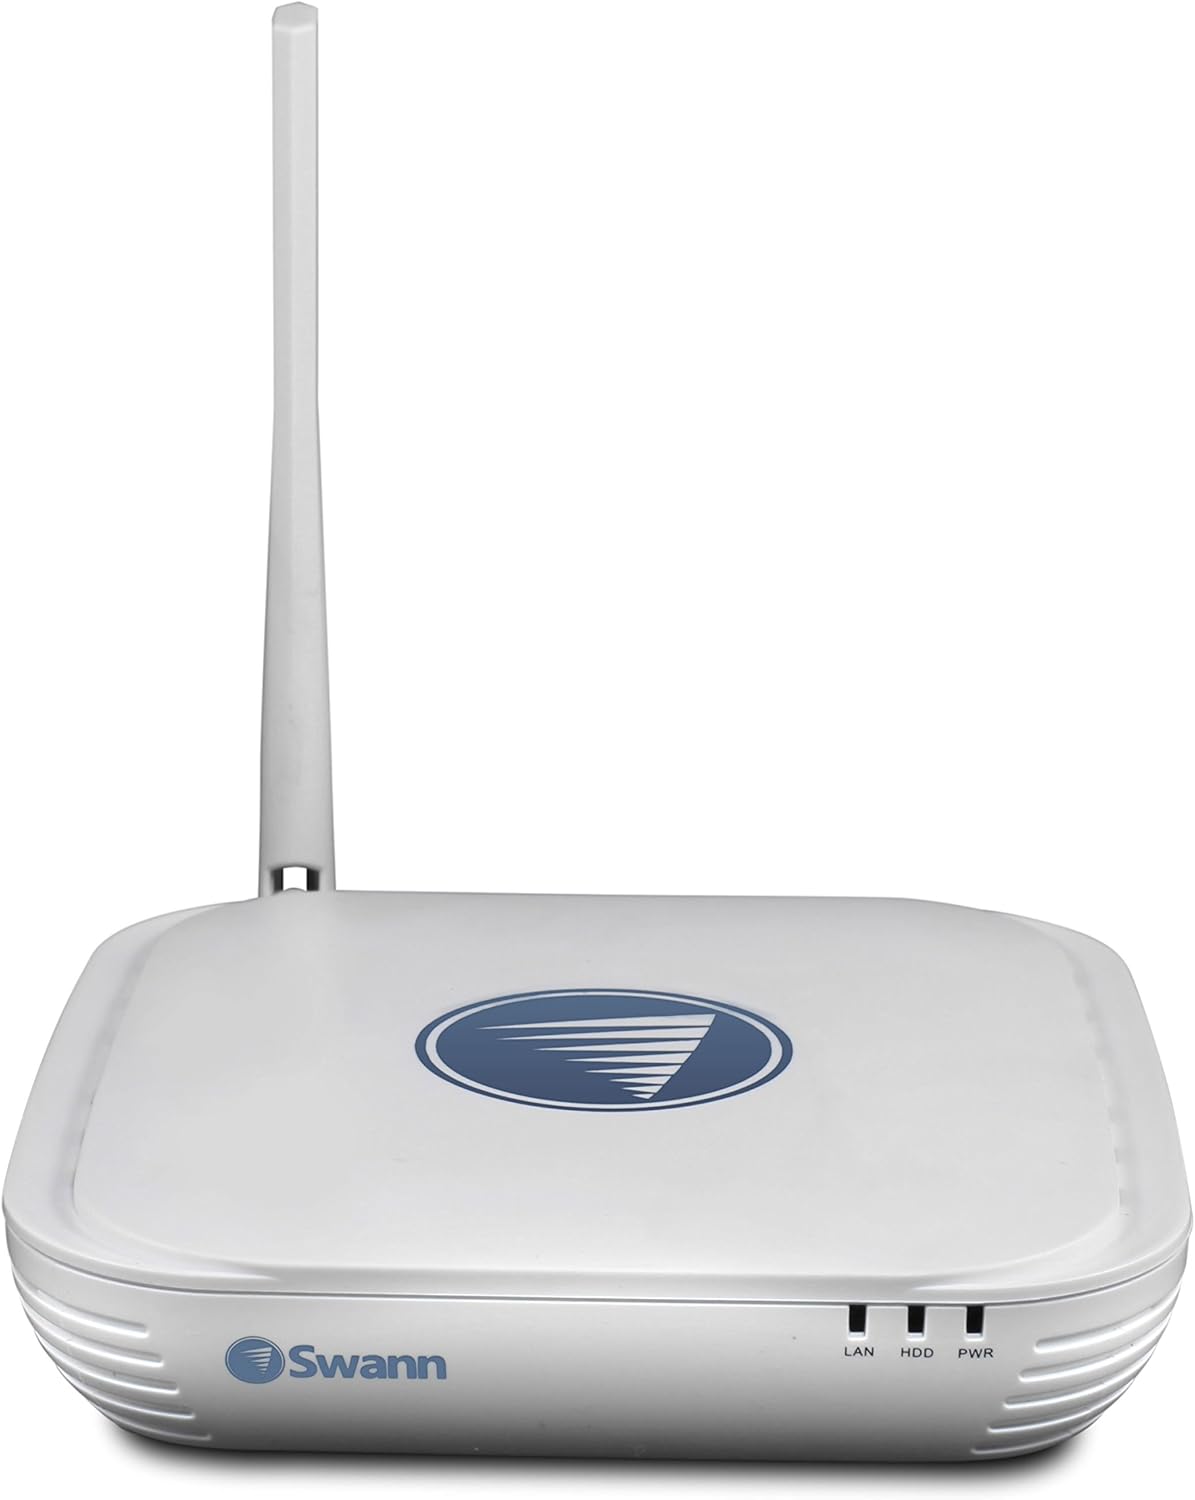
This image displays the front of the Swann NVR-460. On the right side of the front panel, there are three LED indicators: LAN, HDD, and PWR. These LEDs provide status information for network activity, hard drive operation, and power status, respectively.
- LAN LED: Indicates network activity.
- HDD LED: Indicates hard disk drive activity.
- PWR LED: Indicates the device is powered on.
Rear Panel Ports:
This image shows the rear panel of the Swann NVR-460, highlighting its various connectivity ports. From left to right, these include the DC 5V power input, a 3.5mm audio output jack, a VGA port, an HDMI port, an Ethernet port, two USB ports, and an antenna connector.
- DC 5V: Power input port.
- Audio Out: 3.5mm headphone jack for audio output.
- VGA: Video Graphics Array output for connecting to a monitor.
- HDMI: High-Definition Multimedia Interface output for connecting to a display.
- LAN: Ethernet port for wired network connection.
- USB: Two USB ports for connecting a mouse or other peripherals.
- Antenna: Connector for the Wi-Fi antenna.
3. Setup
Follow these steps to set up your Swann NVR-460.
3.1 Initial Connection
- Attach Antenna: Screw the provided antenna onto the antenna connector at the rear of the NVR.
- Connect Display: Connect the NVR to a monitor or TV using either the HDMI cable or VGA cable.
- Connect Mouse: Plug the USB mouse into one of the USB ports on the rear panel.
- Connect Network (Optional): For wired network access, connect an Ethernet cable from the NVR's LAN port to your router. For Wi-Fi, ensure the antenna is attached.
- Power On: Connect the power adapter to the DC 5V input on the NVR, then plug the adapter into an available power outlet. The NVR will power on automatically.
3.2 Setup Wizard
Upon first power-up, the NVR will launch a Setup Wizard. Follow the on-screen prompts to configure basic settings such as language, time zone, network settings, and hard drive initialization. This wizard will also guide you through pairing your compatible Swann Wi-Fi cameras (e.g., SWNVW-460CAM / SWNVW-470CAM).
3.3 Adding Cameras
The NVR-460 supports up to 4 Wi-Fi cameras. Refer to your camera's instruction manual for specific pairing instructions. Generally, cameras are paired wirelessly through the NVR's menu system, often involving a pairing button on the camera and a discovery process on the NVR.
4. Operating Instructions
Once set up, you can begin using your NVR-460 for surveillance.
4.1 Live Viewing
After cameras are paired, the NVR will display live video feeds on the connected monitor. You can typically switch between single-camera view and multi-camera grid view using the USB mouse.
4.2 Recording Modes
The NVR-460 offers several recording options:
- Manual Recording: Start and stop recording manually via the NVR interface.
- Schedule Recording: Set specific times and days for continuous recording.
- Motion Recording: The NVR records only when motion is detected by the connected cameras, saving storage space.
Configure these settings through the NVR's main menu, accessible with the USB mouse.
4.3 Playback
To review recorded footage, navigate to the Playback section in the NVR's menu. You can search for recordings by date, time, and event type (e.g., motion detection). The 500GB hard drive stores a significant amount of footage, depending on recording settings and camera activity.
4.4 Remote Access
The NVR-460 supports remote viewing on your smartphone or tablet. Download the official SwannView Link app (or specified app in your Quick Start Guide) from your device's app store. Follow the in-app instructions to add your NVR using its unique ID or QR code for remote monitoring.
5. Maintenance
Proper maintenance ensures the longevity and optimal performance of your NVR-460.
5.1 Hard Drive Management
The NVR comes with a pre-installed 500GB 2.5-inch SATA hard drive. When the hard drive is full, the NVR will typically overwrite the oldest recordings (loop recording). Regularly back up important footage to an external USB drive if needed. You can also format the hard drive through the NVR's system settings, which will erase all recorded data.
5.2 General Care
- Keep the NVR in a well-ventilated area to prevent overheating.
- Avoid exposing the device to direct sunlight, moisture, or extreme temperatures.
- Clean the exterior with a soft, dry cloth. Do not use liquid cleaners or aerosols.
- Ensure all cable connections are secure.
6. Troubleshooting
If you encounter issues with your NVR-460, refer to the following common troubleshooting steps.
6.1 No Power
- Ensure the power adapter is securely connected to both the NVR and a working power outlet.
- Verify the power outlet is functional by plugging in another device.
- Check the PWR LED on the front panel; if it's off, there might be a power issue.
6.2 No Video Output
- Confirm the HDMI or VGA cable is securely connected to both the NVR and the display.
- Ensure the display is set to the correct input source (HDMI or VGA).
- Try a different HDMI or VGA cable, or a different display, to rule out faulty equipment.
6.3 Cameras Not Displaying
- Verify that your cameras are powered on and within range of the NVR's Wi-Fi signal.
- Check the camera's status indicators for any error lights.
- Re-pair the cameras with the NVR through the NVR's menu system.
- Ensure the NVR's antenna is properly attached and positioned.
6.4 Remote Access Issues
- Ensure the NVR is connected to the internet (either via Ethernet or Wi-Fi).
- Verify your smartphone/tablet has an active internet connection.
- Check that the correct app is installed and updated to the latest version.
- Confirm the NVR's ID or QR code was entered correctly in the app.
7. Specifications
| Feature | Specification |
|---|---|
| Model Number | NVR-460 |
| Hard Drive | 500GB 2.5-inch SATA (pre-installed) |
| Video Input | Up to 4 Wi-Fi Cameras (720p) |
| Video Output | HDMI / VGA |
| Audio Output | 3.5mm Headphone Jack |
| Display Resolution | Supports up to 1080p |
| Display Frame Rate | 15fps per channel |
| Recording Mode | Manual / Schedule / Motion |
| Wireless Range | 30-50ft / 10-15m (depends on local conditions) |
| Ports | 1x Ethernet, 1x HDMI, 1x VGA, 2x USB, 1x 3.5mm Audio out, Antenna, DC 5V |
| Power Adapter Input | 100 - 240V, 50/60Hz, 0.35A |
| Power Adapter Output | 5V, 2000mA |
| Unit Dimensions (H x W x D) | 1.25 x 6 x 6-inches |
| Date First Available | October 27, 2017 |
8. Warranty and Support
This product is manufactured by Swann. For warranty information, technical support, or further assistance, please visit the official Swann website or contact their customer service. You can find more information and support resources at the Swann Store.