1. Introduction
The FRITZ!DECT 301 is an intelligent radiator controller designed for integration into your FRITZ!Box home network. It enables automatic and precise control of room temperature, contributing to energy efficiency and comfort. This manual provides essential information for the installation, operation, and maintenance of your FRITZ!DECT 301 thermostat.
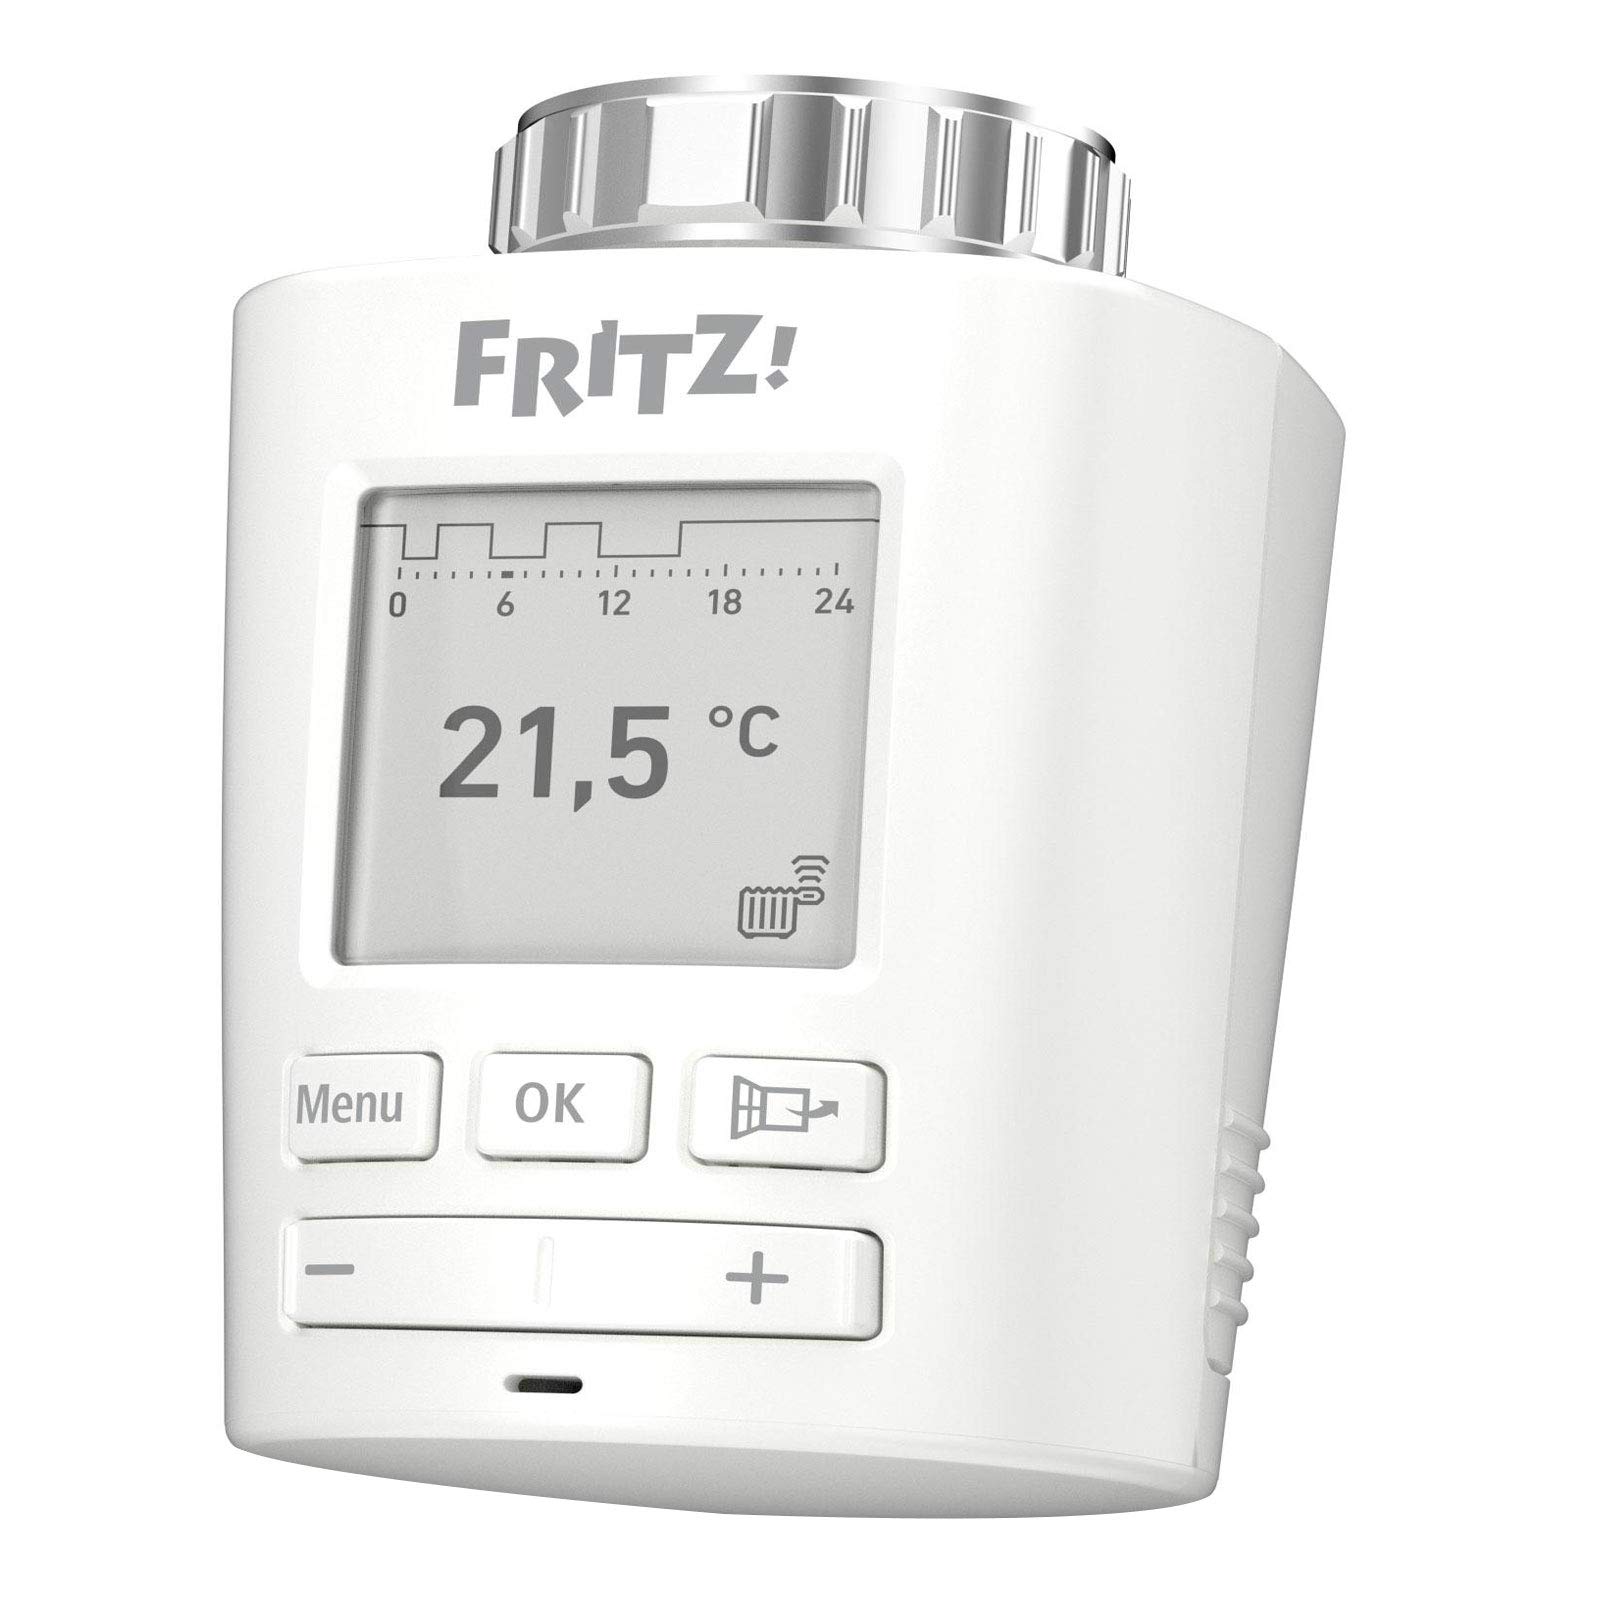
Image 1.1: Front view of the FRITZ!DECT 301 Thermostat, showing the e-paper display and control buttons.
2. Safety Information
- Read all instructions carefully before installation and use.
- Do not expose the device to moisture, extreme temperatures, or direct sunlight.
- Use only the specified battery type (2 x AA batteries). Ensure correct polarity when inserting batteries.
- Keep batteries out of reach of children. Do not dispose of batteries in fire.
- Do not open the device casing. Repairs should only be performed by qualified personnel.
- This device is intended for indoor use only.
3. Package Contents
Verify that all items are present in the package:
- FRITZ!DECT 301 Thermostat
- 2 x AA Batteries
- Installation Instructions (this manual)
- Adaptor for Danfoss RA valves
4. Setup
4.1. Battery Installation
- Remove the battery compartment cover on the back of the FRITZ!DECT 301.
- Insert the two AA batteries, ensuring correct polarity (+/-).
- Replace the battery compartment cover. The device display should activate.
4.2. Mounting on Radiator Valve
The FRITZ!DECT 301 is designed for easy installation on all standard radiator valves with a connection thread. An adaptor for Danfoss RA valves is included if needed.
- Remove your existing thermostat head from the radiator valve.
- If necessary, attach the appropriate adaptor to the radiator valve.
- Screw the FRITZ!DECT 301 onto the radiator valve or adaptor until it is securely fastened. Do not overtighten.
4.3. Pairing with FRITZ!Box
The FRITZ!DECT 301 requires a FRITZ!Box with a DECT base and FRITZ!OS version 6.83 or higher for operation.
- Ensure your FRITZ!Box is powered on and its DECT function is active.
- On the FRITZ!DECT 301, press and hold the "Menu" button until the pairing symbol appears on the display.
- Within 2 minutes, press the "DECT" button on your FRITZ!Box.
- The FRITZ!DECT 301 will connect to the FRITZ!Box. A successful connection will be indicated on the thermostat's display.
- Further configuration, such as naming the thermostat and setting up heating profiles, can be done via the FRITZ!Box user interface (accessible via PC, notebook, smartphone, or tablet).
5. Operating the Thermostat
5.1. Basic Controls
The FRITZ!DECT 301 features an e-paper display and several buttons for local control:
- Menu Button: Accesses settings and functions.
- OK Button: Confirms selections.
- Plus (+) Button: Increases temperature or navigates up in menus.
- Minus (-) Button: Decreases temperature or navigates down in menus.
5.2. Setting Temperature
You can adjust the desired room temperature directly on the device using the Plus (+) and Minus (-) buttons. The current set temperature will be shown on the e-paper display.
5.3. Heating Profiles and Comfort Functions
The FRITZ!DECT 301 offers advanced features configurable through the FRITZ!Box user interface:
- Individual Heating Profiles: Program specific heating schedules for different times of day and days of the week.
- E-Paper Display: Energy-efficient display showing current temperature and status.
- Window Open Detection: Automatically reduces heating when a window is opened to save energy.
- Group Circuit: Control multiple FRITZ!DECT thermostats simultaneously.
- Key Lock: Prevents unauthorized changes to settings on the device.
- Limescale Protection Function: Periodically opens and closes the valve to prevent limescale buildup.
- Automatic Frost Protection: Ensures the room temperature does not drop below a critical level to prevent pipes from freezing.
5.4. Remote Control
Control your FRITZ!DECT 301 from anywhere using the FRITZ!App or the FRITZ!Box user interface via the internet. This allows for convenient temperature adjustments and profile management even when you are away from home.
6. Maintenance
6.1. Battery Replacement
When the battery level is low, an indicator will appear on the e-paper display. Replace the batteries promptly to ensure continuous operation.
- Remove the battery compartment cover.
- Remove the old AA batteries.
- Insert two new AA batteries, observing correct polarity.
- Replace the battery compartment cover.
6.2. Cleaning
Clean the device with a soft, dry cloth. Do not use abrasive cleaners or solvents, as these can damage the casing or display.
7. Troubleshooting
- Device not responding: Check if batteries are correctly inserted and charged. Replace if necessary.
- Cannot connect to FRITZ!Box: Ensure the FRITZ!Box DECT function is active and the thermostat is within range. Repeat the pairing process (Section 4.3). Update your FRITZ!Box OS to the latest version.
- Incorrect temperature readings: Ensure the thermostat is not obstructed or exposed to direct heat sources (e.g., sunlight, other appliances) that could affect its internal sensor.
- Radiator not heating/cooling as expected: Verify that the thermostat is correctly mounted on the valve and that the valve itself is functioning properly. Check the set heating profile in the FRITZ!Box interface.
- Display is blank: Check batteries. If new batteries do not resolve the issue, contact support.
8. Specifications
| Model Number | 20002822 |
| Brand | FRITZ! |
| Manufacturer | AVM |
| Colour | White |
| Power Source | Battery Powered (2 x AA batteries, included) |
| Voltage | 230 Volts (Note: This likely refers to the system voltage the FRITZ!Box operates on, not the thermostat itself) |
| Wattage | 3600 (Likely refers to maximum controlled load, not thermostat consumption) |
| Display Style | E-paper |
| Special Features | Programmable, Window Open Detection, Limescale Protection, Frost Protection, Key Lock |
| Connectivity Technology | DECT ULE (via FRITZ!Box) |
| Controller Type | Application, Programmable, Smart/Remote |
| Product Dimensions (L x W x H) | 8.7 x 5.3 x 5.2 cm |
| Item Weight | 143 Grams |
| Included Components | FRITZ!DECT 301, 2 x AA batteries, installation instructions, adaptor for Danfoss RA |

Image 8.1: FRITZ!DECT 301 Thermostat showing its dimensions (8.7cm length, 5.3cm width, 5.2cm height).
9. Warranty and Support
For warranty information, please refer to the documentation provided with your purchase or visit the official FRITZ! website. If you encounter any issues not covered in this manual or require further assistance, please contact FRITZ! customer support.
Manufacturer: AVM
Website: www.avm.de/en/


