
Retevis EUA9129B-J9129A
Retevis RT95 Amateur Radio Transceiver User Manual
Model: EUA9129B-J9129A
1. Introduction
The Retevis RT95 is a compact and powerful dual-band amateur radio transceiver designed for reliable communication. It features a dual-band, dual-display, and dual-standby capability, supporting both 2-meter and 70-centimeter bands. The color LCD screen is easily readable and provides all necessary information. Its user-friendly design allows for direct parameter adjustments on the device or via PC. The 180-degree rotatable TFT LCD screen and quick mode changer enhance usability. With multiple power output options (5W/10W/25W) and various bandwidth settings (25K wide, 20K medium, 12.5K narrow), it offers flexibility for different communication needs. It supports both amateur and professional modes, including various scanning functions, reverse repeater, offset function, and separate CTCSS/DCS DTMF 5-tone settings. Its mini size (640g, 124x163x39mm) and lightweight design make it ideal for mobile or in-car installation. The slim design incorporates a massive heat sink for efficient cooling, ensuring stable operation. A professional 9-level squelch system provides clear call quality, and the VOX function allows for hands-free operation, improving convenience and safety during driving.
2. Safety Information
Please read all safety instructions carefully before operating the Retevis RT95 transceiver to ensure safe and optimal performance. Failure to follow these guidelines may result in injury, damage to the device, or voiding the warranty.
- Power Supply: Use only the specified 13.8V DC power supply. Incorrect voltage can damage the unit.
- Antenna Connection: Ensure the antenna is properly connected before transmitting to prevent damage to the transceiver's final amplifier.
- Heat Dissipation: The device generates heat during operation, especially at higher power settings. Ensure adequate ventilation around the unit. Do not block the heat sink fins.
- Water Resistance: This device is not waterproof. Avoid exposure to water, rain, or high humidity.
- Installation: When installing in a vehicle, ensure the unit is securely mounted and does not obstruct the driver's view or interfere with vehicle controls.
- Electromagnetic Interference: Be aware that this device can cause electromagnetic interference. If interference occurs, take measures to mitigate it, such as reorienting or relocating the receiving antenna.
- Servicing: Do not attempt to open or service the transceiver yourself. Refer all servicing to qualified personnel.
- Children: Keep the device and its accessories out of reach of children.
3. Package Contents
Upon opening the package, please verify that all the following items are included:

Image: Contents of the Retevis RT95 package, showing the radio, microphone, power cable, mounting bracket, knobs, screws, programming cable, non-slip mats, spare fuse, and user manual.
- Retevis RT95 Ham Radio Transceiver (1 unit)
- Talking Microphone (1 unit)
- Power Cable (1 unit)
- Main Mounting Bracket (1 unit)
- Bracket Knobs (2 units)
- Mounting Screws (2 units)
- Programming Cable (1 unit)
- Non-slip Mat (2 units)
- Spare Fuse (1 unit)
- User Manual (1 unit)
4. Product Overview
Familiarize yourself with the various parts and controls of your Retevis RT95 transceiver and its microphone.

Image: Labeled diagram of the Retevis RT95 radio and its microphone, indicating the Power Switch, Microphone/Program Jack, Self Define Keys (P1-P6), TX/RX indicator, Function Menu Key, Channel Switch/Push button/Key Lock, Microphone's Up/Down buttons, A/B Band button, Number keypad, Band indicator, Speaker, and PTT button.
4.1. Transceiver Front Panel
- Power Switch: Turns the unit on or off.
- Microphone/Program Jack: Connects the microphone or programming cable.
- P1-P6 (Self Define Keys): Programmable function keys.
- TX/RX Indicator: Lights up to indicate transmit (TX) or receive (RX) status.
- Function Menu Key (FUNC): Accesses the function menu.
- Channel Switch/Push button/Key Lock: Rotary knob for channel selection and menu navigation, push for confirmation, and can lock keys.
- LCD Display: Color TFT screen showing frequency, channel, mode, and other operational information. Rotates 180 degrees for flexible viewing.
4.2. Hand Microphone
- PTT (Push-To-Talk) Button: Press to transmit, release to receive.
- Up/Down Buttons: Adjust frequency, channel, or menu options.
- A/B Band Button: Switches between Band A and Band B (VHF/UHF).
- Number Keypad: For direct frequency entry and DTMF tones.
- Band Indicator: Shows the currently active band.
- Speaker: Built-in speaker for audio output.
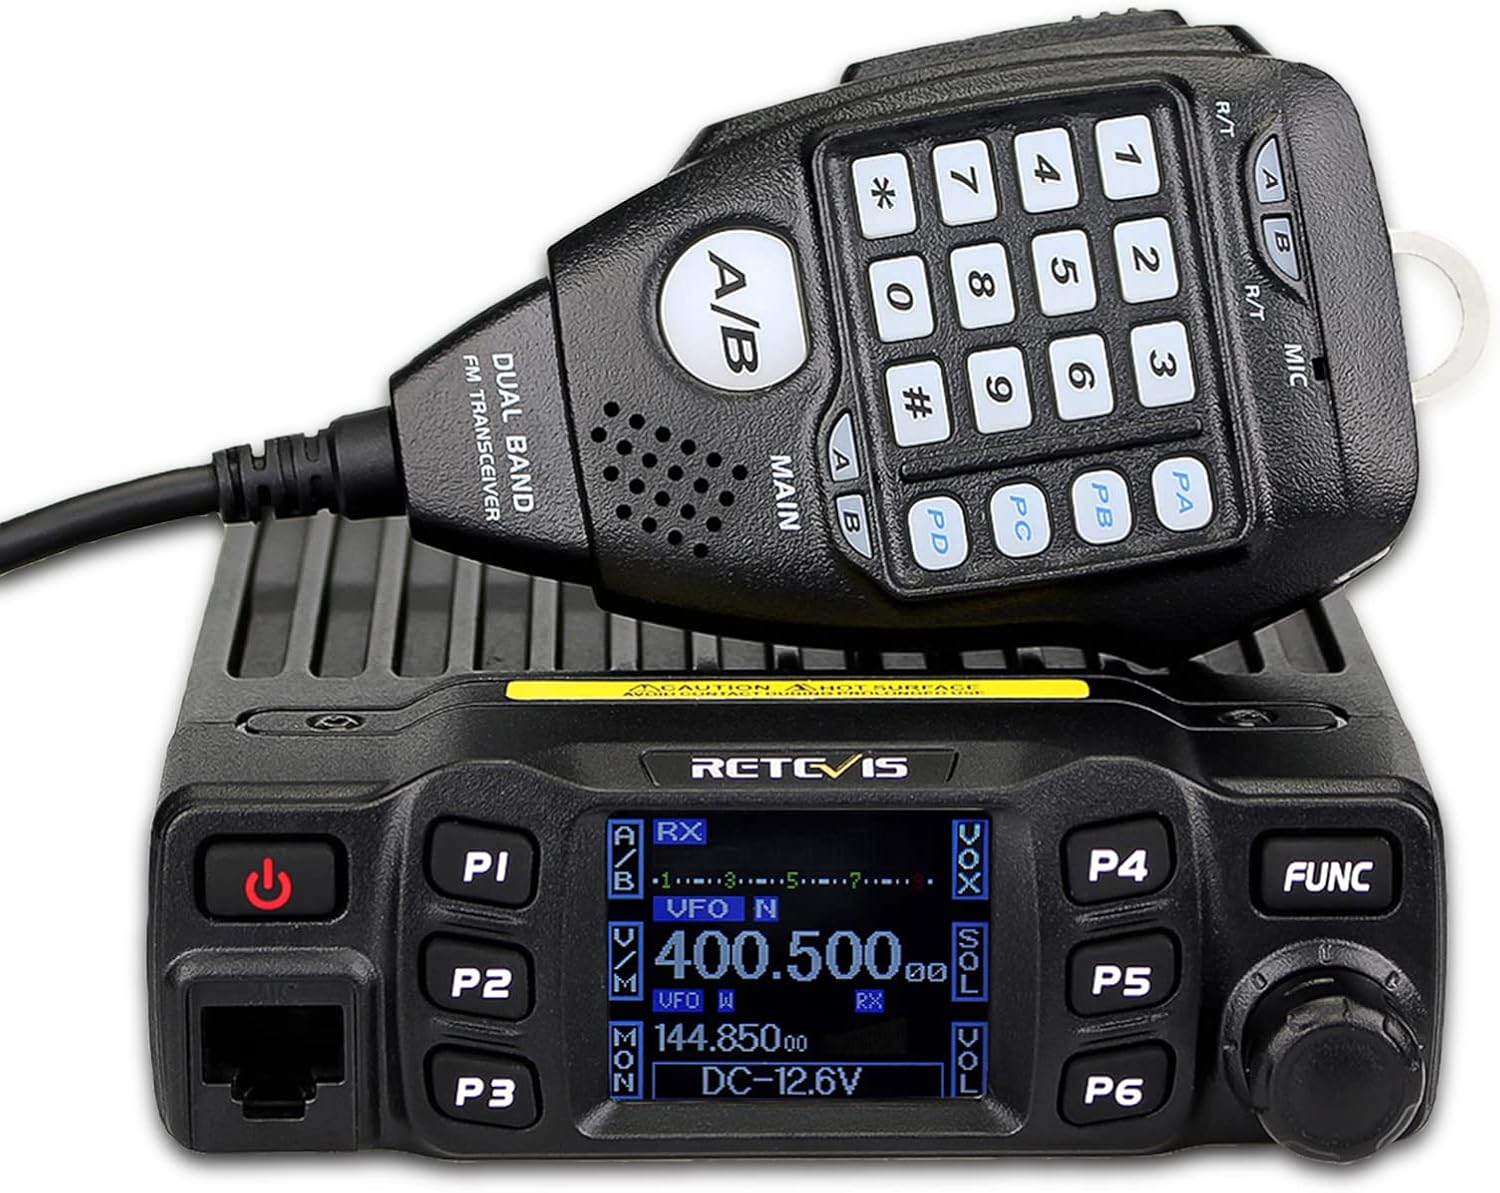
Image: The Retevis RT95 radio transceiver with its attached hand microphone, showcasing the compact design.
4.3. Dimensions and Portability

Image: Diagram illustrating the compact dimensions of the Retevis RT95 radio (12.4cm W x 16.3cm D x 3.9cm H) and its microphone (10cm H), with a total weight of 640g, highlighting its mini size and portability.
5. Setup
This section guides you through the initial setup of your Retevis RT95 transceiver.
5.1. Power Connection
- Ensure the transceiver is turned off.
- Connect the provided power cable to the DC IN port on the rear of the transceiver.
- Connect the other end of the power cable to a stable 13.8V DC power source (e.g., a car battery or a regulated power supply). Observe correct polarity (red to positive, black to negative).
- Verify all connections are secure before proceeding.
5.2. Antenna Connection
- Connect a suitable dual-band antenna (144-148 MHz and 420-450 MHz) to the antenna connector on the rear of the transceiver.
- Ensure the connection is tight and secure. Never transmit without an antenna connected.
5.3. Microphone Connection
- Plug the hand microphone's RJ45 connector into the Microphone/Program Jack on the front panel of the transceiver.
- Ensure it clicks into place securely.
5.4. Mounting (Optional)
For in-vehicle or fixed installations, use the provided mounting bracket and screws.
- Choose a stable and secure location that allows for proper ventilation and does not obstruct driving.
- Attach the main mounting bracket to the desired surface using the self-tapping screws.
- Slide the transceiver into the bracket and secure it with the bracket knobs on both sides.
- Adjust the angle of the transceiver for optimal viewing.
6. Operating Instructions
This section details the basic and advanced operations of your Retevis RT95 transceiver.
6.1. Powering On/Off
- Press and hold the Power Switch button on the front panel to turn the transceiver ON or OFF.
6.2. Frequency and Channel Selection
- VFO Mode (Frequency Mode): Rotate the Channel Switch knob to adjust the frequency. Use the microphone's keypad for direct frequency entry.
- Memory Mode (Channel Mode): Press the FUNC button followed by a programmable key (if assigned) or navigate through the menu to switch to memory mode. Rotate the Channel Switch knob to select a stored channel.
- Band Switching: Press the A/B Band button on the microphone to switch between Band A and Band B (VHF/UHF).

Image: The Retevis RT95's LCD screen shown in two orientations, demonstrating its 180-degree rotatable feature for optimal viewing angle.
6.3. Transmitting and Receiving
- To transmit, press and hold the PTT button on the microphone. Speak clearly into the microphone. The TX/RX indicator will light up (usually red).
- To receive, release the PTT button. The TX/RX indicator will light up (usually green) when a signal is received.
6.4. Adjusting Power Output
The RT95 offers multiple power output levels (5W, 10W, 25W).

Image: Graphic illustrating the high power capabilities of the Retevis RT95, showing 25W, 15W, and 5W output options, dual-band (2m/70cm), 2 modes, and 200 channels, with the radio at the center of a road.
- Access the power setting through the menu system (refer to the detailed user manual for specific menu navigation).
- Select the desired power level (Low, Medium, High). Higher power provides greater range but consumes more power and generates more heat.
6.5. CTCSS/DCS and DTMF Tones
The RT95 supports CTCSS (Continuous Tone-Coded Squelch System), DCS (Digital Coded Squelch), and DTMF (Dual-Tone Multi-Frequency) for selective calling and repeater access.

Image: The Retevis RT95 radio and microphone with a shield icon, indicating support for CTCSS/DCS DTMF tones for enhanced communication security and access.
- These settings are typically configured per channel in memory mode or directly in VFO mode via the menu.
- Use the microphone keypad to input DTMF tones when required (e.g., for repeater control).
6.6. VOX Function
The Voice Operated Exchange (VOX) function allows for hands-free transmission.
- Enable VOX through the menu.
- Adjust the VOX sensitivity level to prevent accidental transmissions or missed voice activations.
- When VOX is active, the transceiver will automatically transmit when it detects your voice and stop transmitting when you stop speaking.
7. Maintenance
Proper maintenance ensures the longevity and optimal performance of your Retevis RT95 transceiver.
7.1. Cleaning
- Wipe the exterior of the transceiver with a soft, damp cloth. Do not use harsh chemicals, solvents, or abrasive cleaners.
- Ensure no moisture enters the unit through openings or jacks.
- Regularly clean the microphone and its keypad to prevent dust and debris buildup.
7.2. Heat Dissipation

Image: The Retevis RT95 radio with arrows indicating airflow for cooling, set against a snowy mountain backdrop, emphasizing its ideal refrigeration system for long-term operation without overheating.
- Ensure the heat sink fins on the rear and sides of the unit are free from dust and obstructions.
- Do not operate the transceiver in enclosed spaces without adequate airflow.
- Prolonged transmission at high power can cause the unit to become warm; this is normal, but excessive heat should be avoided.
7.3. Storage
- When not in use for extended periods, store the transceiver in a cool, dry place, away from direct sunlight and extreme temperatures.
- Disconnect the power supply and antenna before storage.
8. Troubleshooting
If you encounter issues with your Retevis RT95, refer to the table below for common problems and their solutions.
| Problem | Possible Cause | Solution |
|---|---|---|
| No power | Loose power cable connection; Blown fuse; Incorrect voltage supply. | Check power cable connections; Replace fuse (use spare provided); Ensure 13.8V DC supply. |
| Cannot transmit | Antenna not connected; PTT button faulty; Frequency out of band; Power level too low. | Connect antenna securely; Check PTT button; Verify frequency is within 144-148 MHz or 420-450 MHz; Increase power output. |
| No reception or weak signal | Antenna issue; Squelch level too high; Incorrect frequency/channel; Interference. | Check antenna connection and type; Adjust squelch level (9-level professional squelch); Verify frequency/channel; Move away from sources of interference. |
| Poor audio quality | Microphone connection loose; Speaker obstructed; Squelch setting. | Ensure microphone is securely connected; Check for obstructions on the speaker (underside); Adjust squelch level. |
| Screen not rotating | Physical obstruction; Internal issue. | Check for any physical obstructions; If issue persists, contact support. |
If the problem persists after trying these solutions, please contact Retevis customer support for further assistance.
9. Specifications
Detailed technical specifications for the Retevis RT95 Amateur Radio Transceiver.
| Feature | Description |
|---|---|
| Brand | Retevis |
| Model Number | EUA9129B-J9129A |
| Color | Black |
| Frequency Range | 144-148 MHz (VHF), 420-450 MHz (UHF) |
| Number of Channels | 199 |
| Output Power | 5W / 10W / 25W (selectable) |
| Tuning Technology | Dual-band |
| Special Features | CTCSS, DCS, DTMF, 5Tone, Dual Band, Dual Display, Dual Standby, 180-degree Rotatable TFT LCD Screen, VOX, 9-level Squelch |
| Compatible Devices | Portable microphone, headphones, other two-way radios using same frequency bands and protocols |
| Voltage | 13.8 Volts DC |
| Product Dimensions | 16.3 cm (D) x 12.4 cm (W) x 3.9 cm (H) |
| Weight | 640g |
| Water Resistance Level | Not waterproof |
| Manufacturer | Retevis |
| Country of Origin | China |
10. Warranty and Support
Retevis provides comprehensive warranty coverage and customer support for your RT95 transceiver.
10.1. Manufacturer's Warranty
- Radio Body: 2-year warranty from the date of purchase.
- Accessories: 1-year warranty from the date of purchase.
- Return Policy: 30-day no-reason return policy.
- Post-Warranty Service: Maintenance service is still offered beyond the warranty period, with buyers responsible for associated costs.
10.2. Customer Support
For any questions, technical assistance, or warranty claims, please contact Retevis customer support:
- Contact Method: Contact us directly on Amazon.
- Response Time: We aim to respond within 12 hours.
Please have your product model number (EUA9129B-J9129A) and purchase details ready when contacting support.
Related documentsEUA9129B-J9129A


Ask a question about this manual
Ask about setup, troubleshooting, compatibility, parts, safety, or missing instructions. Manuals+ will review the question and use this page’s manual context to help answer it.