1. Introduction
This manual provides detailed instructions for the safe and efficient use of your Powerextra EN-EL3E Battery and Dual LCD Charger. This product is designed to provide reliable power for your Nikon D50, D70, D70s, D80, D90, D100, D200, D300, D300S, D700 Digital SLR Cameras. Please read this manual thoroughly before use and retain it for future reference.
The Powerextra EN-EL3E batteries are fully decoded, ensuring compatibility and proper communication with your Nikon camera. The dual LCD charger allows for simultaneous charging of two batteries, featuring an intelligent LCD display to monitor charging status.

Image: Powerextra EN-EL3E battery shown with various compatible Nikon DSLR camera models (D80, D90, D100, D300, D700).
2. Product Overview and Package Contents
Your Powerextra EN-EL3E Battery and Dual LCD Charger package includes the following components:
- 2 x Powerextra EN-EL3E Lithium-ion Batteries (2200mAh, 7.4V)
- 1 x Dual USB LCD Battery Charger
- 1 x Foldable Micro-USB Cable
- 1 x Microfiber Cleaning Cloth

Image: A flat lay showing the contents of the product box, including the dual charger, two EN-EL3E batteries, a USB cable, and a cleaning cloth.
3. Specifications
| Feature | Specification |
|---|---|
| Battery Type | Lithium-ion |
| Battery Capacity | 2200mAh |
| Battery Voltage | 7.4V |
| Charger Input | 5V / 2A (Micro-USB) |
| Charger Output | 8.4V |
| Product Dimensions | 2.2 x 3.5 x 0.9 inches |
| Item Weight | 8 ounces |
| Material | PC+ABS |
| Safety Certification | CE |
4. Setup
4.1 Battery Installation (into Camera)
- Ensure your camera is powered off.
- Locate the battery compartment on your Nikon DSLR camera, typically on the bottom.
- Open the battery compartment cover.
- Insert the Powerextra EN-EL3E battery into the compartment, aligning the contacts correctly. The battery should click into place.
- Close the battery compartment cover securely.
4.2 Charger Connection
- Connect the provided Micro-USB cable to the input port on the Powerextra Dual LCD Charger.
- Connect the other end of the USB cable to a compatible USB power source. This can be a wall charger (5V/2A recommended), a computer USB port, a car charger, or a power bank.

Image: The dual charger connected to various power sources, including a wall adapter, a laptop, a power bank, and a car charger, demonstrating its versatility.
5. Operating Instructions
5.1 Charging Batteries
- With the charger connected to a power source, insert one or two Powerextra EN-EL3E batteries into the charging slots (CH1 and CH2). Ensure the battery contacts align with the charger's pins.
- The LCD display on the charger will illuminate and show the individual charging status for each battery. A battery icon with segments will indicate the charge level, and the segments will fill up as charging progresses.
- When a battery is fully charged, its corresponding icon on the LCD will show a full battery symbol.
- Once charging is complete, remove the batteries from the charger.
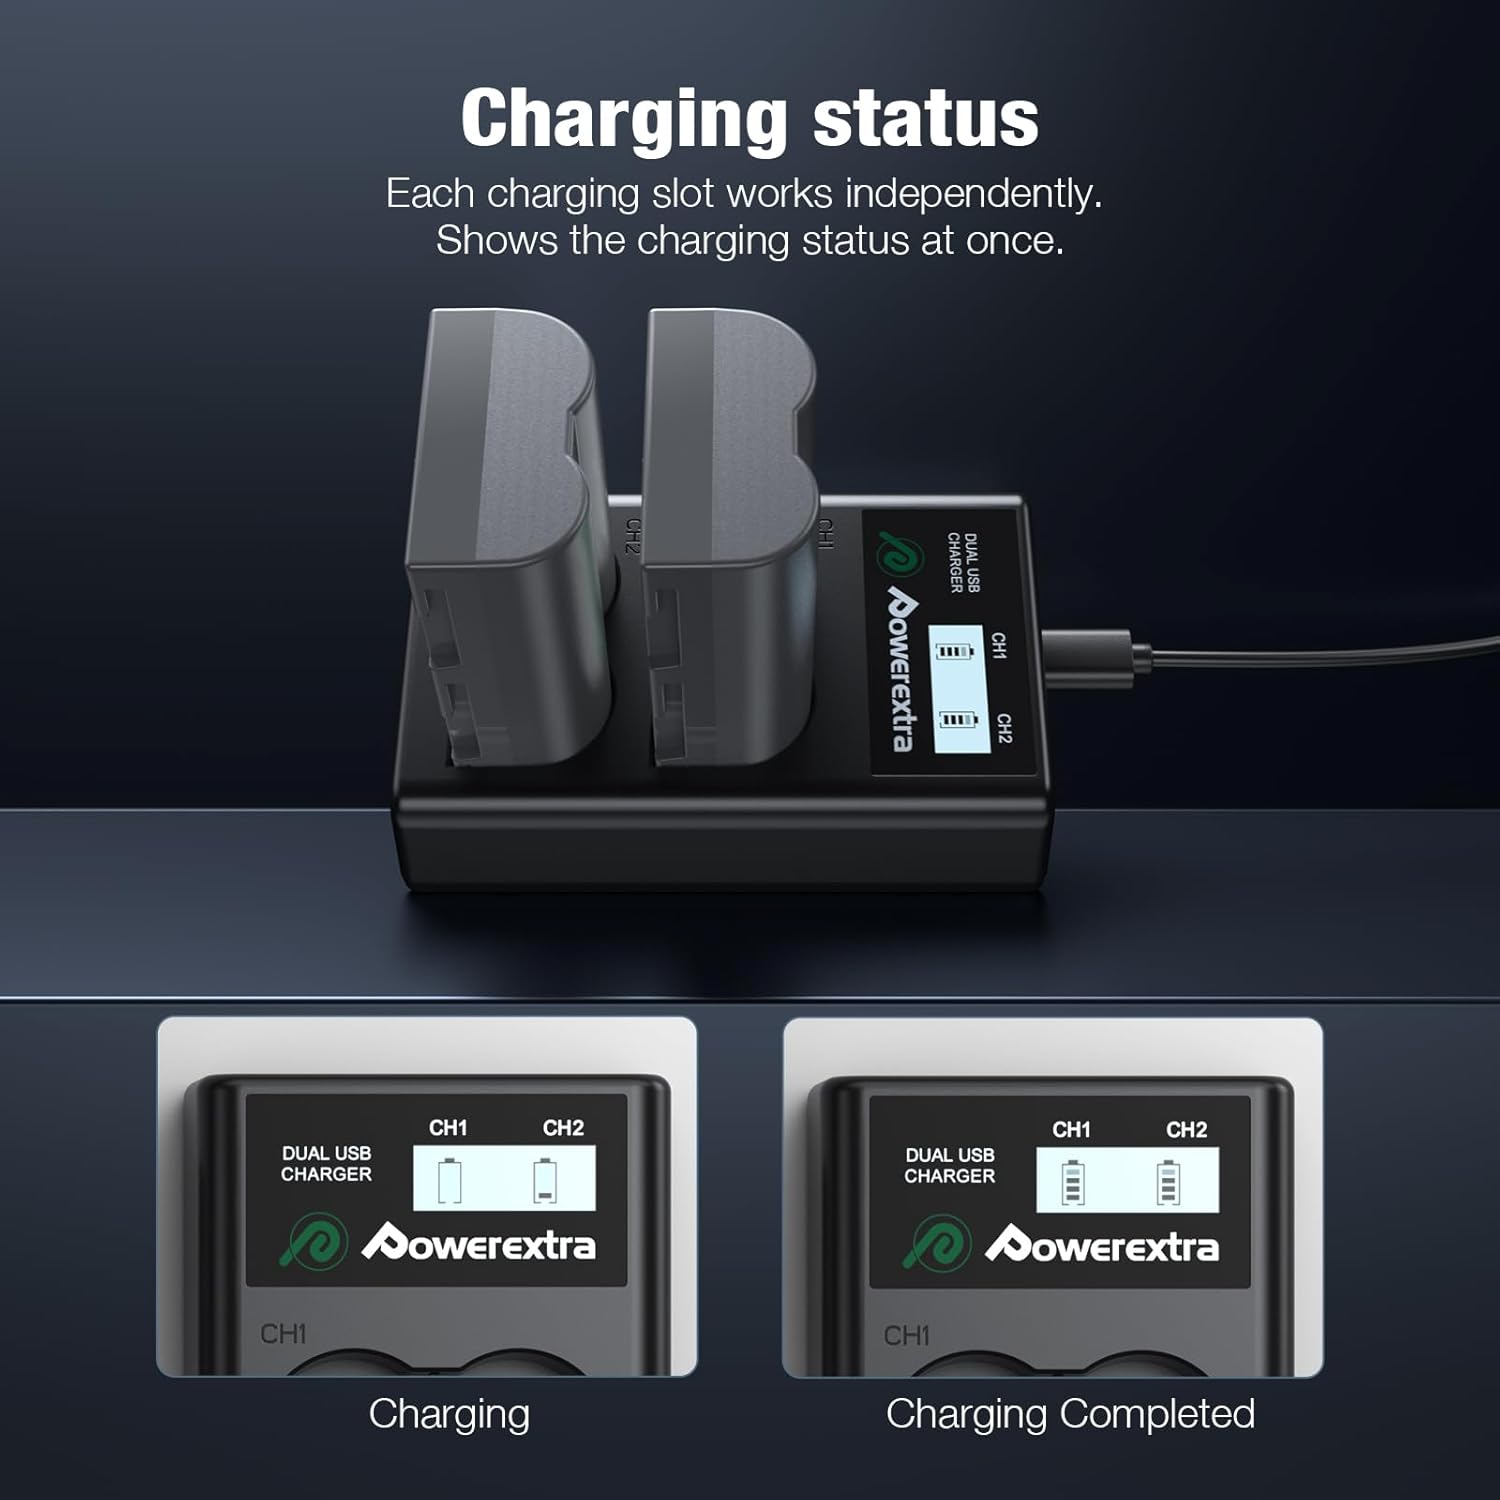
Image: The dual charger's LCD screen displaying the charging progress for two batteries, showing both charging and completed states.
5.2 Charging Time
Charging time may vary depending on the power source and the initial charge level of the batteries. With a 5V/2A input, the charger is designed for efficient charging, typically completing a full charge in approximately 3 hours for two batteries.

Image: The dual charger with batteries inserted, illustrating a 3-hour charging time with a glowing blue circuit pattern.
6. Maintenance and Safety Precautions
To ensure the longevity and safe operation of your Powerextra batteries and charger, please observe the following:
- Storage: Store batteries in a cool, dry place away from direct sunlight and extreme temperatures. For long-term storage, it is recommended to store batteries with a partial charge (around 50%).
- Cleaning: Use the provided microfiber cloth or a soft, dry cloth to clean the batteries and charger. Do not use liquid cleaners or solvents.
- Avoid Short Circuits: Do not short-circuit the battery terminals. Keep batteries away from metal objects like coins, keys, or jewelry.
- Temperature: Do not expose batteries or charger to fire, water, or extreme heat. Operate and charge within recommended temperature ranges.
- Disposal: Dispose of old batteries responsibly according to local regulations. Do not dispose of them in household waste.
- Protection Features: The charger is equipped with multiple protection features including over-charging, short-circuit, high-temperature, over-current, over-voltage, and over-discharge protection to ensure safe operation.

Image: An illustration highlighting the various safety protections integrated into the charger, such as short-circuit, over-voltage, over-current, over-charge, and over-discharge protection, along with no memory effect.
7. Troubleshooting
7.1 Battery Not Charging
- Check Connection: Ensure the USB cable is securely connected to both the charger and the power source.
- Power Source: Verify that the USB power source is active and providing sufficient power (5V/2A recommended). Try a different USB port or adapter.
- Battery Insertion: Make sure the battery is inserted correctly into the charging slot with contacts aligned.
- Charger Indicator: If the LCD does not light up, the charger may not be receiving power or could be faulty.
7.2 Short Battery Life
- Full Charge: Ensure batteries are fully charged before use. The LCD indicator should show a full battery icon.
- Battery Age: All rechargeable batteries have a finite lifespan. If batteries are old and have been used extensively, their capacity may naturally diminish.
- Environmental Factors: Extreme cold temperatures can temporarily reduce battery performance.
7.3 Charger Overheating
- It is normal for the charger to become slightly warm during operation. However, if it becomes excessively hot, disconnect it immediately.
- Ensure adequate ventilation around the charger. Do not cover it during charging.
- If overheating persists, discontinue use and contact customer support.
8. Warranty and Customer Support
Powerextra is committed to customer satisfaction. If you encounter any issues or have questions regarding your product, please do not hesitate to contact our customer service team. We are available to assist you 24 hours a day.
This product is typically covered by a return policy allowing for refunds or replacements within 30 days of purchase. Please refer to your purchase documentation for specific warranty terms and conditions.
For support, please visit the official Powerextra store or contact us through the platform where you purchased the product.
Thank you for choosing Powerextra.


