Introduction
The Sunbeam NutriOven is a versatile multi-use convection oven designed for efficient and economical cooking. It offers a wide range of cooking functions including baking, roasting, steaming, grilling, dry frying, and toasting. Its compact design makes it suitable for various kitchen spaces, and the transparent glass bowl allows for easy monitoring of your cooking progress.
This manual provides essential information for the safe and effective operation, maintenance, and care of your NutriOven.
Important Safety Information
Always follow basic safety precautions when using electrical appliances to reduce the risk of fire, electric shock, and injury to persons.
- Read all instructions carefully before operating the appliance.
- Do not touch hot surfaces. Use handles or knobs.
- To protect against electrical shock, do not immerse cord, plugs, or the main unit (containing electrical components) in water or other liquid.
- Close supervision is necessary when any appliance is used by or near children.
- Unplug from outlet when not in use and before cleaning. Allow to cool before putting on or taking off parts.
- Do not operate any appliance with a damaged cord or plug, or after the appliance malfunctions or has been damaged in any manner.
- The power safety handle in the lid automatically switches off the fan and motor when raised, providing an important safety feature. Ensure the handle is fully lowered during operation.
- Use the sturdy base stand to protect hands from the hot glass bowl and lid during and after cooking.
Product Overview and Components
The Sunbeam NutriOven consists of several key components designed for optimal performance and ease of use.
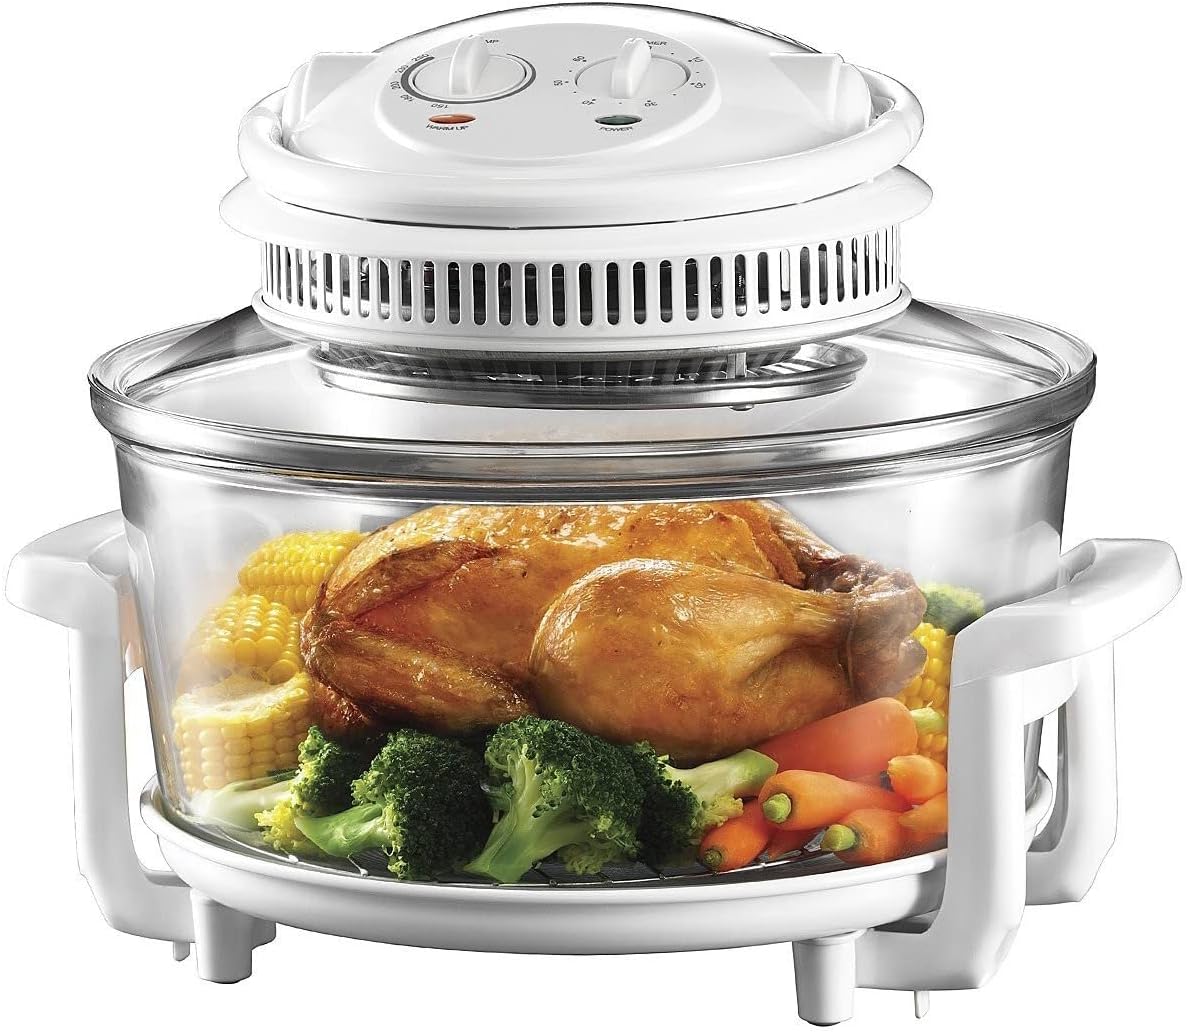
Image: The Sunbeam NutriOven in operation, showcasing a whole roasted chicken surrounded by corn on the cob, broccoli, and carrots within the clear glass bowl. The white lid with controls is visible on top, and the oven rests on its white base stand.
- Control Head: Contains the heating element, fan, temperature dial, and timer dial.
- Glass Bowl: The main cooking chamber, made of durable, heat-resistant glass.
- Base Stand: Provides stable support for the glass bowl and protects surfaces from heat.
- Power Safety Handle: Integrated into the lid, it automatically cuts power when lifted.
- Accessories: (Typically includes) high rack, low rack, tongs.

Image: The Sunbeam NutriOven with an empty, clear glass bowl, resting on its white base stand. The white control head is positioned on top of the bowl, ready for use.
Setup
- Unpacking: Carefully remove all packaging materials and accessories from the box.
- Initial Cleaning: Before first use, wash the glass bowl and all accessories (racks, tongs) in warm, soapy water. Rinse thoroughly and dry. Wipe the control head with a damp cloth, ensuring no water enters the electrical components.
- Placement: Place the NutriOven on a stable, heat-resistant, and level surface. Ensure there is adequate clearance around the appliance for ventilation. Do not place it directly under overhead cabinets.
- Assembly: Place the glass bowl securely onto the base stand. Position the desired cooking rack (high or low) inside the glass bowl.
- Power Connection: Ensure the power safety handle on the control head is in the upright (off) position before plugging the appliance into a standard electrical outlet.
Operating Instructions
General Operation
- Prepare Food: Place your food on the appropriate rack inside the glass bowl.
- Position Control Head: Carefully place the control head onto the glass bowl, ensuring it sits securely.
- Lower Safety Handle: Lower the power safety handle. The appliance will not operate if the handle is in the raised position.
- Set Temperature: Turn the temperature dial to your desired cooking temperature. The NutriOven features variable temperature control.
- Set Timer: Turn the timer dial to the desired cooking time (up to 60 minutes). The oven will begin heating once the timer is set. A light will indicate operation.
- Monitoring: The transparent glass bowl allows you to monitor cooking progress without opening the oven.
- Completion: The oven will automatically switch off when the timer reaches zero. If longer cooking is required, the timer can be reset during operation.
- Removing Food: Once cooking is complete, raise the power safety handle to ensure the unit is off. Use oven mitts and the provided tongs to carefully remove food and racks. Allow the unit to cool before handling the glass bowl.
Cooking Functions
The NutriOven's convection technology ensures efficient and even cooking for a variety of dishes.
- Bake: Ideal for cakes, pastries, and casseroles. The circulating hot air ensures even baking.
- Roast: Perfect for meats like chicken, lamb, and beef. The convection fan helps create a crispy exterior while keeping the interior juicy.
- Steam: By adding a small amount of water to the bottom of the bowl (if applicable for your model's accessories) or using a steaming insert, you can steam vegetables and other foods.
- Grill: Use the high rack for grilling items like sausages, chops, or fish.
- Dry Fry: Achieve crispy results for items like chips or spring rolls with minimal to no oil, thanks to the powerful convection.
- Toast: Quickly toast bread or other items on the rack.
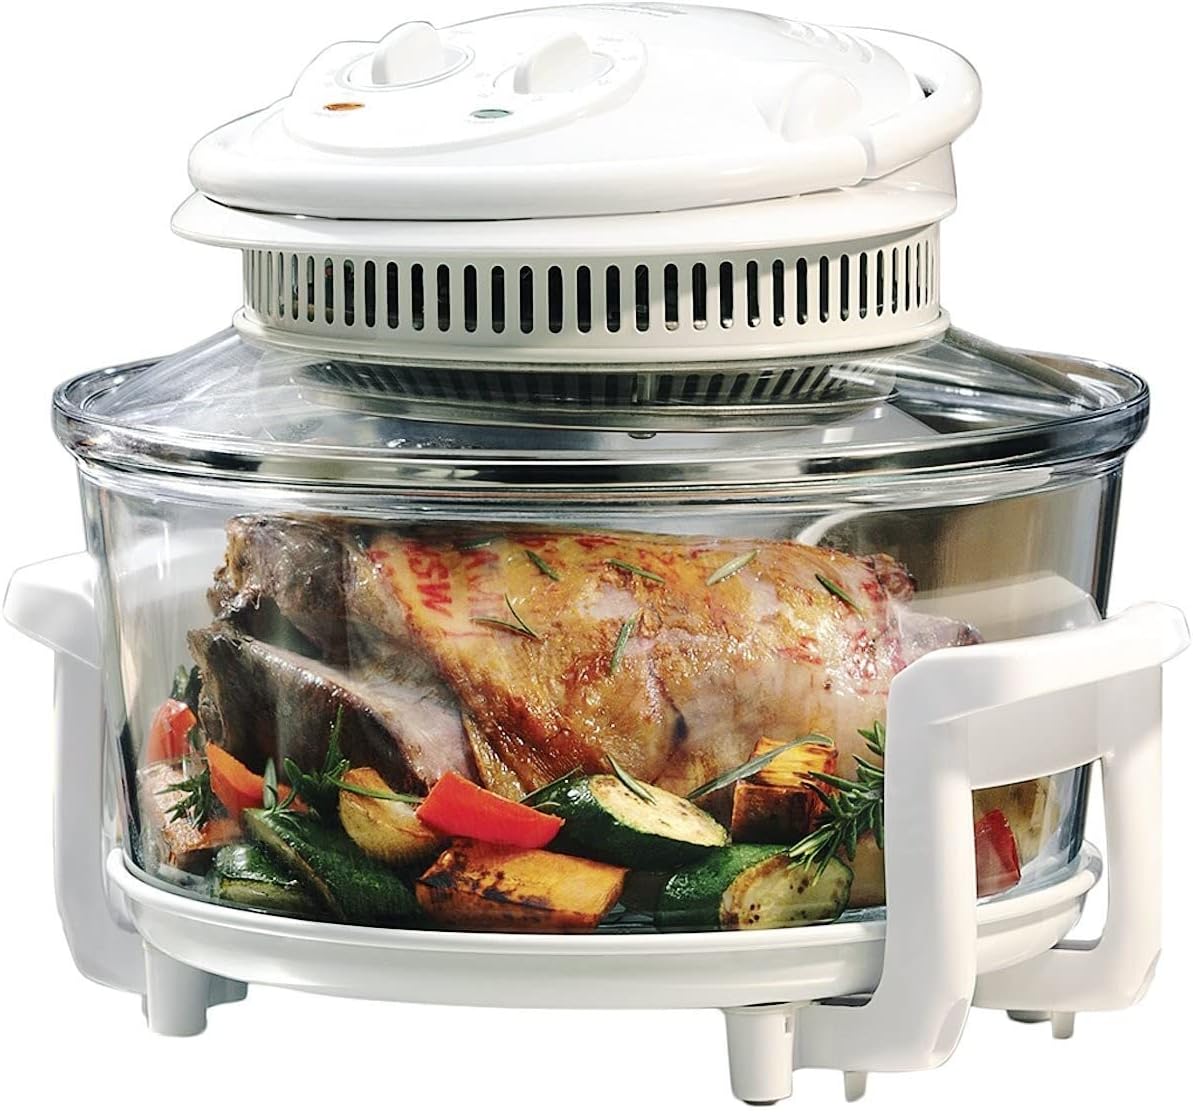
Image: The Sunbeam NutriOven containing a perfectly roasted leg of lamb with herbs and roasted vegetables, demonstrating its roasting capability. The clear glass bowl allows full visibility of the cooking process.

Image: The Sunbeam NutriOven showcasing a baked dessert, possibly a fruit crumble or pie, inside a white and blue baking dish within the clear glass bowl. This illustrates the oven's baking function.
Maintenance and Cleaning
Proper cleaning and maintenance will extend the life of your Sunbeam NutriOven.
- Before Cleaning: Always unplug the appliance from the power outlet and allow it to cool completely before cleaning.
- Glass Bowl: The glass cooking bowl is dishwasher-safe for convenient cleaning. Alternatively, it can be washed manually in warm, soapy water. For stubborn residue, the unit can perform a self-cleaning cycle: add a small amount of water and dish soap to the bowl, set the temperature to medium, and run the timer for 5-10 minutes. Then, rinse thoroughly.
- Accessories: All metal accessories (racks, tongs) can be washed in warm, soapy water and rinsed clean.
- Control Head: Wipe the exterior of the control head with a damp cloth. Do not immerse the control head in water or any other liquid. Ensure no water enters the electrical components.
- Storage: Store the NutriOven in a clean, dry place when not in use.
Troubleshooting
If you encounter issues with your Sunbeam NutriOven, refer to the following common troubleshooting steps:
| Problem | Possible Cause | Solution |
|---|---|---|
| Appliance does not turn on. |
|
|
| Food is not cooking evenly. |
|
|
| Glass bowl cracked. |
|
|
If the problem persists after attempting these solutions, please contact Sunbeam customer support.
Specifications
| Brand | Sunbeam |
| Model Number | CO3000 |
| Capacity | 11 Litres |
| Power/Wattage | 1200 watts |
| Material | Glass |
| Product Dimensions (L x W x H) | 35.5 x 35.5 x 25.5 cm |
| Item Weight | 8.2 kg |
| Special Features | Timer, Steam Feature |
Warranty and Support
Sunbeam products are designed to provide reliable performance. In the unlikely event that your appliance develops a fault during the warranty period, please contact Sunbeam Customer Service for assistance.
For detailed warranty information, product registration, or to find service centers, please visit the official Sunbeam website or refer to the warranty card included with your purchase.
Sunbeam Customer Service:
- Website: www.sunbeam.com.au (Example link, replace with actual if available)
- Phone: Refer to your product's specific warranty documentation for local contact numbers.


