1. Introduction
The ORICO 6518US3-V1 is a SuperSpeed USB 3.0 docking station designed for 2.5-inch and 3.5-inch SATA I, SATA II, and SATA III Hard Disk Drives (HDDs) and Solid State Drives (SSDs). This device offers a convenient, tool-free solution for accessing your data with high-speed transfer capabilities.
Key Features:
- Tool-Free installation for 2.5-inch and 3.5-inch SATA HDDs and SSDs.
- SuperSpeed USB 3.0 interface providing data transfer rates up to 5Gbps, backward compatible with USB 2.0 and 1.1.
- Driver-free operation for Windows XP/Vista/7/8/8.1, Mac OS X 10.2 and above, and Linux.
- Built-in power control switch, hot-swap support, and plug-and-play functionality.
- Includes a premium 12V AC power adapter and a 3.3ft double-foil-shielded, twisted-pair USB 3.0 cable.
2. Product Overview
Familiarize yourself with the components and interfaces of your ORICO docking station.
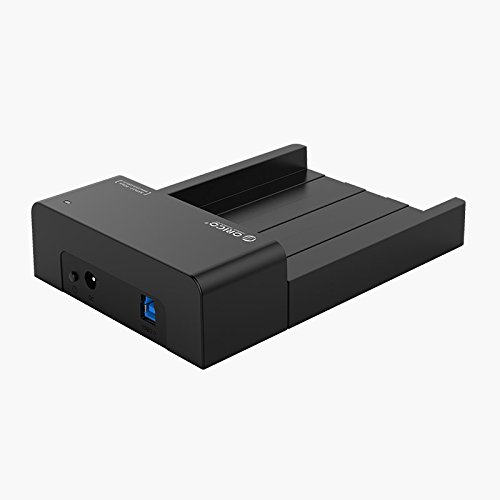
Image: Front view of the ORICO 6518US3-V1 SuperSpeed USB 3.0 HDD/SSD Docking Station, showing the drive slot and power/USB ports.

Image: Close-up of the ORICO docking station's rear panel, highlighting the DC power input interface for stable power delivery.

Image: Exploded view illustrating the internal components and the SuperSpeed USB 3.0 chipset, demonstrating data transfer capabilities up to 5Gbps.
3. Setup Instructions
Follow these steps to set up your ORICO docking station.
- Connect Power: Connect the included 12V AC power adapter to the DC input port on the docking station and then plug it into a power outlet.
- Connect to Computer: Use the provided USB 3.0 cable to connect the docking station's USB 3.0 port to an available USB 3.0 port on your computer.
- Insert Drive: Gently slide your 2.5-inch or 3.5-inch SATA HDD or SSD into the drive slot of the docking station until it is securely seated. The tool-free design allows for easy insertion and removal.
- Power On: Flip the power control switch on the docking station to the 'ON' position. The power indicator light should illuminate.

Image: Diagram illustrating the tool-free installation process for both 2.5-inch SSDs and 3.5-inch HDDs into the docking station.

Image: The ORICO docking station with a 3.5-inch HDD inserted, connected via USB to a laptop, demonstrating a typical setup.
4. Operating Instructions
Once set up, the docking station is ready for use.
- Drive Recognition: Your operating system (Windows, Mac, Linux) should automatically detect the connected drive. If it's a new drive, you may need to initialize and format it through your operating system's disk management tools before use.
- Data Transfer: You can now access, read, and write data to the inserted HDD/SSD at SuperSpeed USB 3.0 rates.
- Hot-Swap Functionality: The docking station supports hot-swapping. This means you can remove and insert drives without needing to power down the computer, provided you safely eject the drive from your operating system first.
- Power Management: Use the power control switch to turn the docking station on or off as needed. Always safely eject the drive from your operating system before powering off the docking station or removing the drive.
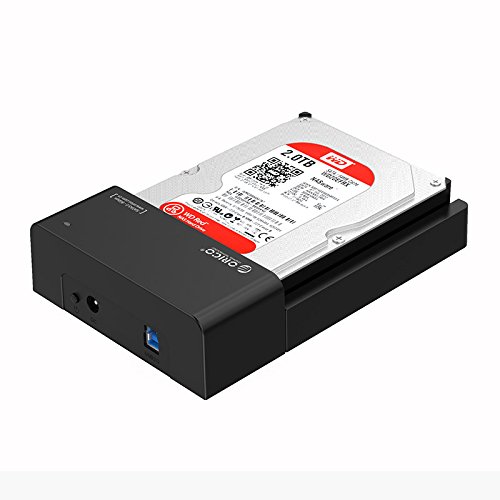
Image: The ORICO docking station with a 2TB HDD fully inserted, ready for operation.

Image: The ORICO docking station integrated into a desktop computer setup, connected and operational.
5. Maintenance
To ensure the longevity and optimal performance of your docking station:
- Keep the device clean and free from dust. Use a soft, dry cloth for cleaning.
- Avoid exposing the docking station to extreme temperatures, humidity, or direct sunlight.
- Do not block the ventilation openings, as this can affect heat dissipation.
- Handle the device with care to prevent physical damage.

Image: Diagram illustrating the scientific design of the exposed HDD docking station, highlighting its good heat dissipation properties.
6. Troubleshooting
If you encounter issues, consider the following:
- Drive Not Detected:
- Ensure the power adapter is securely connected and the docking station is powered on.
- Verify the USB cable is properly connected to both the docking station and your computer.
- Try connecting to a different USB port on your computer.
- Check if the drive is properly seated in the docking station.
- For new drives, ensure they are initialized and formatted in your operating system's disk management utility.
- Slow Transfer Speeds:
- Ensure you are connected to a USB 3.0 port on your computer. USB 2.0 ports will result in slower speeds.
- Verify the USB 3.0 cable is not damaged.
- Performance can also be affected by the speed of the HDD/SSD itself.
- No Drivers Required: This device is plug-and-play and does not require manual driver installation for supported operating systems (Windows, Mac, Linux).
7. Specifications
| Model | 6518US3-V1 |
| Brand | ORICO |
| Compatible Drive Types | 2.5-inch & 3.5-inch SATA I/II/III HDD/SSD |
| Max Storage Capacity | 8 TB |
| Hardware Interface | USB 3.0 (backward compatible with USB 2.0, USB 1.1) |
| Data Transfer Rate | Up to 5 Gbps (USB 3.0) |
| Compatible Operating Systems | Windows, Linux, Mac OS X 10.2 and above |
| Material | Metal |
| Color | Black |
| Item Weight | 660 g |
| Package Dimensions | 24.4 x 13.2 x 8.2 cm |
8. Warranty and Support
ORICO provides a warranty for this product. Please refer to the details below for warranty claims and customer support.

Image: ORICO warranty information, indicating a 1-year warranty period.
- Warranty Period: 1 Year
- Official Website: www.oricoindia.in
- Customer Care Number: 022-24118805
For technical assistance or warranty service, please contact ORICO customer support using the provided contact information.


