1. Introduction
This manual provides essential information for the safe and efficient operation, installation, and maintenance of your TEMPO TI-70 TCA Hot Plate. Please read these instructions thoroughly before using the device to ensure proper function and to prevent injury or damage.
The TEMPO TI-70 TCA Hot Plate is designed for uniform heating applications in laboratory and industrial settings, featuring a grooved cast iron top and a thermostat for temperature control.
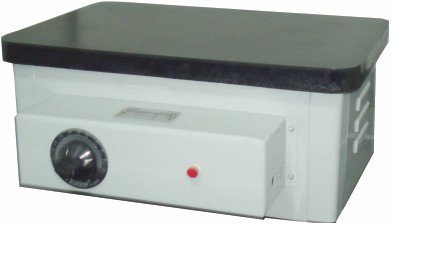
Figure 1: The TEMPO TI-70 TCA Hot Plate. This image displays the hot plate unit, featuring a dark cast iron top surface, a light-colored main body, and a control panel on the front. The control panel includes a rotary thermostat knob on the left and a red indicator light on the right. The side of the unit shows ventilation slots.
2. Safety Instructions
Observe the following safety precautions to prevent electric shock, fire, or personal injury:
- Always connect the hot plate to a properly grounded electrical outlet.
- Do not operate the hot plate in the presence of flammable or explosive materials.
- Ensure adequate ventilation around the hot plate during operation.
- Avoid touching the hot plate surface during and immediately after operation, as it can reach temperatures up to 300°C. Use appropriate heat-resistant gloves.
- Do not immerse the hot plate in water or other liquids.
- Disconnect the power cord before cleaning or servicing the unit.
- Keep children and unauthorized personnel away from the operating hot plate.
- Inspect the power cord and plug for any damage before each use. Do not use if damaged.
3. Package Contents
Verify that all items are present upon unpacking:
- TEMPO TI-70 TCA Hot Plate Unit
- Instruction Manual (this document)
4. Product Features
The TEMPO TI-70 TCA Hot Plate offers the following key features:
- Robust Construction: Features a thick gauge Mild Steel (M.S.) body for durability.
- Uniform Heating: Equipped with a thick, well-machined, and smooth cast iron top, grooved from the bottom to circulate spiral heaters for consistent heat distribution.
- Integrated Thermostat: Includes a temperature controller (thermostat) for precise temperature management, allowing a maximum surface temperature of 300°C.
- Efficient Heating Elements: Heating elements are securely housed into the grooves with porcelain beads underneath the cast iron for optimal performance and longevity.
- Dimensions: Inner dimensions of the heating surface are 25 x 40 cm.
5. Setup
- Unpacking: Carefully remove the hot plate from its packaging and inspect for any shipping damage.
- Placement: Place the hot plate on a stable, level, heat-resistant surface, away from flammable materials. Ensure there is sufficient clearance around the unit for proper ventilation.
- Power Connection: Ensure the thermostat knob is in the "OFF" position (or lowest setting). Plug the power cord into a grounded 230V AC electrical outlet.
6. Operation
- Power On: Once connected to power, turn the thermostat knob clockwise to the desired temperature setting. The red indicator light will illuminate, indicating that the heating elements are active.
- Heating Process: The hot plate will begin to heat. The thermostat will cycle the heating elements on and off to maintain the set temperature. The indicator light will turn off when the set temperature is reached and turn back on when heating resumes.
- Temperature Adjustment: Adjust the thermostat knob as needed to increase or decrease the heating temperature.
- Power Off: To turn off the hot plate, rotate the thermostat knob counter-clockwise to the "OFF" or minimum setting. Disconnect the power cord from the outlet when not in use.
- Cool Down: Allow the hot plate to cool completely before handling or storing. The surface will remain hot for a significant period after being turned off.
7. Maintenance
Regular maintenance ensures the longevity and optimal performance of your hot plate.
- Cleaning: Ensure the unit is unplugged and completely cool before cleaning. Wipe the cast iron top and exterior surfaces with a damp cloth. Do not use abrasive cleaners or immerse the unit in water.
- Inspection: Periodically inspect the power cord for any signs of wear or damage. Check the hot plate surface for any cracks or deformities.
- Storage: Store the hot plate in a dry, clean environment when not in use.
8. Troubleshooting
If you encounter issues with your hot plate, refer to the following common problems and solutions:
- Hot Plate Not Heating:
- Check if the power cord is securely plugged into a live outlet.
- Ensure the thermostat knob is turned to a temperature setting above "OFF".
- Verify that the circuit breaker or fuse for the outlet has not tripped.
- Uneven Heating:
- Ensure the hot plate is placed on a level surface.
- Allow sufficient time for the cast iron top to reach a stable, uniform temperature.
- Indicator Light Not Illuminating:
- If the hot plate is heating but the light is off, the indicator bulb may need replacement. If the hot plate is not heating, refer to "Hot Plate Not Heating" above.
For issues not covered here, please contact customer support.
9. Specifications
| Feature | Detail |
|---|---|
| Model Number | TI-70 TCA |
| Brand | TEMPO |
| Manufacturer | Tempo Instruments Pvt Ltd |
| Power | 1.2 KW |
| Voltage | 230 Volts |
| Heating Surface Dimensions | 25 x 40 cm |
| Maximum Surface Temperature | 300°C |
| Heater Surface Material | Cast Iron |
| Body Material | Mild Steel (M.S.) |
| Control Type | Thermostat |
| Included Components | Hot Plate |
10. Warranty and Support
For warranty information or technical support, please contact Tempo Instruments Pvt Ltd directly. Keep your purchase receipt as proof of purchase.
Manufacturer: Tempo Instruments Pvt Ltd
Please refer to the manufacturer's official website or contact information provided at the time of purchase for the most current support details.


