
Introduction
This manual provides comprehensive instructions for the safe and effective operation, setup, maintenance, and troubleshooting of your Huepar 2026 3D Laser Level, model HX03CG-PRO. Please read this manual thoroughly before using the device to ensure optimal performance and safety.
Safety Instructions
The Huepar HX03CG-PRO laser level is a Class 2 laser product (IEC/EN60825-1/2014), emitting laser radiation less than 1mW. Adhere to the following safety guidelines:
- DO NOT stare directly into the laser beam.
- DO NOT intentionally direct the laser beam at other people or reflective surfaces.
- Avoid exposing the laser tool to extreme temperatures or humidity.
- Keep the device out of reach of children.
- Use only specified batteries and chargers.
- Do not attempt to modify or disassemble the laser level. Repairs should only be performed by authorized service personnel.
Package Contents
Verify that all items are present upon unpacking:
- 1x Huepar 3x360 Laser Level HX03CG-PRO
- 1x Li-Ion Battery
- 1x Remote Control
- 1x Hard Carry Case
- 1x User Manual
- 1x Green Laser Target Plate
Product Features
The Huepar HX03CG-PRO offers advanced features for precise leveling and alignment:
- 3x360° Green Laser Lines: One horizontal and two vertical 360° laser planes for comprehensive coverage.
- Electric Fine Adjustment Rotating Base: Allows precise micro-adjustments around a fixed point, controlled via remote.
- LCD Display: Clearly shows X and Y axis tilt angles, battery level, current mode, and brightness settings.
- High Accuracy: Provides an accuracy of ±1/13 inch at 33 feet.
- Self-Leveling Mode with Auto-Sensor: Automatically levels within ±3.5°. The Auto-Sensor alerts if the device is disturbed.
- Pulse Mode: Extends working range up to 197 feet when paired with a Huepar laser receiver (sold separately).
- Remote Control: Enables switching laser lines, activating pulse mode, adjusting brightness, and controlling the rotating base from a distance.
- Long Battery Life: Powered by a 5200mAh rechargeable Li-Ion battery, offering up to 8 hours of continuous runtime.
- Versatile Mounting: Equipped with 1/4"-20 and 5/8"-11 threaded mounts for compatibility with various tripods and pole mounts.
- Durable Design: IP54 rated for water and dust resistance.
Setup
- Battery Installation and Charging:
Locate the slide-out battery tray on the side of the laser level. Insert the provided Li-Ion battery, ensuring correct polarity. To charge, connect the charging cable to the battery tray and a power source. The LCD will indicate charging status.

Description: The image displays the Huepar HX03CG-PRO laser level with its 5200mAh battery being charged via a slide-out battery tray. This illustrates the easy charging process.
- Mounting the Device:
The laser level can be placed on a flat surface, mounted on a tripod using the 1/4"-20 or 5/8"-11 threads, or attached to metallic surfaces using its integrated magnetic mount.

Description: The image shows the Huepar HX03CG-PRO laser level magnetically attached to a metal pillar, demonstrating its integrated strong magnetic mount and manual rotation capability.

Description: This image highlights the universal 1/4"-20 and 5/8"-11 threaded mounts on the laser level, indicating compatibility with various tripods for stable placement.
Operating Instructions
- Power On/Off:
To power on, slide the pendulum lock switch to the unlocked position. To power off, slide the switch back to the locked position.
- Self-Leveling Mode:
When the pendulum lock switch is in the unlocked position, the device enters self-leveling mode. The laser will automatically level itself within a ±3.5° tilt range. If the tilt exceeds this range, the laser lines will flash rapidly to indicate it is out of level.

Description: The image illustrates the self-leveling mode of the Huepar HX03CG-PRO, showing the device automatically adjusting within a ±3.5° tilt.
- Auto-Sensor Mode:
In self-leveling mode, activate the Auto-Sensor function via the remote control or device button. The 'Auto' icon on the LCD will flash. If the laser level is moved or disturbed, the laser lines will disappear, and the 'Auto' icon will flash rapidly to alert you.

Description: This image demonstrates the Auto-Sensor Mode, where the laser level detects movement. The LCD screen shows the 'Auto' icon flashing, indicating that the laser has been disturbed.
- Manual Mode (Slope Function):
To activate manual mode, ensure the pendulum lock switch is in the locked position. Press the power button to cycle through laser line combinations. In this mode, the laser lines can be projected at any angle, but they will not self-level. The LCD will display the tilt angles for X and Y axes.

Description: The image displays the Huepar HX03CG-PRO laser level tilted, with its LED screen clearly showing the X and Y axis tilt angles, battery indication, and other status icons.
- Laser Line Selection:
Press the 'H' button on the device or remote control to activate/deactivate the horizontal line. Press the 'V' button to activate/deactivate the vertical lines (V1 and V2). You can use combinations of lines as needed.

Description: This image demonstrates the switchable 3x360° lasers, showing how to independently control horizontal (H1) and vertical (V1, V2) laser lines using the remote or on-tool buttons.
- Brightness Adjustment:
Use the brightness adjustment button on the remote control or device to cycle through high, medium, and low brightness settings to suit environmental conditions.

Description: The image illustrates the three brightness adjustment levels (High, Medium, Low) for the laser lines, allowing customization based on environmental lighting.
- Pulse Mode:
Activate pulse mode by pressing the dedicated button on the device or remote control. This mode is essential for outdoor use or in bright conditions when using a Huepar laser receiver (not included) to extend the working range up to 197 feet.

Description: This image depicts the laser level in an outdoor environment, demonstrating the use of Pulse Mode with a remote control to extend the working range up to 197 feet when paired with a laser receiver.
- Electric Rotating Base and Remote Control Fine Adjustment:
The integrated electric rotating base allows for precise horizontal adjustment of the laser lines. Use the remote control to rotate the base clockwise or counter-clockwise, either slowly for fine adjustments or quickly for larger movements. This feature is particularly useful for fixed-point pivot alignment.
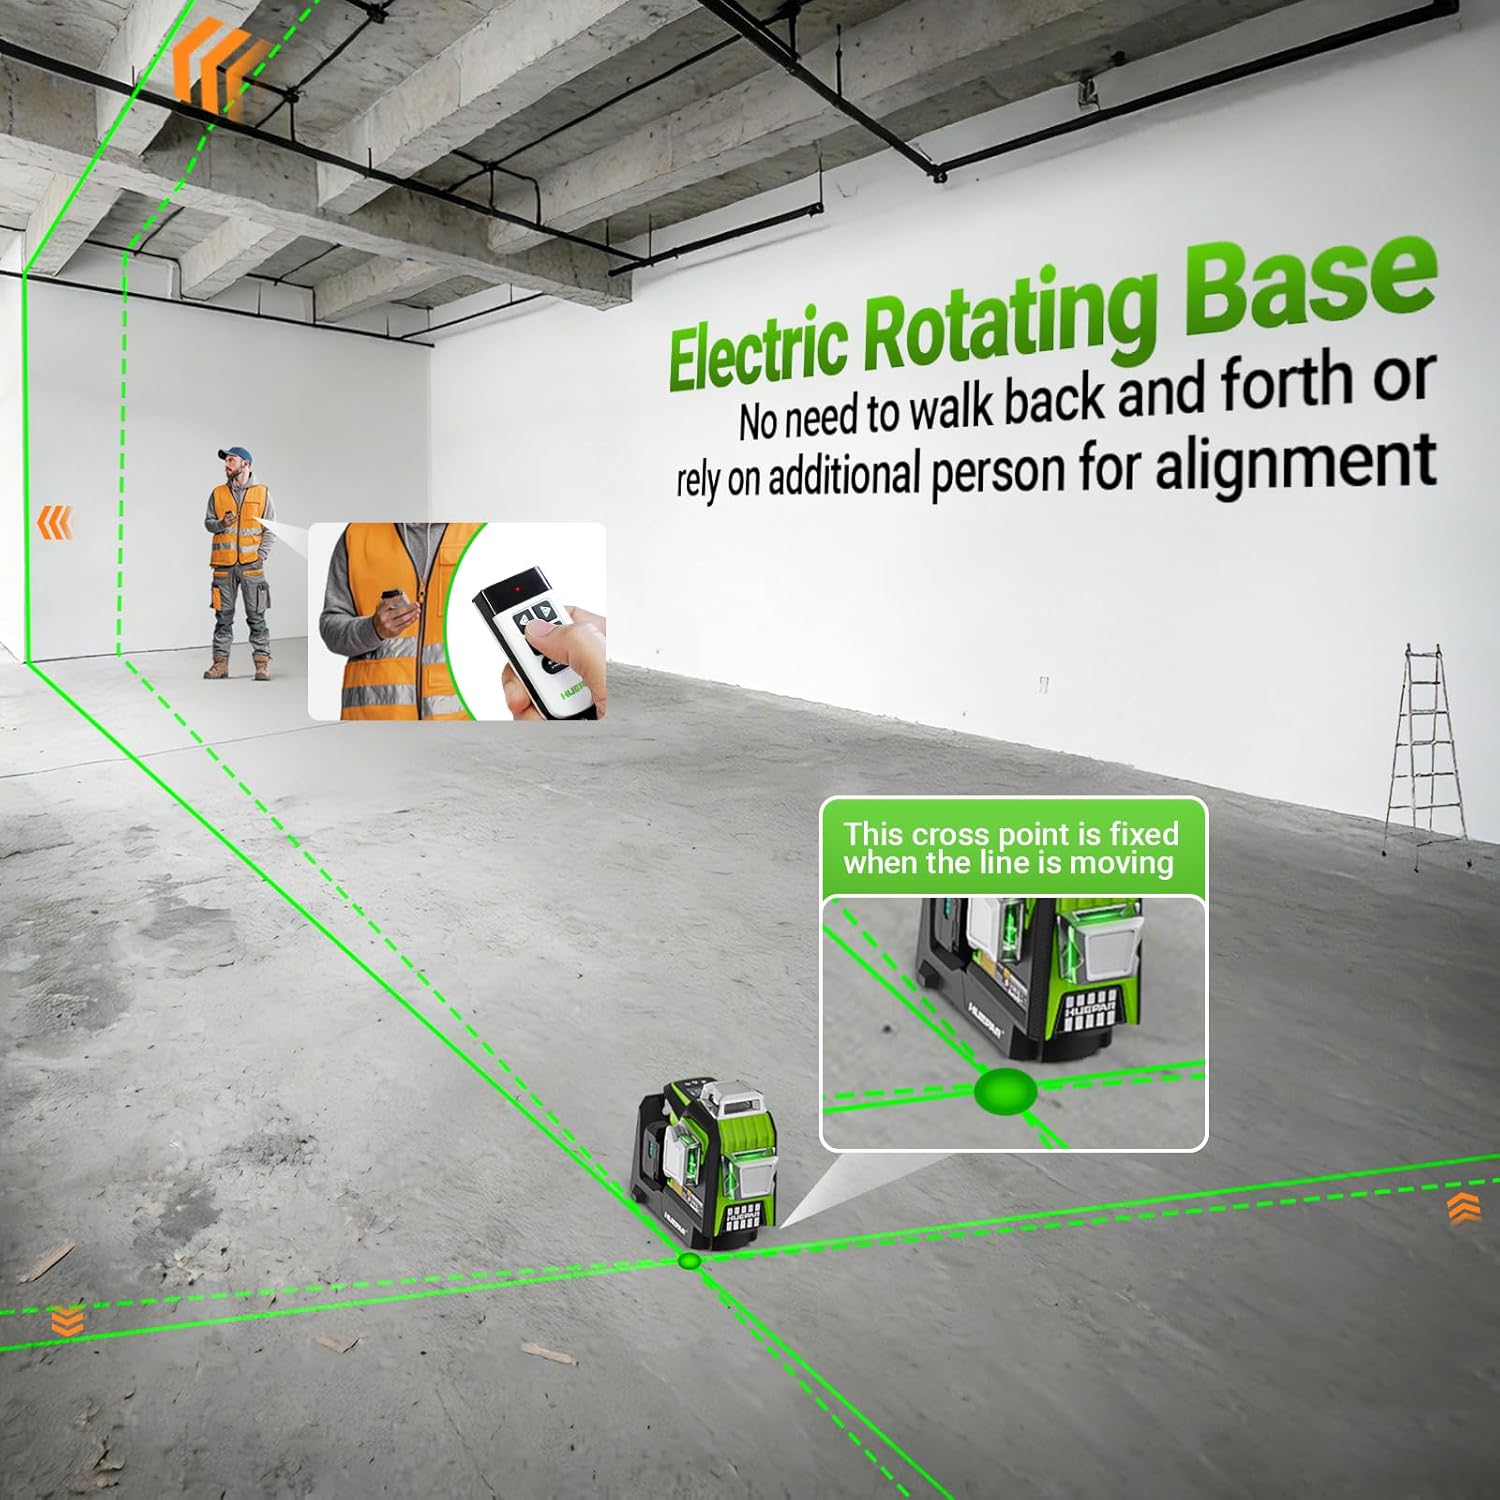
Description: The image illustrates the Electric Rotating Base feature, showing a user operating the laser level with a remote control for precise alignment without needing to physically move the device.

Description: This image highlights the remote control's buttons for pivot-around-point fine adjustment, allowing users to precisely rotate the vertical lines around a fixed cross point.
Maintenance
- Cleaning: Use a soft, damp cloth to clean the device. Do not use abrasive cleaners or solvents. Keep the laser apertures clean and free of dust.
- Storage: Store the laser level in its hard carry case in a dry, dust-free environment when not in use. If storing for extended periods, remove the battery.
- Battery Care: Charge the battery regularly, even if not in use, to maintain its lifespan. Avoid fully discharging the battery.
- Calibration: While the device is factory calibrated, regular checks for accuracy are recommended, especially after drops or impacts. Refer to the troubleshooting section for basic accuracy checks.
Troubleshooting
| Problem | Possible Cause | Solution |
|---|---|---|
| Laser lines are flashing rapidly. | Device is out of its self-leveling range (±3.5°). | Place the device on a more level surface. |
| Laser lines are dim or not visible outdoors. | Bright ambient light. | Activate Pulse Mode and use with a Huepar laser receiver. Adjust brightness settings. |
| Remote control is not responding. | Low battery in remote or device; obstruction. | Replace remote battery. Ensure line of sight. Charge device battery. |
| Laser lines disappear and 'Auto' icon flashes. | Device was moved or disturbed in Auto-Sensor mode. | Reposition the device and allow it to re-level. |
| Device does not power on. | Battery is depleted or incorrectly installed. | Charge or correctly install the battery. Ensure pendulum lock is unlocked. |
Specifications
| Feature | Specification |
|---|---|
| Brand | Huepar |
| Model | HX03CG-PRO |
| Laser Class | Class 2 (IEC/EN60825-1/2014), <1mW |
| Accuracy | ±1/13 inch at 33 feet |
| Self-Leveling Range | ±3.5° |
| Laser Lines | 1 Horizontal 360°, 2 Vertical 360° |
| Battery Type | 5200mAh Li-Ion Rechargeable |
| Operating Time | Up to 8 hours |
| Mount Threads | 1/4"-20 and 5/8"-11 |
| IP Rating | IP54 (Waterproof and Dustproof) |
| Operation Mode | Automatic and Manual |
| Material | Acrylonitrile Butadiene Styrene, Thermoplastic Elastomers |
Warranty and Support
Huepar is committed to providing excellent customer service and support for your product.
- Warranty: Enjoy a 5-year warranty for the device and a 2-year warranty for the battery (covering non-human damage).
- Technical Support: Lifetime technical support is available for setup and troubleshooting assistance.
- Service Team: Our 24/7 service team aims for a response within 24 hours and a solution within 48 hours.
- Contact Information:
- Email: support@huepar.com
- WhatsApp: https://wa.me/16262545609