1. Introduction
Thank you for purchasing the Pyle PRJG74 Portable Home Theater LED Projector. This device is designed to provide a versatile and immersive viewing experience, supporting 1080p resolution for movies, video games, and presentations. Its compact and lightweight design makes it suitable for various environments, from home entertainment to small office use. This manual provides detailed instructions for setup, operation, maintenance, and troubleshooting to ensure optimal performance and longevity of your projector.
2. Important Safety Instructions
Please read and follow all safety instructions carefully before using the projector to prevent fire, electric shock, or injury.
- Ventilation: Ensure adequate ventilation around the projector. Do not block ventilation openings.
- Power Source: Use only the specified power adapter and connect to a grounded power outlet.
- Moisture: Do not expose the projector to rain, moisture, or immerse it in water.
- Heat: Avoid placing the projector near heat sources or in direct sunlight.
- Cleaning: Unplug the projector before cleaning. Use a dry, soft cloth. Do not use liquid or aerosol cleaners.
- Servicing: Do not attempt to service this product yourself. Refer all servicing to qualified service personnel.
- Eye Protection: Do not look directly into the projector lens when the lamp is on.
3. What's in the Box
Verify that all components are present upon unpacking:
- Compact Projector (Pyle PRJG74)
- Remote Control
- Power Cord
- AV Cable
4. Product Overview
Familiarize yourself with the projector's components and ports.
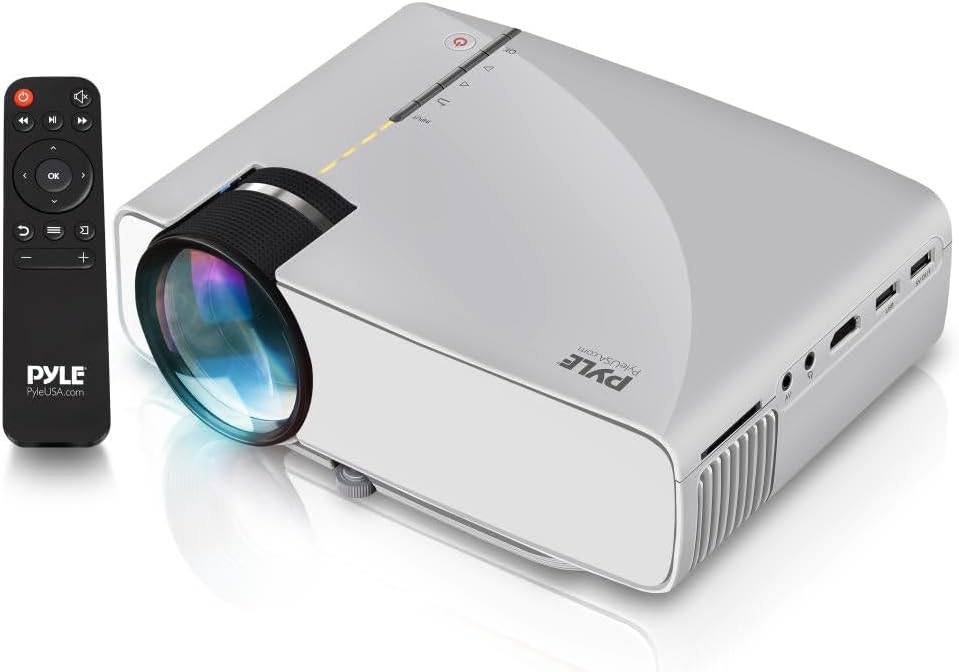
Image: The Pyle PRJG74 projector shown with its included remote control. The projector features a lens on the front, control buttons on top, and various input ports on the side.
4.1 Front Panel
- Projection Lens: Emits the image.
- Focus Ring: Adjusts image clarity.
4.2 Top Panel
- Power Button: Turns the projector on/off.
- Input Source Button: Selects input sources.
- Navigation Buttons (Up/Down/Left/Right/OK): For menu navigation and selection.
4.3 Side/Rear Panels
- HDMI Port: Connects to HDMI-enabled devices (laptops, gaming consoles, Blu-ray players).
- USB Port: Connects USB storage devices for media playback.
- SD Card Slot: Inserts SD cards for media playback.
- AV Port: Connects to devices using RCA composite video/audio cables.
- VGA Port: Connects to computers with VGA output.
- Audio Out (3.5mm): Connects to external speakers or headphones.
- Power Input: Connects the power cord.
5. Setup
5.1 Placement
Position the projector on a stable, flat surface or mount it overhead. Ensure the projection path is clear of obstructions. The optimal projection distance and screen size are:
- Screen Size: Adjustable from 50 to 130 inches.
- Projection Distance: Varies based on desired screen size. Refer to the table below for guidance.
| Screen Size (inches) | Projection Distance (feet) |
|---|---|
| 50 | ~5.5 |
| 80 | ~8.5 |
| 100 | ~10.5 |
| 130 | ~13.5 |
5.2 Power Connection
- Connect the power cord to the projector's power input port.
- Plug the other end of the power cord into a standard electrical outlet.
5.3 Connecting Input Devices
The PRJG74 supports multiple input sources:
- HDMI: Connect an HDMI cable from your device (e.g., laptop, game console) to the projector's HDMI port.
- USB/SD: Insert a USB flash drive or SD card into the respective port/slot.
- AV: Use the provided AV cable to connect devices with RCA output.
- VGA: Connect a VGA cable from your computer to the projector's VGA port.
5.4 Focus and Keystone Adjustment
- Focus: Rotate the focus ring on the front of the projector until the image appears sharp and clear.
- Keystone: If the projected image appears trapezoidal (wider at the top or bottom), use the keystone correction dial (if available, or digital keystone in menu) to adjust it to a rectangular shape.
6. Operating Instructions
6.1 Powering On/Off
- Power On: Press the Power button on the projector or remote control. The indicator light will turn on.
- Power Off: Press the Power button again. Confirm shutdown if prompted.
6.2 Input Source Selection
After connecting your input device:
- Press the 'Input' button on the projector or remote control.
- Use the navigation buttons to select the desired input source (HDMI, USB, SD, AV, VGA).
- Press 'OK' to confirm your selection.
6.3 Menu Navigation
Use the 'Menu' button on the remote or projector to access settings. Navigate using the arrow keys and 'OK' to select. Common settings include:
- Picture Settings: Brightness, Contrast, Color, Aspect Ratio.
- Sound Settings: Volume, Audio Mode.
- Time Settings: Sleep Timer.
- Option Settings: Language, Factory Reset.
6.4 Media Playback (USB/SD)
When a USB drive or SD card is inserted and selected as the input source, the projector will display a media browser. You can play various file types including:
- Video: MP4, AVI, MKV, etc.
- Audio: MP3, WMA, AAC, etc.
- Image: JPEG, BMP, PNG, etc.
- Text: TXT.
Navigate through folders and files using the remote control and press 'OK' to play or view.
7. Maintenance
Regular maintenance ensures optimal performance and extends the life of your projector.
7.1 Cleaning the Lens
Use a soft, lint-free cloth specifically designed for optical lenses. Gently wipe the lens to remove dust or smudges. Avoid using abrasive materials or harsh chemicals.
7.2 Cleaning the Projector Body
Wipe the exterior of the projector with a soft, dry cloth. For stubborn dirt, a slightly damp cloth can be used, followed by a dry cloth. Ensure no liquid enters the ventilation openings.
7.3 Ventilation
Periodically check the ventilation openings for dust accumulation. Use a soft brush or compressed air to gently clear any blockages. Proper airflow is crucial for preventing overheating.
8. Troubleshooting
If you encounter issues, refer to the following common problems and solutions:
| Problem | Possible Cause | Solution |
|---|---|---|
| No image displayed | Incorrect input source selected; loose cable connection; device not powered on. | Select the correct input source. Check all cable connections. Ensure the source device is powered on. |
| Image is blurry | Focus not adjusted; projector too close/far from screen. | Adjust the focus ring. Reposition the projector according to recommended distances. |
| Image is trapezoidal | Projector not perpendicular to the screen. | Adjust the keystone correction dial or digital keystone setting. |
| No sound | Volume too low; audio cable not connected; source device audio settings. | Increase projector volume. Check audio cable connections. Adjust audio output settings on the source device. |
| Remote control not working | Batteries dead or incorrectly inserted; obstruction between remote and projector. | Replace batteries. Ensure clear line of sight to the projector's IR receiver. |
9. Specifications
Key technical specifications for the Pyle PRJG74 Projector:
- Model: PRJG74
- Display Resolution: 1920 x 1080 (1080p Support)
- Projection Screen Size: 50" to 130" inches
- Connectivity Technology: HDMI, USB, VGA, AV, Mini SD
- Light Source: LED
- Item Weight: 2.06 pounds
- Product Dimensions: 7.9 x 5.7 x 3 inches
- Special Features: Lightweight, Portable, Built-in Dual Stereo Speaker
- Recommended Use: Home Theater, Gaming, Presentations
10. Warranty and Support
Pyle products are designed and manufactured to the highest quality standards. For warranty information, technical support, or service inquiries, please refer to the warranty card included with your product or visit the official Pyle website. Keep your purchase receipt as proof of purchase.
Online Support: For additional resources, FAQs, and contact information, please visit www.pyleusa.com.


