1. Introduction
This manual provides essential information for the safe operation, maintenance, and troubleshooting of your Craftsman Model 315.220100 Radial Arm Saw. Please read this manual thoroughly before operating the saw to ensure proper use and to prevent injury or damage. Keep this manual for future reference.
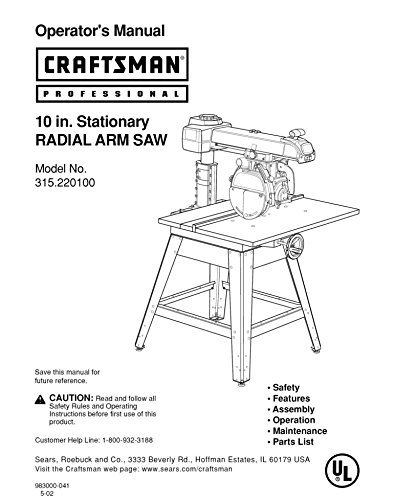
Figure 1.1: Cover of the Craftsman 315.220100 Radial Arm Saw Instruction Manual Reprint. This image displays the front cover of the physical instruction manual reprint, which contains important information regarding the saw's operation and maintenance.
2. Safety Instructions
Always follow basic safety precautions to reduce the risk of fire, electric shock, and personal injury when operating power tools. This section outlines critical safety guidelines specific to radial arm saws.
- Read the Manual: Understand all instructions and warnings before operating the saw.
- Wear Eye Protection: Always wear safety goggles or a face shield.
- Use Hearing Protection: Prolonged exposure to noise can cause hearing damage.
- Keep Guards in Place: Never operate the saw without all guards properly installed.
- Maintain a Clean Work Area: Cluttered areas invite accidents.
- Do Not Overreach: Maintain proper footing and balance at all times.
- Secure Workpiece: Always clamp or hold the workpiece firmly against the fence.
- Avoid Kickback: Ensure the blade is sharp and the workpiece is properly supported.
- Disconnect Power: Always unplug the saw before making adjustments, changing blades, or performing maintenance.
3. Setup
Proper setup is crucial for safe and accurate operation of your radial arm saw.
3.1 Unpacking and Inspection
- Carefully remove all components from the packaging.
- Inspect for any shipping damage. If damage is found, contact your retailer immediately.
- Verify all parts listed in the packing list are present.
3.2 Mounting the Saw
Mount the radial arm saw securely to a sturdy workbench or stand using appropriate hardware. Ensure the mounting surface is level and capable of supporting the saw's weight and operational forces.
3.3 Blade Installation
- Disconnect the saw from the power source.
- Raise the saw arm and lock it in the up position.
- Remove the blade guard.
- Use the provided wrench to loosen the arbor nut and remove the old blade (if applicable).
- Install the new blade, ensuring the teeth are pointing in the correct direction for cutting.
- Tighten the arbor nut securely.
- Reinstall the blade guard.
4. Operating Instructions
Familiarize yourself with the controls and functions before beginning any cutting operations.
4.1 Power On/Off
- To turn on, press the green 'ON' button.
- To turn off, press the red 'OFF' button.
4.2 Basic Crosscutting
- Position the workpiece firmly against the fence.
- Adjust the saw arm to the desired cutting position.
- Turn on the saw and allow the blade to reach full speed.
- Slowly pull the saw carriage forward through the workpiece.
- Once the cut is complete, push the saw carriage back to its resting position.
- Turn off the saw.
4.3 Angle and Bevel Adjustments
The radial arm saw allows for various angle and bevel cuts. Refer to the specific adjustment knobs and levers on your saw for precise settings. Always ensure adjustments are locked securely before operating.
5. Maintenance
Regular maintenance ensures the longevity and safe operation of your radial arm saw.
5.1 Cleaning
- Disconnect power before cleaning.
- Remove sawdust and debris from the motor vents, table, and arm assembly using a brush or vacuum.
- Clean the saw blade regularly to remove pitch and resin buildup.
5.2 Lubrication
Apply a light coat of machine oil to moving parts, such as the carriage bearings and arm pivot points, as recommended in the original manufacturer's guidelines (typically every 6 months or as needed).
5.3 Blade Sharpening/Replacement
A dull blade can cause kickback and poor cuts. Sharpen or replace the blade when it becomes dull or damaged. Always use blades appropriate for your saw's specifications.
6. Troubleshooting
This section addresses common issues you might encounter with your radial arm saw.
| Problem | Possible Cause | Solution |
|---|---|---|
| Saw does not start | No power; tripped circuit breaker; faulty switch | Check power connection; reset breaker; contact service |
| Poor cut quality (rough, splintering) | Dull blade; incorrect blade type; improper feed rate | Sharpen/replace blade; use appropriate blade; adjust feed rate |
| Excessive vibration | Loose mounting; unbalanced blade; worn bearings | Tighten mounting bolts; replace blade; inspect bearings |
| Saw binds or kicks back | Dull blade; improper workpiece support; forcing cut | Sharpen/replace blade; ensure proper support; reduce feed pressure |
7. Specifications
The following are general specifications for the Craftsman 315.220100 Radial Arm Saw. Actual specifications may vary slightly based on manufacturing revisions.
- Model: 315.220100
- Motor: Universal, 120V AC, 60 Hz (typical)
- Blade Diameter: 10 inches (typical)
- Arbor Size: 5/8 inch (typical)
- Crosscut Capacity: Approximately 15-1/2 inches at 90 degrees (typical)
- Rip Capacity: Approximately 24 inches (typical)
- Weight: Approximately 150-200 lbs (typical, varies by model year)
8. Warranty and Support
For specific warranty information, please refer to the original purchase documentation or contact Craftsman customer service. Typically, Craftsman power tools come with a limited warranty covering defects in materials and workmanship.
For technical support, replacement parts, or service inquiries, please visit the official Craftsman website or contact their customer service department. When contacting support, have your model number (315.220100) and serial number ready.
Craftsman Official Website: www.craftsman.com


