1. Overview
The TENKER 9.5" Portable DVD Player is designed for on-the-go entertainment, featuring a swivel screen, long-lasting rechargeable battery, and support for various media formats. Its compact design and versatile features make it suitable for diverse environments.
- Up to 5 hours of playback with the built-in rechargeable battery.
- Supports CD, DVD, CD-R/RW, DVD -R/+R, DVD+RW/-RW, VCD, SVCD, MP3/WMA/WAV, JPEG, MPEG2/AVI/DIVX, and TXT formats.
- 270-degree rotating and 180-degree flipping screen for flexible viewing angles.
- USB port and SD card slot for digital media playback.
- Break-point memory function to resume playback from where you left off.
2. Package Contents
Please verify that all items are present in the package upon unboxing.

Image showing the TENKER Portable DVD Player, remote control, power adapters, and cables.
- TENKER 9.5" Portable DVD Player
- Remote Control
- AC Power Adapter (Wall Charger)
- Car Charger
- AV Cable
- User Manual (Quick User Guide)
3. Product Features
3.1. Swivel Screen
The 9.5-inch LCD screen can rotate 270 degrees and flip 180 degrees, allowing for multiple viewing positions. This feature is useful for sharing the screen or mounting the player in a vehicle.

Image illustrating the 270-degree rotation and 180-degree flip capabilities of the screen.
3.2. Multi-Format Support
The player supports a wide range of disc formats including CD, DVD, CD-R/RW, DVD -R/+R, DVD+RW/-RW, VCD, and SVCD. It also supports digital media files such as MP3/WMA/WAV (audio), JPEG (images), MPEG2/AVI/DIVX (video), and TXT (text) via USB and SD card.

Image detailing the various ports and supported media formats, including USB, SD card, 3.5mm audio, AV out/in, and charging port.
3.3. Last Memory Function
The break-point memory function automatically saves your playback position, allowing you to resume watching a movie or listening to audio from where you left off, even after powering off the device.
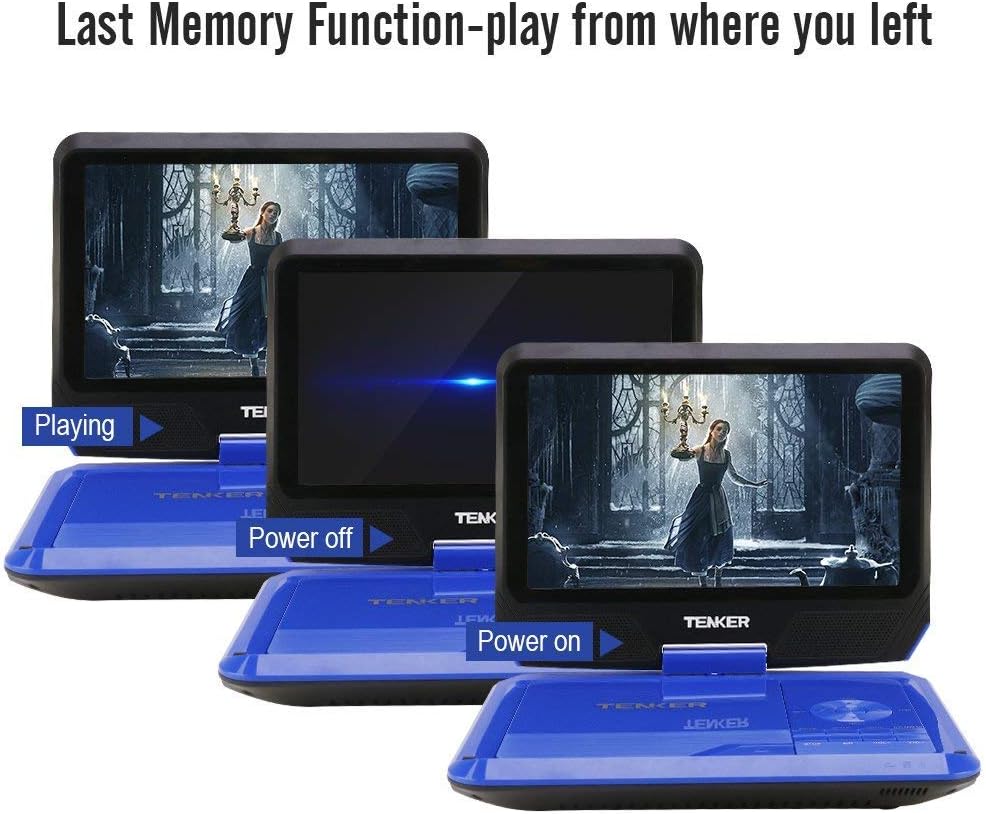
Image demonstrating the last memory function, showing the player resuming playback after being powered off and on.
4. Setup
4.1. Initial Charging
Before first use, fully charge the portable DVD player using the provided AC power adapter or car charger. The charging indicator light is located on the side of the device and will illuminate when charging.

Image showing the power adapter and car charger connections, highlighting the rechargeable battery.
4.2. Inserting a DVD
- Open the disc cover by gently lifting it.
- Gently place the DVD onto the spindle, ensuring it clicks into place.
- Close the disc cover securely until it latches.
4.3. Powering On/Off
Locate the power switch on the side of the device. Slide it to the "ON" position to power on. Slide it to "OFF" to power off.
5. Operating Instructions
5.1. Basic Playback
After inserting a disc and powering on, the player will typically begin playback automatically. Use the control buttons on the player or the remote control for functions like Play, Pause, Stop, Next, Previous, Volume Up/Down, and Menu.
5.2. Connecting to a TV
Use the supplied AV cable to connect the portable DVD player to a television. Connect the yellow, white, and red plugs from the AV cable to the corresponding input jacks on your TV. This allows you to view content on a larger screen.

Image demonstrating how to connect the portable DVD player to a television using the AV cable.
5.3. USB and SD Card Playback
Insert a USB flash drive into the USB port or an SD card into the SD card slot. Use the "Mode" button on the player or remote to select the USB or SD card input. Navigate through your digital media files using the directional buttons and select to play.
5.4. Using the Remote Control
The remote control provides full functionality for operating the DVD player from a distance. It includes buttons for playback control, menu navigation, volume adjustment, and setup options.
5.5. Screen Adjustment
The screen's swivel and flip features allow for optimal viewing angles. Adjust the screen as needed for personal viewing or shared viewing.

Image showing the portable DVD player being used in different environments like a bedroom, kitchen, office, outdoors, and in a car.
5.6. Official Product Video
Video demonstrating the unboxing, setup, and basic operation of the TENKER Portable DVD Player.
6. Maintenance
6.1. Cleaning
Use a soft, dry cloth to clean the exterior of the player. For the screen, use a soft, lint-free cloth specifically designed for electronics screens. Do not use liquid cleaners or abrasive materials.
6.2. Battery Care
To prolong battery life, avoid fully discharging the battery frequently. Charge the device regularly, even if not in use for extended periods. Store the player in a cool, dry place.
7. Troubleshooting
7.1. No Power
- Ensure the power adapter is securely connected and the power switch is in the "ON" position.
- Check if the battery is charged. Connect to power and observe the charging indicator light.
7.2. Disc Not Playing
- Verify the disc is inserted correctly with the label side facing up.
- Check if the disc is clean and free of scratches or smudges.
- Ensure the disc format is supported by the player (CD, DVD, etc.).
7.3. No Picture on TV
- Confirm the AV cable is correctly connected to both the player and the TV.
- Select the correct input source (AV, Video 1, etc.) on your television.
7.4. No Sound
- Adjust the volume on the player and ensure it is not muted.
- If using external speakers or headphones, ensure they are properly connected and functional.
8. Specifications
| Feature | Detail |
|---|---|
| Brand | TENKER |
| Model Number | MP0746 |
| Screen Size | 9.5 Inches |
| Display Type | LCD |
| Media Type | CD, DVD, SVCD, VCD |
| Item Weight | 2.9 pounds |
| Product Dimensions | 36.2 x 22.3 x 7.5 inches |
| Color | Blue |
9. Warranty and Support
For warranty information or technical support, please refer to the contact details provided in the Quick User Guide included with your product or visit the official TENKER website.


