1. Introduction
Welcome to the user manual for your Vibe Audio CVEN 3 Way Sound Quality Component Speaker Kit. This manual provides essential information for the proper installation, operation, and maintenance of your new audio system. Please read this manual thoroughly before attempting to install or use the speakers to ensure optimal performance and longevity.
2. Product Overview
The Vibe Audio CVEN63C-V4 CVEN 6 3 Way Sound Quality Component Speaker Kit is engineered to deliver an exceptional audio experience in your vehicle. Designed with a wide and flat frequency response, this kit is versatile enough for both two-way and three-way component configurations. The midwoofer is specifically crafted to address common loudspeaker challenges such as distortion, power handling, dynamic response, and efficiency, ensuring a superior listening experience.

Figure 2.1: Complete Vibe Audio CVEN 3 Way Component Speaker Kit
Key Features:
- Wide and Flat Frequency Response: Ensures accurate sound reproduction across the entire audio spectrum.
- Optimized Design: Engineered to minimize distortion, enhance power handling, and improve dynamic response and efficiency.
- Superior Listening Experience: Delivers high-fidelity audio for an immersive in-car soundstage.
- High Sensitivity and Low Moving Mass: Contributes to monstrous output and precise sound.
- Versatile Configuration: Suitable for both two-way and three-way component setups.
3. Kit Components
Your Vibe Audio CVEN 3 Way Component Speaker Kit includes the following high-quality components:

Figure 3.1: 6.5" Woofer (Front)
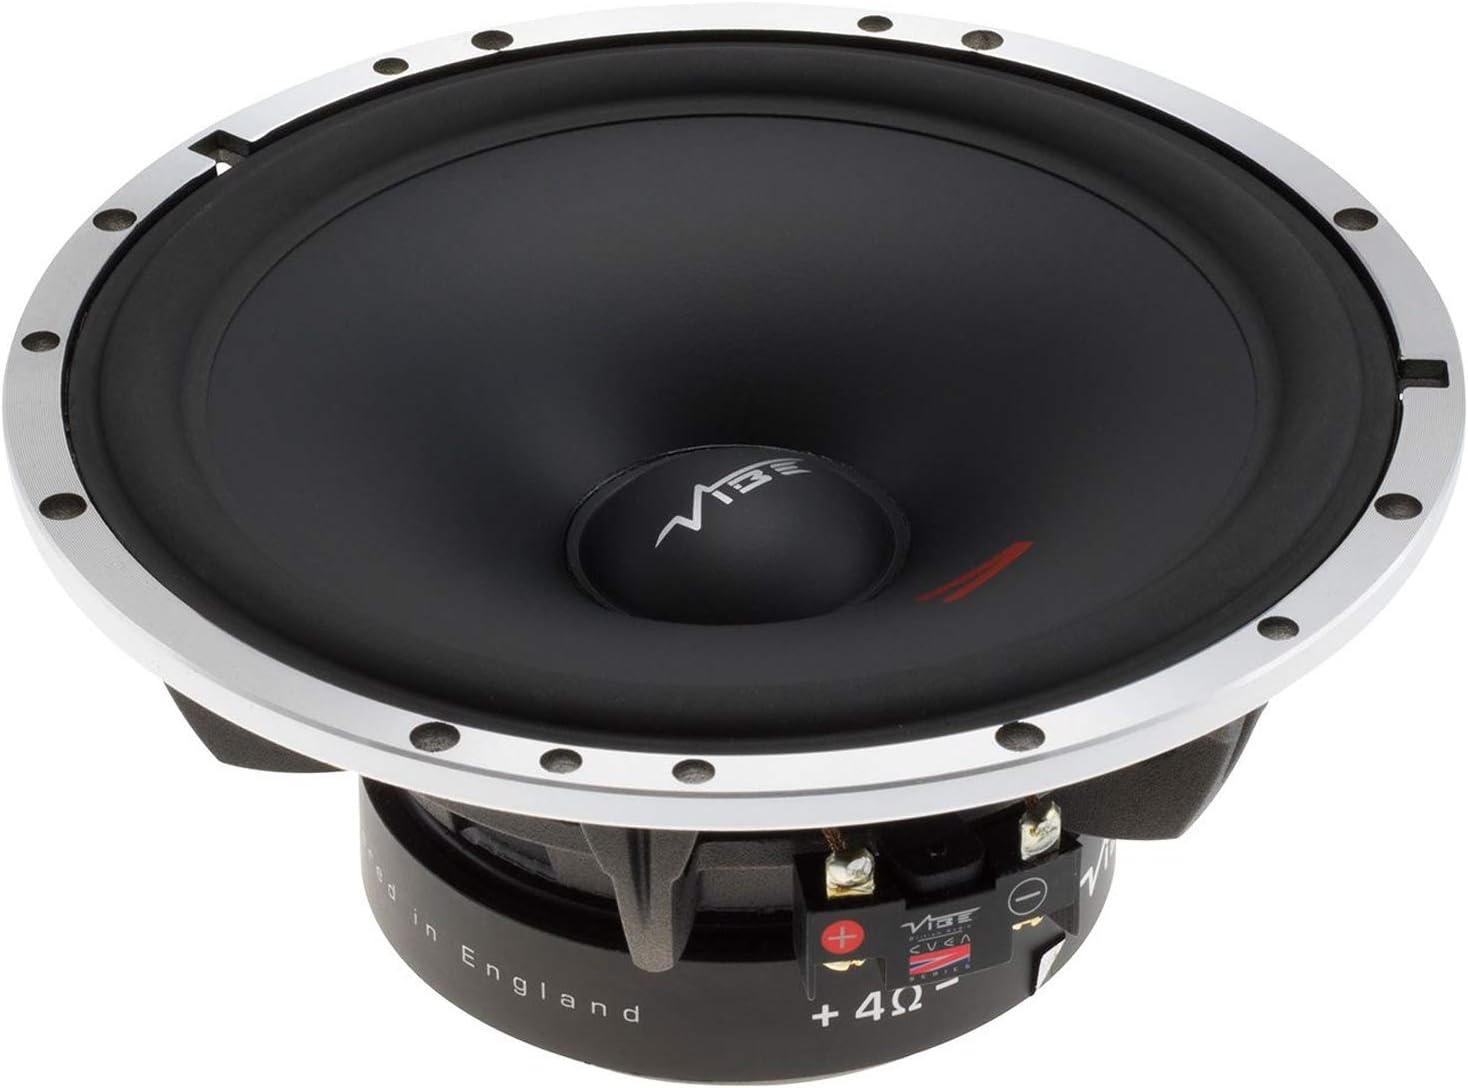
Figure 3.2: 6.5" Woofer (Angled)

Figure 3.3: Mid-Range Speaker

Figure 3.4: Tweeter
The kit also includes a passive crossover network (shown in Figure 2.1) designed to optimally distribute audio frequencies to each speaker component.
4. Technical Specifications
| Specification | Value |
|---|---|
| Configuration | 3-way |
| Speaker Size | 6.5” (165mm) |
| RMS Power | 130 watts |
| Peak Power | 290 watts |
| Minimum Input (RMS) | 65 watts |
| Sensitivity | 91dB |
| Frequency Response | 45Hz – 20kHz |
| Impedance | 4Ω |
| Mounting Depth | 2.9-inch (73mm) |
| Mounting Diameter | 5.6” (143mm) |
| Recommended Amplifier | CVENC6-V4 |
| Material | Plastic |
| Color | Black |
| Item Weight | 5.12 kg |
| Product Dimensions | 41D x 15.6W x 31H centimetres |
| Is Waterproof | True |
| Speaker Amplification Type | Passive |
| Speaker Connectivity | Wired |
| Connectivity Technology | Coaxial |
| Audio Output Mode | Stereo |
| Mounting Type | Wall Mount (General, typically flush/surface mount for car audio) |
5. Installation and Setup
Proper installation is crucial for the performance and safety of your speaker kit. It is recommended that installation be performed by a qualified professional. If you choose to install it yourself, please follow these general guidelines:
- Safety First: Disconnect the vehicle's battery before beginning any electrical work.
- Choose Mounting Locations: Identify suitable locations in your vehicle for the woofers, mid-range speakers, and tweeters. Ensure adequate mounting depth and diameter for each component.
- Prepare Mounting Surfaces: Carefully cut openings if necessary, ensuring clean and precise edges. Use appropriate mounting hardware to secure the speakers firmly.
- Wire Routing: Route speaker wires safely, avoiding sharp edges, moving parts, and heat sources. Use proper gauge wiring for optimal power transfer.
- Crossover Connection: Connect the passive crossover network according to the provided wiring diagram (not included in this general manual). Ensure correct polarity for all connections (positive to positive, negative to negative). The crossover will split the audio signal for the woofer, mid-range, and tweeter.
- Speaker Connection: Connect the woofers, mid-range speakers, and tweeters to the appropriate outputs on the crossover.
- Amplifier Connection: Connect the input of the crossover to your car amplifier's speaker outputs. Ensure the amplifier's power rating is compatible with the speaker kit's RMS and peak power handling.
- Test System: Reconnect the vehicle's battery. Before reassembling interior panels, perform a low-volume test to ensure all speakers are functioning correctly and sound is balanced.
- Final Assembly: Secure all panels and trim pieces.
For detailed wiring diagrams and specific mounting instructions, please refer to the full installation guide provided with your product packaging.
6. Operation Guide
Once your Vibe Audio CVEN speaker kit is correctly installed and connected to your car audio system, operation is straightforward. The speakers will reproduce audio signals from your head unit or amplifier.
- Audio Source: Select your desired audio source (radio, CD, USB, Bluetooth, etc.) on your car's head unit.
- Volume Control: Adjust the volume to a comfortable listening level. Avoid excessively high volumes that can cause distortion or damage to the speakers.
- Tone Controls: Use your head unit's or amplifier's bass, treble, and balance controls to fine-tune the sound to your preference. Start with flat settings and make small adjustments.
- Fader/Balance: Adjust the fader (front-to-rear) and balance (left-to-right) settings to optimize the sound stage within your vehicle.
- Break-in Period: Allow a break-in period of approximately 20-30 hours of normal listening for the speaker components to fully loosen up and achieve their optimal sound characteristics.
7. Care and Maintenance
To ensure the longevity and continued performance of your Vibe Audio CVEN speaker kit, follow these simple care and maintenance tips:
- Cleaning: Use a soft, dry cloth to gently wipe down the speaker grilles and surrounds. Avoid using harsh chemicals, solvents, or abrasive cleaners, as these can damage the speaker materials.
- Avoid Overpowering: Do not continuously play audio at extremely high volumes that cause audible distortion. This can lead to speaker damage.
- Environmental Factors: While the product is listed as waterproof, prolonged exposure to extreme moisture, direct sunlight, or extreme temperatures should be minimized to prevent degradation over time.
- Secure Mounting: Periodically check that all speakers are securely mounted and that mounting screws have not loosened due to vehicle vibrations.
- Wiring Inspection: Occasionally inspect speaker wiring for any signs of wear, fraying, or loose connections.
8. Troubleshooting
If you encounter any issues with your Vibe Audio CVEN speaker kit, refer to the following common troubleshooting steps:
| Problem | Possible Cause & Solution |
|---|---|
| No Sound from Speakers |
|
| Distorted Sound |
|
| Weak or Uneven Sound |
|
| Buzzing or Hissing Noise |
|
If the problem persists after attempting these solutions, please contact Vibe Audio customer support or a qualified car audio technician.
9. Warranty and Support
Vibe Audio products are manufactured to the highest standards and are covered by a limited warranty against defects in materials and workmanship. Please refer to the warranty card included with your product for specific terms, conditions, and duration of coverage.
For technical support, warranty claims, or service inquiries, please contact your authorized Vibe Audio dealer or visit the official Vibe Audio website for contact information. When contacting support, please have your product model number (CVEN63C-V4) and proof of purchase readily available.


