
1. Introduction
This manual provides essential instructions for the setup, operation, and maintenance of your Hantek 365A USB Wireless Data Logger. This device is designed for long-term recording of various electrical parameters including voltage, current, resistance, and capacitance, and for generating trend curves. It features a plug-and-play USB interface and requires a PC for operation.
2. Product Overview
The Hantek 365A is a compact and versatile data logger. Its primary function is to acquire and record data over extended periods, providing valuable insights into electrical system performance. The device connects to a computer via USB for power and data transfer, utilizing dedicated software for control and analysis.
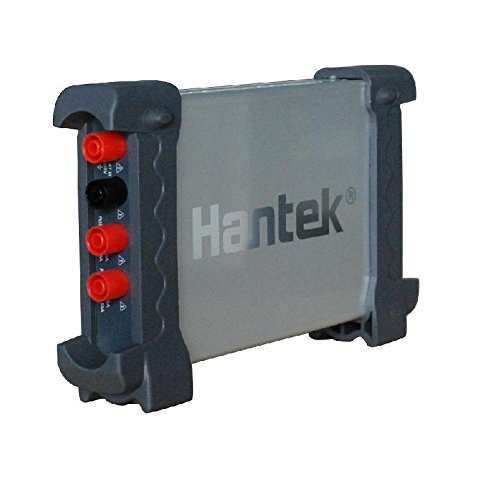
Figure 2.1: Front view of the Hantek 365A USB Wireless Data Logger, showing input terminals.

Figure 2.2: Top view of the Hantek 365A device, displaying the Hantek logo.
3. Package Contents
Upon unpacking, please verify that all items listed below are present and in good condition:
- Hantek 365A USB Wireless Data Logger unit
- USB Cable
- Test Leads (red and black)
- Alligator Clips
- Instruction Manual (this document)

Figure 3.1: The Hantek 365A device shown with its standard accessories, including USB cable and test leads.

Figure 3.2: The Hantek 365A and its accessories neatly packed within the product box.
4. Setup
- Software Installation: Before connecting the device, install the Hantek data logger software on your PC. The software supports Windows 2000, Windows XP, Windows 7, and Windows 8. Refer to the software installation guide provided separately or available for download from the Hantek website.
- Connect to PC: Connect the Hantek 365A to your computer using the provided USB cable. The device is USB powered, so no external power adapter is required.
- Driver Installation: Upon first connection, your operating system may automatically install necessary drivers. If prompted, follow the on-screen instructions.
- Launch Software: Once the device is connected and drivers are installed, launch the Hantek data logger software. The software should detect the connected device.

Figure 4.1: Side view of the Hantek 365A, highlighting the USB port for PC connection and power supply.
5. Operating Instructions
The Hantek 365A operates in conjunction with its dedicated PC software. The software provides the interface for configuring measurement parameters, initiating data logging, and viewing recorded data.
- Select Measurement Type: Within the software, choose the desired measurement parameter (e.g., voltage, current, resistance, capacitance).
- Configure Settings: Adjust measurement ranges, sampling rates, and logging duration as required for your application.
- Connect Test Leads: Connect the test leads to the appropriate input terminals on the Hantek 365A and to the circuit or component you wish to measure. Ensure correct polarity and safe connection practices.
- Start Recording: Initiate data logging through the software interface. The device will begin recording data according to your configured settings.
- View and Analyze Data: The software allows real-time viewing of data and the generation of trend curves. Recorded data can typically be exported for further analysis.
For detailed software operation, refer to the Hantek data logger software user manual, which provides comprehensive guidance on all software features and functions.
6. Specifications
Key technical specifications for the Hantek 365A USB Wireless Data Logger:
| Feature | Detail |
|---|---|
| Model Number | 365A |
| Power Source | USB Power |
| Interface | USB (Plug & Play) |
| Supported OS | Windows 2000, Windows XP, Windows 7, Windows 8 |
| Measurement Capabilities | Voltage, Current, Resistance, Capacitance, On-off |
| Manufacturer | Hantek |
| UPC | 680580919703, 732140172438 |

Figure 6.1: Comparison table showing features across different Hantek 365 series models.
7. Maintenance
- Cleaning: Use a soft, dry cloth to clean the exterior of the device. Do not use abrasive cleaners or solvents.
- Storage: Store the data logger in a cool, dry place away from direct sunlight and extreme temperatures when not in use.
- Cable Care: Inspect the USB cable and test leads regularly for any signs of damage. Replace damaged cables immediately to ensure safe and reliable operation.
- Software Updates: Periodically check the Hantek website for software updates to ensure optimal performance and access to new features.
8. Troubleshooting
- Device Not Detected:
- Ensure the USB cable is securely connected to both the device and the PC.
- Try a different USB port on your computer.
- Verify that the necessary drivers are installed. Check Device Manager on Windows.
- Restart the Hantek software and/or your computer.
- Software Not Launching:
- Confirm your operating system is supported (Windows 2000, XP, 7, 8).
- Reinstall the software if issues persist.
- Inaccurate Readings:
- Check test lead connections for proper contact and polarity.
- Ensure the correct measurement range is selected in the software.
- Verify the device is not exposed to strong electromagnetic interference.
9. Warranty and Support
For warranty information, technical support, or service inquiries, please refer to the documentation included with your purchase or visit the official Hantek website. Keep your purchase receipt as proof of purchase for warranty claims.
Manufacturer: Hantek

