
BN-LINK SU101D
Contents
BN-LINK 7 Day Programmable In-Wall Timer Switch User Manual
Model: SU101D | Brand: BN-LINK
1. Product Overview
The BN-LINK 7 Day Programmable in-Wall Timer Switch is designed to automate the control of lights, fans, and motors in your home. It offers advanced programming features, including up to 18 On/Off programs, 7-day scheduling, and a convenient blue backlight for easy visibility. This timer switch is compatible with both single pole and 3-way wiring configurations, requiring a neutral wire for installation. Its built-in rechargeable battery ensures settings are retained during power outages, providing reliable and energy-efficient operation.
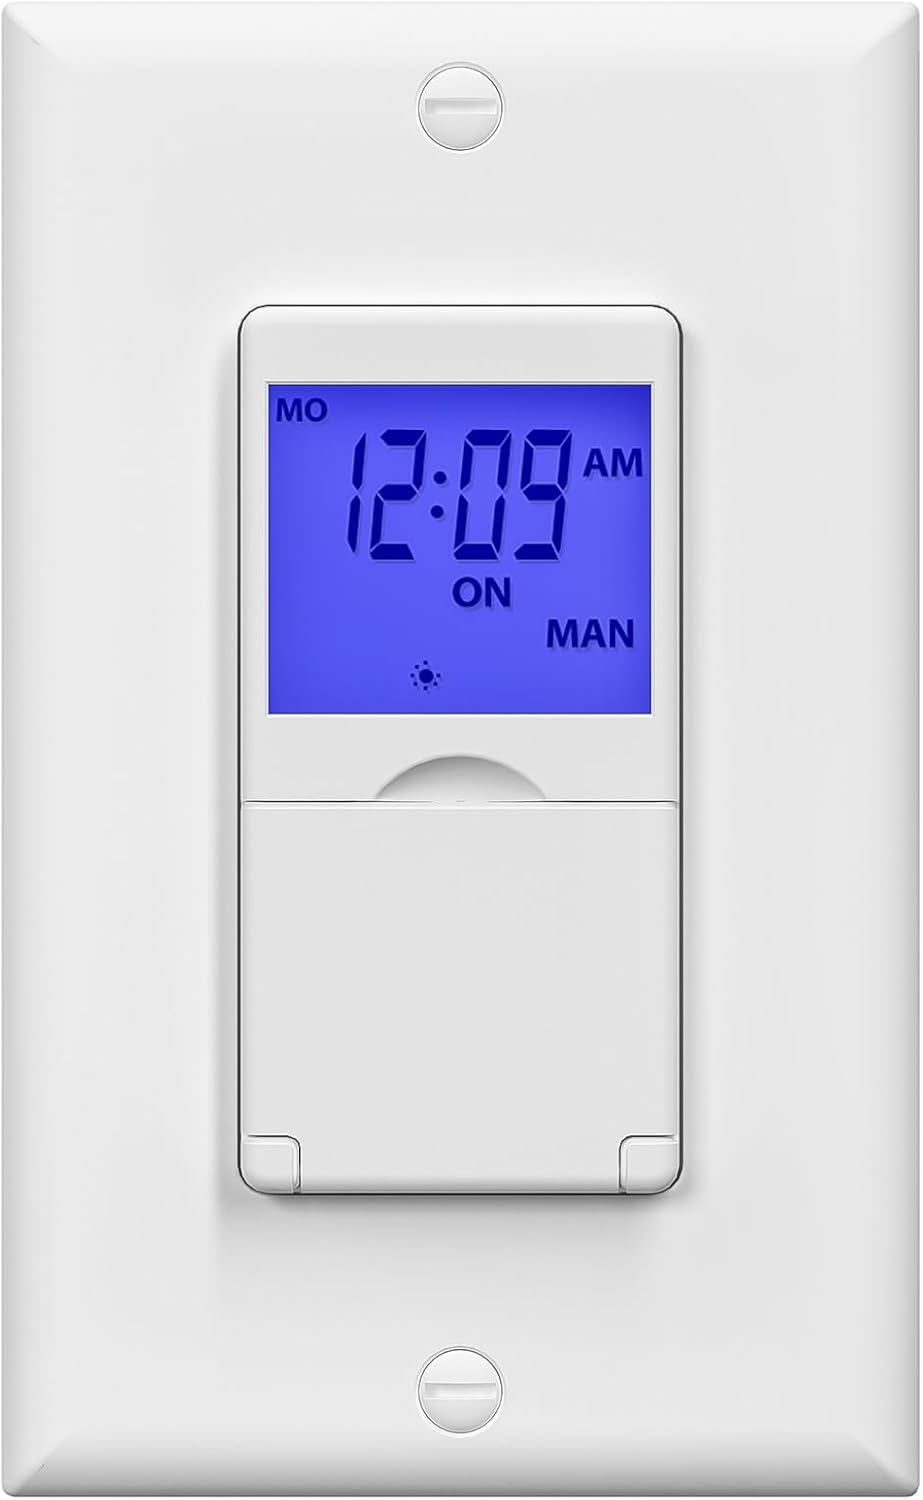
Front view of the BN-LINK 7 Day Programmable In-Wall Timer Switch.
Key Features:
- Blue Backlight & 18 On/Off Programs: Ensures easy visibility and allows for up to 18 customizable on/off schedules over 7 days.
- Full Control & Backup Battery: Seamlessly switch between AUTO and MANUAL modes. A built-in rechargeable battery preserves settings during power interruptions.
- Protect Home & Save Energy: Features a "Random" vacation mode for enhanced security and helps reduce energy consumption through automated scheduling.
- Single-Way & 3-Way Compatible: Offers flexible installation options for both single pole and 3-way setups (compatible with SPDT).
- Neutral Wire Required: Essential for proper installation and operation.
2. Safety Information
Please read all instructions carefully before installation and use. Improper installation can lead to electrical shock or fire. Always turn off power at the circuit breaker before beginning any electrical work.
- WARNING: Risk of Electric Shock. Disconnect power at the circuit breaker or fuse before installing.
- Neutral Wire Required: This device requires a neutral wire for operation. Ensure your electrical box has a neutral wire (typically white) before attempting installation.
- ETL Listed: This digital light timer switch is ETL listed, conforming to UL Std.60730-1, 60730-2-7, ensuring quality and safety.
- Rating: 15A/1875W, 10A/1250W Tungsten, 10A/1250W Ballast, 1/2HP, 125VAC, 60Hz.
3. Package Contents
Verify that all components are present in the package:
- BN-LINK 7 Day Programmable In-Wall Timer Switch
- Wire Nuts (for secure connections)
- Face Plate (for finished installation)

Diagram showing the timer switch, wire nuts, and face plate included in the package.
4. Installation
Before starting, ensure power is OFF at the circuit breaker. A neutral wire is required for installation.
Wiring Diagrams:

Wiring diagram for Single-Pole installation. Note: Use a wire nut to twist the BLUE (3-way) wire for safety in single-pole setups.

Wiring diagram for 3-Way installation. Connect the blue wire to the 3-way wire (traveler).
Installation Video:
For a detailed visual guide on installation, please refer to the official instruction video:
Official BN-LINK BND-60 SU101D Instruction video, demonstrating the installation process.
5. Setup and Programming
After installation, follow these steps to set up and program your timer switch.
Initial Power-Up and Reset:
After wiring, allow the internal battery to charge for at least 10 minutes. Then, press the "RESET" button using a non-metallic object (like a toothpick) to clear all previous settings and initialize the device.

Image showing the location of the reset button and programming interface.
Setting System Time:
- Press the reset button using the tip of a toothpick or any non-metallic object.
- Set the time and calendar by pressing the SET button. The year will flash. Use the + or - button to set the year, then press SET.
- Press the + or - button to change the month and day, then press SET. The day of the week will automatically set.
- Press the + or - button to change the time, then press SET. Make sure that AM and PM are set correctly.
- When DST appears on the screen, press the + or - button to turn on or off Daylight Saving Time, then press SET.
- Press the + or - button to choose the time zone that best fits your location (PAC for Pacific, MOU for Mountain, CEN for Central, EAS for Eastern, HAW for Hawaiian, ALA for Alaska). Then press SET.
- Press the + or - button to select the correct time of the sunrise in your time zone, then press SET.
- Press the + or - button to select the correct time of the sunset in your time zone, then press SET.
Setting Program (Sunset to Sunrise Example):
- Press the PROG button, then press the SET button to set the first ON event. Use the + or - button to set the desired days, then press SET.
- Once the time is blinking, press the D/D button twice until you see the moon icon (for sunset).
- Press the PROG button, then press the SET button to set the first OFF event. Use the + or - button to set the desired days, then press SET.
- Once the time is blinking, press the D/D button once until you see the sun icon (for sunrise).
- Press and hold the PROG button for 3 seconds to accept the program.
- To delete a set program, press the PROG button, then press the ON and OFF button until it deletes the time.

Detailed view of the timer switch buttons for programming.
Switching Between Manual and Auto Mode:
To switch between MANUAL or AUTO mode, press and hold the ON/OFF button (located on the door) for 3 seconds.
- MAN ON: Power remains on.
- MAN OFF: Power remains off.
- AUTO ON: Will remain on temporarily until the OFF schedule takes effect.
- AUTO OFF: Will remain off temporarily until the ON schedule takes effect.
6. Maintenance
The BN-LINK timer switch requires minimal maintenance. Keep the device clean by wiping it with a dry, soft cloth. Do not use abrasive cleaners or solvents. The built-in rechargeable battery is designed to maintain settings during power outages and typically does not require replacement.
7. Troubleshooting
If you encounter issues with your BN-LINK timer switch, refer to the common problems and solutions below:
Common Issues:
- Difficulty with Wiring (LOAD vs HOT): Ensure you correctly identify the LOAD and HOT wires. The LOAD wire runs from the switch to the fixture (e.g., ceiling fan), while the HOT wire comes from the electrical breaker panel. It's not always color-matching; trace the wires back to their bundles. If reversed, the device may not function. Turn off the breaker, switch the wires, and retest.
- Programming Sunset/Sunrise Settings: If the timer is not turning on/off at sunset/sunrise as expected, ensure you have correctly activated the sunset/sunrise function. After setting the ON/OFF event, press the D/D button to cycle through options until the sun/moon icon appears for the desired event. Just setting it to AUTO mode is not sufficient to enable sunset/sunrise functionality.
- Device Not Responding After Installation: Ensure the internal battery has charged for at least 10 minutes after initial wiring. Press the "RESET" button to clear any potential errors and re-attempt programming. Verify all wire connections are secure.
If problems persist, consider consulting a qualified electrician or contacting BN-LINK customer support.
8. Specifications
| Attribute | Value |
|---|---|
| Operation Mode | MANUAL-AUTO |
| Current Rating | 15 Amps |
| Operating Voltage | 125 Volts |
| Contact Type | Normally Open |
| Connector Type | Wire Connect |
| Terminal | Screw |
| Item dimensions L x W x H | 4.92 x 3.23 x 2.44 inches |
| Circuit Type | 3-way |
| Actuator Type | Push Button |
| Contact Material | Metal |
| International Protection Rating | IP54 |
| Lower Temperature Rating | 5 Degrees Fahrenheit (-15°C) |
| Upper Temperature Rating | 122 Degrees Fahrenheit (50°C) |
| Controller Type | Push Button |
| Connectivity Protocol | X-10 |
| Color | White |
| Wattage | 1875 watts |
| Horsepower | 0.50 HP |
| Model Number | SU101D |
| UPC | 726179401928 |
9. Warranty and Support
For warranty information or technical support, please contact BN-LINK customer service. You can also refer to the official user guide PDF for additional details and diagrams.
Official User Guide (PDF): Download Here
Ask a question about this manual
Ask about setup, troubleshooting, compatibility, parts, safety, or missing instructions. Manuals+ will review the question and use this page’s manual context to help answer it.