1. Important Safety Information
Please read all instructions carefully before using the Sduck Replacement Blade Assembly. Failure to follow these safety guidelines may result in injury or damage to the product.
- WARNING: DO NOT BLEND HOT LIQUIDS. Blending hot liquids can create pressure buildup, leading to potential injury or property damage.
- CAUTION: Press down and twist to extract for no more than 1 minute. If more blending is needed, wait 1 minute, then repeat. If the product is used for more than 3 cycles, allow the power base to cool for 3-5 minutes after the third extraction.
- Always ensure the blade assembly is securely attached to the cup before placing it on the blender base.
- Keep hands and utensils out of the container while blending to reduce the risk of severe personal injury.
- Never operate the blender with a damaged blade assembly. Inspect the blades for any signs of wear or damage before each use.
- This blade assembly is sharp. Handle with care to avoid cuts.
- Keep out of reach of children.
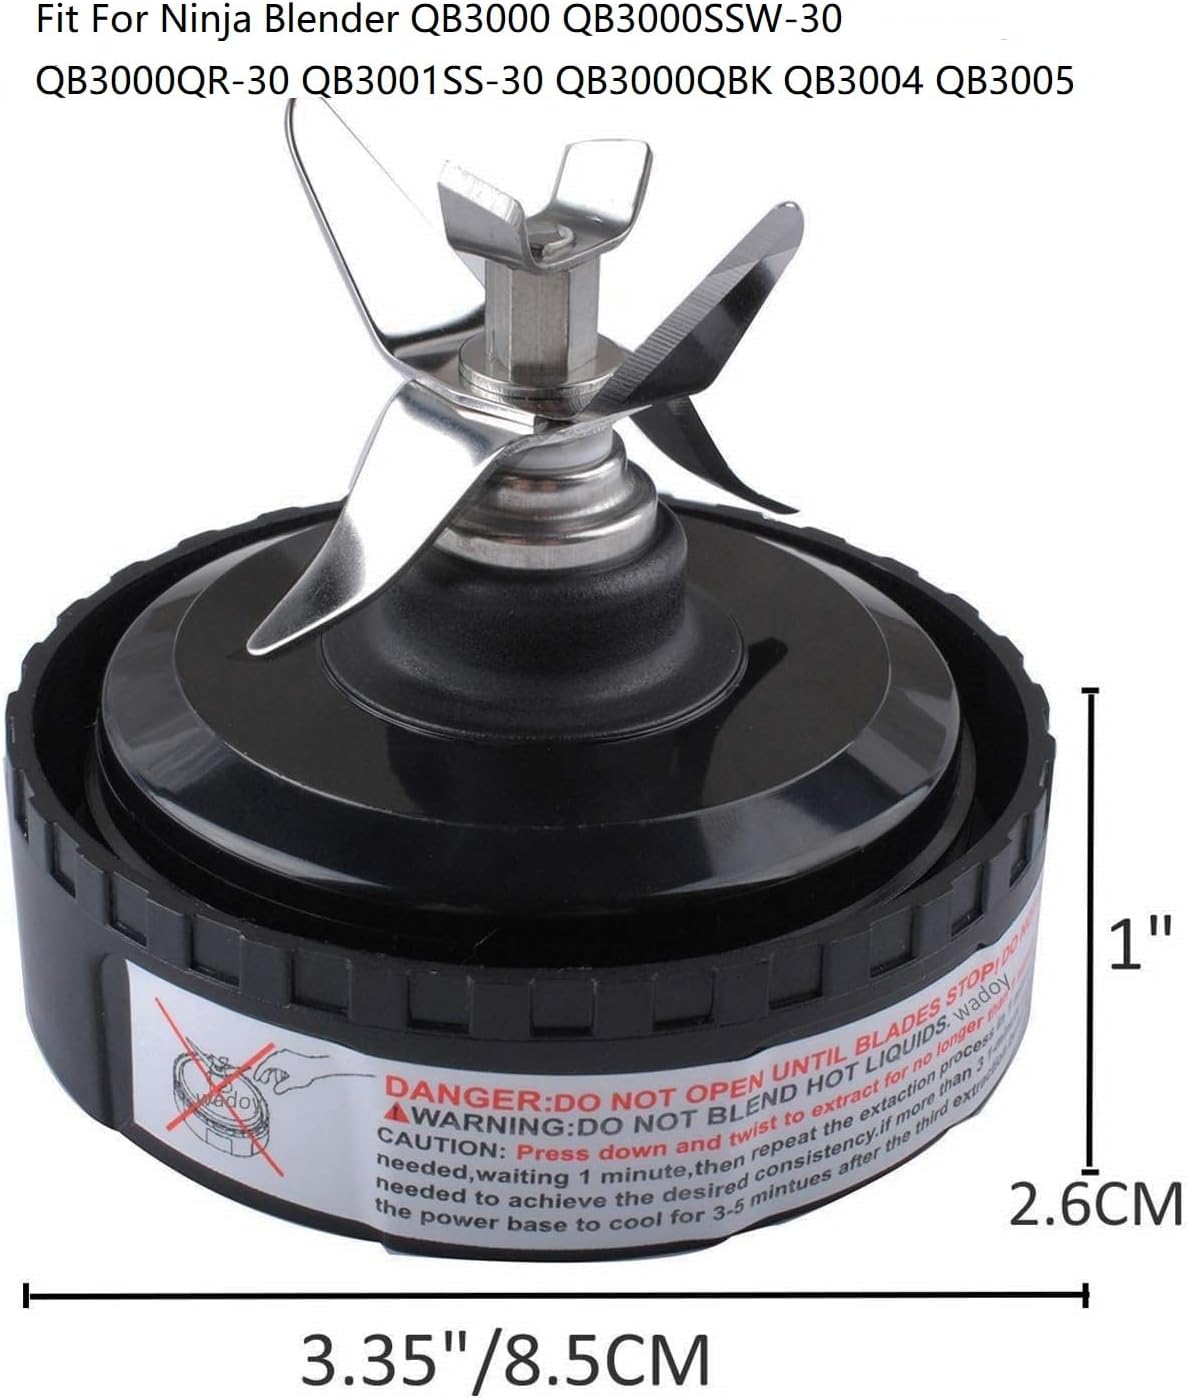
Image 1: Sduck Replacement Blade Assembly showing warning label and dimensions. The label clearly states "DANGER: DO NOT OPEN UNTIL BLADES STOP" and "WARNING: DO NOT BLEND HOT LIQUIDS".
2. Product Overview
The Sduck Replacement Blade Assembly is designed to replace worn or damaged blade assemblies for specific Nutri Ninja Blender models. It features durable stainless steel blades for efficient blending and extraction.
2.1. Package Contents
- 1 x Sduck Replacement Blade Assembly
2.2. Compatible Models
This replacement blade assembly is compatible with the following Nutri Ninja Blender models:
- Nutri Ninja Blender 700 Watts QB3000
- Nutri Ninja Blender QB3000SS
- Nutri Ninja Blender QB3000SSW
- Nutri Ninja Blender QB3001SS 30
- Nutri Ninja Blender QB3004
- Nutri Ninja Blender QB3005
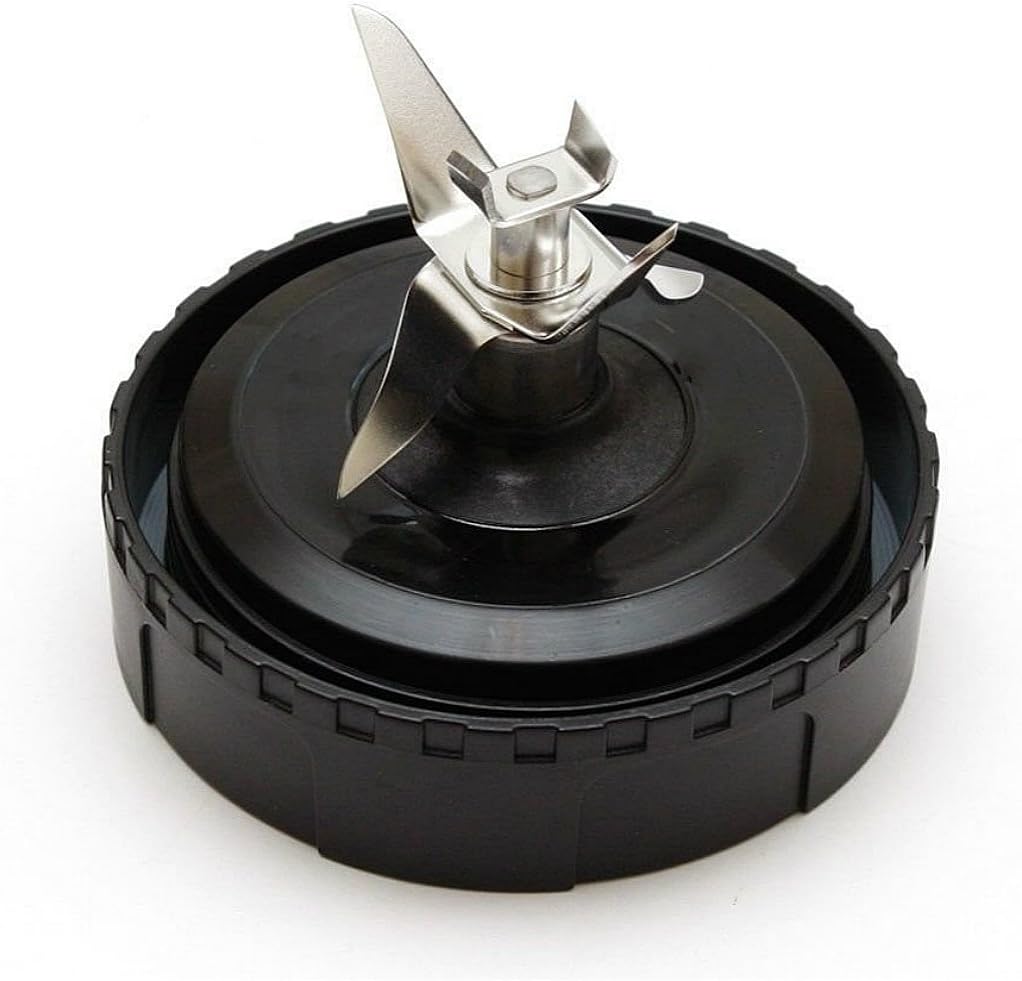
Image 2: Top-down view of the Sduck Replacement Blade Assembly, showing the four-pronged stainless steel blade and black base.
3. Setup
Follow these steps to properly install the replacement blade assembly onto your Nutri Ninja blender cup.
- Ensure Power is Off: Before handling any blender components, ensure the blender base is unplugged from the power outlet.
- Prepare the Cup: Fill your 16 oz Nutri Ninja cup with your desired ingredients. Do not overfill past the MAX fill line.
- Attach Blade Assembly: Place the Sduck Replacement Blade Assembly onto the open end of the cup. Align the threads of the blade assembly with the threads on the cup.
- Securely Tighten: Twist the blade assembly clockwise until it is tightly sealed onto the cup. Ensure there are no gaps to prevent leakage during blending.
- Place on Blender Base: Invert the assembled cup and blade, and place it onto the Nutri Ninja blender power base. Align the tabs on the cup with the slots on the base.
- Lock into Place: Twist the cup clockwise on the power base until it locks securely into position.

Image 3: Sduck Replacement Blade Assembly shown alongside the underside of a compatible blender cup lid, illustrating the connection points.
4. Operating Instructions
Once the blade assembly and cup are securely attached to the blender base, you can begin blending.
- Plug In: Plug the blender power base into a suitable electrical outlet.
- Start Blending: Press down on the cup to activate the blending action. For continuous blending, twist the cup further clockwise until it locks into the "ON" position (if your blender model supports this).
- Blending Duration: Blend in short bursts (pulse) or continuously for up to 1 minute per cycle.
- Avoid Overheating: If more blending is required after 1 minute, release the cup, wait 1 minute, and then repeat the blending cycle. After three consecutive 1-minute blending cycles, allow the blender power base to cool for 3-5 minutes to prevent overheating.
- Finish Blending: Once desired consistency is achieved, release pressure on the cup or twist it counter-clockwise to the "OFF" position.
- Remove Cup: Unplug the blender. Twist the cup counter-clockwise to unlock it from the power base, then lift it off.
- Remove Blade Assembly: Carefully twist the blade assembly counter-clockwise to remove it from the cup.
Important: Always ensure the blender is unplugged before removing or attaching any parts.
5. Cleaning and Maintenance
Proper cleaning and maintenance will extend the life of your Sduck Replacement Blade Assembly.
- Immediate Cleaning: Clean the blade assembly immediately after each use to prevent food from drying onto the blades and seals.
- Hand Washing: Wash the blade assembly with warm, soapy water. Use a brush to clean around the blades carefully. Rinse thoroughly.
- Dishwasher Safe: The blade assembly is generally top-rack dishwasher safe. However, hand washing is recommended for longevity, especially for the rubber gasket.
- Drying: Allow all parts to air dry completely before storing or reassembling.
- Gasket Inspection: Periodically inspect the rubber gasket for any signs of wear, cracks, or damage. A damaged gasket can lead to leaks.
- Storage: Store the blade assembly in a dry place, away from direct sunlight.
6. Troubleshooting
| Problem | Possible Cause | Solution |
|---|---|---|
| Blender leaks during operation. | Blade assembly not tightened sufficiently. Damaged or improperly seated gasket. | Ensure the blade assembly is twisted on tightly. Check the rubber gasket for proper seating and any damage; replace if necessary. |
| Blades are not spinning. | Cup not properly locked onto the power base. Overfilled cup. Ingredients are too thick. | Ensure the cup is twisted and locked securely onto the power base. Reduce the amount of ingredients. Add more liquid. |
| Unusual noise or burning smell. | Overheating of the motor. Foreign object in the blade. Worn blade assembly. | Immediately unplug the blender. Allow the motor to cool down. Check for any obstructions. If the issue persists, the blade assembly or blender motor may be faulty. |
7. Specifications
- Product Dimensions: Approximately 4 x 4 x 4 inches (10.16 x 10.16 x 10.16 cm)
- Item Weight: Approximately 3 ounces (85 grams)
- Blade Material: Stainless Steel
- Base Material: Durable Plastic
- Compatibility: Nutri Ninja Blender models QB3000, QB3000SS, QB3000SSW, QB3001SS 30, QB3004, QB3005
8. Warranty and Support
For any questions regarding the Sduck Replacement Blade Assembly, please contact the seller or manufacturer directly through your purchase platform. Please refer to your original purchase documentation for specific warranty details.
Keep your purchase receipt or order number handy when contacting support.


