1. Product Overview
The SANS 42V 2A charger is specifically designed for charging 36V lithium battery packs commonly found in electric bicycles, E-Scooters, and various communication apparatus. This charger incorporates smart charging technology, ensuring efficient, precise, and reliable performance. Its compact and lightweight design, weighing less than 600 grams, makes it highly portable. The charger is certified with EMC, LVD, UL, and CE approvals, guaranteeing safety and quality.

Figure 1: SANS 36V Lithium Battery Charger with its power input cable and DC2.1 output connector cable.
2. Safety Information
- This charger is intended for indoor use only. Do not expose to rain, moisture, or extreme temperatures.
- Ensure the charger is used only with compatible 36V lithium battery packs. Using it with other battery types may cause damage, fire, or personal injury.
- Always connect the charger to the battery first, then to the power outlet. Disconnect from the power outlet before disconnecting from the battery.
- Do not operate the charger if it has been dropped, damaged, or exposed to water.
- Keep out of reach of children and pets.
- Avoid covering the charger during operation to ensure proper ventilation.
- Unplug the charger from the power outlet when not in use.
3. Package Contents
Upon opening the package, verify that all components are present and undamaged:
- SANS 42V 2A Lithium Battery Charger Unit (Model: SSLC084v42M)
- AC Power Cord (for connecting to wall outlet)
- DC Output Cable with DC2.1 Connector (5.5x2.1 mm)
Video 1: Unboxing and overview of the VONBLAY Charger 42V 2A with DC2.1 Connector, showing the charger unit and its included cables.
4. Setup Instructions
Follow these steps to set up your SANS battery charger:
- Connect AC Power Cord: Insert the female end of the AC power cord into the power input port on the charger unit. Ensure it is firmly seated.
- Identify DC Output Connector: Locate the DC output cable with the DC2.1 connector (5.5x2.1 mm). This is the cable that connects to your battery pack.
- Prepare for Charging: Ensure your 36V battery pack is ready for charging and its charging port is clean and free of debris.
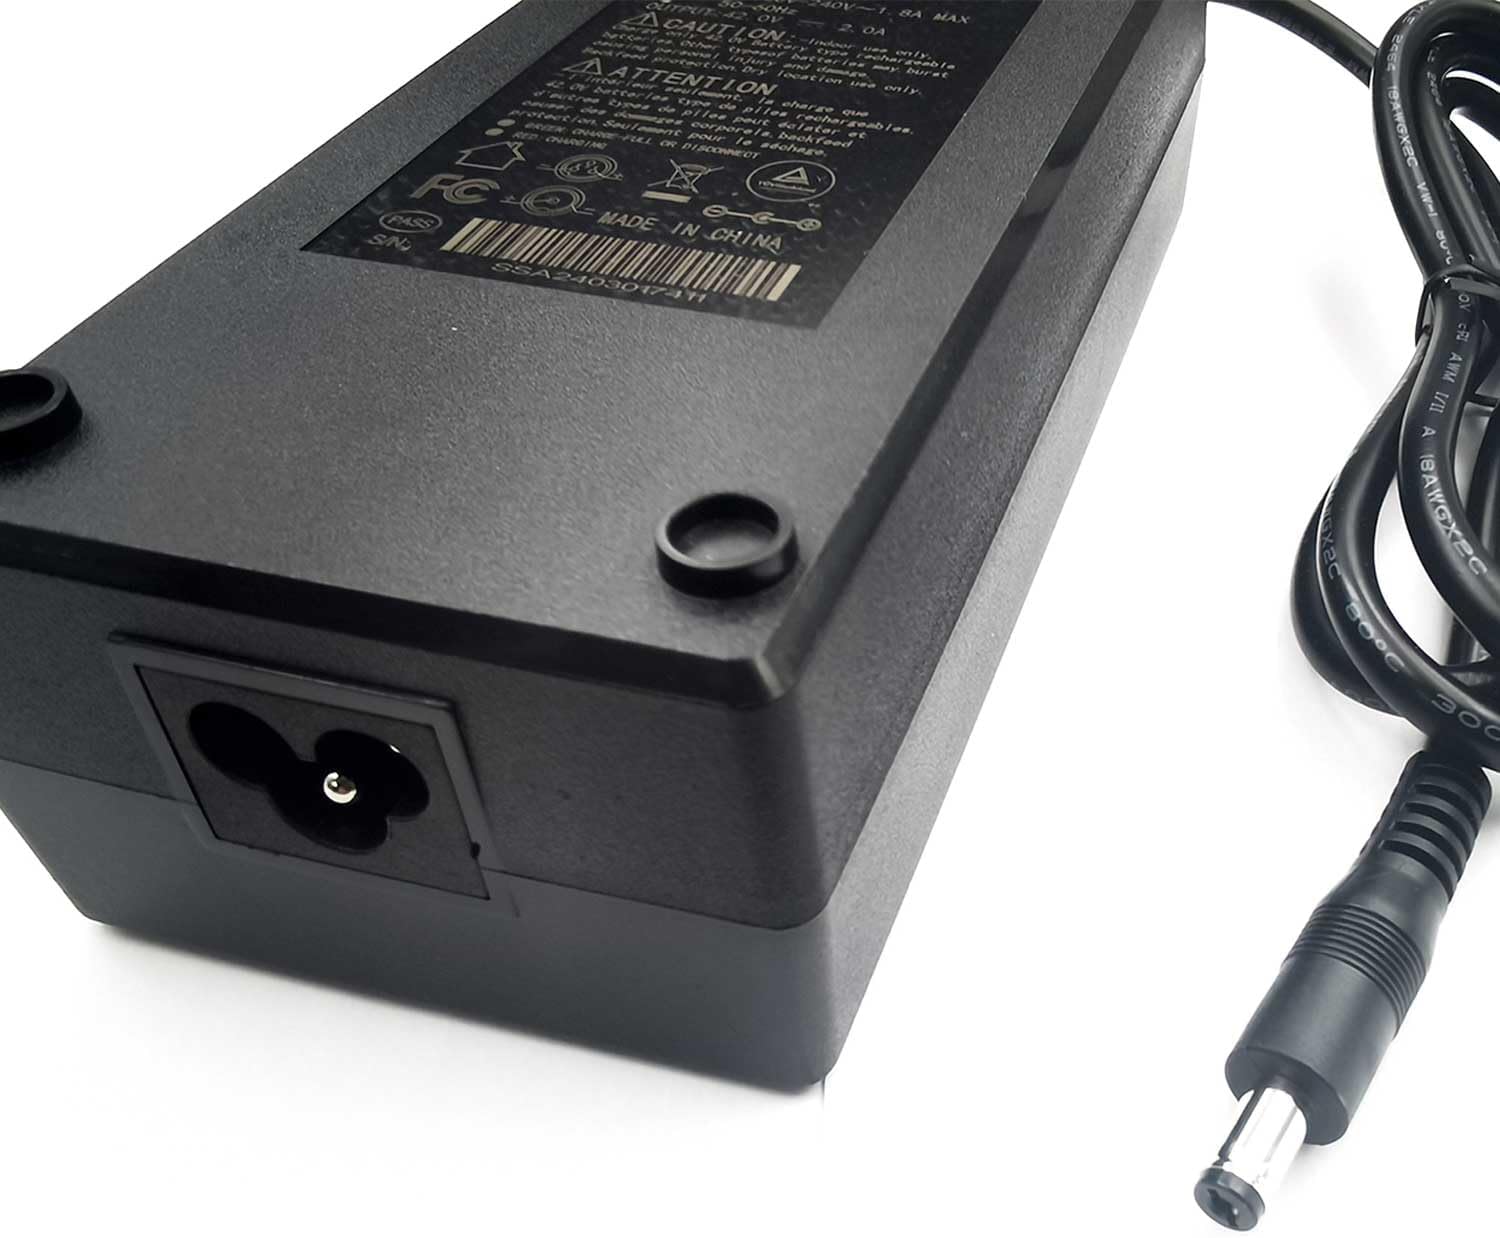
Figure 2: Rear view of the charger highlighting the AC power input port.
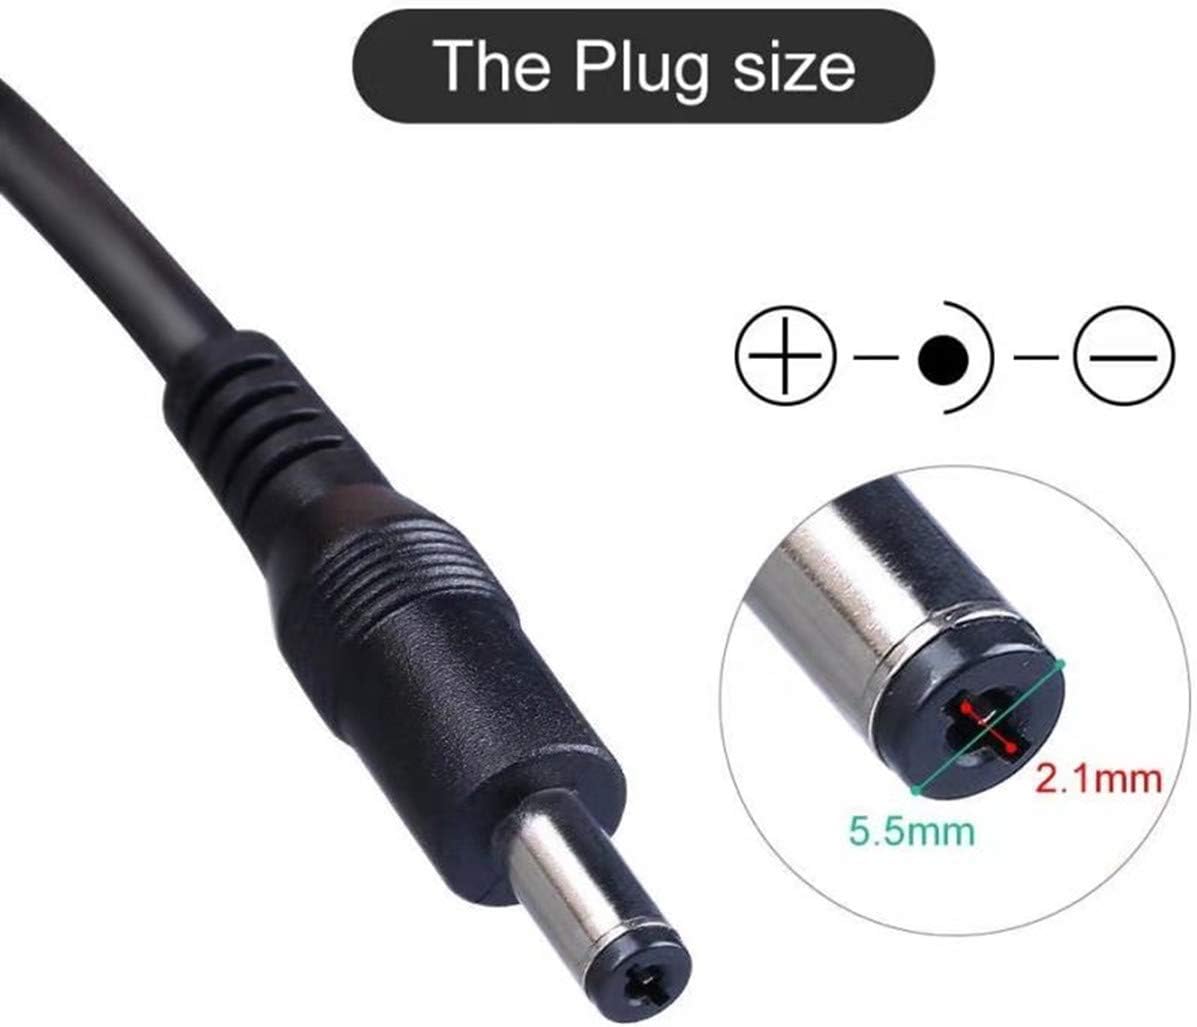
Figure 3: Detailed view of the DC2.1 connector, showing its dimensions (5.5mm outer, 2.1mm inner diameter).
5. Operating Instructions
To charge your 36V lithium battery pack:
- Connect to Battery: Plug the DC2.1 output connector of the charger into the charging port of your 36V battery pack.
- Connect to Power Outlet: Insert the AC power plug into a standard 100-240VAC, 50/60Hz wall outlet.
- Charging Indicator: The charger features an LED indicator light.
- Red Light: Indicates the battery is currently charging.
- Green Light: Indicates the battery is fully charged.
- Charging Process: The smart charging technology will automatically manage the charging process, providing optimal current and voltage to the battery. Charging time will vary depending on the battery's capacity and its current charge level.
- Disconnecting: Once the indicator light turns green, the battery is fully charged. First, unplug the AC power cord from the wall outlet, then disconnect the DC output connector from the battery pack.
Note: It is normal for the charger to become slightly warm during the charging process. If it becomes excessively hot, disconnect it immediately and contact support.
6. Maintenance
- Cleaning: Use a soft, dry cloth to clean the charger. Do not use liquid cleaners or solvents.
- Storage: Store the charger in a cool, dry place away from direct sunlight and moisture when not in use.
- Cable Care: Avoid bending or crimping the cables excessively. Do not pull on the cables to disconnect the charger. Always grasp the plug.
- Inspection: Periodically inspect the charger and cables for any signs of damage, such as frayed wires or cracked casing. If damage is found, discontinue use and replace the charger.
7. Troubleshooting
| Problem | Possible Cause | Solution |
|---|---|---|
| Charger indicator light is off. | No power from outlet, loose connection, or charger malfunction. | Check wall outlet with another device. Ensure AC power cord is securely plugged into both the charger and the outlet. If problem persists, charger may be faulty. |
| Charger indicator remains red (charging) indefinitely. | Battery not fully charged, faulty battery, or charger malfunction. | Allow more time for charging. Test the battery with another compatible charger if possible. If the issue persists, the battery or charger may be faulty. |
| Charger indicator is green, but battery is not fully charged. | Faulty battery or incorrect voltage/current output from charger. | Verify battery health. Ensure the charger's specifications match your battery's requirements. |
| Charger gets excessively hot. | Poor ventilation, overloaded, or internal fault. | Ensure charger is in a well-ventilated area. Disconnect immediately. Do not use if overheating persists. |
If you encounter issues not listed here or if the suggested solutions do not resolve the problem, please contact the manufacturer or seller for further assistance.
8. Specifications
- Model Name: SANS charger
- Item Model Number: SSLC084v42M
- Manufacturer: SANS
- Brand: VONBLAY
- Input Voltage: 100-240VAC, 50/60Hz
- Output Voltage: 42V
- Output Current: 2A
- Wattage: 84 watts
- Connector Type: DC2.1 (5.5x2.1 mm)
- Protections: OVP (Over output Voltage Protection), OCP (Over output Current Protection), SCP (Short Circuit Protection)
- Product Dimensions: 6.3 x 2.76 x 1.97 inches
- Item Weight: 1.3 pounds (approx. 590 grams)
- Certifications: EMC, LVD, UL, CE approved

Figure 4: Bottom label of the SANS charger displaying detailed specifications and certifications.
9. Warranty and Support
For information regarding product warranty, returns, or technical support, please refer to the documentation provided with your purchase or contact the seller directly. Specific warranty terms and conditions may vary.
Legal Disclaimer: This product is sold under brand new conditions.