Introduction
This manual provides essential information for the safe and efficient operation, maintenance, and troubleshooting of your Magic Chef MCSRG24S 24-inch Freestanding Gas Range with Convection. Please read this manual thoroughly before using your appliance and keep it for future reference.
The Magic Chef MCSRG24S is a compact yet powerful gas range designed for modern kitchens. It features a 2.7 cu. ft. convection oven and a 4-burner gas cooktop, offering versatile cooking options for various culinary needs.
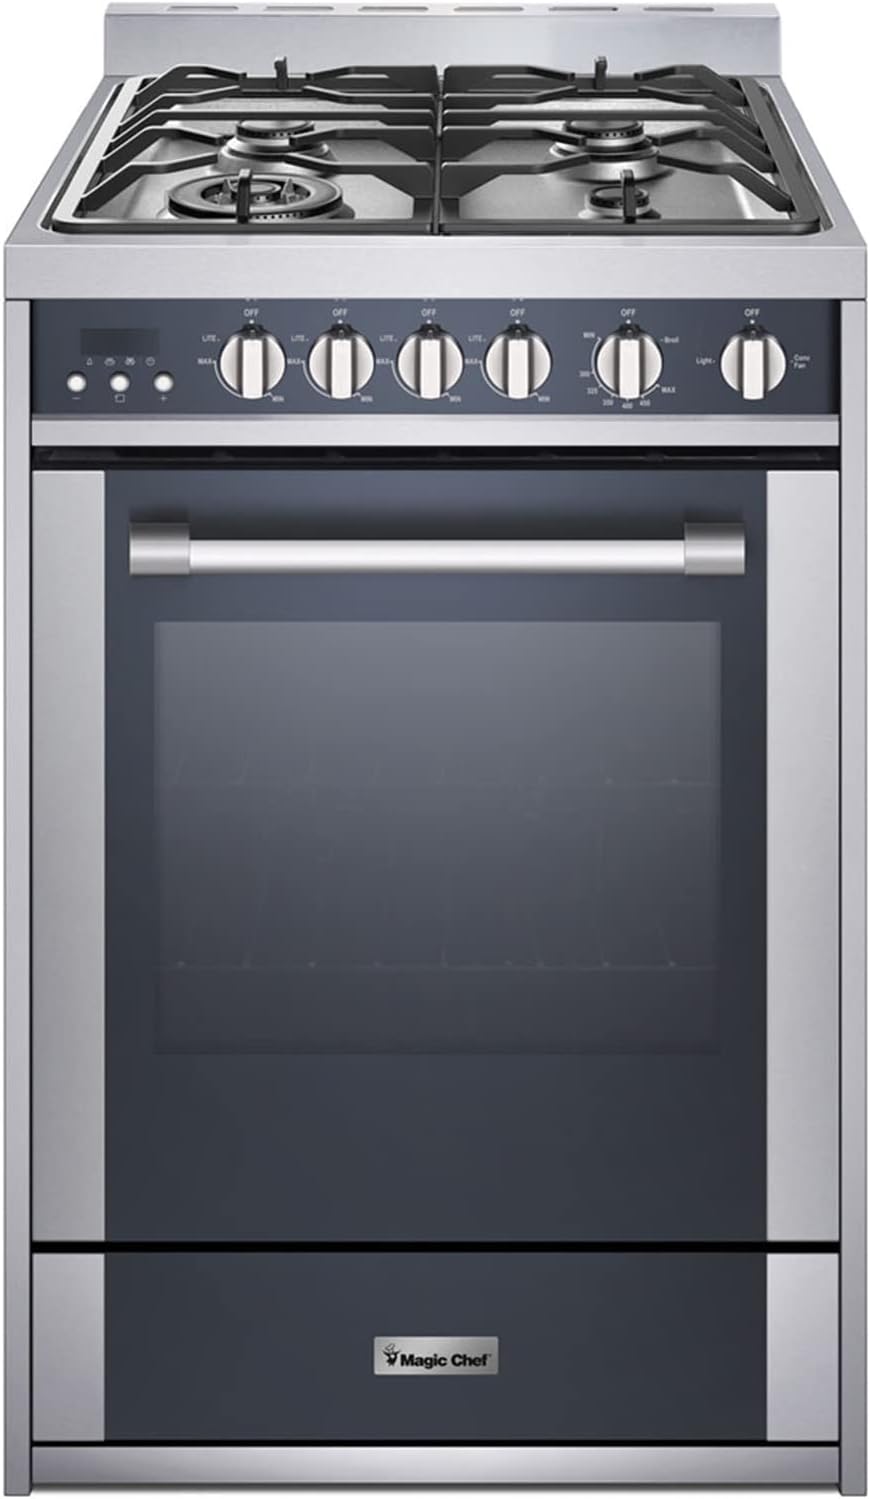
Figure 1: Magic Chef MCSRG24S Freestanding Gas Range
This image displays the full front view of the Magic Chef MCSRG24S gas range. It highlights the stainless steel finish, the four gas burners on the cooktop, the control knobs for both the cooktop and oven functions, the large oven window, and the lower storage drawer. The overall design is sleek and compact, suitable for various kitchen layouts.
Important Safety Information
Always follow basic safety precautions when using this appliance to reduce the risk of fire, electric shock, or injury to persons.
- Gas Safety: Ensure proper ventilation. Do not store or use gasoline or other flammable vapors and liquids in the vicinity of this or any other appliance.
- Installation: This appliance must be properly installed and grounded by a qualified technician in accordance with the National Fuel Gas Code ANSI Z223.1/NFPA 54, latest edition, and the National Electrical Code NFPA 70, latest edition.
- Anti-Tip Device: The range is equipped with an anti-tip bracket. This device must be installed to prevent the range from tipping over. Failure to do so could result in serious injury.
- Children Safety: Do not leave children alone or unattended in an area where an appliance is in use. They should not be allowed to climb, stand, or hang on any part of the range.
- Hot Surfaces: Be aware that the cooktop and oven surfaces become hot during use. Allow sufficient time for cooling before cleaning or touching.
- LP Gas Conversion: If converting from natural gas to LP gas, ensure the conversion is performed by a qualified service technician using the provided LP conversion kit.
Setup and Installation
Proper installation is crucial for the safe and efficient operation of your gas range. It is highly recommended that installation be performed by a qualified professional.
- Unpacking: Carefully remove all packaging materials, tape, and protective film from the range. Inspect for any shipping damage.
- Location: Choose a suitable location that meets clearance requirements for combustible materials and provides adequate ventilation.
- Gas Connection: Connect the range to the gas supply line. Ensure all connections are tight and leak-free.
- Electrical Connection: Plug the range into a properly grounded electrical outlet.
- Anti-Tip Bracket Installation: Securely install the anti-tip bracket to the wall or floor as per the instructions in the separate Installation Manual. Engage the range with the bracket.
- Leveling: Adjust the leveling legs at the bottom of the range to ensure it is stable and level.
- LP Conversion (if applicable): If you are using LP gas, ensure the LP conversion kit is installed by a qualified technician before connecting to the gas supply.
For detailed installation instructions, please refer to the official Installation Manual (PDF).
Operating Instructions
Cooktop Operation
The cooktop features four gas burners with varying BTU outputs for diverse cooking needs.
- Ignition: Push in and turn the desired burner knob counter-clockwise to the "LITE" position. You will hear a clicking sound as the igniter sparks.
- Flame Adjustment: Once the burner ignites, continue to hold the knob for a few seconds to allow the flame sensor to activate. Then, adjust the knob to the desired flame size (from "MAX" for high heat to "MIN" for simmer).
- Burner Sizes: The cooktop includes burners ranging from 5,000 BTUs to 17,400 BTUs. Use appropriate pan sizes for each burner for optimal heat distribution and efficiency.
- Turning Off: Turn the burner knob clockwise to the "OFF" position.
Oven Operation
The 2.7 cu. ft. oven offers multiple cooking modes, including convection.
- Setting Temperature: Turn the oven control knob to the desired temperature. The oven will begin to preheat.
- Preheating: Allow the oven to preheat fully before placing food inside. The indicator light will typically turn off or change color when the set temperature is reached.
- Convection Cooking: To activate convection, select the convection mode on the control panel (if available via a separate button or knob setting). Convection uses a fan to circulate hot air, promoting even cooking and faster baking.
- Broiling: The broil element allows for both low and high heat broiling. Turn the oven knob to the "BROIL" setting and select the desired intensity. Position food on the appropriate oven rack for best results.
- Oven Light: Use the oven light button on the control panel to illuminate the oven interior.
- Digital Clock and Timer: The integrated digital clock can be set for current time, and the timer function can be used for precise cooking durations. Refer to the control panel section of the full manual for specific programming steps.
Maintenance and Cleaning
Regular cleaning and maintenance will ensure the longevity and optimal performance of your Magic Chef gas range.
- Cooktop:
- Remove grates and burner caps after they have cooled.
- Wipe spills immediately with a damp cloth. For stubborn stains, use a mild non-abrasive cleaner.
- Clean burner ports with a small wire or needle if clogged.
- Oven Interior:
- For light spills, wipe with a damp cloth and mild detergent once the oven has cooled.
- For heavier soil, use an oven cleaner specifically designed for gas ovens, following the product instructions carefully.
- Remove oven racks and clean them separately in soapy water.
- Exterior Surfaces:
- Clean stainless steel surfaces with a soft cloth and a stainless steel cleaner or mild soapy water. Always wipe in the direction of the grain.
- Avoid abrasive cleaners, scouring pads, or harsh chemicals that can damage the finish.
- Control Knobs: Pull off the control knobs and wash them with warm, soapy water. Dry thoroughly before replacing.
Troubleshooting
Before contacting service, review the following common issues and their potential solutions.
| Problem | Possible Cause | Solution |
|---|---|---|
| Burner does not ignite or ignites slowly. | Gas supply off; burner ports clogged; igniter wet or dirty; power outage. | Check gas valve; clean burner ports and igniter; verify power supply. |
| Oven not heating or uneven heating. | Gas supply off; temperature set incorrectly; oven door not closed properly; igniter issue. | Verify gas supply; ensure correct temperature setting; check door seal; contact service if igniter is faulty. |
| Digital display, timer, or oven light not working. | Power supply issue; loose connection; electronic control board malfunction. | Check circuit breaker; ensure range is properly plugged in; if problem persists, professional service is required. |
| Range tips forward when oven door is opened. | Anti-tip bracket not installed or not engaged. | Refer to the Installation Manual to properly install and engage the anti-tip bracket. This is a critical safety measure. |
| Excessive heat from oven vents. | Normal operation for ventilation; potential insulation issue. | Some heat discharge is normal. If excessive, ensure proper clearances around the range. If concerned, contact service. |
For issues not listed here or if solutions do not resolve the problem, please contact Magic Chef customer support.
Specifications
| Feature | Detail |
|---|---|
| Brand | Magic Chef |
| Model Number | MCSRG24S |
| Capacity | 2.7 Cubic Feet (Oven) |
| Installation Type | Freestanding |
| Product Dimensions (W x D x H) | 23.6 x 23.6 x 35.4 inches |
| Item Weight | 133.8 pounds |
| Burner Type | Gas (4 Heating Elements) |
| Burner BTU Range | 5,000 to 17,400 BTUs |
| Fuel Type | Dual Fuel (Natural Gas, LP conversion kit included) |
| Voltage | 120 Volts |
| Control Console | Knob |
| Color | Stainless Steel |
| Material Type | Stainless Steel |
| Included Components | Range, Manual |
| Drawer Type | Storage, Broiler |
Warranty and Support
Magic Chef products are manufactured to the highest quality standards. For information regarding your product's warranty coverage, please refer to the warranty card included with your appliance or visit the official Magic Chef website.
For technical assistance, troubleshooting beyond this manual, or to schedule service, please contact Magic Chef Customer Support. Have your model number (MCSRG24S) and serial number ready when you call.
You can also find additional support resources and frequently asked questions on the Magic Chef Store on Amazon.