Introduction
Thank you for choosing the kwmobile Digital Wooden Look Alarm Clock. This manual provides detailed instructions for setting up, operating, and maintaining your new alarm clock. Please read this manual carefully to ensure proper use and to fully utilize all features of the device.
The kwmobile Digital Wooden Look Alarm Clock is designed to display time, temperature, and date with a stylish wood-look finish. It features multiple alarm settings, sound and touch activation for the display, and flexible power options.

Figure 1: kwmobile Digital Wooden Look Alarm Clock with included USB power cable. The clock displays the time and temperature with green LEDs.
Package Contents
- 1 x kwmobile Digital Wooden Look Alarm Clock
- 1 x USB Power Cable
Setup
Powering the Device
The alarm clock can be powered in two ways:
- USB Power (Recommended for continuous display): Connect the included USB cable to the DC 5V port on the back of the clock and plug the other end into a USB power adapter (not included) or a powered USB port. When powered via USB, the display remains permanently on.
- Battery Power (for backup or power-saving mode): Insert 3 x AAA batteries (not included) into the battery compartment on the back of the clock. When operating on batteries, the clock automatically enters power-saving mode to conserve battery life. The display will turn off after approximately 30 seconds.
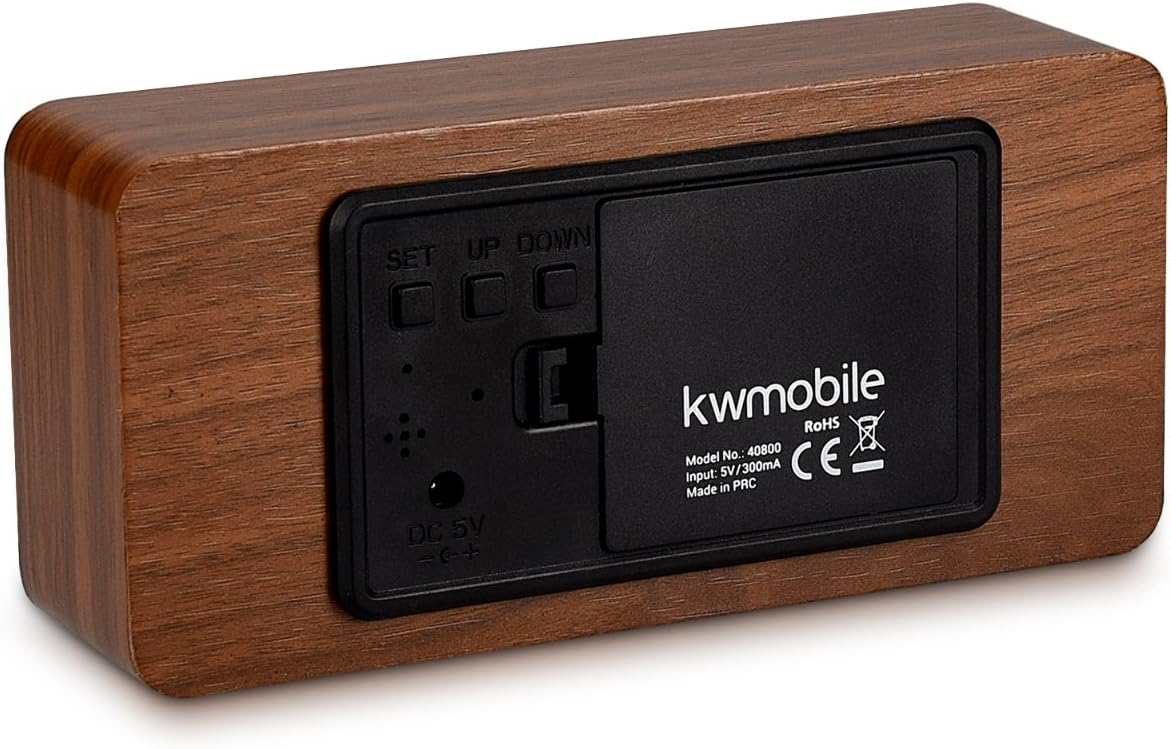
Figure 2: Rear view of the alarm clock, showing the battery compartment, DC 5V input, and control buttons (SET, UP, DOWN).
Initial Power-On
Once powered, the clock will display the time. If using battery power, the display may turn off after a short period. You can activate the display by touching the clock or making a sound.
Operating Instructions
The clock features three control buttons on the back: SET, UP, and DOWN.
Setting Time and Date
- Press and hold the SET button for 3 seconds to enter setting mode. The display will flash.
- Use the UP and DOWN buttons to adjust the value.
- Press SET briefly to confirm the current setting and move to the next parameter.
- The setting sequence is typically: Year → Month → Day → 12/24 Hour Format → Hour → Minute.
- After setting the minute, press SET again to exit time/date setting mode.
Setting Alarms (A1, A2, A3)
The clock supports up to three independent alarms (A1, A2, A3).
- Press the SET button repeatedly until "A1" (or A2, A3) appears on the display.
- Press and hold the SET button for 3 seconds. The alarm hour will flash.
- Use UP and DOWN to set the alarm hour, then press SET.
- Use UP and DOWN to set the alarm minute, then press SET.
- You can then choose alarm activation settings:
- ON: Alarm is active every day.
- --: Alarm is inactive.
- E: Alarm is active only on weekdays (Monday-Friday).
- Press SET to confirm and exit alarm setting mode. Repeat for A2 and A3 if desired.
When an alarm sounds, it will typically last for one minute. To stop the alarm, press any button.
Temperature Display
The clock displays temperature in either Celsius (°C) or Fahrenheit (°F).
- In normal display mode, press the DOWN button to toggle between °C and °F.
Display Modes (dP-1, dP-2)
The clock offers two display modes:
- dP-1 (Fixed Display): The display cycles between time, date, and temperature.
- dP-2 (Time Only Display): The display shows only the time.
To switch between display modes, press the UP button in normal display mode.
Power Saving Mode (oNSd, --Sd)
This mode is primarily active when the clock is battery-powered. In power-saving mode, the display turns off after approximately 30 seconds to conserve energy.
- oNSd: Power-saving mode is ON. The display will turn off after 30 seconds of inactivity.
- --Sd: Power-saving mode is OFF. The display will remain on (only effective when USB powered).
To activate the display when in power-saving mode, you can either touch the top of the clock or make a sound (e.g., clap your hands).
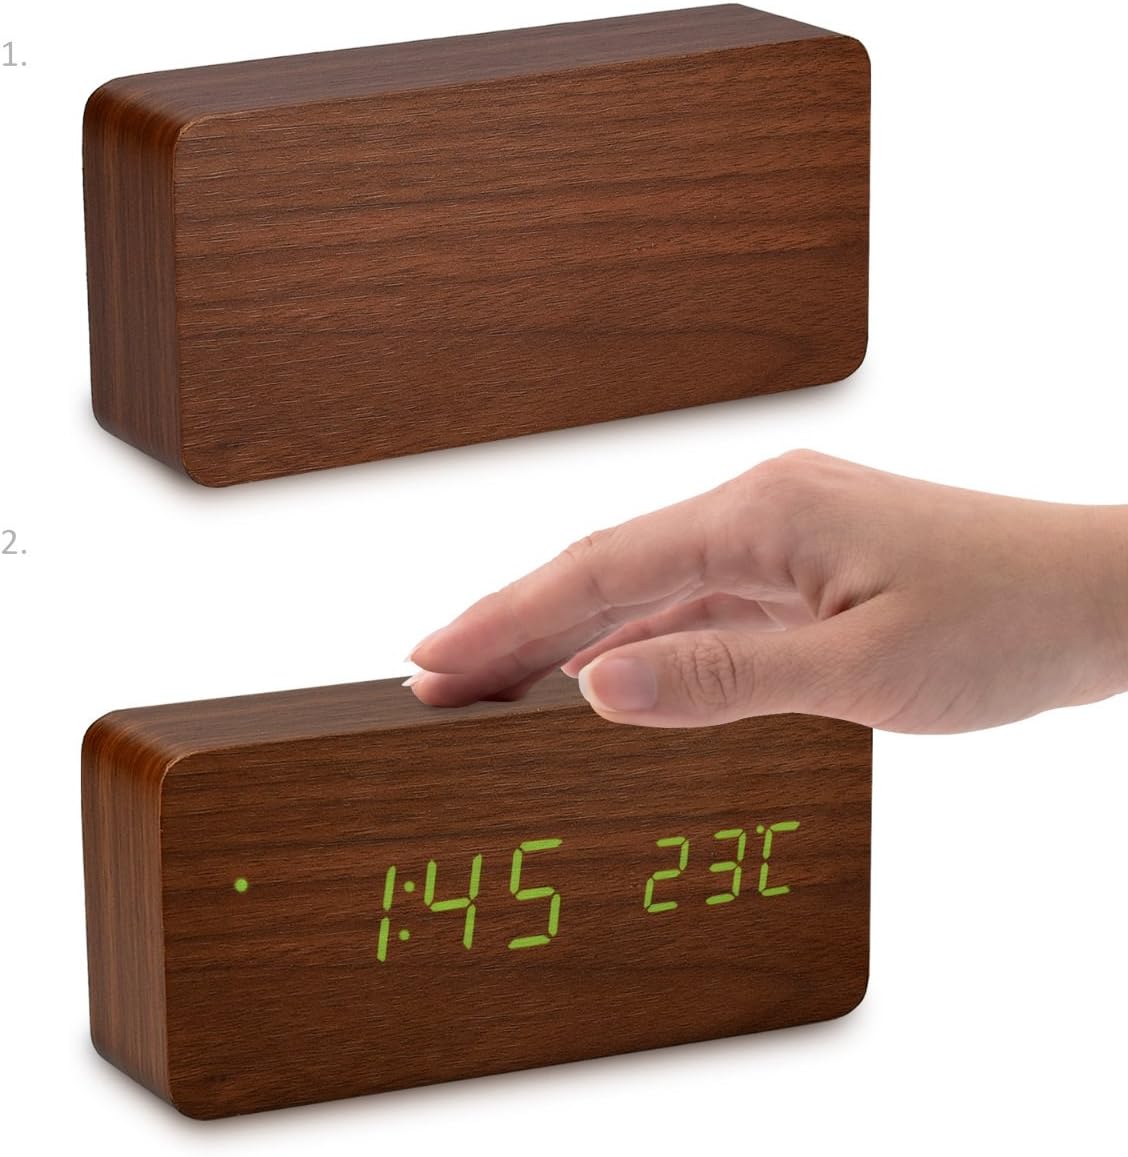
Figure 3: Activating the display by touching the top surface of the clock.

Figure 4: Activating the display through sound, such as clapping hands.
Maintenance
Cleaning
To clean the clock, gently wipe the surface with a soft, dry cloth. Do not use abrasive cleaners, solvents, or chemical sprays, as these may damage the finish or internal components.
Battery Replacement
If using batteries, replace all three AAA batteries when the display becomes dim or the clock functions erratically. Ensure correct polarity when inserting new batteries.
Storage
If storing the clock for an extended period, remove the batteries to prevent leakage and potential damage to the device.
Troubleshooting
- Display is off or dim:
- Check if the clock is in power-saving mode (oNSd). Touch the clock or make a sound to activate the display.
- If using batteries, they might be low. Replace with fresh AAA batteries.
- Ensure the USB cable is securely connected and the power source is active if using USB power.
- Clock not responding to buttons:
- Ensure the clock is properly powered.
- Try removing and re-inserting batteries or unplugging and re-plugging the USB cable to reset the device.
- Alarm does not sound or stops too quickly:
- Verify that the alarm is set to "ON" or "E" (for weekdays) in the alarm settings.
- Ensure the alarm time is correctly set.
- The alarm typically sounds for one minute. Pressing any button will stop it.
- Temperature reading seems inaccurate:
- Ensure the clock is not placed near heat sources or in direct sunlight, which can affect temperature readings.
- Confirm the correct temperature unit (°C or °F) is selected.
Specifications
| Brand | kwmobile |
| Model Number | 40800 |
| Material | Wood |
| Colour | Brown (with Green LEDs) |
| Product Dimensions | 15 x 7 x 4.2 cm |
| Weight | 254.01 g |
| Power Supply | DC 5V/300mA via USB cable, or 3x AAA batteries (backup/power-saving mode) |
| Display Type | Digital LED |
| Special Features | Alarm, Illuminated Display, Temperature Display, Calendar Display, Sound/Touch Activation, Power Saving Mode |
Warranty and Support
kwmobile products are designed for reliability and performance. For warranty information or technical support, please refer to the official kwmobile website or contact their customer service directly. Keep your purchase receipt as proof of purchase.
For further assistance, please visit the kwmobile Store on Amazon.


