1. Introduction
Welcome to your new Adesso CyberPad P2 LED Light Tracing Pad. This manual provides essential information for setting up, operating, and maintaining your device. Please read these instructions carefully before use to ensure proper function and longevity of your product.
The CyberPad P2 offers a generous 12" x 17" working surface, making it ideal for various creative and professional applications. It features flicker-free LED lighting for comfortable, even illumination and eye protection during extended use. Its ultra-thin and portable design allows for easy transport and storage.
2. Important Safety Information
2.1 General Safety
- Do not expose the device to water or excessive moisture.
- Avoid dropping or subjecting the device to strong impacts.
- Keep the device away from direct sunlight and heat sources.
- Do not attempt to disassemble or repair the device yourself. Refer all servicing to qualified personnel.
- Use the device in a well-ventilated area.
2.2 Electrical Safety
- Only use the provided USB power cable.
- Ensure the power source is compatible with the device's requirements (DC 5V).
- Unplug the device during lightning storms or when unused for long periods.
- Do not operate the device with a damaged power cable or plug.
3. Package Contents
Please check the package contents upon opening to ensure all items are present:
- Adesso CyberPad P2 LED Light Tracing Pad
- USB Power Cable
4. Product Features
- Large Working Surface: 12" x 17" active area for various projects.
- Flicker-Free LED Lighting: Provides even illumination and protects eyes during prolonged use.
- Stepless Adjustable Brightness: Allows precise control over light intensity to suit different needs and environments.
- USB Powered: Conveniently powered via USB cable from computers, power banks, or USB wall adapters (DC 5V, 3.2W).
- Built-in Rulers: Integrated rulers on the sides for precise measurements and alignment.
- Versatile Applications: Ideal for stenciling, 2D animation, calligraphy, embossing, scrapbooking, tattoo transferring, sketching, drawing, sewing projects, stained glass, quilting, appliqué, and X-ray viewing.
- Ultra-thin and Portable Design: Lightweight and easy to carry for on-the-go creativity.
5. Product Overview
Familiarize yourself with the main components of your CyberPad P2:
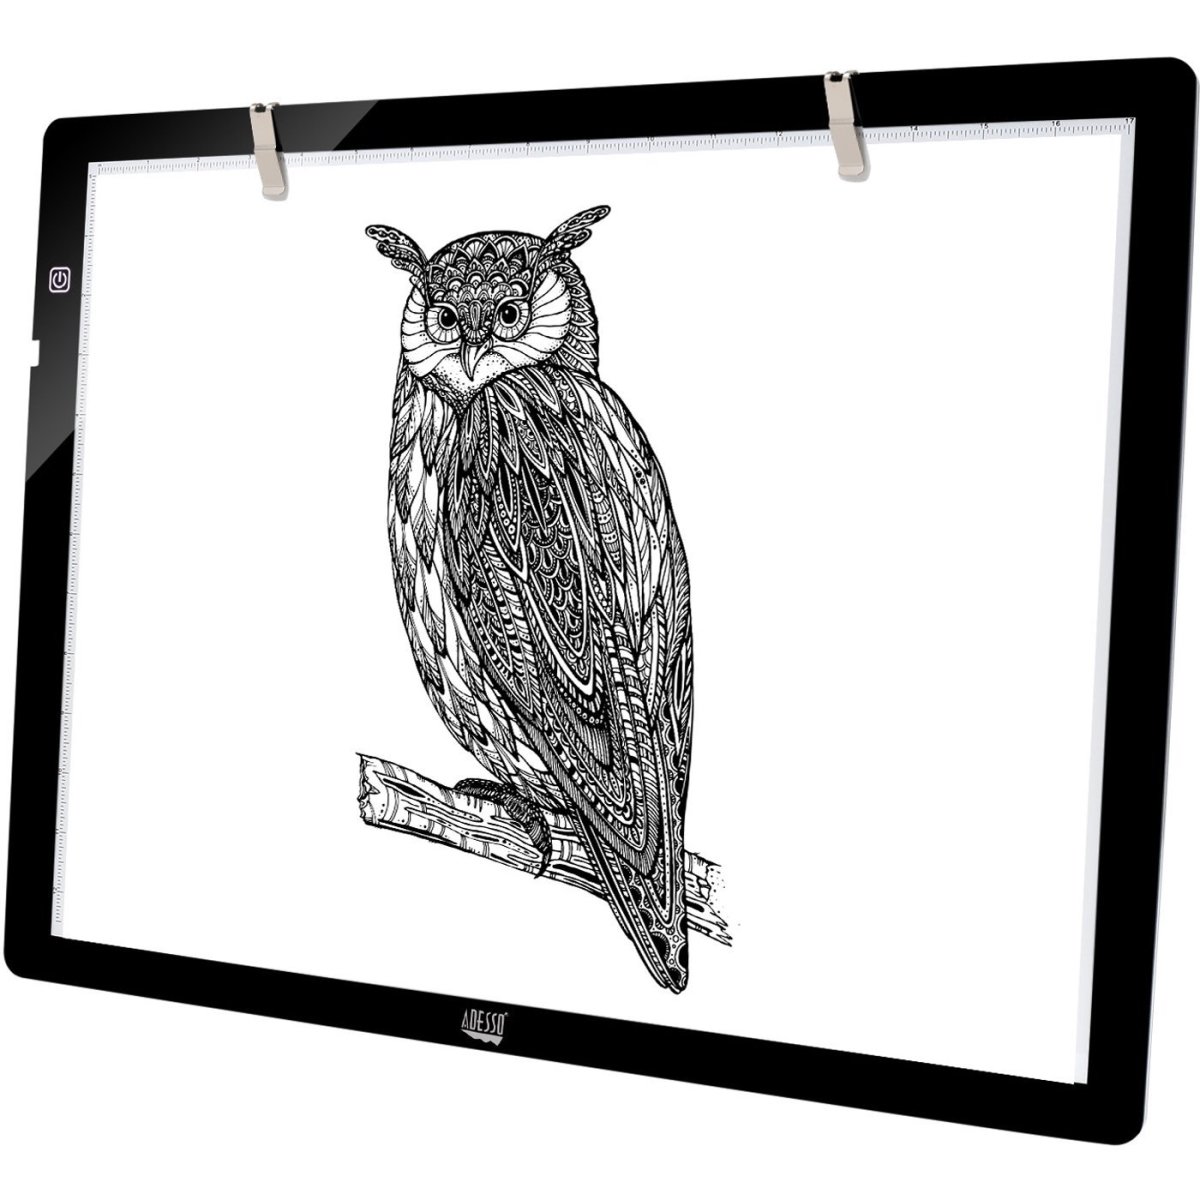
Figure 1: Adesso CyberPad P2 LED Light Tracing Pad. This image shows the overall design of the light pad, highlighting its slim profile and illuminated surface.
- A. Active Light Area: The main illuminated surface for tracing and viewing.
- B. Power Button/Brightness Control: Used to turn the device on/off and adjust brightness.
- C. USB Power Port: Connects the USB power cable to the device.
- D. Integrated Rulers: Measurement guides along the edges of the active area.
6. Setup
6.1 Connecting Power
- Insert the small end of the provided USB power cable into the USB Power Port (C) on the side of the CyberPad P2.
- Connect the larger end of the USB cable to a compatible power source, such as a computer's USB port, a power bank, or a USB wall adapter (not included).
- Ensure the connection is secure.
7. Operating Instructions
7.1 Powering On/Off
- To turn the CyberPad P2 ON, press the Power Button (B) once. The LED light will illuminate.
- To turn the CyberPad P2 OFF, press and hold the Power Button (B) for a few seconds until the light turns off.
7.2 Adjusting Brightness
- While the CyberPad P2 is on, press and hold the Power Button (B). The brightness will gradually increase or decrease.
- Release the button when you reach your desired brightness level. This is a stepless adjustment, allowing for fine-tuning.
8. Maintenance
8.1 Cleaning
- Ensure the device is powered off and unplugged before cleaning.
- Use a soft, dry, lint-free cloth to wipe the surface of the light pad.
- For stubborn marks, lightly dampen the cloth with water or a mild, non-abrasive cleaner. Avoid harsh chemicals or abrasive materials.
- Do not spray cleaning solutions directly onto the device.
8.2 Storage
- Store the CyberPad P2 in a cool, dry place, away from direct sunlight and extreme temperatures.
- If storing for an extended period, consider placing it back in its original packaging or a protective sleeve to prevent dust and scratches.
9. Troubleshooting
If you encounter issues with your CyberPad P2, please refer to the following table for common problems and solutions:
| Problem | Possible Cause | Solution |
|---|---|---|
| Light pad does not turn on. | No power connection or faulty cable. | Ensure the USB cable is securely connected to both the light pad and the power source. Try a different USB port or power adapter. |
| Light flickers or is uneven. | Insufficient power or faulty unit. | Ensure the power source provides adequate power (DC 5V). Try a different power source. If the problem persists, contact customer support. |
| Brightness adjustment not working. | Incorrect operation. | Ensure you are pressing and holding the power button to adjust brightness, not just pressing it once. |
10. Specifications
| Feature | Detail |
|---|---|
| Model Name | CyberPad P2 |
| Brand | Adesso |
| Color | Black |
| Material | LED ABS |
| Light Source Type | Light Emitting Diode (LED) |
| Power Source | AC (via USB adapter), DC 5V (USB Powered) |
| Rated Power | 3.2W |
| Product Dimensions (LxWxH) | 19 x 0.25 x 14 inches |
| Active Area Size | 12 x 17 inches |
| Item Weight | 2.2 pounds (1 Kilogram) |
| Recommended Uses | Artistic and design activities including stenciling, 2D animation, calligraphy, embossing, scrapbooking, tattoo transferring, sketching & drawing, sewing projects, stained glass, quilting, appliqué, and X-ray viewing. |
11. Warranty and Support
Adesso products are designed for quality and reliability. For information regarding warranty coverage, please refer to the warranty card included with your purchase or visit the official Adesso website. For technical support or service inquiries, please contact Adesso customer service through their official channels.