1. Introduction
Thank you for purchasing the Udirc Petrel U42W WiFi FPV Drone. This manual provides essential information for the safe operation, setup, and maintenance of your drone. Please read this manual thoroughly before operating the aircraft to ensure a safe and enjoyable flight experience.
2. Safety Information
Always operate the drone in open areas, away from people, animals, and obstacles. Do not fly near airports or restricted airspace. Ensure the battery is fully charged and propellers are securely attached before each flight. Adult supervision is recommended for younger users.
- Do not fly in strong winds or adverse weather conditions.
- Keep hands and face away from rotating propellers.
- Do not touch the motors immediately after flight as they may be hot.
- Always turn off the drone and remote controller when not in use.
- Follow all local regulations and laws regarding drone operation.
3. Package Contents
Verify that all items listed below are included in your package:
- 1 x Udirc U42W Quadcopter
- 1 x 2.4GHz Remote Controller
- 2 x 3.7V 500mAh Li-Po Batteries
- 1 x USB Battery Charger
- 4 x Spare Propellers
- 1 x User Manual (this document)
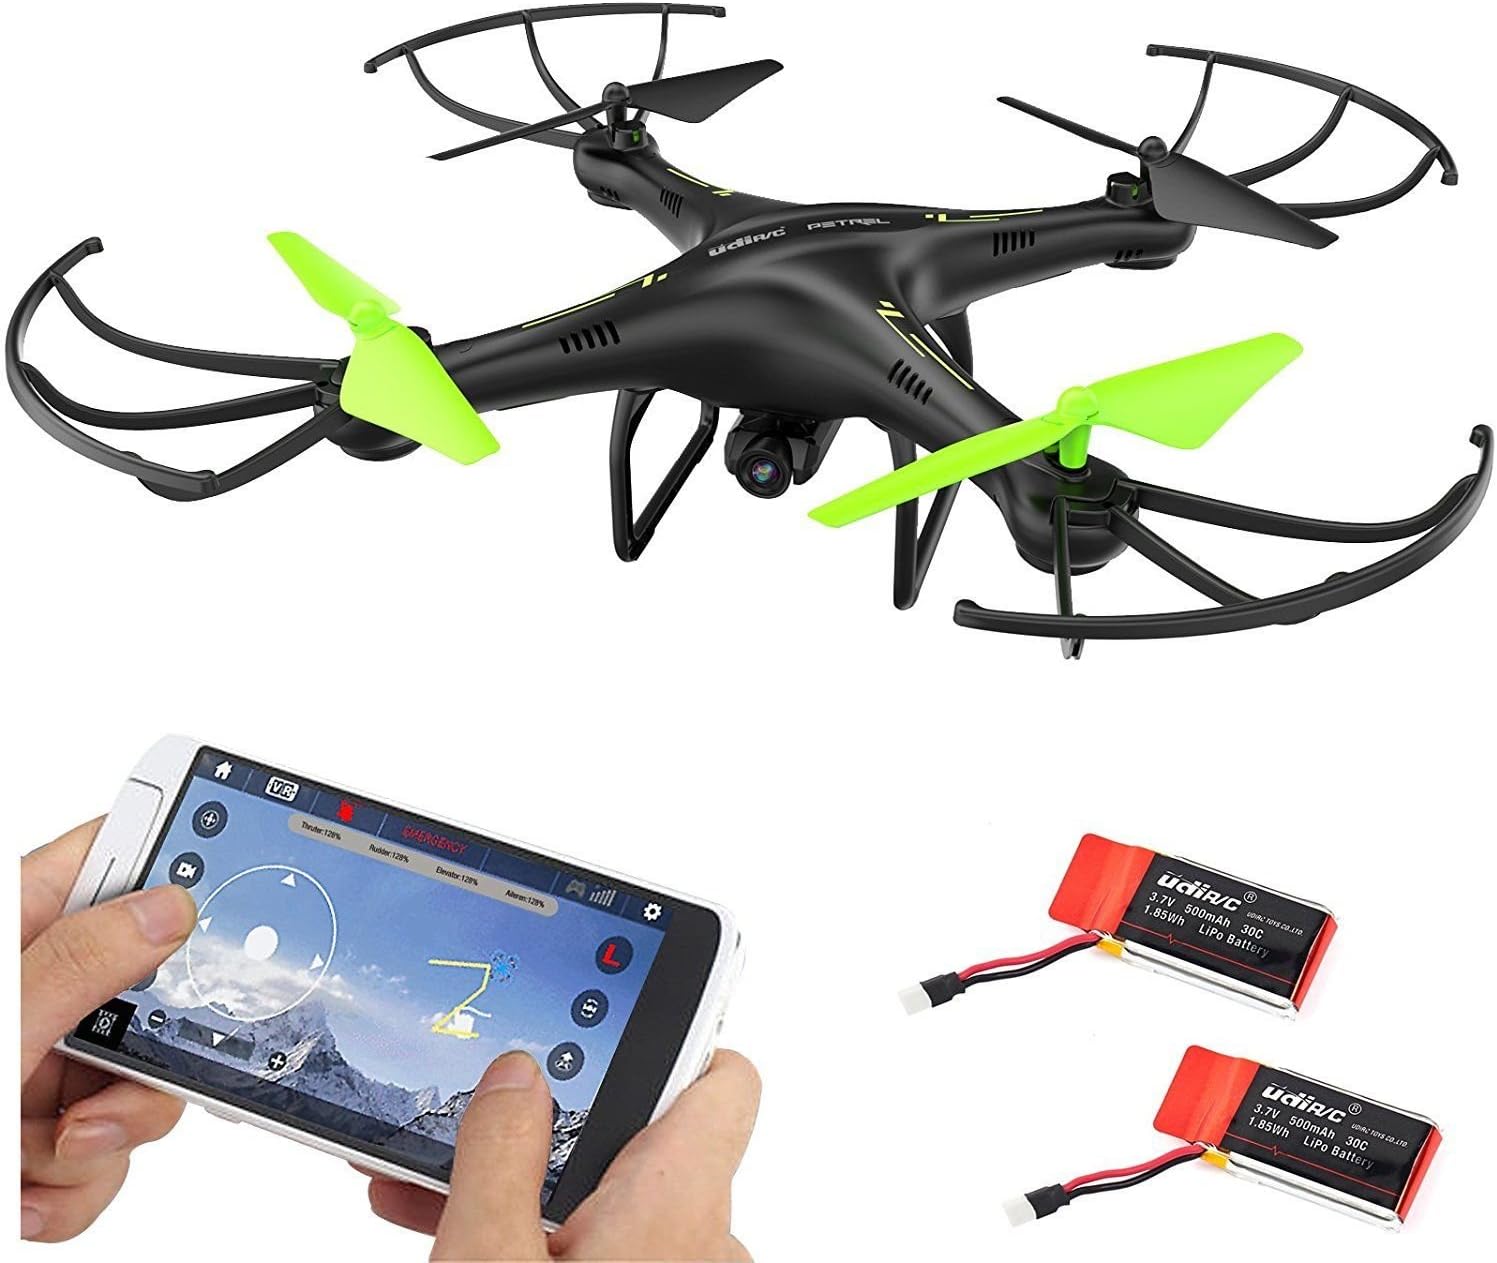
This image displays the Udirc U42W quadcopter, its dedicated 2.4GHz remote controller, and the two included 3.7V 500mAh Li-Po batteries, which are essential components for drone operation.
4. Component Identification
4.1. Drone Overview

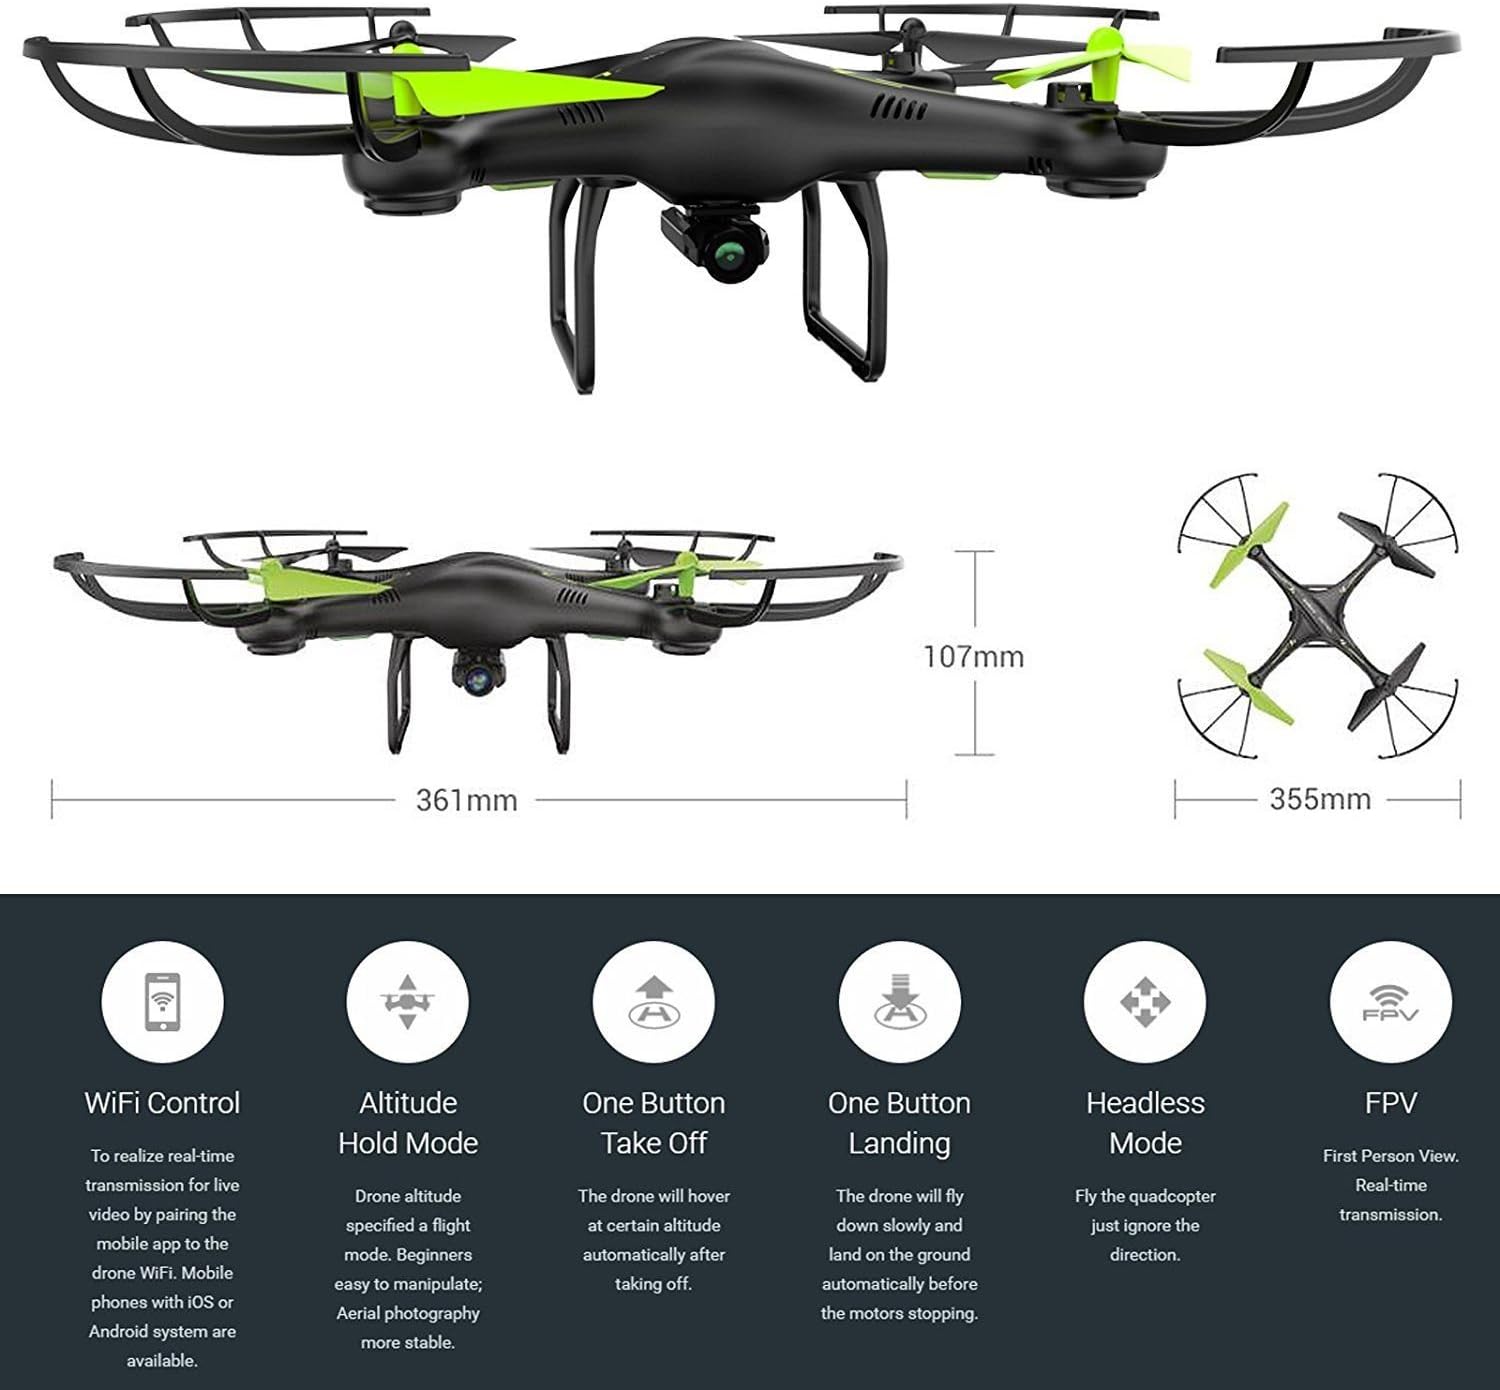
This diagram illustrates the Udirc U42W drone from various angles, highlighting its overall dimensions: 361mm length, 355mm width, and 107mm height. It also shows the propeller configuration and the central body of the quadcopter.
4.2. Remote Controller

This image provides a detailed diagram of the 2.4GHz LCD remote controller, labeling its various components and controls. Key features include the mobile phone holder, lens hood, power indicator, power switch, left stick (throttle/rudder), rotation trimmer, right stick (forward/backward/left/right), left/right trimmer, heading hold mode button, high/low speed mode button, take off/landing/emergency stop button, flip mode button, LCD screen, and indication direction of power switch.
- Left Stick: Controls throttle (up/down) and rudder (left/right rotation).
- Right Stick: Controls forward/backward and left/right movement.
- One Button Take Off / Landing / Emergency Stop: Initiates automatic take-off, landing, or emergency propeller stop.
- Heading Hold Mode: Activates headless mode.
- High / Low Speed Mode: Toggles flight speed.
- Flip Mode: Initiates 360° eversion.
- Mobile Phone Holder: Secures your smartphone for FPV viewing.
- LCD Screen: Displays flight information and settings.
5. Setup
5.1. Battery Charging
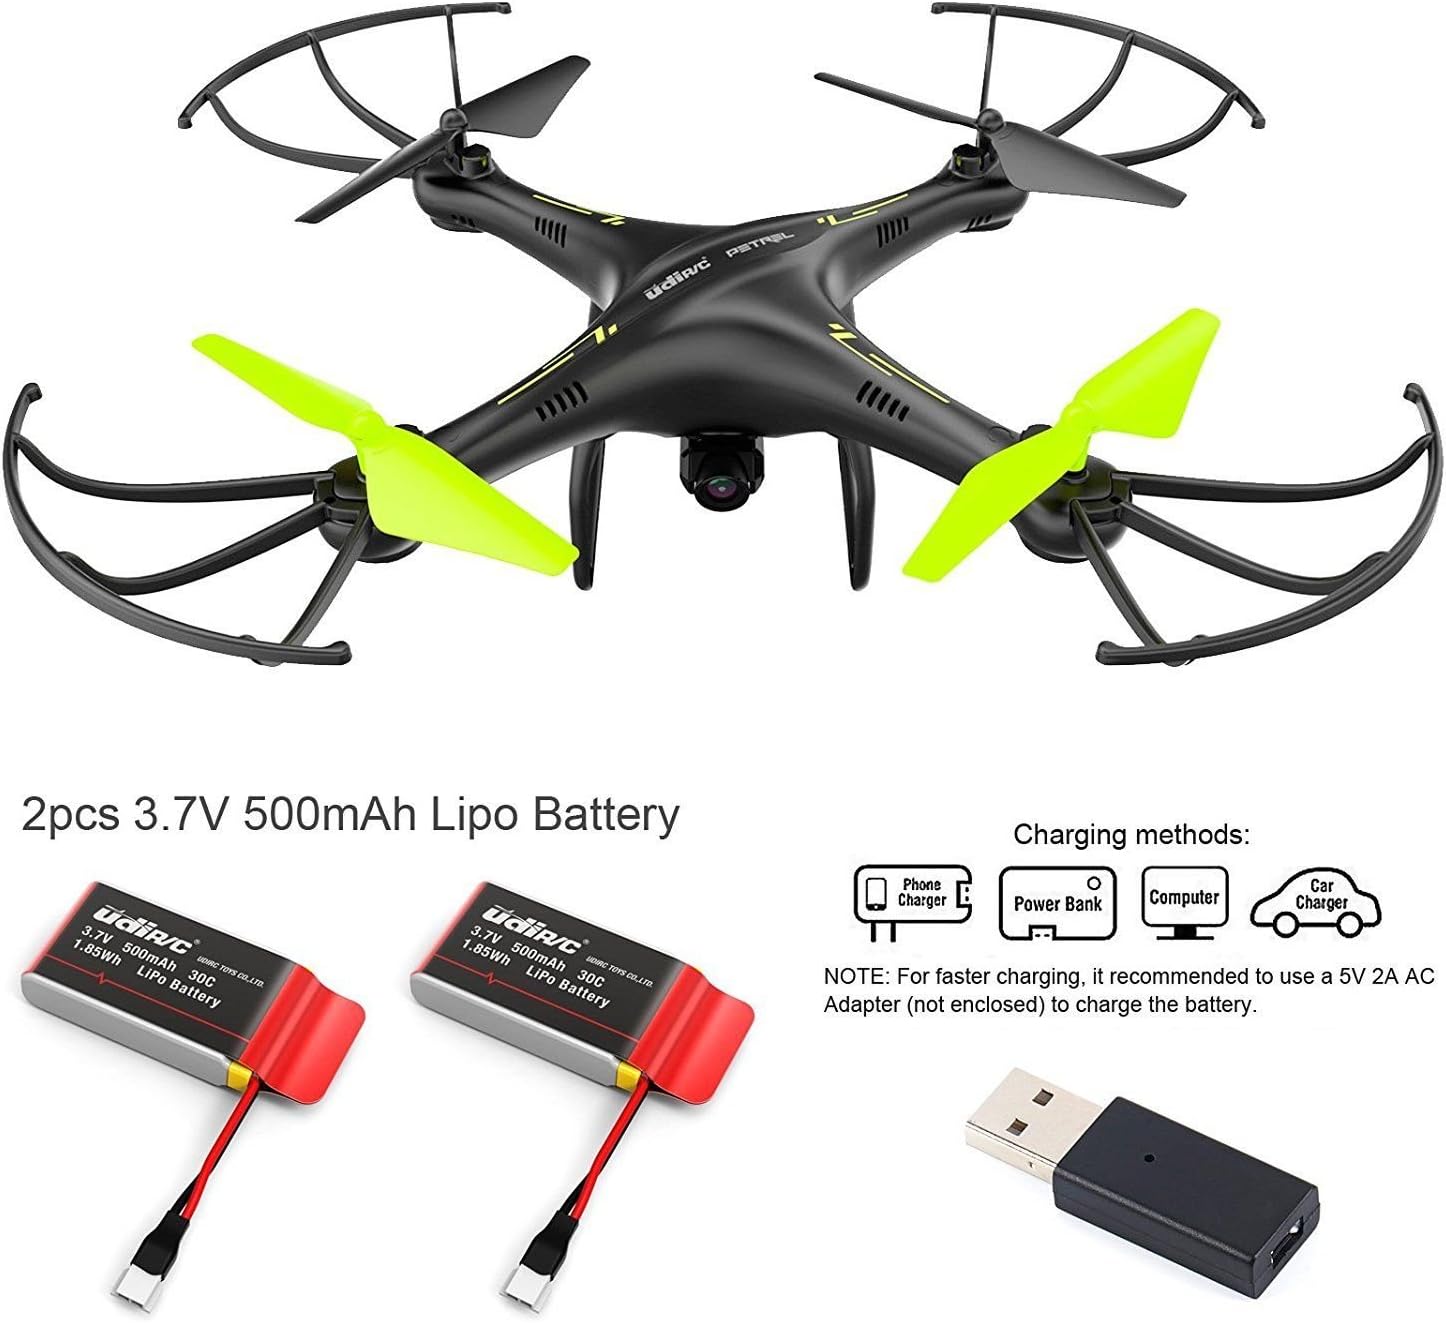
The drone comes with two 3.7V 500mAh Li-Po batteries. Use the provided USB charger to charge them. Charging typically takes approximately 60 minutes. For faster charging, it is recommended to use a 5V 2A AC adapter (not included).

This image shows the two 3.7V 500mAh Li-Po batteries for the drone and illustrates different charging methods: via a phone charger, power bank, computer, or car charger. A USB charging cable is also depicted.
5.2. Drone Battery Installation
- Ensure the drone's power switch is OFF.
- Locate the battery compartment on the drone.
- Insert the fully charged Li-Po battery into the compartment.
- Connect the battery cable to the drone's power port.
- Close the battery compartment securely.
5.3. Remote Controller Battery Installation
The remote controller requires 4 "AAA" batteries (not included).
- Open the battery cover on the back of the remote controller.
- Insert 4 "AAA" batteries, ensuring correct polarity (+/-).
- Close the battery cover.
5.4. App Installation (Flyingsee)
To utilize the WiFi FPV and advanced flight features, download the "Flyingsee" app on your iOS or Android smartphone.
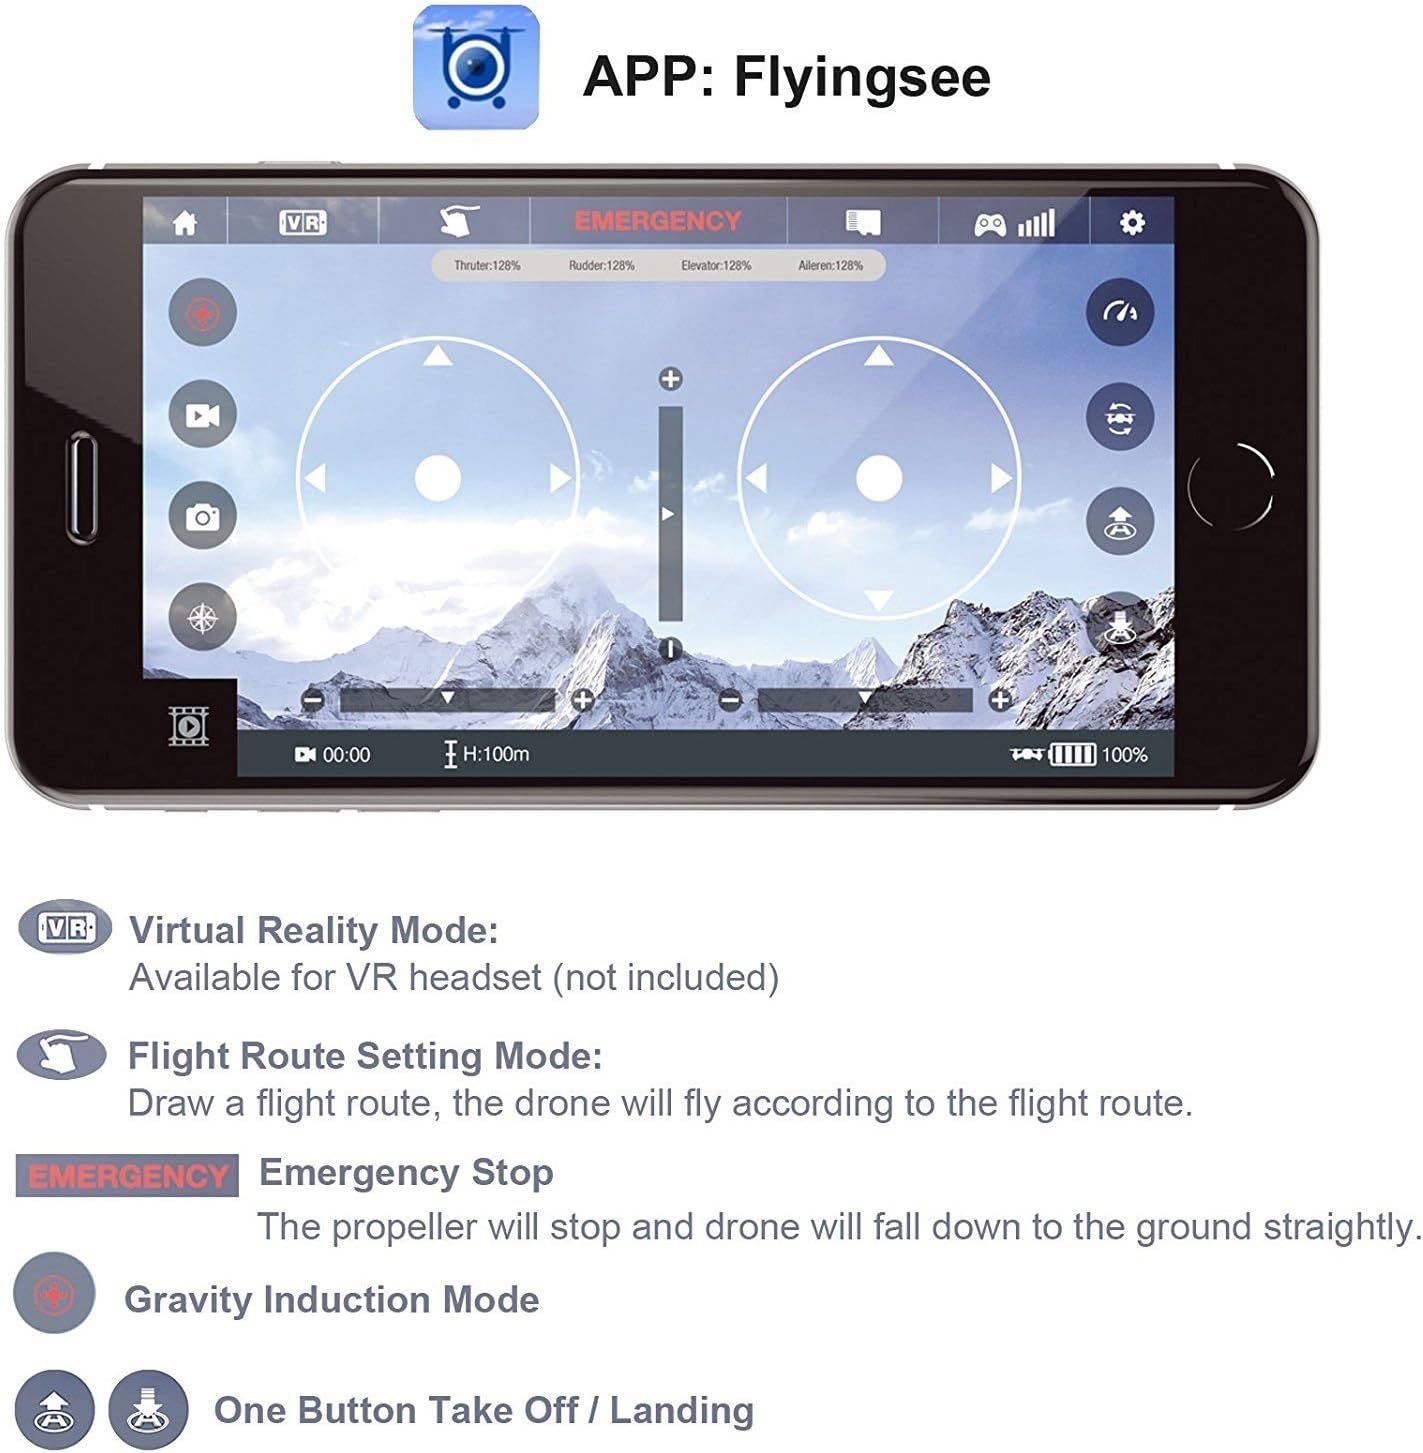
This image displays the "Flyingsee" app interface on a smartphone, showing virtual joysticks and various control icons. It highlights features such as Virtual Reality Mode, Flight Route Setting Mode, Emergency Stop, Gravity Induction Mode, and One Button Take Off / Landing, all accessible through the app.
- Scan the QR code in the quick start guide (if provided) or search for "Flyingsee" in your device's app store.
- Install the app.
- Once installed, connect your smartphone to the drone's WiFi network (usually named "UDIRC-U42W-XXXXXX").
- Open the Flyingsee app to view the live FPV feed and access app-controlled features.
6. Operating Instructions
6.1. Pairing the Drone and Remote Controller
- Place the drone on a flat, level surface.
- Turn on the drone's power switch. The LED lights will flash.
- Turn on the remote controller.
- Push the left stick (throttle) all the way up, then all the way down. The drone's LED lights will become solid, indicating successful pairing.
6.2. One Button Take Off / Landing
This feature allows beginners to easily launch and land the drone.
This image illustrates the drone performing an automatic take-off or landing. Pressing the dedicated button will make the drone ascend to a certain altitude and hover, or descend slowly and land automatically before the motors stop.
- One Button Take Off: After pairing, press the "One Button Take Off / Landing" button. The drone will automatically ascend to a certain altitude and hover.
- One Button Landing: During flight, press the "One Button Take Off / Landing" button. The drone will slowly descend and land on the ground automatically before the motors stop. This function is crucial for protecting the drone during low battery or loss of control.
6.3. Flight Modes
- Altitude Hold Mode: The drone maintains a specified altitude, making it easier for beginners to control and providing more stable aerial photography.
- Headless Mode: In Headless Mode, the drone's orientation is relative to the pilot, regardless of the drone's actual front direction. This simplifies control, especially for new pilots. Activate this mode using the dedicated button on the remote controller.
- Flight Route Setting Mode: Available via the Flyingsee app, this mode allows you to draw a flight path on your smartphone screen, and the drone will automatically follow the specified route.
- Gravity Induction Mode: Also available in the app, this mode allows you to control the drone's forward/backward/left/right movement by tilting your smartphone.
- 360° Eversion (Flips): Press the "Flip Mode" button on the remote controller, then move the right stick in the desired direction to perform a 360-degree flip. Ensure sufficient altitude before attempting.

This image depicts the drone maintaining a stable altitude above a road, demonstrating the Altitude Hold Mode feature. This mode simplifies flight control for beginners and enhances stability for aerial photography.
6.4. WiFi Camera Operation (FPV)
The Udirc U42W is equipped with a WiFi HD camera for real-time video transmission (FPV) to your smartphone.

This image highlights the drone's WiFi camera, emphasizing its capability to achieve real-time FPV (First Person View) by pairing with a mobile app on iOS or Android devices. The camera is shown with a detailed view of its lens.
- Ensure your smartphone is connected to the drone's WiFi network.
- Open the "Flyingsee" app.
- The live video feed from the drone's camera will appear on your screen.
- Use the app interface to capture photos or record videos.
6.5. Virtual Reality (VR) Mode
The Flyingsee app supports a VR mode for an immersive flight experience when used with a compatible VR headset (not included).
This image demonstrates the Virtual Reality Mode, showing a smartphone inserted into a VR headset, displaying a split-screen view for 3D visualization. This mode allows users to experience real-time FPV in an immersive way.
- In the Flyingsee app, click on the VR icon to activate the mobile phone split-screen mode.
- Insert your smartphone into a compatible VR headset.
- Enjoy a real-time 3D visualization of your flight.
7. Maintenance
- Cleaning: Use a soft, dry cloth to clean the drone and remote controller. Avoid using water or solvents.
- Propeller Replacement: If propellers are damaged, replace them with the provided spare parts. Ensure correct propeller (A or B) is installed on the corresponding motor.
- Battery Care: Store batteries in a cool, dry place. Do not overcharge or over-discharge. If not used for a long period, charge them to about 50% capacity.
- Storage: Store the drone and accessories in a safe place, away from direct sunlight and extreme temperatures.
8. Troubleshooting
| Problem | Possible Cause | Solution |
|---|---|---|
| Drone does not respond to controller. | Not paired; low battery (drone or controller). | Re-pair the drone and controller; charge/replace batteries. |
| Drone drifts during flight. | Not calibrated; uneven surface at take-off; wind interference. | Calibrate the gyroscope (refer to quick start guide); take off from a level surface; avoid flying in windy conditions. |
| FPV feed is laggy or disconnected. | Weak WiFi signal; too far from drone; interference. | Ensure strong WiFi connection; fly closer to the drone; avoid areas with high WiFi interference. |
| Drone cannot take off. | Low battery; propellers blocked; motors not spinning. | Charge drone battery; check for obstructions; ensure drone is paired and calibrated. |
9. Specifications
| Feature | Detail |
|---|---|
| Model Name | U42W |
| Dimensions | 36 x 35.5 x 10.7 cm (14.2 x 14 x 4.2 inches) |
| Flight Weight | 130 g (0.29 lbs) |
| Video Recording Resolution | 640 x 480p |
| Max Flight Time | 7-8 minutes |
| Charging Time | Approx. 60 minutes |
| WiFi Distance | 40 meters |
| Control Distance | 100 meters |
| Quadcopter Battery | 3.7V 500mAh Li-Po battery (x2 included) |
| Controller Battery | 4 x "AAA" batteries (not included) |
| Radio Control Frequency | 2.4 GHz |
| Recommended Age | 12 years and up |
10. Warranty and Support
For warranty information and technical support, please refer to the official Udirc website or contact their customer service directly. Keep your purchase receipt as proof of purchase.
Manufacturer: Udirc
ASIN: B074XQ6FC7


