
ESCO 90521
ESCO 3 Ton Pro Series Low Profile Floor Trolley Jack User Manual
Model: 90521
Introduction
This manual provides essential information for the safe and effective operation, maintenance, and troubleshooting of your ESCO 3 Ton Pro Series Low Profile Floor Trolley Jack. Please read this manual thoroughly before using the jack to ensure proper function and to prevent injury or damage.
Safety Information
WARNING: Failure to follow these instructions may result in serious injury or property damage.
- Always use the jack on a hard, level surface.
- Do not exceed the rated capacity of 3 tons (6000 pounds).
- Ensure the vehicle is in park with the parking brake engaged and wheels chocked before lifting.
- Never work under a vehicle supported only by a jack. Always use appropriate jack stands to support the vehicle after lifting.
- Keep hands and feet clear of moving parts.
- Do not modify the jack in any way.
- Wear appropriate personal protective equipment, such as safety glasses.
- Inspect the jack for damage or leaks before each use. Do not use if damaged.
- Lower the vehicle slowly and in a controlled manner.
Components
Familiarize yourself with the main components of your ESCO 3 Ton Pro Series Low Profile Floor Trolley Jack:
- Handle: Used for pumping and maneuvering the jack. Features a padded section to protect vehicle finishes.
- Lifting Arm: The main structural component that raises and lowers.
- Saddle/Lifting Pad: The contact point with the vehicle's lifting point.
- Release Pedal/Mechanism: Controls the lowering of the jack.
- Wheels: For easy positioning and movement of the jack.
- Double Piston Pump: Provides quick lifting action.
- Tools and Parts Tray: Integrated tray for convenience.
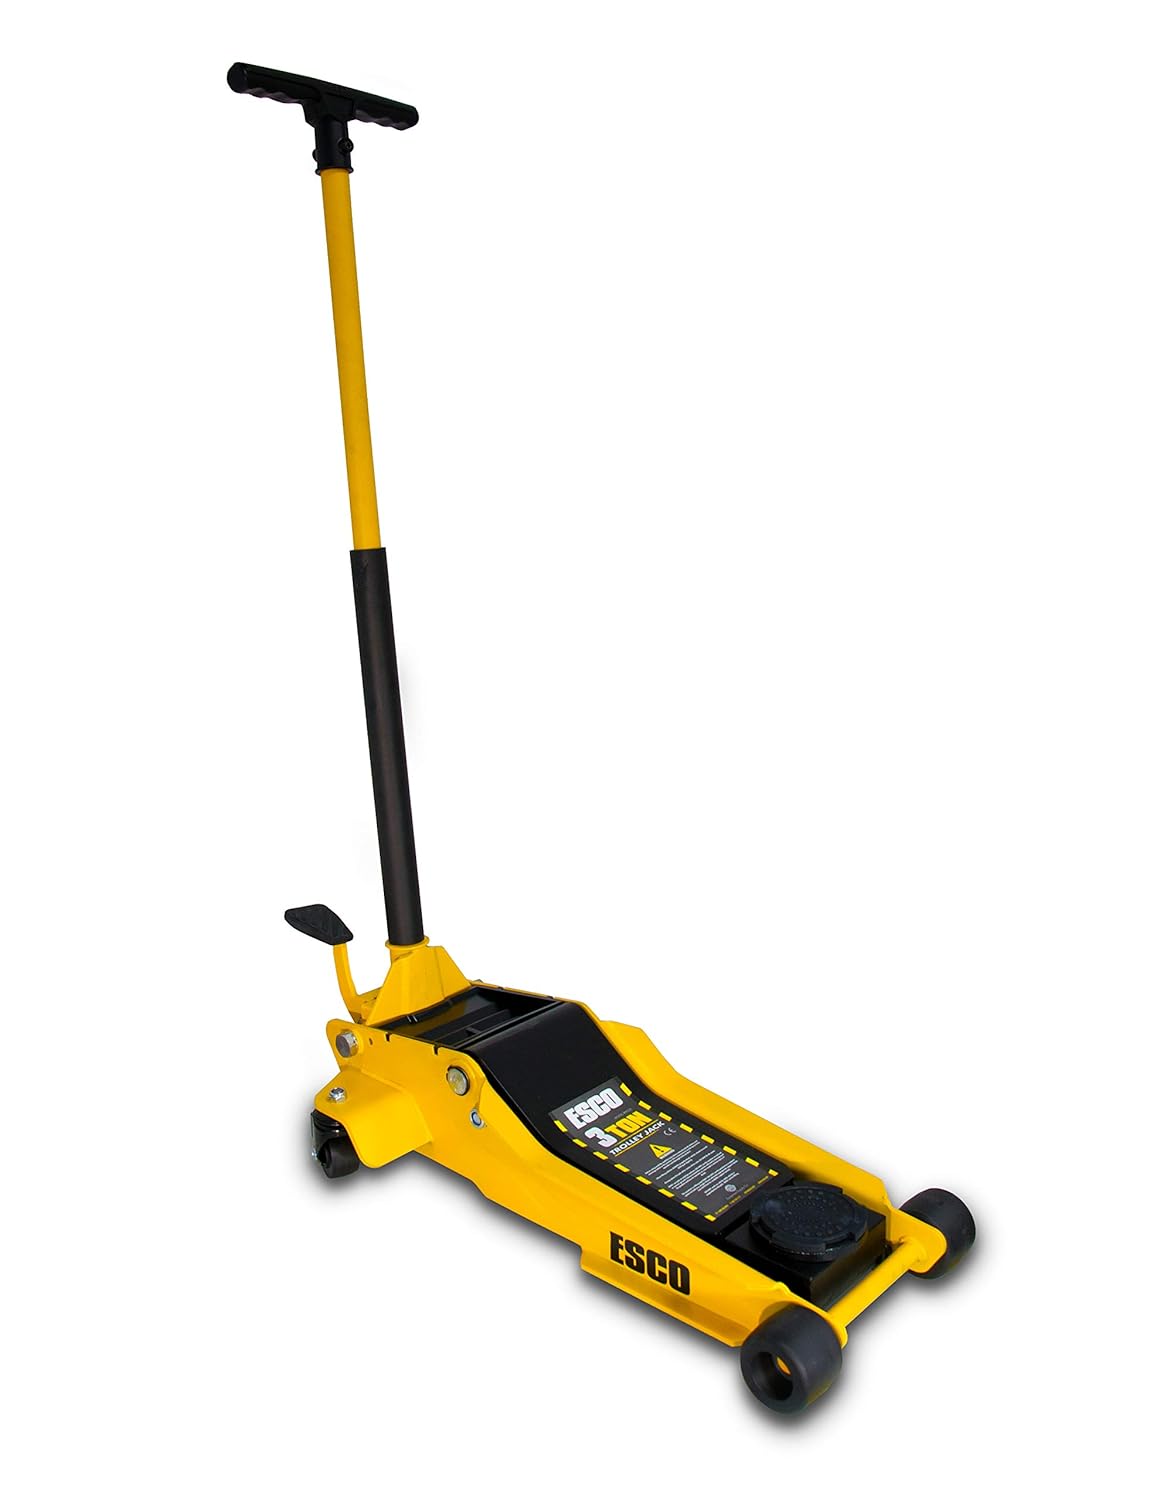
Figure 1: Overview of the ESCO 3 Ton Pro Series Low Profile Floor Trolley Jack in its lowered position.

Figure 2: Close-up view of the jack's handle, designed for comfortable grip and featuring a padded section.

Figure 3: Detailed view of the jack's lifting saddle, the primary contact point with the vehicle.
Setup
- Unpacking: Carefully remove the jack and all components from the packaging.
- Handle Assembly: Insert the handle into the handle socket on the jack. Ensure it is securely seated and locked into place if a locking mechanism is present.
- Bleeding the Hydraulic System (Initial Use):
- With the jack fully lowered, open the release valve by twisting the handle counter-clockwise.
- Pump the handle several times to circulate the hydraulic fluid and remove any trapped air.
- Close the release valve by twisting the handle clockwise.
- Test the jack by lifting it to its maximum height and then lowering it. Repeat if necessary until operation is smooth.
Operating Instructions
Lifting a Vehicle:
- Preparation: Park the vehicle on a hard, level surface. Engage the parking brake and place wheel chocks on the wheels that will remain on the ground.
- Positioning the Jack: Locate the manufacturer-recommended lifting points on the vehicle. Position the jack's saddle directly under the lifting point.
- Lifting: Close the release valve by twisting the handle clockwise until it is tight. Pump the handle to raise the jack. The double piston pump allows for quick lifting.

Figure 4: The jack partially raised, demonstrating the lifting mechanism.

Figure 5: The jack fully extended, showing its maximum lifting height.
- Using Jack Stands: Once the vehicle is at the desired height, immediately place appropriately rated jack stands under the vehicle's designated support points. Slowly lower the vehicle onto the jack stands using the release mechanism.
- Removing the Jack: Once the vehicle is securely supported by jack stands, fully lower the jack and remove it from under the vehicle.
Lowering a Vehicle:
- Preparation: Ensure the area around the vehicle is clear.
- Re-engage Jack: If the vehicle is on jack stands, raise the vehicle slightly with the floor jack so the jack stands can be safely removed.
- Controlled Lowering: Slowly twist the handle counter-clockwise to open the release valve. The unique "lift & twist" controlled lowering system allows for precise and controlled descent. Do not open the valve too quickly, as this can cause the vehicle to drop rapidly.

Figure 6: Detail of the foot pedal and release mechanism for controlled lowering.
- Complete Lowering: Continue to lower the vehicle until it is fully on the ground.
- Remove Jack: Once the vehicle is fully lowered, remove the jack.
Maintenance
Regular maintenance ensures the longevity and safe operation of your jack.
- Cleaning: Keep the jack clean and free of dirt, grease, and debris. Wipe down the hydraulic ram and other moving parts after each use.
- Lubrication: Periodically lubricate pivot points and wheel axles with light machine oil.
- Hydraulic Fluid: Check the hydraulic fluid level regularly. If low, add high-quality hydraulic jack oil. Do not use brake fluid or motor oil. To check/add fluid:
- Ensure the jack is fully lowered.
- Locate the oil filler plug (refer to diagram in product manual if available).
- Remove the plug and check the fluid level. It should be just below the filler hole.
- Add fluid slowly until the correct level is reached.
- Replace the filler plug securely.
- Storage: Store the jack in a clean, dry place with the ram fully retracted to prevent corrosion and extend seal life.
- Inspection: Before each use, inspect the jack for any signs of damage, wear, or leaks. Pay close attention to welds, wheels, and hydraulic hoses.

Figure 7: View of the jack's underside, highlighting the double piston pump mechanism.
Troubleshooting
| Problem | Possible Cause | Solution |
|---|---|---|
| Jack will not lift or lifts slowly. | Low hydraulic fluid, air in system, release valve open, overloaded. | Check fluid level and add if necessary. Bleed air from system (see Setup). Ensure release valve is fully closed. Do not exceed capacity. |
| Jack lowers under load. | Leaking seals, release valve not fully closed, internal valve issue. | Ensure release valve is fully closed. If problem persists, discontinue use and contact customer support for seal replacement or repair. |
| Jack does not lower completely. | Release valve not fully open, obstruction. | Ensure release valve is fully open. Check for any physical obstructions. |
| Noisy operation. | Low fluid, air in system. | Check fluid level. Bleed air from system. |
If you encounter issues not listed here or if solutions do not resolve the problem, please contact ESCO customer support.
Specifications
| Feature | Detail |
|---|---|
| Model Number | 90521 |
| Load Capacity | 3 Ton (6000 Pounds) |
| Minimum Height | 3.75 inches |
| Maximum Lifting Height | 19.69 inches |
| Product Dimensions (L x W x H) | 28.35 x 11.5 x 3.75 inches |
| Jack Length | 28.35 inches |
| Handle Length | 47 inches |
| Weight | 90 Pounds |
| Certifications | ASME certified |
Warranty and Support
This ESCO product is designed for durability and performance. For specific warranty details, including coverage period and terms, please refer to the warranty information provided with your purchase or visit the official ESCO website. For technical assistance, parts, or service inquiries, please contact ESCO customer support.
You can typically find contact information on the manufacturer's website or on the product packaging.
Related documents90521


Ask a question about this manual
Ask about setup, troubleshooting, compatibility, parts, safety, or missing instructions. Manuals+ will review the question and use this page’s manual context to help answer it.