
1. Introduction
This instruction manual provides essential information for the safe and efficient installation, operation, and maintenance of your ChiliTec Delphi 160° Recessed Indoor Motion Detector. Please read this manual thoroughly before installation and use, and retain it for future reference.
2. Safety Instructions
- Electrical Installation: Installation must be performed by a qualified electrician in accordance with all local and national electrical codes. Incorrect installation can lead to electric shock, fire, or damage to the device.
- Power Disconnection: Always disconnect the main power supply before performing any installation, maintenance, or troubleshooting.
- Voltage: This device operates on 230V AC. Ensure your power supply matches this requirement.
- Indoor Use Only: This motion detector is designed for indoor use only (IP20 rating). Do not expose it to moisture, rain, or extreme temperatures.
- Load Capacity: Do not exceed the maximum load capacity of 400W for ohmic loads (e.g., incandescent bulbs) or 100W for LED loads.
- Children: Keep the device out of reach of children.
3. Package Contents
Verify that all components are present in the package:
- 1 x ChiliTec Delphi 160° Motion Detector
- 1 x 1-Gang Frame (80x80mm)
- 1 x PIR Module (55x55mm)
4. Product Overview
The ChiliTec Delphi motion detector is a recessed, 3-wire sensor designed to automatically switch lighting based on detected movement. It features a 160° detection angle and adjustable settings for light sensitivity and duration.

Image 4.1: Front view of the ChiliTec Delphi motion detector. It shows the white outer frame, the central sensor lens, and a small slider switch at the bottom for ON/OFF/PIR modes.

Image 4.2: This image highlights the key features of the motion detector: it is LED compatible, uses a PIR sensor, has a 7-meter range, and requires a 3-wire connection.

Image 4.3: This image illustrates the physical dimensions of the motion detector. The inner module measures 55x55mm, and with the included frame, the total outer dimension is 80x80mm.
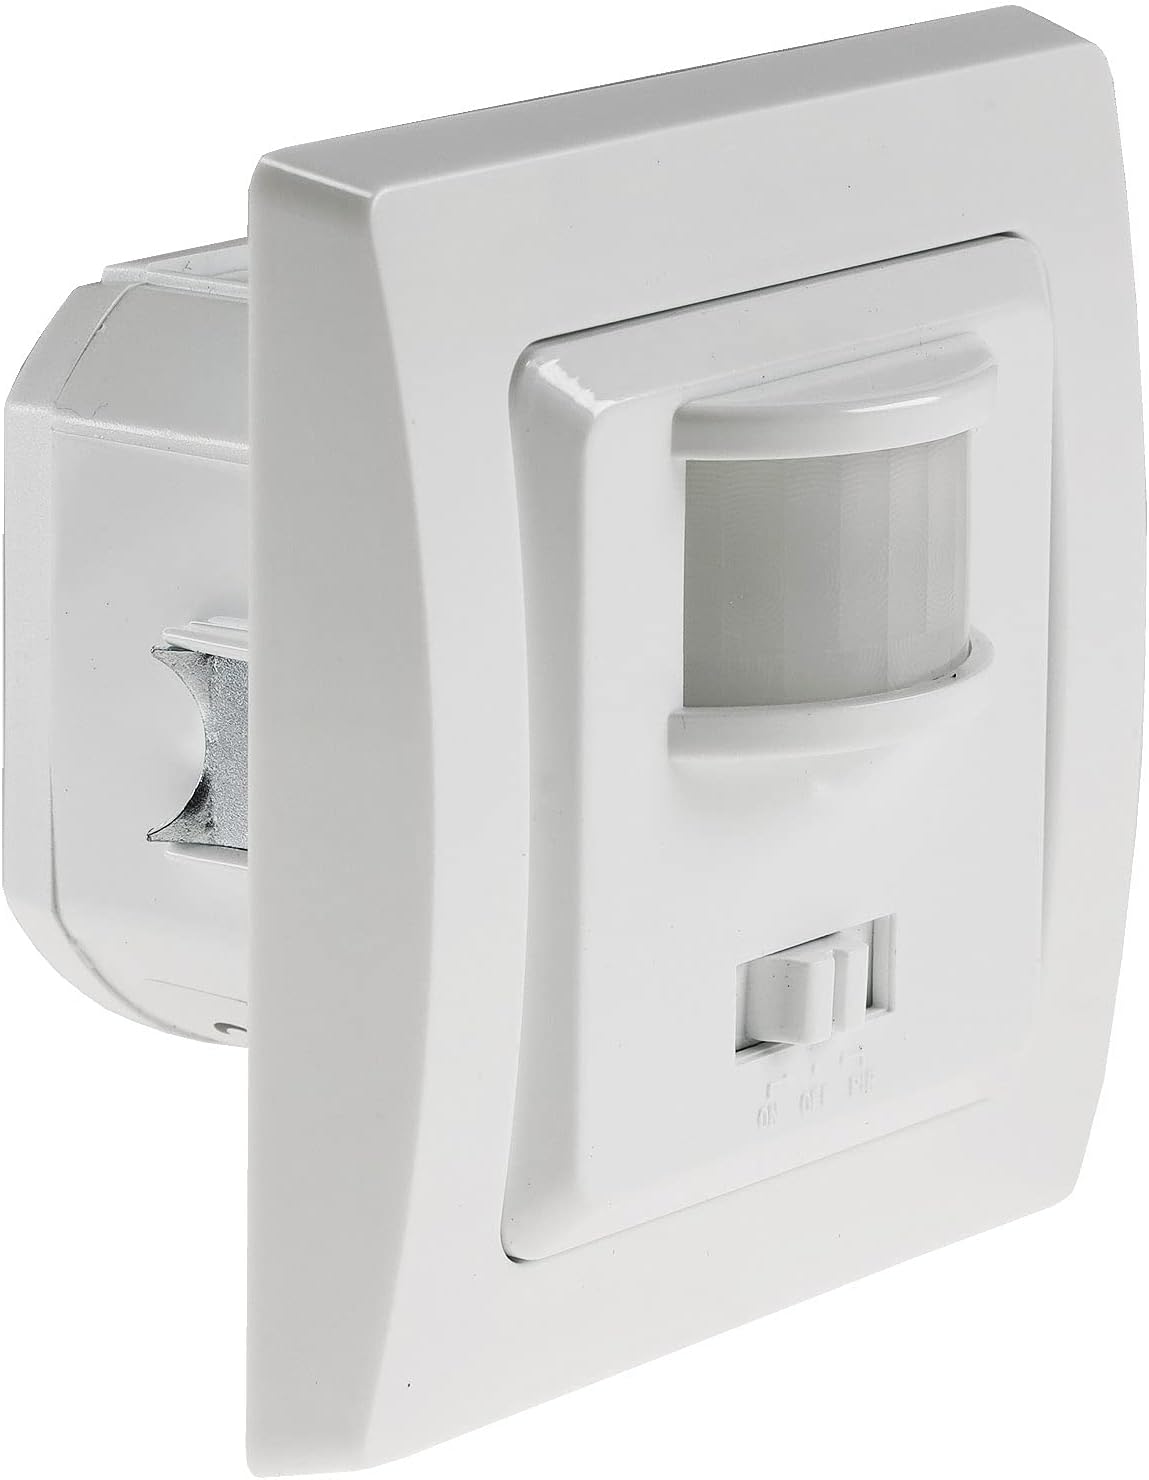
Image 4.4: Side view of the motion detector, illustrating its recessed mounting design and the depth of the unit when installed.
5. Setup and Installation
Important: Installation should only be carried out by a qualified electrician. Ensure the main power supply is disconnected before starting any work.
5.1 Wiring Diagram
The ChiliTec Delphi motion detector uses a 3-wire connection. Refer to the diagram below for correct wiring:

Image 5.1: Wiring diagram for the motion detector. It shows terminals for N (Neutral), L1 (Output to consumer, e.g., lamp), and L (Phase/Live input). The diagram also indicates a maximum load of 400 Watts.
- L (Phase): Connect to the live wire of your circuit.
- N (Neutral): Connect to the neutral wire of your circuit.
- L1 (Load): Connect to the live input of the light fixture or other consumer device.
5.2 Mounting
- The device is designed for recessed mounting in standard 60-68mm switch boxes.
- Ensure the mounting depth of 35mm is available in your switch box.
- Secure the insert into the switch box using screws.
- Attach the 1-gang frame (80x80mm) over the insert.
5.3 Parallel Connection
This 3-wire sensor is suitable for parallel connection of two motion detectors, for example, in stairwells. Consult a qualified electrician for parallel wiring configurations.
6. Operating Instructions
The motion detector features a slider switch on the front for selecting operating modes:
- ON: The connected light will remain continuously on, bypassing the motion sensor function.
- OFF: The connected light will remain continuously off, bypassing the motion sensor function.
- PIR (Automatic): The motion sensor will activate the light based on detected movement and ambient light conditions, according to the set LUX and TIME parameters.
7. Adjustments
The motion detector has two adjustable dials, typically located behind the front cover or on the module itself, for setting light sensitivity (LUX) and activation duration (TIME).
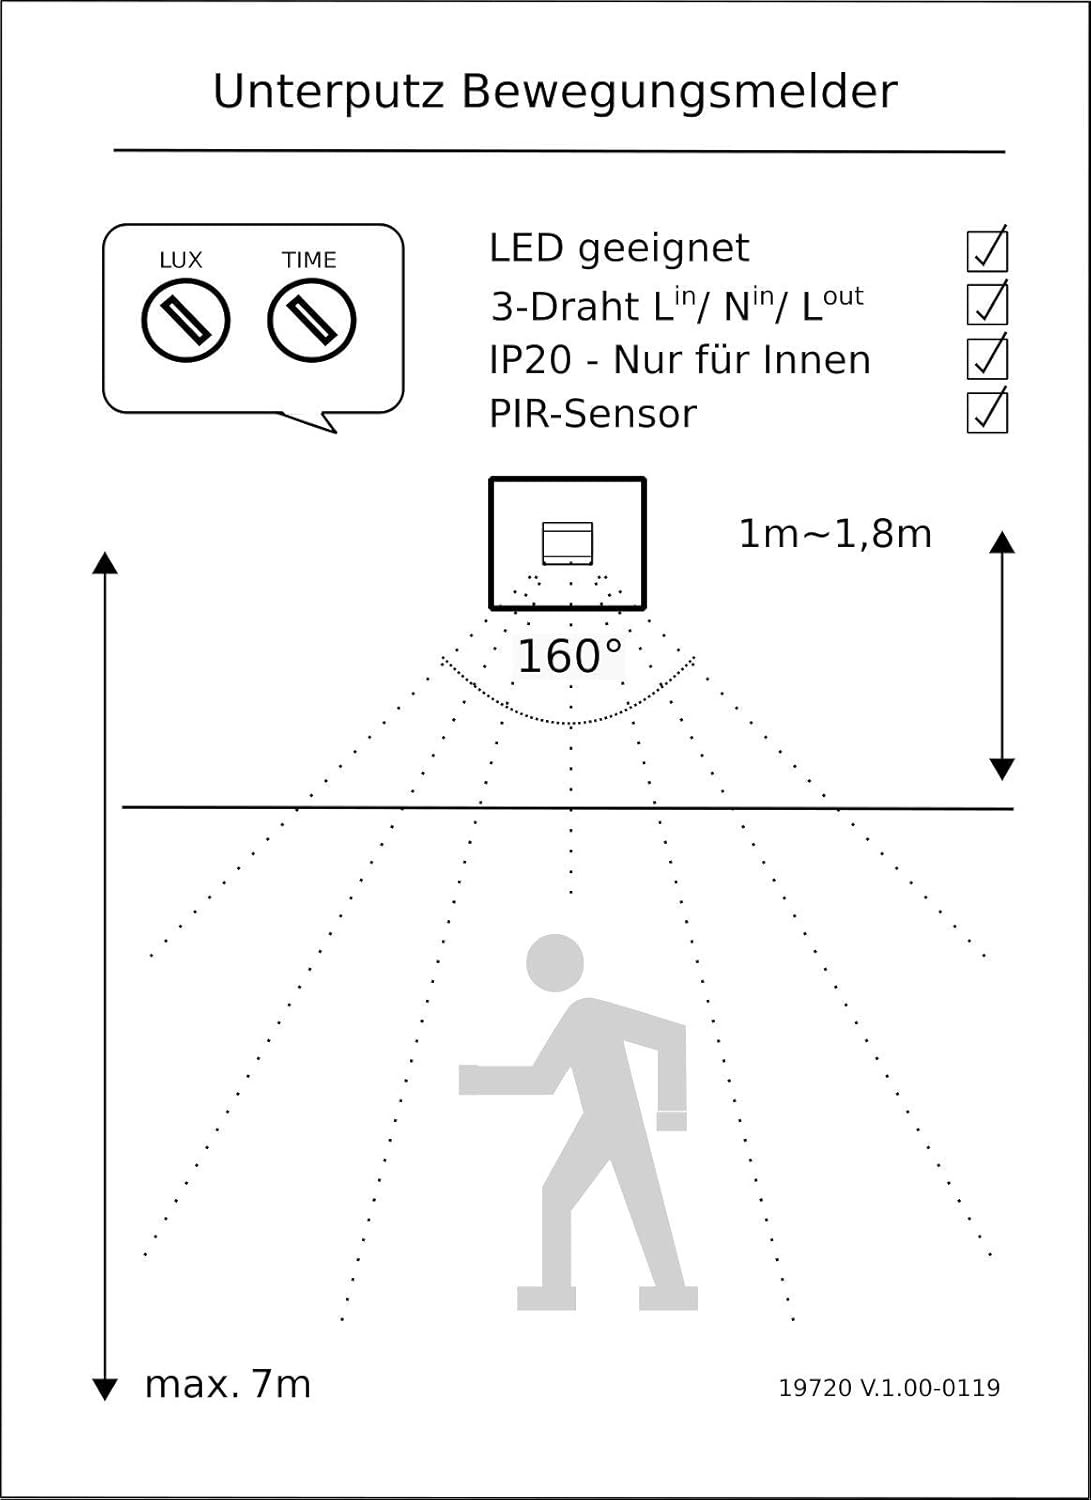
Image 7.1: This diagram illustrates the detection capabilities of the motion detector. It shows a 160° detection angle, an optimal installation height between 1m and 1.8m, and a maximum detection range of 7 meters.
7.1 LUX (Light Sensitivity) Adjustment
This dial controls the ambient light level at which the sensor becomes active. Turn the dial:
- Towards the moon symbol (low LUX) for activation only in dark conditions.
- Towards the sun symbol (high LUX) for activation in brighter conditions or during the day.
The sensitivity can be adjusted from 2 to 1000 lux.
7.2 TIME (Duration) Adjustment
This dial sets how long the light remains on after motion is detected and no further motion is sensed. Turn the dial:
- Towards the minus symbol for shorter duration.
- Towards the plus symbol for longer duration.
The duration can be adjusted from approximately 10 seconds to 7 minutes.
8. Maintenance
The ChiliTec Delphi motion detector requires minimal maintenance. To ensure optimal performance:
- Cleaning: Gently wipe the sensor lens and outer frame with a soft, dry cloth. Do not use abrasive cleaners or solvents.
- Inspection: Periodically check for any visible damage or loose connections. If any issues are found, disconnect power and consult a qualified electrician.
9. Troubleshooting
If you encounter issues with your motion detector, refer to the following common problems and solutions:
| Problem | Possible Cause | Solution |
|---|---|---|
| Light stays on continuously. |
|
|
| Light does not turn on. |
|
|
| Light turns on even in bright conditions. | LUX setting too high. | Adjust LUX dial towards the 'moon' symbol to decrease sensitivity to ambient light. |
| Light turns off too quickly or too slowly. | TIME setting incorrect. | Adjust TIME dial to increase or decrease the duration the light stays on. |
| Light switches on at irregular intervals without apparent motion. |
|
|
10. Specifications
| Feature | Specification |
|---|---|
| Model Number | 19720 |
| Manufacturer | ChiliTec GmbH |
| Voltage | 230V AC |
| Detection Angle | 160° |
| Detection Range | Max. 7 meters |
| Installation Height | 1m - 1.8m (recommended) |
| Time Delay Adjustment | 10 seconds to 7 minutes |
| Light Sensitivity (LUX) Adjustment | 2 - 1000 lux |
| Load Capacity (Ohmic) | 30 - 400 W (e.g., incandescent bulbs) |
| Load Capacity (LED) | 3 - 100 W |
| Connection Type | 3-wire connection |
| Installation Method | Recessed mounting in 60-68mm switch boxes |
| Insert Dimensions (H x W) | 55 x 55 mm |
| Frame Dimensions (H x W) | 80 x 80 mm |
| Installation Depth | 35 mm |
| Special Features | ON/OFF/PIR mode switch, suitable for parallel connection |
| Color | White |
| Product Dimensions | 8 x 8 x 3.5 cm; 120 g |
11. Warranty and Support
For warranty information and customer support, please refer to the documentation provided at the time of purchase or contact your retailer. Keep your proof of purchase for any warranty claims.

