
Rollerhouse ERB25-1.1/28
Rollerhouse Rechargeable Wireless Tubular Roller Shade Motor Kit User Manual
Model: ERB25-1.1/28
Introduction
This manual provides detailed instructions for the installation, programming, and maintenance of your Rollerhouse Rechargeable Wireless Tubular Roller Shade Motor Kit. This kit is designed to motorize existing blinds and shades, offering convenience and enhanced control over your window coverings. It supports various types including sheer horizontal blinds, roller, and roman window shades.
What's Included
Your Rollerhouse motor kit includes the following components:
- Wireless Blind Motor
- Drive Wheels (for 1.5 inch tube)
- Remote Control
- 8.4V Charging Adapter
- 2x 38mm Rubber Fittings
- Installation Instruction Manual

Image: The complete Rollerhouse motor kit, showing the red tubular motor, white remote control, and black charging adapter.
Compatibility & Measurement
This motor kit is designed for 1.5 inch (38mm) shade tubes. It is compatible with blinds and shades of sheer horizontal blinds, roller, and roman window shades. It is NOT compatible with pleated, aluminum blinds, or vertical blinds. Ensure your shade tube's Inner Diameter (ID) and Outer Diameter (OD) match the motor's requirements for proper fitment.

Image: Diagram illustrating how to measure the Inner Diameter (ID) and Outer Diameter (OD) of your existing shade tube to ensure compatibility.

Image: Visual guide showing various 1.5 inch (38mm & 40mm) shade tube configurations and their corresponding ID/OD measurements supported by the motor.
Video: This video demonstrates how to make your own electric blackout shades using Rollerhouse components, providing a practical example of retrofitting.
Installation Guide
Follow these steps to retrofit your existing roller blinds with the Rollerhouse motor:
- Unclip your blind and remove your chain drive: Carefully detach your manual shade from its mounting brackets and remove the chain drive mechanism.
- Measure ID and OD of the shade tube: As detailed in the compatibility section, ensure you have the correct measurements to choose the right motor and drive parts.
- Ensure correct Crown & Drive: Verify that the crown and drive adapters included with your motor are suitable for your shade tube's dimensions.
- Insert your motor: Gently slide the motor into the shade tube. Ensure the charging port and setting button are accessible (facing upwards or downwards as preferred for charging).
- Set up your controls: Proceed to the programming section to pair your remote and set the upper and lower limits.

Image: A visual comparison showing a manual roller shade system versus a motorized system, highlighting the components involved in retrofitting.
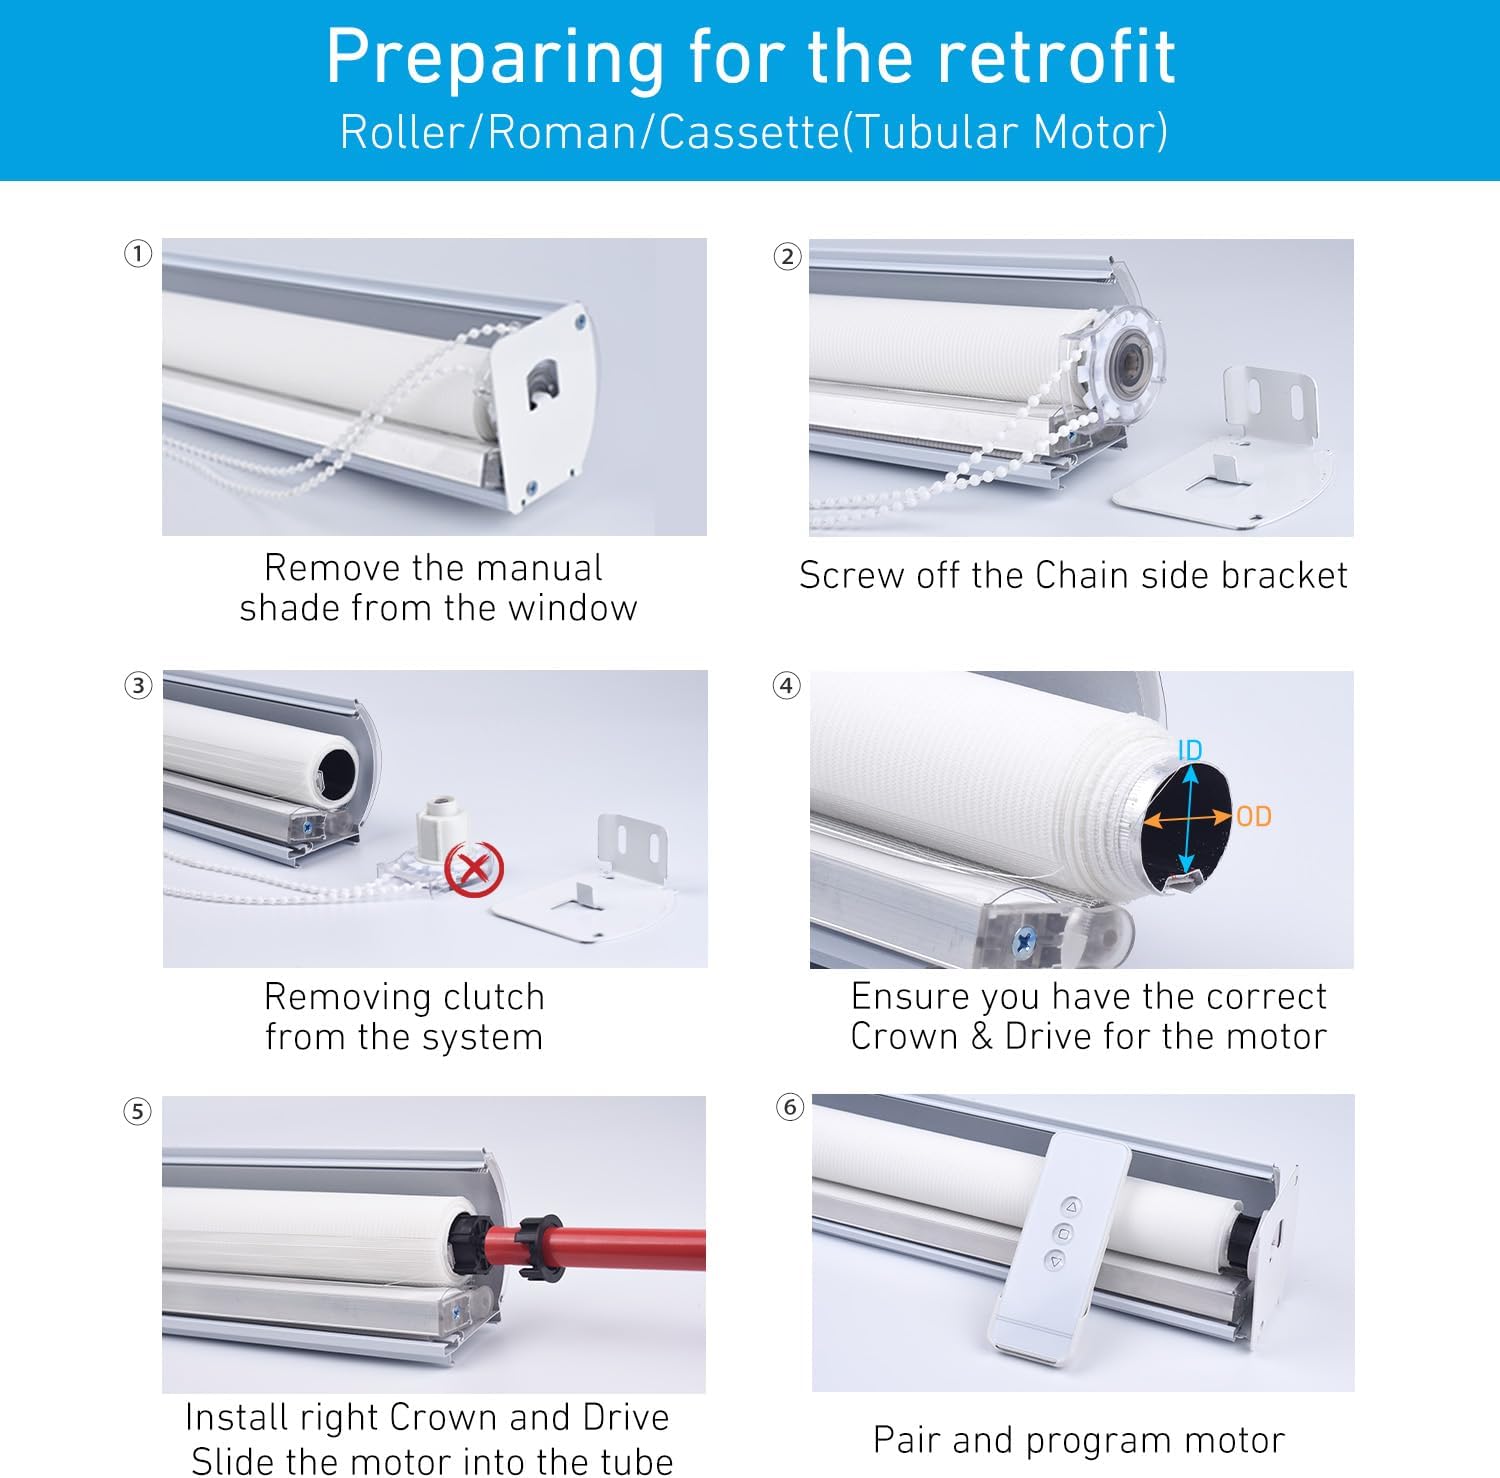
Image: Various types of chain side brackets are shown, emphasizing the need to inspect your shade hardware to determine the correct bracket system for your installation.

Image: A step-by-step visual guide on preparing your roller shade for motorization, including removing the manual shade, unscrewing the chain side bracket, and inserting the motor.
Video: This official Rollerhouse video provides a comprehensive guide on how to motorize your existing blinds, shades, and draperies with remote control.
Video: This video offers DIY retrofit solutions for automating various window coverings, providing practical tips for integrating the motor into your existing setup.
Remote Control & Programming
After installing the motor, you will need to program the remote control and set the upper and lower limits for your shade. The remote allows for precise control and can be integrated with smart home systems.
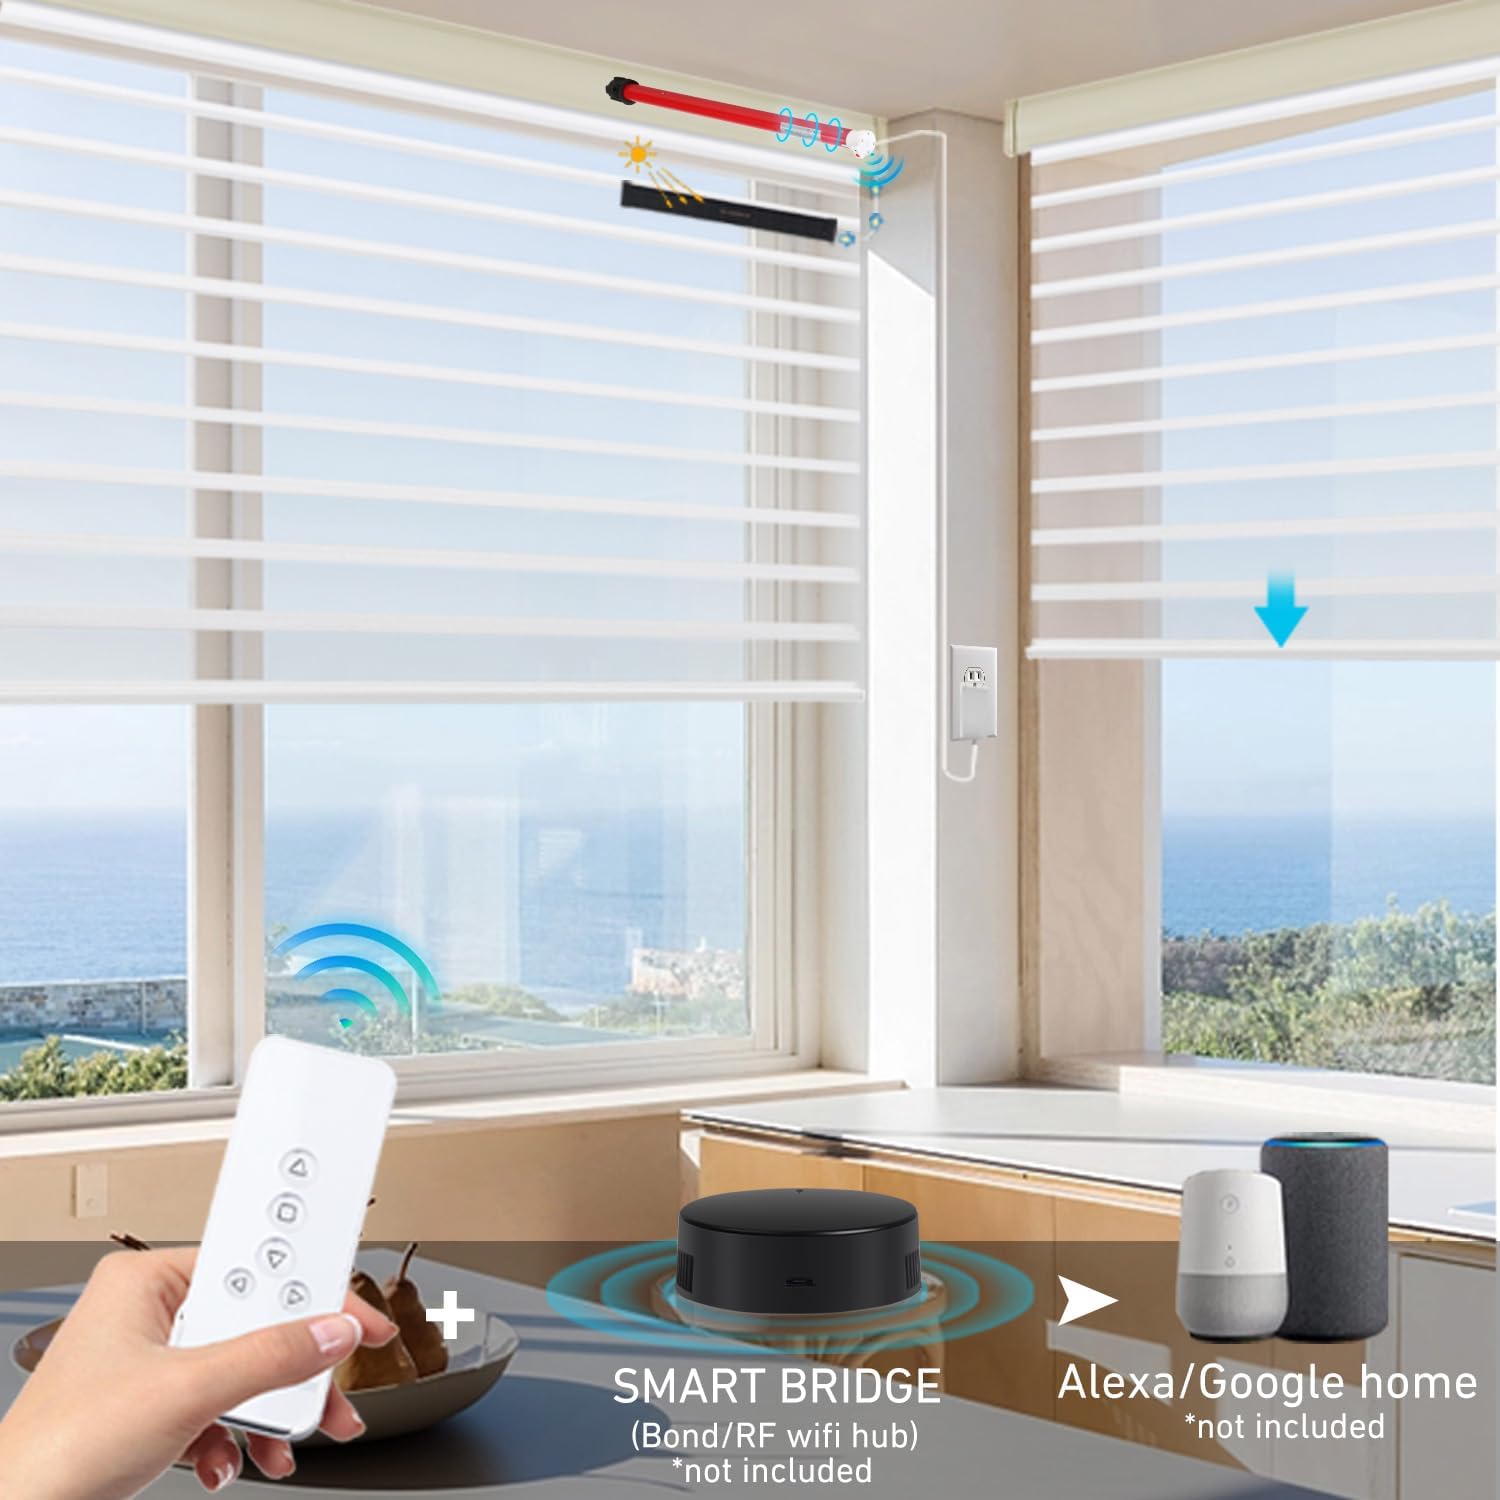
Image: This image illustrates the compatibility of the Rollerhouse system with various smart home platforms like Amazon Alexa, Google Assistant, Siri, Smart Life, and Tuya, often requiring a smart bridge.
Video: This official Rollerhouse video provides step-by-step instructions on how to program the remote control to operate your motorized blinds, including setting limits.
Video: Learn how to connect your RF Shade Motor to an RF hub, such as Broadlink, to enable smart home integration and control via voice assistants or apps.
Charging the Motor
The motor is battery-powered and rechargeable. Use the included 8.4V charging adapter to recharge the motor. For continuous power, the motor is compatible with solar charging options (sold separately) that allow you to keep your blinds plugged in at all times.
Troubleshooting
If you encounter issues with your motor, please refer to the following common solutions or contact support.
- Motor not responding: Ensure the motor is charged. Check remote battery. Re-pair the remote if necessary.
- Incorrect direction: Follow the remote programming instructions to reverse the motor direction.
- Limits not setting: Ensure you are pressing the correct buttons on the remote and motor in the specified sequence.
Video: This video provides instructions on how to remove the C-clip to replace the crown and adapters on the motor, which may be necessary for maintenance or compatibility adjustments.
Product Specifications
| Material | Plastic, Metal |
| Product Dimensions | 16"L x 1"W |
| Brand | Rollerhouse |
| Color | Red |
| Operation Mode | Electric, Rechargeable |
| Included Components | 2x 38mm rubber fittings, 8.4V plug charger, Install Instruction, Roller shade motor, Remote |
| Item Weight | 1.78 pounds |
| Item Model Number | ERB25-1.1/28 |
| Batteries | 1 Lithium Ion batteries required. |
Warranty & Support
Rollerhouse offers comprehensive service on its motors and controls. If you experience any damage or failures within the valid warranty period, please provide pictures, and we will work with you for a free replacement. Our team is dedicated to providing real-time professional sales and technical support, aiming to answer your queries within 24 hours.
Image: Illustration of Rollerhouse's commitment to customer support, highlighting 24-hour response times for sales and technical inquiries.
Related documentsERB25-1.1/28


Ask a question about this manual
Ask about setup, troubleshooting, compatibility, parts, safety, or missing instructions. Manuals+ will review the question and use this page’s manual context to help answer it.