
1. Introduction
This manual provides detailed instructions for the proper assembly, operation, and maintenance of the Molex Mini-Fit Jr 12 Circuit Connector Set. Adherence to these guidelines ensures optimal performance and longevity of the connector system. Please read this manual thoroughly before proceeding with any installation or use.
2. Product Overview
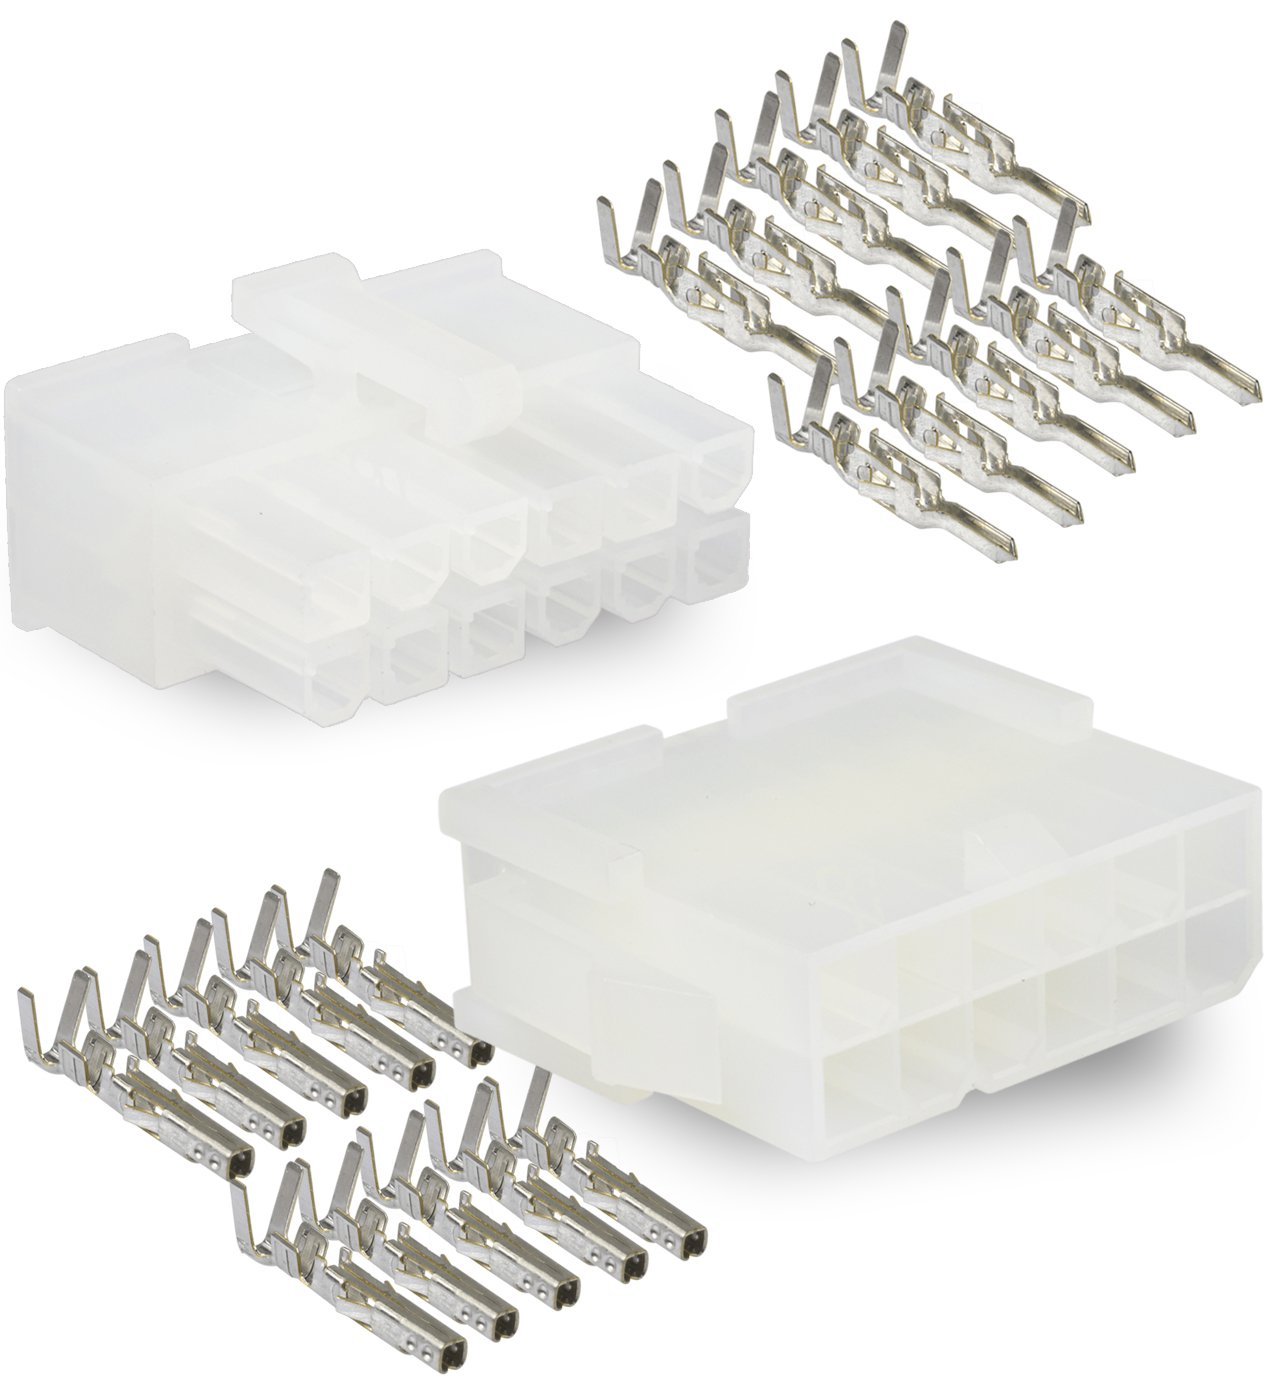
The Molex Mini-Fit Jr 12 Circuit Connector Set is designed for robust wire-to-wire and wire-to-board applications, providing reliable power and signal connections. This set includes both male and female housings, along with the necessary crimp terminals.
2.1 Components
- 12-Circuit Female Housing: Designed to accept female crimp terminals.
- 12-Circuit Male Housing: Designed to accept male crimp terminals.
- Female Crimp Terminals: For connection to wires, inserted into the female housing.
- Male Crimp Terminals: For connection to wires, inserted into the male housing.

3. Setup and Assembly
Proper assembly of the Molex Mini-Fit Jr connectors is crucial for reliable electrical connections. This process involves crimping the terminals onto wires and then inserting the crimped terminals into the connector housings.
3.1 Required Tools
- Wire Stripper: To remove insulation from wires.
- Crimping Tool: A specialized tool designed for Mini-Fit Jr terminals (Molex recommends specific tools for optimal crimps, refer to Molex documentation for details).
- Wire: Appropriate gauge wire (18-24 AWG) for the terminals.
3.2 Assembly Steps
- Prepare Wires: Strip approximately 3-4mm of insulation from the end of each wire. Ensure the stripped length is appropriate for the terminal's crimp barrel.
- Crimp Terminals:
- Insert a terminal into the crimping tool's appropriate die cavity.
- Insert the stripped wire into the terminal's crimp barrel.
- Actuate the crimping tool to securely crimp the terminal onto the wire. A proper crimp should firmly hold both the conductor and the wire insulation.
- Visually inspect the crimp for proper formation and secure wire retention.
- Insert Terminals into Housing:
- Orient the crimped terminal correctly according to the housing's keying. Refer to Figure 3 for typical terminal orientation within the housing.
- Push the crimped terminal into the designated cavity of the connector housing until it clicks into place. A distinct click indicates that the terminal's locking tang has engaged with the housing.
- Gently pull on the wire to ensure the terminal is securely seated and cannot be easily removed.
- Repeat for all necessary circuits.


4. Operating Instructions
Once assembled, the Molex Mini-Fit Jr connectors are designed for straightforward mating and un-mating.
4.1 Mating Connectors
- Align the male and female connector housings, ensuring the keying features are correctly matched.
- Gently push the two housings together until a distinct click is heard or felt. This indicates that the locking latches have engaged, securing the connection.
- Verify the connection by gently pulling on the housings to ensure they are securely mated and do not easily separate.
4.2 Un-mating Connectors
- Locate the locking latches on the connector housing.
- Press the locking latches to disengage them.
- While holding the latches, gently pull the two connector housings apart. Avoid pulling on the wires directly, as this can damage the crimp connections.
5. Maintenance
The Molex Mini-Fit Jr connectors are designed for durability, but proper maintenance can extend their lifespan and ensure continued reliable performance.
- Regular Inspection: Periodically inspect connectors for any signs of physical damage, corrosion, or discoloration.
- Cleaning: If necessary, gently clean the contact areas with a non-abrasive, electrical contact cleaner. Ensure connectors are dry before re-mating.
- Environmental Protection: Ensure connectors are used within their specified environmental conditions (temperature, humidity). Protect from excessive dust, moisture, and corrosive substances.
- Avoid Stress: Do not subject wires or connectors to excessive pulling, bending, or twisting forces, especially near the crimp area.
6. Troubleshooting
If issues arise, consider the following common troubleshooting steps:
- Intermittent Connection:
- Check for proper crimp quality. A poor crimp can lead to high resistance or intermittent contact.
- Ensure terminals are fully seated and locked into the housing.
- Inspect for bent or damaged pins/sockets within the connector.
- Difficulty Mating/Un-mating:
- Verify correct alignment and keying. Do not force connectors together.
- Ensure locking latches are fully disengaged when un-mating.
- Check for debris or damage within the connector cavities.
- Loose Wires:
- Re-crimp any terminals that appear loose or pull out of the housing easily. Ensure the correct crimping tool and technique are used.
7. Specifications
Key technical specifications for the Molex Mini-Fit Jr 12 Circuit Connector Set:
| Feature | Specification |
|---|---|
| Model Number | 12 Circuit Connector -2 Complete Set |
| Manufacturer | Molex |
| Connector Type | Pin Terminal (Mini-Fit Jr Series) |
| Contact Material | Copper (Tin plated brass) |
| Insulation Material | Nylon |
| Wire Size AWG | 18, 20, 22, 24 AWG (depending on terminal) |
| Current per Contact (Max) | 9.0A |
| Voltage (Max) | 600V |
| Durability | 30 Mating Cycles |
| Package Dimensions | 4.96 x 3.43 x 0.43 inches; 0.85 ounces |


8. Warranty and Support
For specific warranty information and technical support regarding your Molex Mini-Fit Jr connectors, please refer to the official Molex website or contact Molex customer service directly. Product documentation and support resources are typically available on their corporate website.
Manufacturer: Molex
Website: www.molex.com


