
Best Choice Products VD-22769BKEP
User Manual
Best Choice Products Portable Countertop Ice Maker
Model: VD-22769BKEP
1. Introduction
Thank you for purchasing the Best Choice Products Portable Countertop Ice Maker. This appliance is designed to provide you with a convenient and efficient way to produce fresh ice cubes quickly. Its compact design makes it suitable for various settings, including kitchens, offices, apartments, and dorm rooms. Please read this manual thoroughly before operating the ice maker to ensure safe and optimal performance.
2. Safety Information
To reduce the risk of fire, electric shock, or injury when using your ice maker, follow these basic safety precautions:
- Read all instructions before use.
- Do not touch the evaporator or ice blades when the unit is in operation.
- Do not immerse the power cord, plug, or any part of the unit in water or other liquids.
- Close supervision is necessary when the appliance is used by or near children.
- Unplug the ice maker from the outlet when not in use and before cleaning.
- Do not operate any appliance with a damaged cord or plug, or after the appliance malfunctions or has been damaged in any manner.
- Do not use outdoors.
- Do not place on or near a hot gas or electric burner, or in a heated oven.
- Ensure proper ventilation around the unit. Maintain at least 6 inches of space on all sides for adequate airflow.
- Use only potable water in the reservoir.
- Important: After delivery, allow the ice maker to stand upright for at least 1 hour before plugging it in. This allows the refrigerant to settle.
3. Product Overview
Familiarize yourself with the components of your ice maker:

Figure 3.1: Front View with Control Panel

Figure 3.2: Interior Components

Figure 3.3: Side View with Ventilation

Figure 3.4: Ice Basket and Scoop
Components:
- Control Panel: Features indicator lights for "Add Water" and "Ice Full," along with "Power" and "Select" buttons.
- Water Reservoir: Located beneath the ice basket, holds water for ice production.
- Ice Basket: Removable basket for collecting produced ice cubes.
- Ice Scoop: Included for convenient ice retrieval.
- Air Vent: Located on the side, essential for proper heat dissipation.
- Drain Plug: Located at the bottom for draining water.
4. Setup
- Unpack: Carefully remove all packaging materials and check for any damage. Ensure all accessories (ice basket, scoop) are present.
- Clean: Before first use, clean the interior of the ice maker, including the water reservoir, ice basket, and scoop, with a soft cloth and mild detergent. Rinse thoroughly and dry.
- Placement: Place the ice maker on a flat, stable, and level surface away from direct sunlight and heat sources. Ensure there is at least 6 inches of clear space around the unit for proper ventilation.
- Refrigerant Settling: After transporting or receiving the unit, allow it to stand upright for at least 1 hour before plugging it into a power outlet. This allows the refrigerant system to stabilize.
- Power Connection: Plug the ice maker into a grounded 120V electrical outlet.
5. Operating Instructions
- Fill Water Reservoir: Open the lid and fill the water reservoir with potable water up to the MAX fill line. Do not overfill.
- Power On: Press the "POWER" button to turn on the ice maker. The "POWER" indicator light will illuminate.
- Select Ice Size: Press the "SELECT" button to choose your desired ice cube size: Small (S) or Large (L). The corresponding indicator light will illuminate.
- Ice Production: The ice maker will begin its cycle. The first batch of ice may take slightly longer to produce (approximately 6-13 minutes, depending on water temperature and selected size). Subsequent cycles will be faster.
- Ice Full Indicator: When the ice basket is full, the "ICE FULL" indicator light will illuminate, and the ice production will automatically pause. Remove ice from the basket to resume production.
- Add Water Indicator: If the water level in the reservoir is too low, the "ADD WATER" indicator light will illuminate, and the unit will stop producing ice. Refill the reservoir with water to resume operation.
- Retrieve Ice: Use the provided ice scoop to remove ice from the basket. For best results, transfer ice to a freezer for long-term storage as the ice maker is not a freezer and ice will melt over time.
- Power Off: Press the "POWER" button again to turn off the ice maker.
6. Maintenance
Regular cleaning and maintenance will prolong the life of your ice maker.
Cleaning the Interior:
- Unplug the unit from the power outlet.
- Remove the ice basket.
- Drain any remaining water from the reservoir by removing the drain plug located at the bottom of the unit.
- Clean the interior with a soft cloth dampened with a mixture of water and mild vinegar or a non-abrasive cleaner.
- Rinse thoroughly by filling the reservoir with clean water and draining it a few times.
- Dry all interior surfaces thoroughly before reassembling.
Cleaning the Exterior:
- Wipe the exterior with a soft, damp cloth. Do not use harsh chemicals or abrasive cleaners.
- Ensure the air vents are clear of dust and debris to maintain proper airflow.
Storage:
- If storing for an extended period, ensure the unit is completely drained and dry.
- Store in a cool, dry place.
7. Troubleshooting
| Problem | Possible Cause | Solution |
|---|---|---|
| "ADD WATER" indicator light is on. | Water reservoir is empty or water level is too low. | Add potable water to the reservoir up to the MAX fill line. |
| "ICE FULL" indicator light is on. | Ice basket is full. | Remove ice from the basket. |
| Ice cubes are too small or wet. | Water temperature is too high; ambient temperature is too warm. | Use colder water. Ensure the unit is in a cooler, well-ventilated area. Allow several cycles for optimal ice formation. |
| Ice maker is not producing ice. | No water, ice full, or unit malfunction. | Check water level. Check if ice basket is full. If issues persist, unplug for 10 minutes and restart. |
| Unit is not turning on. | No power. | Check power cord connection and wall outlet. Try a different outlet. |
8. Specifications
| Feature | Detail |
|---|---|
| Model Number | VD-22769BKEP |
| Overall Dimensions | 14" (L) x 9.5" (W) x 13" (H) / 35.56 x 24.13 x 33.02 cm |
| Water Reservoir Capacity | 2.3 qt |
| Daily Ice Production | Up to 26 lbs (11.79 kg) |
| Weight | 21 lbs (approx. 9.5 kg) |
| Material | Plastic (Exterior), Stainless Steel (Internal components) |
| Power | 120V AC |
| Certifications | ETL-listed, meets CSA and UL standards |
| UPC | 842957100149 |
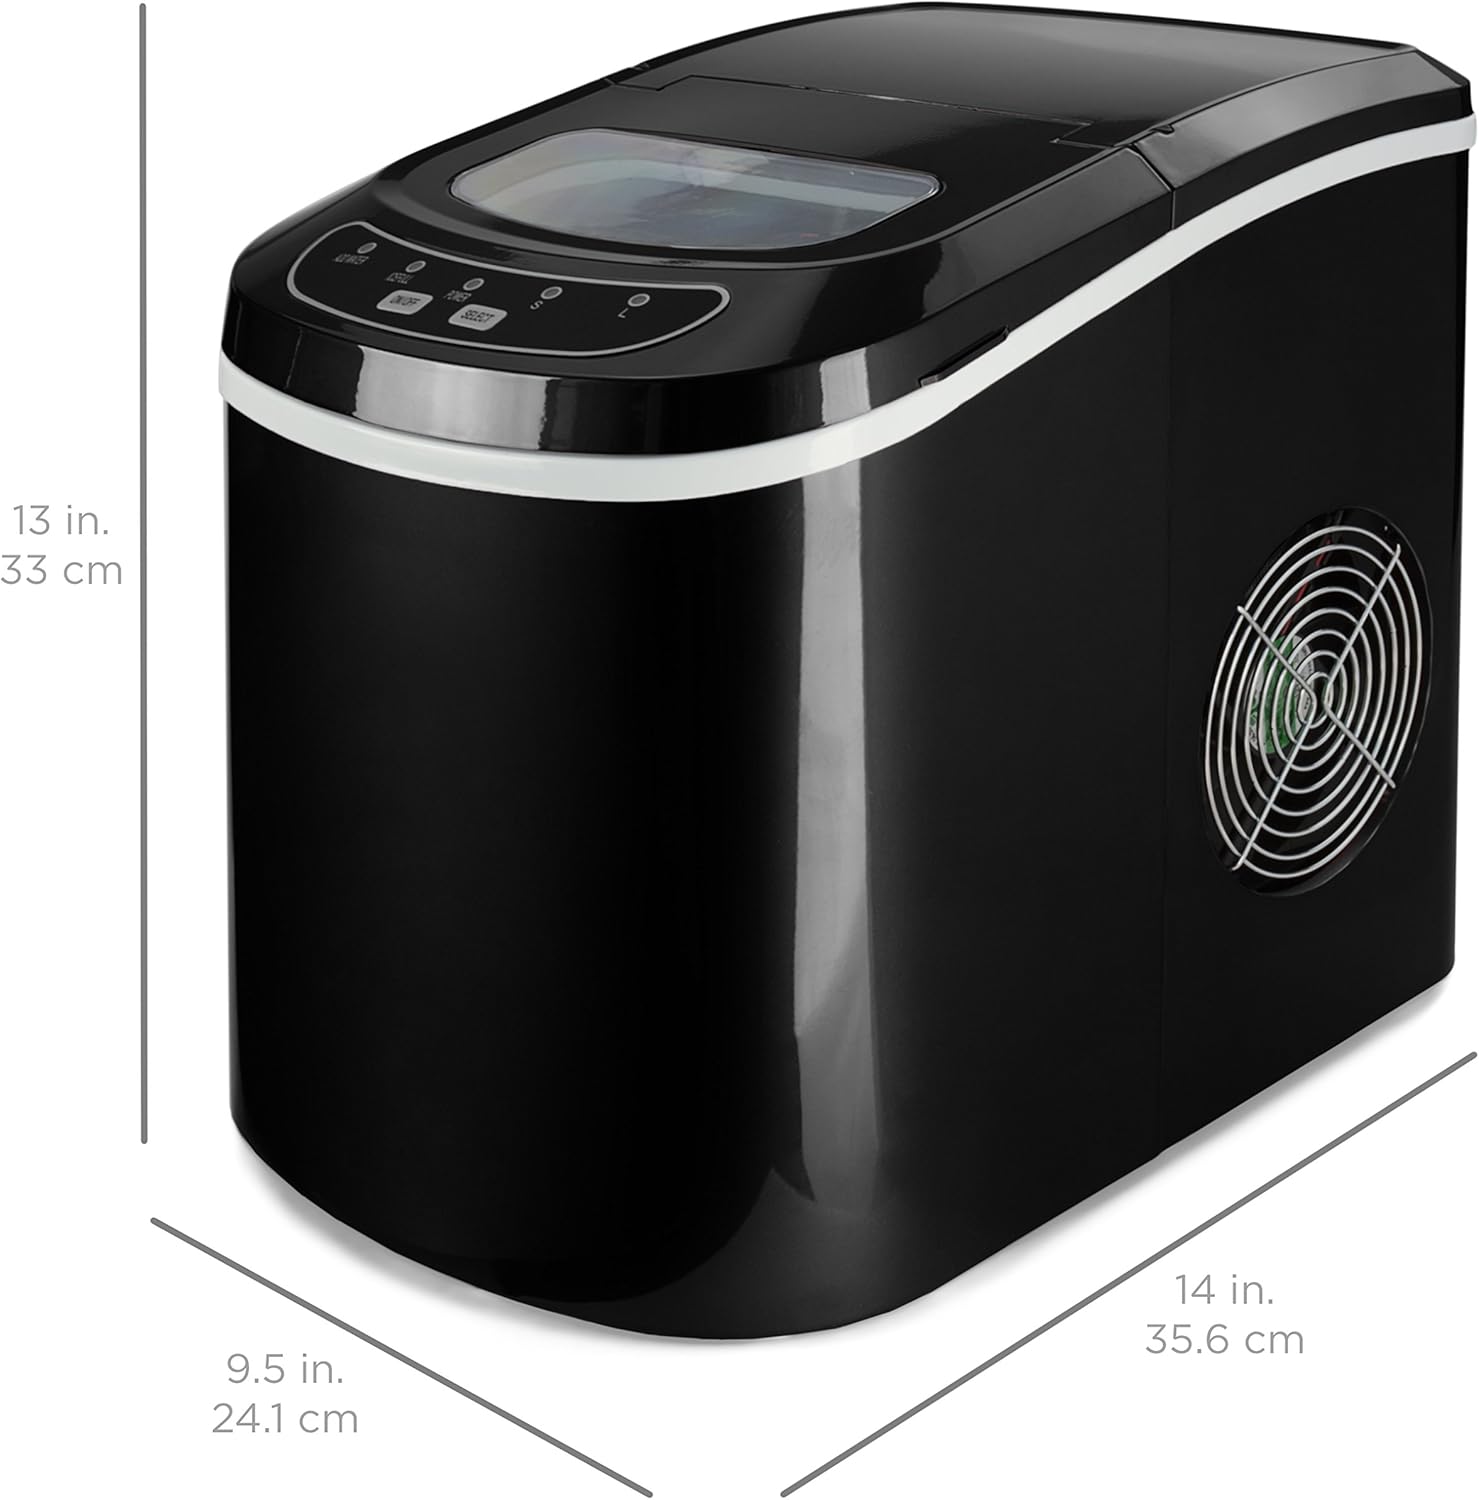
Figure 8.1: Product Dimensions
9. Warranty and Support
For warranty information or technical support, please contact Best Choice Products customer service. Keep your purchase receipt for warranty claims.
Contact information can typically be found on the manufacturer's official website or on the product packaging.
Ask a question about this manual
Ask about setup, troubleshooting, compatibility, parts, safety, or missing instructions. Manuals+ will review the question and use this page’s manual context to help answer it.