1. Introduction
This manual provides detailed instructions for the installation, operation, and maintenance of your Antennas Direct ClearStream 4MAX Indoor Outdoor TV Antenna. Designed for optimal reception of UHF and VHF signals, this multi-directional antenna offers access to free over-the-air (OTA) high-definition television channels, including NEXTGEN TV, 4K, and 8K UHD content, without requiring an internet connection or subscription.
The ClearStream 4MAX is engineered with four patented loops for multi-directional reception, capable of receiving signals from broadcast towers up to 70+ miles away. Its durable construction allows for versatile installation indoors, in an attic, or outdoors.

Figure 1: Front view of the Antennas Direct ClearStream 4MAX TV Antenna. This image displays the antenna's distinctive figure-eight loop design, which is optimized for receiving both UHF and VHF signals.
2. Safety Information
- Electrical Safety: Always exercise caution when working with electrical components. Ensure all power is disconnected before making any connections or adjustments.
- Ladder Safety: If installing the antenna on a roof or elevated surface, use a sturdy ladder and follow all ladder safety guidelines. Consider having a second person assist with installation.
- Power Lines: Never install the antenna near power lines. Maintain a safe distance from all electrical wires to prevent electrocution.
- Weather Conditions: Avoid installing the antenna during adverse weather conditions such as strong winds, rain, or lightning.
- Secure Mounting: Ensure the antenna is securely mounted to prevent it from falling, especially in windy conditions.
3. Package Contents
Verify that all components are present in your package:
- ClearStream 4MAX TV Antenna
- 20-inch Mast with Pivoting Base
- Assembly Instructions
- Mounting Hardware (U-bolts, wingnuts, screws, sealing pads)
4. Setup and Installation
4.1. Antenna Assembly
Follow these steps to assemble your ClearStream 4MAX antenna:
- Attach Antenna Elements: Secure the antenna elements to the antenna spine by inserting the short tubes into the spine holes. Use the provided 60mm and 10mm antenna spine bolts to tighten them. Ensure the ClearStream 4MAX brand logo and the logos on each loop element are in the same orientation.
- Add Dipoles: Attach the dipoles to the back of the horizontal spine using the dipole end caps and the 19mm end cap screws.
- Assemble Mast Clamp: Place the U-bolt behind the mast clamp base and attach it to the back of the antenna using the provided 25mm mast clamp bolts. Loosely screw on the wingnuts.
- Attach J-Mount Mast: Secure the J-mount mast to the mount base using the hex bolts and nuts.
Video 1: ClearStream 4MAX Outdoor TV Antenna Assembly. This video demonstrates the step-by-step process of assembling the antenna, including attaching the elements, dipoles, and mounting hardware.
4.2. Antenna Placement
Optimal antenna placement is crucial for best reception. Consider the following:
- Location: The ClearStream 4MAX can be installed indoors, in an attic, or outdoors. Outdoor installation typically yields the best results.
- Line of Sight: Aim for a clear line of sight to broadcast towers. Obstructions like trees, buildings, and terrain can weaken signals. The higher the antenna, the better the reception.
- Antenna Point App: Use the free "Antenna Point" app (available on iOS and Android) to identify local broadcast towers, their distances, and optimal compass headings for aiming your antenna.
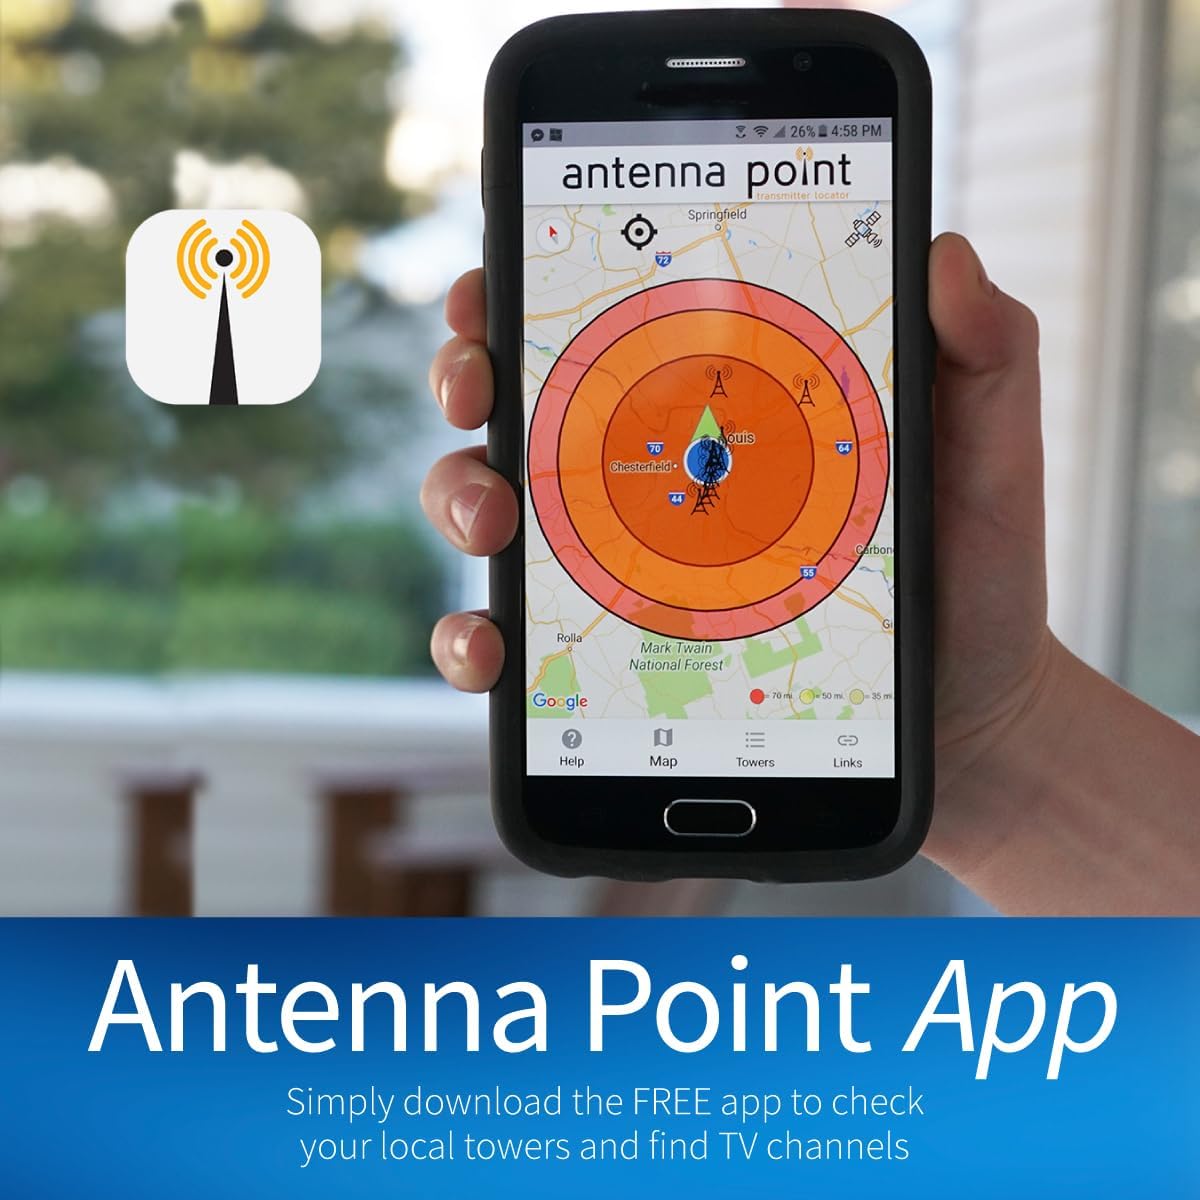
Figure 2: The Antenna Point App. This image shows a smartphone screen displaying a map with signal radius patterns and broadcast tower locations, assisting users in finding the best antenna placement.
- Testing Reception: Before permanent installation, temporarily position the antenna and perform a channel scan on your TV to test reception. Adjust the antenna's position and orientation as needed to maximize the number and quality of channels received.
- Permanent Mounting: Once the optimal location is found, mark the mast base position. Drill 1.5-inch deep holes using a 3/16-inch drill bit for each mounting bolt. Place sealing pads over each drilled hole, then position the base on top of the pads. Use a ratchet or drill to tighten the bolts securely.
- Leveling: Ensure the mast is adjusted to a vertical position using a level before attaching the antenna.

Figure 3: Multi-directional design of the antenna. This image highlights the antenna's capability to receive signals from various directions without requiring manual rotation.
4.3. Connecting to TV
- Connect one end of a coaxial cable (not included) to the antenna's F-connector.
- Route the coaxial cable to your TV, ensuring it is securely fastened and protected from damage.
- Connect the other end of the coaxial cable to the "Antenna In" or "RF In" port on your TV.
- If you are replacing a satellite dish, the existing coaxial cable can often be repurposed. Simply connect the antenna to the existing cable.
5. Operating Instructions
5.1. Channel Scan
After connecting the antenna, perform a channel scan on your TV to find available channels:
- Turn on your TV and select the correct input source (Antenna or Air).
- Navigate to your TV's menu settings. Look for options like "Channel Setup," "Auto Program," "Channel Scan," or "Tuner Setup."
- Select "Air" or "Antenna" as the signal type, then initiate the channel scan. This process may take several minutes.
- Once the scan is complete, your TV will display the available free over-the-air channels.

Figure 4: Connect, Scan, Watch. This visual guide illustrates the three simple steps to set up and enjoy free TV channels: connecting the antenna, scanning for channels on your TV, and then watching.
6. Maintenance
- Regular Inspection: Periodically inspect the antenna and its mounting hardware for any signs of wear, corrosion, or damage, especially after severe weather.
- Cable Check: Ensure coaxial cable connections remain tight and free from moisture. Use weather boots or electrical tape to protect outdoor connections.
- Cleaning: If necessary, gently clean the antenna elements with a soft cloth and mild detergent. Avoid abrasive cleaners.
- Rescan Channels: Occasionally rescan for channels, as broadcast frequencies or available channels in your area may change.
7. Troubleshooting
| Problem | Possible Cause | Solution |
|---|---|---|
| No Signal / Few Channels | Incorrect antenna aiming, obstructions, loose connections, TV not set to antenna input. |
|
| Pixelation / Intermittent Signal | Weak signal, interference, antenna not securely mounted. |
|
| Missing Specific Channels | Channel broadcasts on a different frequency band (VHF vs. UHF) or is too far. |
|
8. Specifications
| Feature | Detail |
|---|---|
| Model Number | C4MVJ |
| Product Dimensions | 31.3"L x 4"W x 17.4"H (31.3 x 4 x 17.4 inches) |
| Item Weight | 2.7 pounds |
| Frequency Bands | UHF, VHF (Multi-directional) |
| Maximum Range | 70 Miles |
| Compatibility | NEXTGEN TV, 4K, 8K UHD, Full HD 1080p |
| Impedance | 75 Ohms |
| Color | Black |
| Mounting Options | Indoor, Attic, Outdoor (20" mast with pivoting base) |
| UPC | 817848011613 |
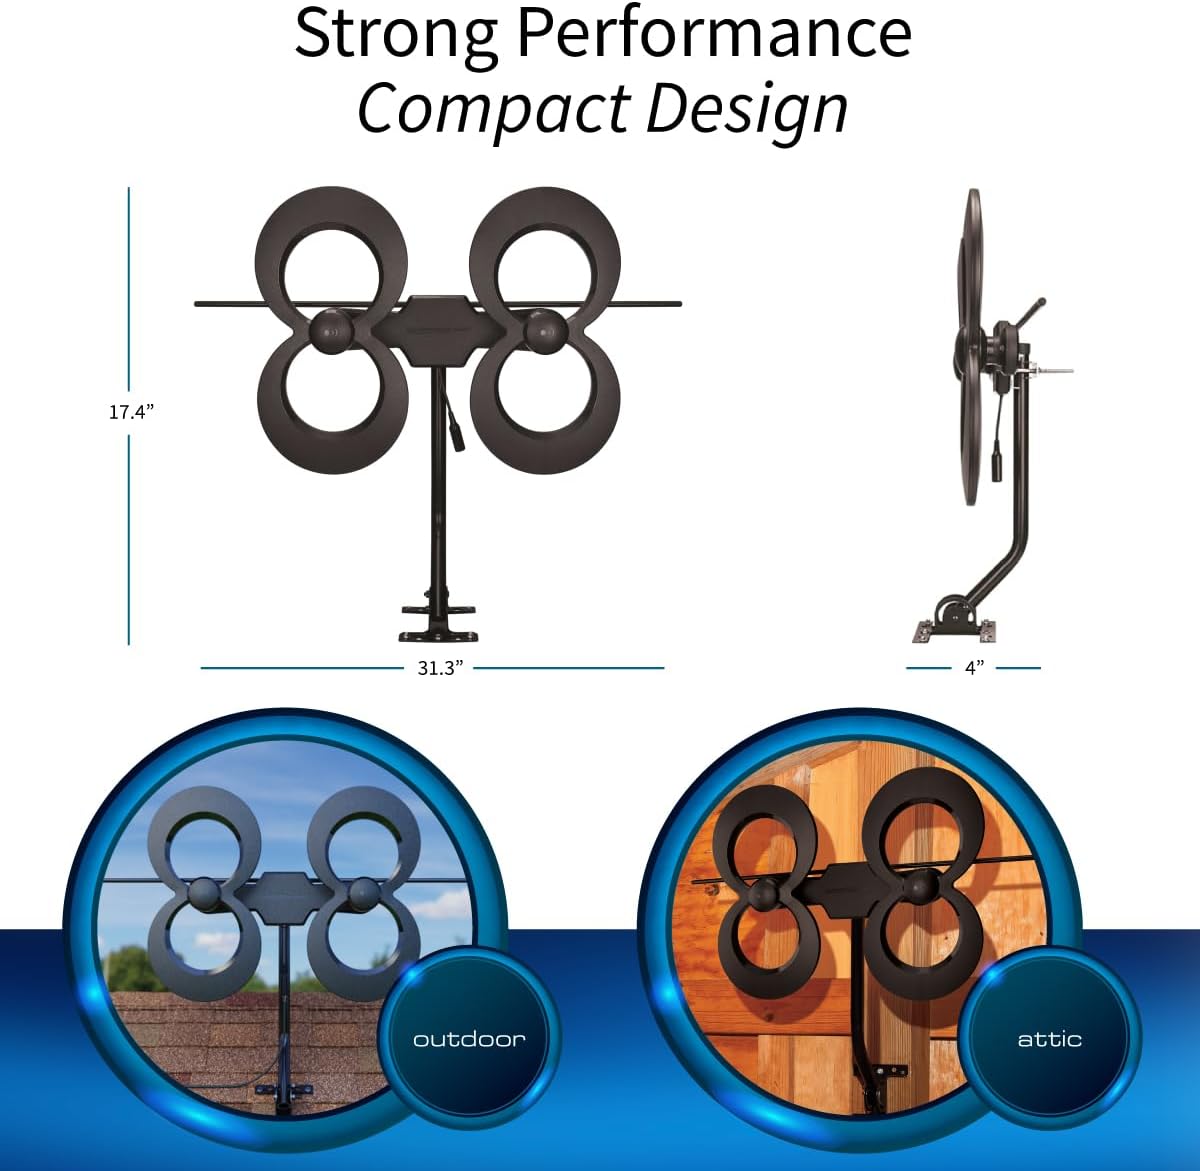
Figure 5: Strong Performance, Compact Design. This image illustrates the antenna's dimensions (17.4" H x 31.3" W x 4" D) and provides visual examples of its installation flexibility for both outdoor and attic environments.
9. Warranty Information
Antennas Direct products are designed for durability and performance. For specific warranty details regarding your ClearStream 4MAX antenna, please refer to the warranty documentation included with your purchase or visit the official Antennas Direct website. The manufacturer stands behind the quality of its products, offering support for optimal performance.
10. Customer Support
If you require assistance with installation, troubleshooting, or have any questions about your Antennas Direct ClearStream 4MAX antenna, please contact our dedicated support team:
- Phone Support: 1-877-825-5572 (Toll-Free United States)
- Online Support: Visit the Antennas Direct Store on Amazon or the official Antennas Direct website for FAQs, live chat, and additional resources.
Our support team is available to help ensure you get the best possible reception and experience with your antenna.


