1. Introduction
This manual provides instructions for the setup, operation, and maintenance of the OBO HANDS Biometric Time Clock, Model A6. This device is designed to record employee attendance using fingerprint, RFID card, or password verification methods. It features a 2.4-inch TFT HD color screen and supports direct export of attendance records via USB.
2. Setup
2.1 Unpacking and Components
Carefully unpack the device and ensure all components are present. The package typically includes the time clock unit and a power adapter.
2.2 Power Connection
Connect the provided power adapter to the device's power input port and then plug it into a standard electrical outlet. The device will power on automatically.
2.3 Initial Device Settings
Upon first power-on, or after a factory reset, you may need to configure basic settings such as date, time, and language. Navigate through the menu using the keypad and the 'OK' button.

Figure 1: Device screen displaying menu options.
2.4 Installation Options
The device supports both desktop placement and wall-mounting. For wall-mounting, use appropriate screws and anchors (not included) to secure the device in a suitable indoor location.

Figure 2: Wall-mounted installation of the time clock.
2.5 User Registration
To register users, access the 'Users' menu. The device supports up to 1000 fingerprints, 500 RFID cards, and 500 passwords. It can store up to 100,000 attendance records.
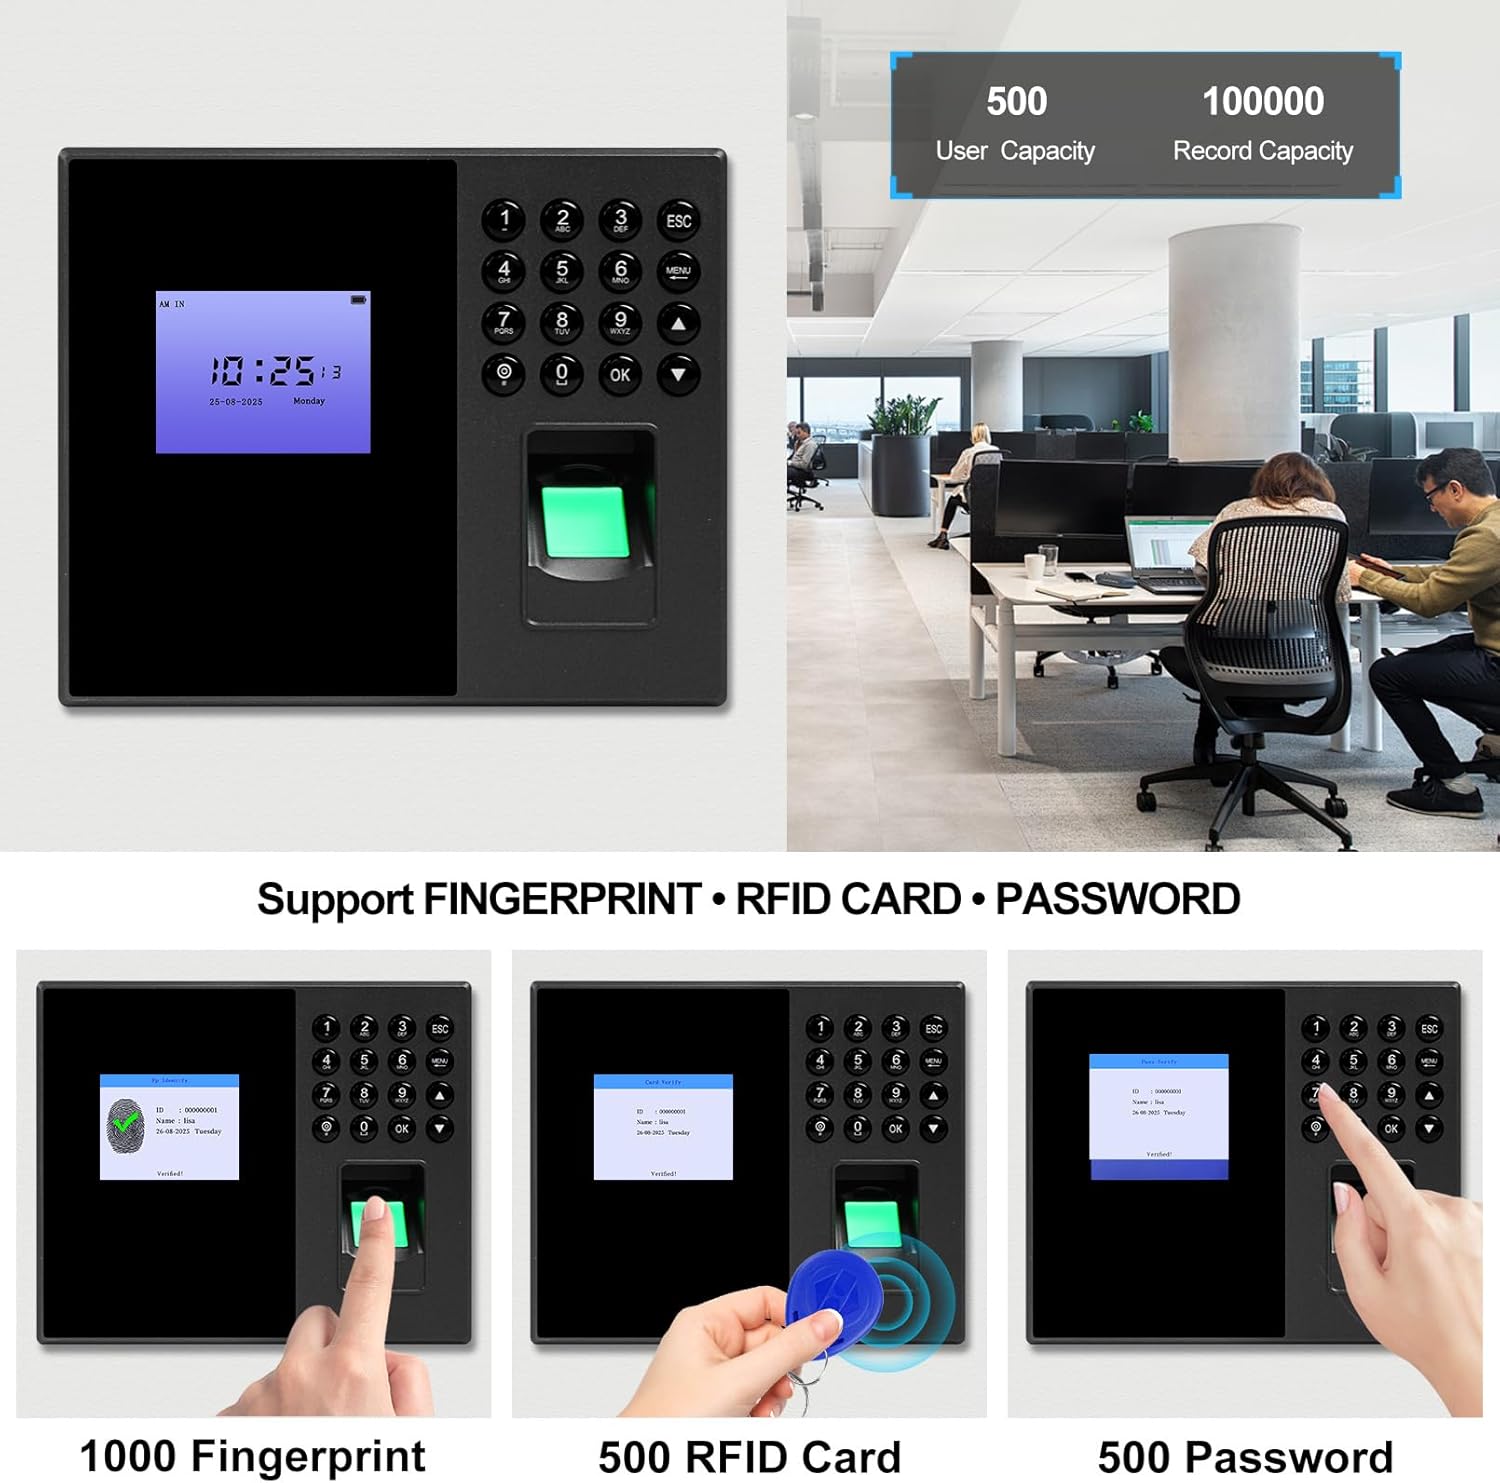
Figure 3: User and record capacity with supported attendance methods.
2.5.1 Fingerprint Registration
- From the main menu, select 'Users'.
- Choose 'Add User'.
- Select 'Fingerprint' as the verification method.
- Follow the on-screen prompts to place the user's finger on the scanner multiple times until registration is complete.
2.5.2 RFID Card Registration
- From the main menu, select 'Users'.
- Choose 'Add User'.
- Select 'Card' as the verification method.
- Present the RFID card to the device's card reader when prompted.
2.5.3 Password Registration
- From the main menu, select 'Users'.
- Choose 'Add User'.
- Select 'Password' as the verification method.
- Enter a numerical password using the keypad and confirm it.
3. Operating Instructions
3.1 Clocking In/Out
Users can clock in or out using their registered fingerprint, RFID card, or password. The device provides voice broadcast feedback for successful operations.
- Fingerprint: Place a registered finger on the scanner.
- RFID Card: Present a registered RFID card to the card reader.
- Password: Enter the registered password using the keypad and press 'OK'.
3.2 Menu Navigation
Press the 'MENU' button to access the main menu. Use the arrow keys to navigate and 'OK' to select. 'ESC' returns to the previous screen or the main display.

Figure 4: Main Menu Interface.
3.2.1 Advanced Settings Menu
The 'Advanced' menu contains settings for Company, Device, Time, and Device Test.

Figure 5: Advanced Settings Menu.
3.2.2 Shift Management Menu
The 'Shift' menu allows configuration of shifts, shift settings, rules, and schedules.

Figure 6: Shift Management Menu.
3.2.3 Information Viewing Menu
The 'Info' menu provides access to view records, admin logs, registration information, and device details.

Figure 7: Information Viewing Menu.
3.3 Exporting Attendance Reports
The device allows direct export of attendance records to an Excel-compatible format using a USB flash drive. No additional software is required.
- Insert a USB flash drive into the device's USB port.
- Navigate to the 'Report' menu.
- Select the desired report type and date range.
- Choose the option to export data to USB. The device will generate an Excel file on the flash drive.
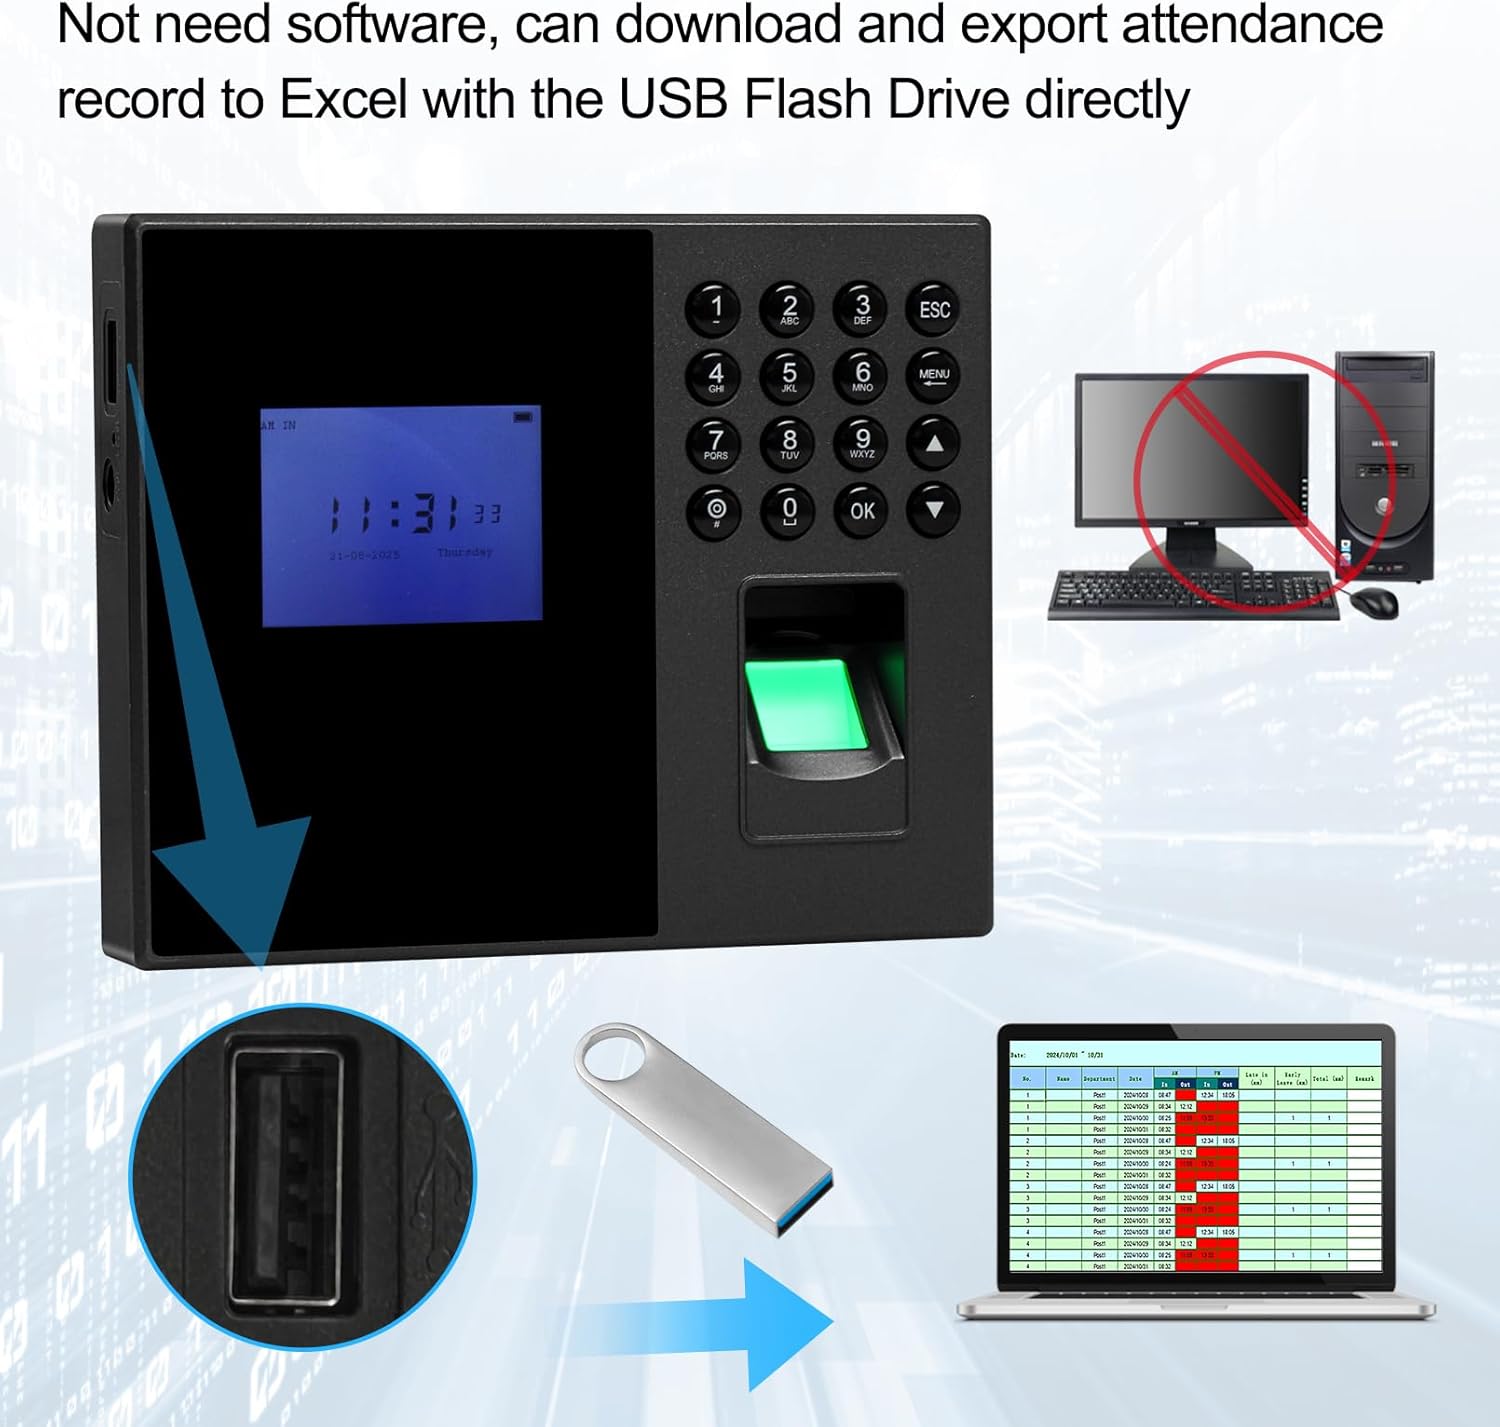
Figure 8: USB flash drive for data export to Excel.

Figure 9: Examples of attendance report formats.
4. Maintenance
4.1 Cleaning the Device
To ensure optimal performance, especially of the fingerprint scanner, regularly clean the device. Use a soft, dry cloth to wipe the screen and scanner surface. Avoid using abrasive cleaners or solvents.
4.2 Data Backup
Periodically export attendance records to a USB flash drive to create backups. This helps prevent data loss in case of unexpected device issues.
5. Troubleshooting
5.1 Fingerprint Recognition Issues
- Problem: Fingerprint not recognized.
- Solution: Ensure your finger is clean and dry. Place your finger flat on the scanner, covering the entire surface. Try re-registering the fingerprint if issues persist.
5.2 Incorrect Time Display
- Problem: Device displays incorrect time or date.
- Solution: Access the 'Time' settings in the 'Advanced' menu to adjust the date and time manually. Ensure the time zone is correctly set. The device is designed to maintain correct time even when unplugged.
5.3 Attendance Report Issues
- Problem: Exported Excel reports are difficult to interpret.
- Solution: Review the report structure carefully. The reports are generated in a standard format. If specific columns or data points are unclear, refer to the device's 'Info' menu for explanations or contact support for clarification on report interpretation.
5.4 Device Not Powering On
- Problem: Device does not turn on when connected to power.
- Solution: Check the power adapter and cable for any damage. Ensure the power outlet is functional. Try using a different power outlet. If the issue persists, contact customer support.
6. Specifications
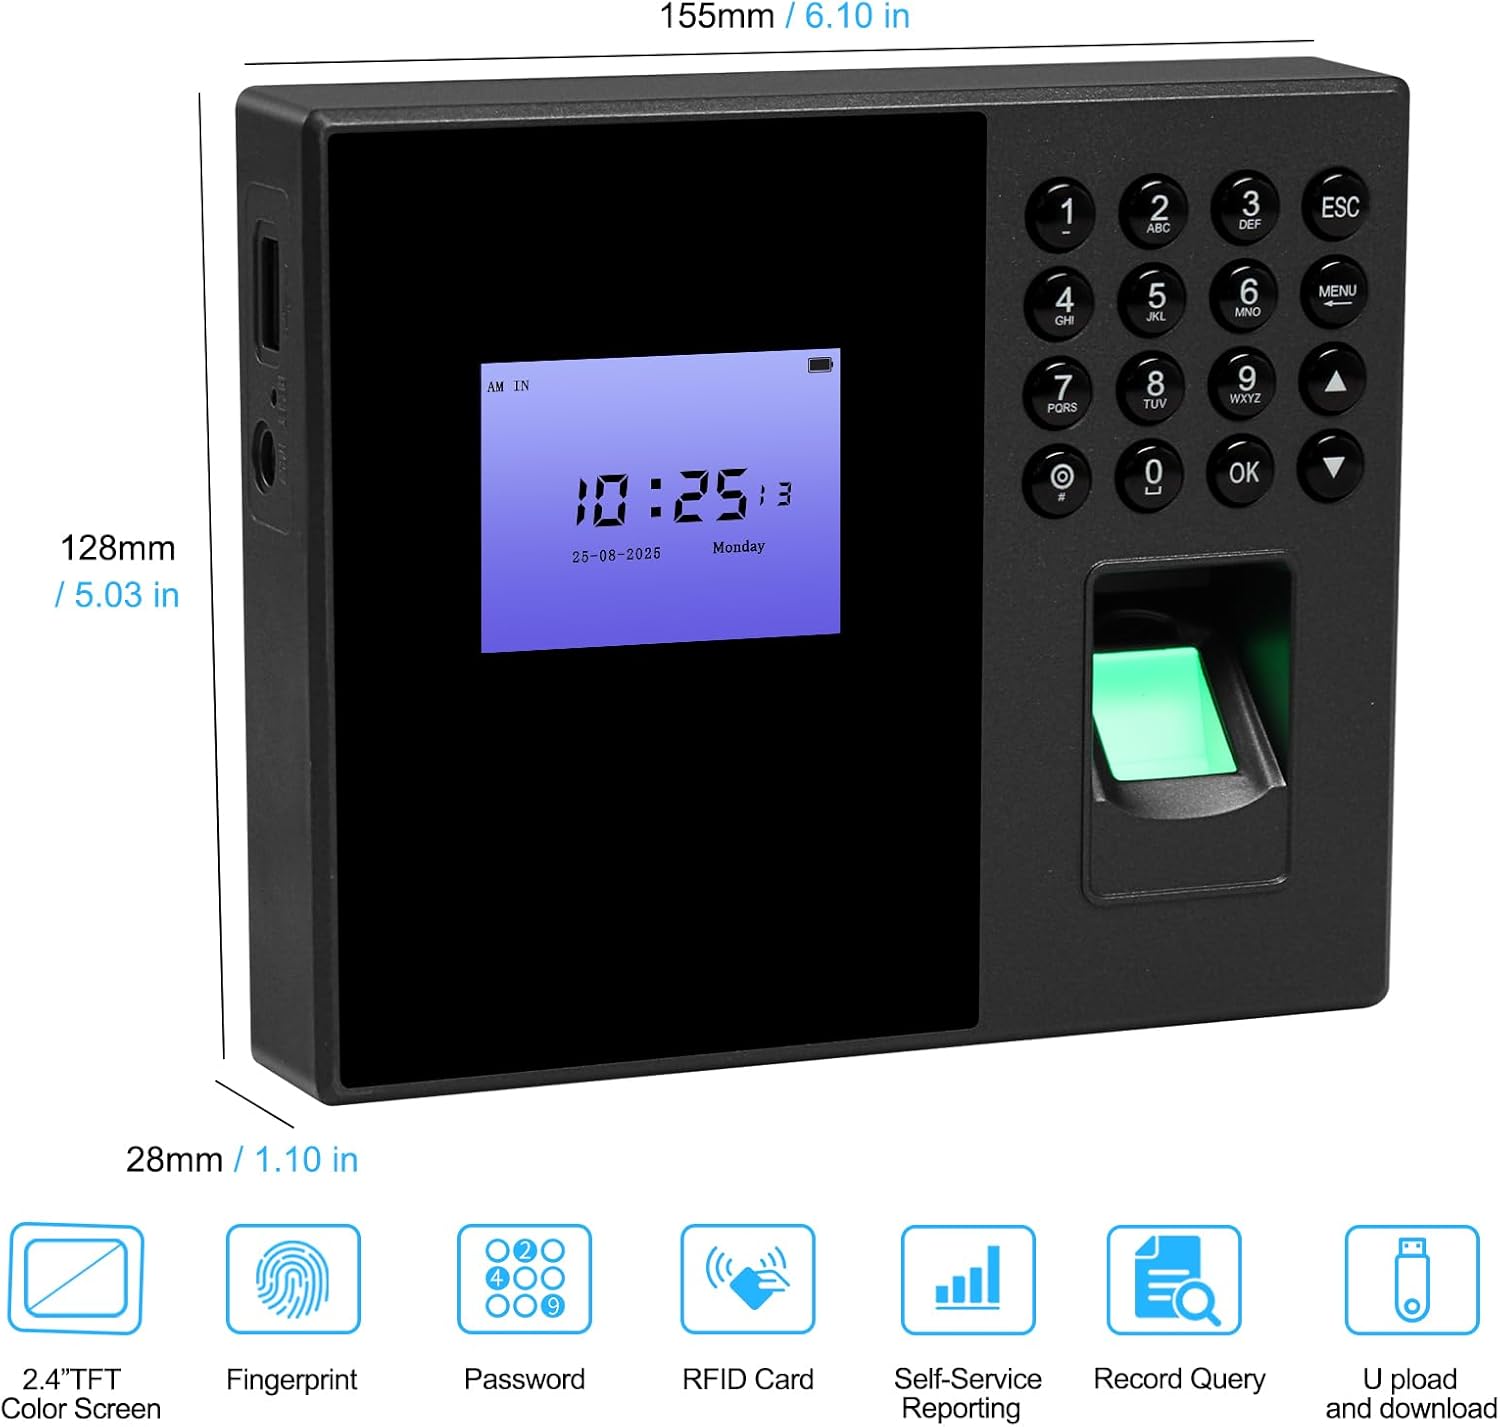
Figure 10: Device dimensions and key features.
| Feature | Detail |
|---|---|
| Model Number | A6 |
| Brand | OBO HANDS |
| Scanner Type | ID Card (also supports Fingerprint, Password) |
| Connectivity Technology | USB |
| Resolution | 500 DPI (for fingerprint sensor) |
| Fingerprint Capacity | 1000 |
| Password Capacity | 500 |
| RFID Card Capacity | 500 |
| Record Capacity | 100,000 |
| Display | 2.4-inch TFT HD Color Screen |
| Item Weight | 7.7 ounces |
| Package Dimensions | 14.21 x 11.61 x 2.09 inches |
| Minimum System Requirements | Windows 7 (for report viewing on PC) |
| UPC | 737353860493 |
7. Warranty Information
Please refer to your purchase documentation or contact the retailer for specific warranty terms and conditions applicable to your OBO HANDS Biometric Time Clock Model A6.
8. Customer Support
For technical assistance or inquiries, please contact OBO HANDS customer support:
- WhatsApp: +86 177 2255 8183 (Available Mon-Sun 24/7)


