
eclife BT-02
Contents
eclife 24-inch Farmhouse Bathroom Vanity Sink Combo (Model BT-02) Instruction Manual
Model: BT-02
1. Introduction
This manual provides detailed instructions for the assembly, installation, operation, and maintenance of your eclife 24-inch Farmhouse Bathroom Vanity Sink Combo. Please read all instructions carefully before beginning installation and retain this manual for future reference.
The eclife vanity combo features a modern design with a black MDF cabinet, a white square ceramic vessel sink, a solid faucet, and a pop-up drain. It is designed for durability and ease of use.

2. Package Contents
Verify that all components listed below are present and undamaged before proceeding with assembly.
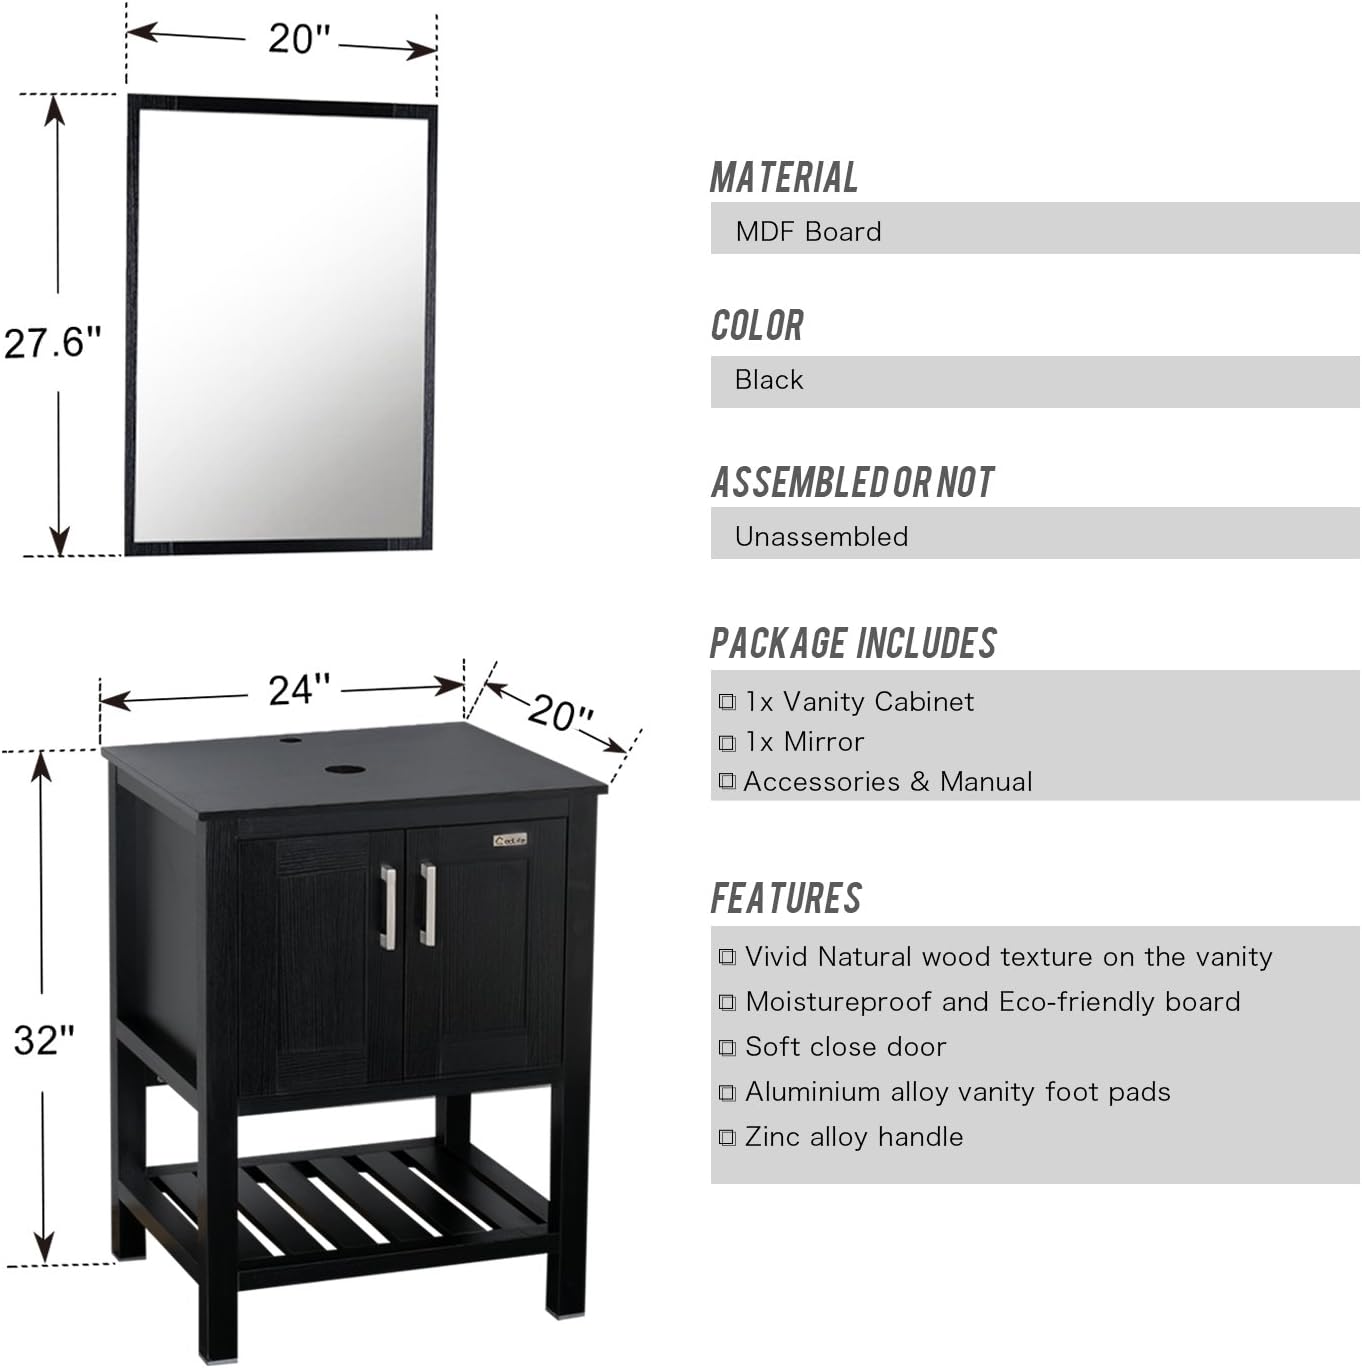
- 1x Vanity Cabinet
- 1x Vessel Sink
- 1x Faucet
- 1x Hot and Cold Water Supply Pipe (1/2'' connector)
- 1x Pop Up Drain
- 1x Mirror
- 1x Installation Manual (this document)
- 1x Accessories Package (hardware for assembly)
3. Product Features
- Cabinet Material: Constructed from MDF board, offering humidity and corrosion resistance, ease of cleaning, and wear resistance for long-term use.
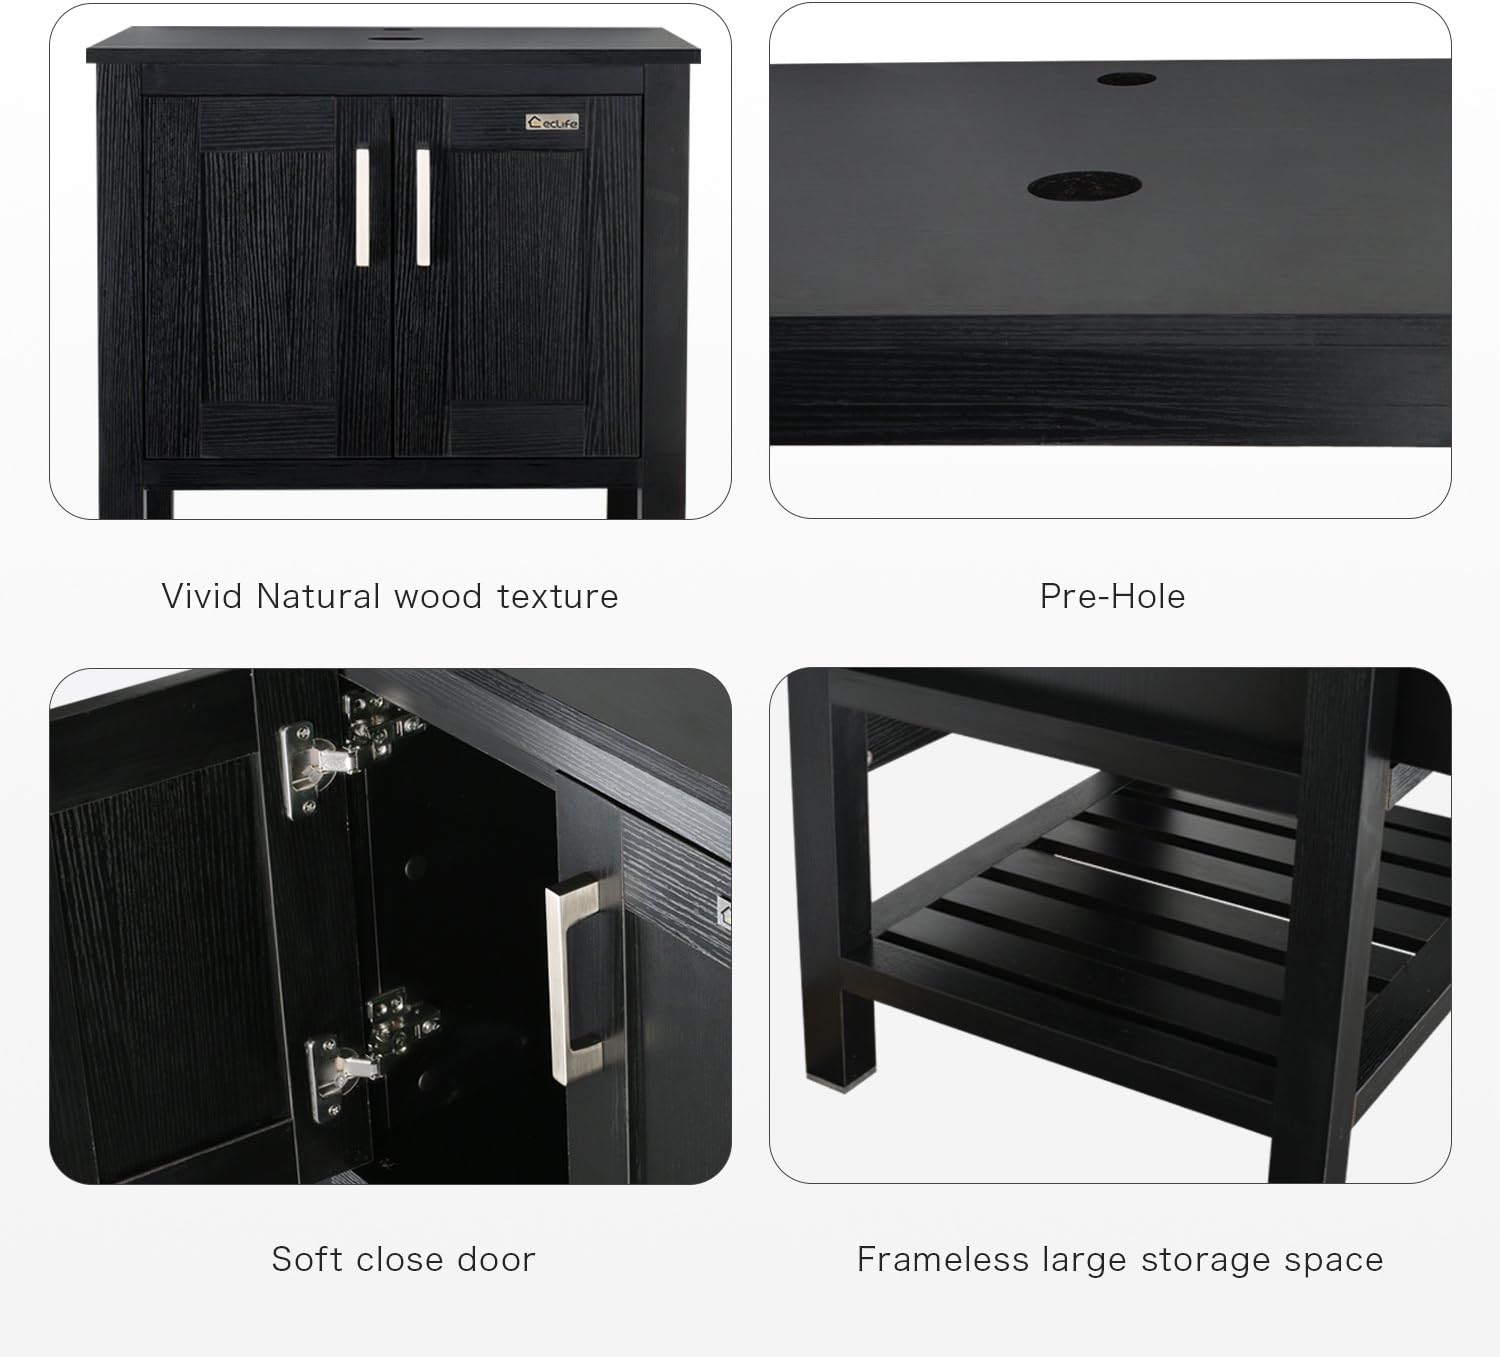
- Design: Features a vivid natural wood texture on the vanity, enhancing its modern and elegant appearance.
- Door Mechanism: Equipped with 304 stainless steel hinges with dampers for soft-closing doors, tested for thousands of fatigue cycles.
- Hardware: Includes zinc alloy handles and aluminum alloy vanity foot pads for durability.
- Sink: White square ceramic vessel sink with a scratch and stain-resistant surface, making it easy to clean.
- Faucet: Chrome-finished faucet with solid brass construction, ceramic disc cartridge, and 1.5 GPM aerator for efficient water flow.
- Drain: Solid brass pop-up drain with a chrome finish.
- Storage: Frameless large storage space within the cabinet and an open bottom storage shelf.


4. Specifications
| Brand | eclife |
| Model Number | BT-02 |
| Color | Black (Cabinet), White (Sink) |
| Material | MDF Board (Cabinet), Ceramic (Sink), Stainless Steel (Faucet/Drain components) |
| Product Dimensions (Vanity) | 20"D x 24"W x 32"H |
| Sink Dimensions | 16.3" x 16.3" x 4.8" (Square Vessel Sink) |
| Faucet Height | 12" |
| Installation Type | Countertop (Sink), Floor Mount (Vanity) |
| Drain Type | Pop-Up |
| Item Weight | 122.8 Pounds |
| Maximum Weight Capacity | 150 Pounds |
| UPC | 728360146984 |

5. Setup and Installation
Professional installation is recommended for plumbing connections. Ensure all local plumbing codes are followed.
5.1. Vanity Cabinet Assembly
- Unpack all components and verify against the package contents list.
- Identify all panels (sides, back, bottom, top, shelf, doors) and hardware (screws, dowels, hinges, handles).
- Assemble the main cabinet structure using the provided hardware. Follow the specific instructions in the included accessory package for detailed steps.
- Attach the bottom storage shelf to the cabinet.
- Install the cabinet doors using the soft-close hinges.
- Attach the aluminum alloy vanity foot pads to the base of the cabinet.
- Install the zinc alloy handles onto the cabinet doors.
5.2. Sink and Faucet Installation
- Place the vessel sink onto the pre-drilled holes on the vanity top. Ensure proper alignment.
- Install the faucet through the designated hole on the vanity top. Secure it according to the faucet manufacturer's instructions.
- Install the pop-up drain into the sink's drain opening. Apply plumber's putty or silicone sealant as required to ensure a watertight seal.
- Connect the hot and cold water supply pipes to the faucet's inlet lines and your home's water supply. Ensure all connections are tight to prevent leaks.
- Connect the pop-up drain to the P-trap and the main drain line.
5.3. Mirror Installation
Mount the mirror to the wall at your desired height using appropriate wall anchors and screws (not always included, check accessory package).
5.4. Hinge Adjustment
If the cabinet doors are not aligned correctly or do not close smoothly, adjust the hinges as shown in the video below.
6. Operation
The eclife bathroom vanity combo is designed for straightforward operation.
6.1. Faucet Operation
- To turn on the water, lift the faucet handle.
- Adjust water temperature by moving the handle left for hot water and right for cold water.
- Adjust water flow by raising or lowering the handle.
- To turn off the water, push the handle down to its original position.
6.2. Pop-Up Drain Operation
- To close the drain and fill the sink, press the top of the pop-up drain down.
- To open the drain and allow water to flow out, press the top of the pop-up drain again.
6.3. Cabinet and Storage
- The cabinet doors feature soft-close hinges, preventing slamming.
- Utilize the internal cabinet space and the open bottom shelf for storing bathroom essentials.
7. Care and Maintenance
Proper care will ensure the longevity and appearance of your vanity combo.
7.1. Cabinet Care
- Clean the MDF cabinet surfaces with a soft, damp cloth. Avoid abrasive cleaners or harsh chemicals.
- Wipe spills immediately to prevent moisture damage.
- Do not use excessive water when cleaning to protect the wood texture finish.
7.2. Sink Care
- Clean the ceramic vessel sink with mild soap and water.
- For stubborn stains, use a non-abrasive ceramic cleaner.
- Rinse thoroughly after cleaning to remove all soap residue.
- Avoid dropping heavy objects into the sink to prevent chipping or cracking.
7.3. Faucet and Drain Care
- Clean chrome-finished surfaces with a soft cloth and mild, non-abrasive cleaner specifically designed for chrome.
- Do not use cleaners containing ammonia, bleach, or abrasive particles, as these can damage the finish.
- Regularly check for and clean any mineral deposits around the faucet aerator to maintain optimal water flow.
8. Troubleshooting
This section addresses common issues you might encounter with your vanity combo.
| Problem | Possible Cause | Solution |
|---|---|---|
| Water Leakage | Loose plumbing connections, damaged seals. | Check all water supply and drain connections for tightness. Ensure plumber's putty or sealant is properly applied around the drain. Replace any damaged washers or seals. |
| Slow Drainage | Partial clog in the drain or P-trap. | Remove and clean the pop-up drain assembly. Inspect the P-trap for obstructions and clear if necessary. |
| Faucet Drips | Worn-out ceramic disc cartridge. | Contact customer support for a replacement ceramic disc cartridge. |
| Cabinet Doors Misaligned | Hinges require adjustment. | Refer to Section 5.4 and Video 5.1 for instructions on adjusting the soft-close hinges. |
9. Warranty Information
This eclife product comes with a Limited Lifetime Warranty. For specific details regarding coverage, terms, and conditions, please refer to the warranty card included in your accessories package or contact eclife customer support.
10. Customer Support
For further assistance, missing parts, or warranty claims, please contact eclife customer support. You can find more information and contact details on the official eclife store page:
Documents and downloads
Ask a question about this manual
Ask about setup, troubleshooting, compatibility, parts, safety, or missing instructions. Manuals+ will review the question and use this page’s manual context to help answer it.