1. Introduction
This manual provides detailed instructions for the installation, operation, and maintenance of your Lorex LNB8005 4K UHD IP Bullet Security Camera. This camera is designed for both indoor and outdoor surveillance, offering high-resolution video and advanced features to enhance your security system.
Key Features:
- 4K Ultra HD Resolution: Captures video at 8 Megapixel (3840x2160) resolution for superior clarity.
- Power over Ethernet (PoE): Simplifies installation by providing power and video transmission through a single Ethernet cable.
- Color Night Vision (CNV): Provides full-color video in low-light conditions for improved object recognition.
- IR Night Vision: Extends visibility up to 130ft (40m) in complete darkness using infrared illumination.
- True High Dynamic Range (HDR): Balances light and dark areas in the video for optimal image quality.
- Weatherproof Design: IP66 rated for reliable performance in various weather conditions.
2. What's in the Box
Please verify that all components are present before beginning installation:
- 1 × Lorex LNB8005 Ultra HD 8MP Security Camera
- 1 × 18m (60ft) Camera Cable
- 1 × Mounting Kit (screws and wall plugs)
- Quick Setup Guide
3. Product Overview
Familiarize yourself with the components of your Lorex LNB8005 camera.

Figure 3.1: Front view of the Lorex LNB8005 camera, showing the lens, IR LEDs, and light sensor.

Figure 3.2: Angled view of the Lorex LNB8005 camera, highlighting the bullet design and Lorex branding on the side.

Figure 3.3: A slightly different angled perspective of the Lorex LNB8005 camera, showcasing its robust housing and mounting bracket.
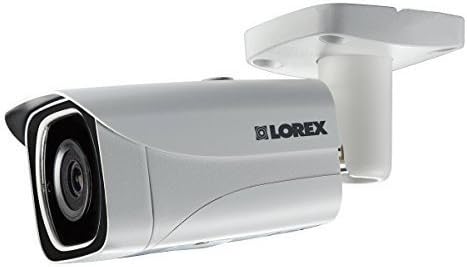
Figure 3.4: Side view of the Lorex LNB8005 camera, illustrating its compact profile and the adjustable mounting arm.
4. Setup
4.1. Installation Location
The Lorex LNB8005 camera is IP66 rated, making it suitable for both indoor and outdoor use. Choose a location that provides the desired field of view and is within reach of your network cable. Consider mounting the camera high enough to prevent tampering but low enough for easy access during installation.
4.2. Mounting the Camera
- Prepare the Surface: Ensure the mounting surface (wall or ceiling) is clean and sturdy enough to support the camera's weight.
- Mark Drill Holes: Use the included mounting template or the camera base to mark the positions for drilling.
- Drill Holes: Drill pilot holes at the marked positions. Insert the provided wall plugs if mounting on drywall or masonry.
- Secure the Camera: Align the camera's base with the drilled holes and secure it using the provided screws.
- Adjust Angle: Loosen the adjustment screw on the camera's bracket to set the desired viewing angle. Tighten the screw once the angle is set.
4.3. Connecting the Camera
The LNB8005 camera supports Power over Ethernet (PoE), allowing both power and data to be transmitted over a single Ethernet cable. Alternatively, it can be powered via a 12V DC power barrel (adapter sold separately).
- Ethernet Connection: Connect one end of the included 18m (60ft) camera cable to the RJ45 Ethernet port on the camera. Connect the other end to a PoE-enabled NVR (Network Video Recorder) or a PoE switch.
- (Optional) DC Power Connection: If not using PoE, connect a compatible 12V DC power adapter (not included) to the camera's DC power barrel.
- Network Configuration: Once connected to your NVR or network, the camera will typically obtain an IP address automatically. Refer to your NVR's manual for specific steps on adding and configuring IP cameras.
5. Operating
5.1. Video Monitoring
Access the camera's live view and recorded footage through your Lorex NVR or compatible viewing software/app. The camera provides 4K (3840x2160) resolution at 15 frames per second, ensuring clear and detailed video.
5.2. Night Vision Modes
The LNB8005 camera features two primary night vision modes:
- Color Night Vision (CNV): In low-light conditions, the camera can maintain a full-color image, providing more detail than traditional black and white infrared. This feature requires a minimum ambient light level.
- IR Night Vision: When light levels are too low for CNV, the camera automatically switches to infrared (IR) mode, providing clear black and white video up to 130ft (40m) using its built-in 850nm IR LEDs.
5.3. Motion Detection
The camera supports motion-only alerts. Configure motion detection zones and sensitivity settings via your NVR or camera interface to receive notifications and trigger recordings when activity is detected in specified areas.
5.4. Advanced Features
- True High Dynamic Range (HDR): This feature automatically adjusts the image to ensure optimal exposure in scenes with both very bright and very dark areas, preventing overexposure or underexposure.
- Video Compression: Supports H.265 and H.264 video compression, which efficiently reduces file sizes while maintaining video quality, saving storage space and bandwidth.
6. Maintenance
Regular maintenance helps ensure optimal performance and longevity of your security camera.
- Cleaning the Lens and Housing: Periodically clean the camera lens and housing with a soft, damp cloth. Avoid using harsh chemicals or abrasive materials that could scratch the lens or damage the finish.
- Checking Connections: Ensure all cable connections (Ethernet, power) are secure and free from corrosion or damage.
- Firmware Updates: Check the Lorex website or your NVR's settings for available firmware updates. Keeping your camera's firmware updated can improve performance, add new features, and enhance security.
- Environmental Checks: While the camera is designed for outdoor use, periodically inspect it for any signs of wear or damage due to extreme weather conditions. Ensure no obstructions are blocking the camera's view.
7. Troubleshooting
If you encounter issues with your Lorex LNB8005 camera, refer to the following common problems and solutions:
| Problem | Possible Cause | Solution |
|---|---|---|
| No video feed from camera | No power; Loose cable connection; Network issue; Incorrect IP address. | Check PoE connection or 12V DC power supply. Ensure Ethernet cable is securely connected. Verify network connectivity to the NVR/switch. Confirm camera's IP address is correct and accessible. |
| Poor image quality / blurry video | Dirty lens; Condensation; Incorrect focus (less common for fixed lens); Low light conditions. | Clean the camera lens. Allow time for condensation to clear. Ensure adequate lighting for optimal image quality, especially for Color Night Vision. |
| Night vision not working | IR LEDs obstructed; Insufficient power; IR cut filter stuck. | Ensure nothing is blocking the IR LEDs. Verify stable power supply. If the issue persists, a factory reset or contacting support may be necessary. |
| Motion detection not triggering | Incorrect sensitivity settings; Motion detection zone not configured; Obstructions in view. | Adjust motion detection sensitivity and reconfigure detection zones in your NVR settings. Clear any physical obstructions from the camera's field of view. |
For more complex issues or if the problem persists, please refer to the Lorex support website or contact their technical support team.
8. Specifications
Detailed technical specifications for the Lorex LNB8005 4K UHD IP Bullet Security Camera:
| Feature | Specification |
|---|---|
| Model Number | LNB8005 |
| Image Sensor | 1/2.5" 8MP |
| Video Resolution | 8MP/4K (3840x2160) @ 15fps |
| Video Compression | H.265/H.264 |
| Lens Type | 4mm F1.6 Fixed Lens |
| Field of View (Horizontal) | 88° |
| Night Vision Type | Color Night Vision (CNV), IR Night Vision (850nm) |
| IR Night Vision Range | 130ft (40m) / 90ft (27m) |
| Minimum Illumination | 0.5 lux (without IR), 0.3 lux (with IR) |
| Power Requirement | PoE (Power over Ethernet) Class 0 / 12V DC (optional) |
| Power Consumption | Max. 330mA / 4W |
| Operating Temperature | -22° ~ 140°F / -30° ~ 60°C |
| Operating Humidity | <95% RH |
| Environmental Rating | IP66 (Indoor / Outdoor) |
| Dimensions (L x W x H) | 6 x 8 x 2 inches |
| Weight | 1lb / 0.5kg (camera only); 2.89 pounds (shipping) |
| Material | Aluminum |
| Connectivity Protocol | Ethernet, Wi-Fi (for certain configurations) |
| Mounting Type | Wall Mount |
| Alert Type | Motion Only |
9. Warranty & Support
9.1. Product Warranty
For detailed information regarding the warranty coverage for your Lorex LNB8005 camera, please refer to the official Lorex website or the warranty card included with your product. Warranty terms and conditions may vary by region and purchase date.
9.2. Technical Support
If you require technical assistance, have questions about your product, or need to troubleshoot an issue not covered in this manual, please contact Lorex customer support. You can typically find support contact information, FAQs, and additional resources on the official Lorex website:
- Lorex Official Website: www.lorex.com
- Support Section: Look for a 'Support' or 'Contact Us' link on their website for phone numbers, live chat, or email options.
Please have your product model number (LNB8005) and purchase information ready when contacting support.


