1. Introduction
This manual provides detailed instructions for the assembly, operation, maintenance, and troubleshooting of your Explore Scientific FirstLight 130mm Newtonian Reflector Telescope with Equatorial Mount. Please read this manual thoroughly before using your telescope to ensure proper setup and optimal performance. This telescope is designed for observing celestial objects such as planets, the Moon, and deep-sky objects like galaxies and nebulae.
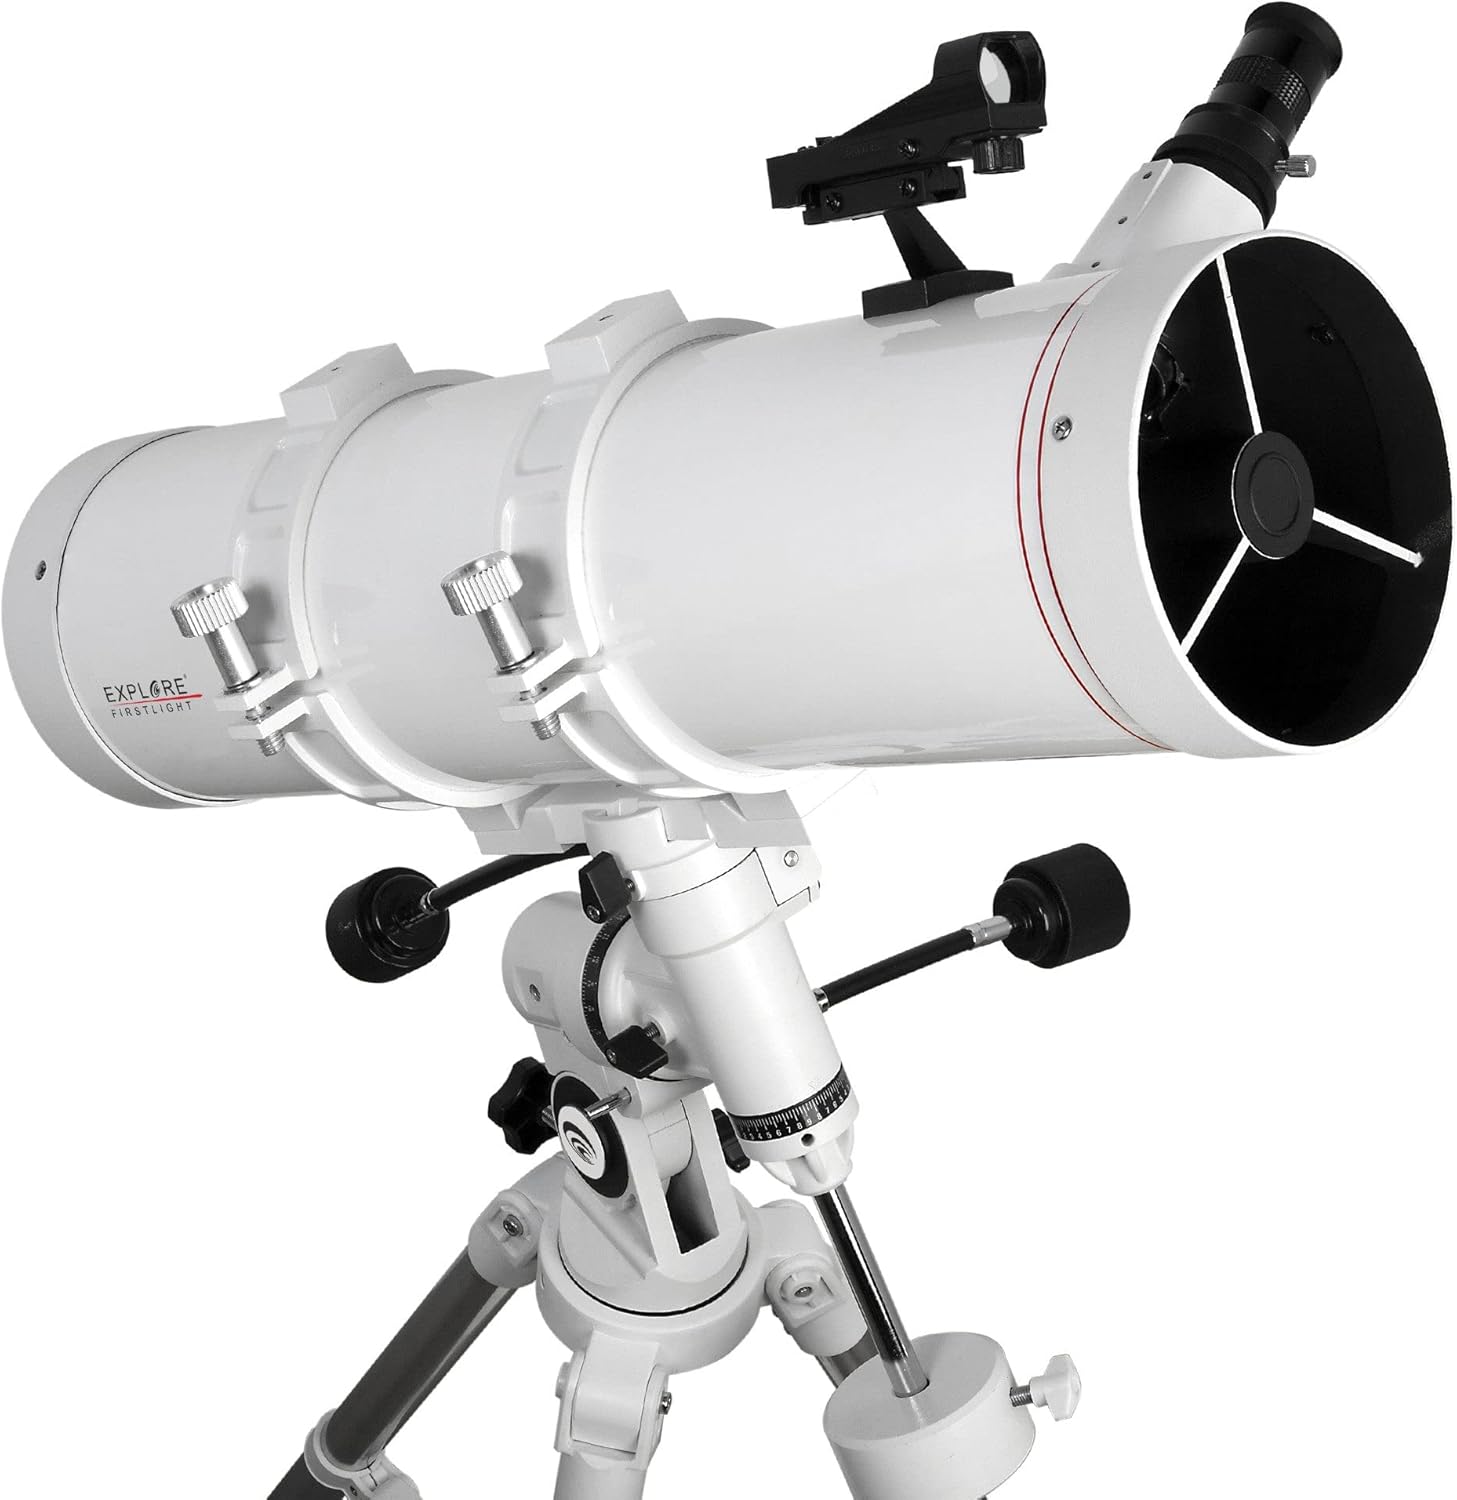
Image 1.1: The Explore Scientific FirstLight 130mm Newtonian Reflector Telescope, fully assembled on its equatorial mount and tripod.
2. Package Contents
Verify that all components listed below are present in your package:
- 1x Telescope Optical Tube (130mm Newtonian Reflector)
- 1x Equatorial Mount (EXOS Nano EQ3 German Equatorial mount)
- 1x Tripod (Full size with accessory tray)
- 1x 25mm Plössl Eyepiece
- 1x Red-Dot Finder
- 1x Smartphone Camera Adapter
- 1x Focuser (40mm draw tube)
- 2x Flexible Slow-Motion Control Shafts
- 1x Counterweight (2.5 lbs)
3. Setup and Assembly
Follow these steps to assemble your telescope. It is recommended to perform the initial assembly indoors in a well-lit area.
3.1. Tripod Assembly
- Unfold the tripod legs and extend them to your desired height. Secure the leg locks.
- Attach the accessory tray to the center brace of the tripod. This tray provides stability and a convenient place for eyepieces.

Image 3.1: The tripod and equatorial mount assembled, showing the accessory tray and counterweight shaft.
3.2. Equatorial Mount Attachment
- Place the equatorial mount head onto the tripod's mounting platform. Secure it using the large knob or bolt located underneath the tripod head.
- Thread the counterweight shaft into the mount. Slide the 2.5 lb counterweight onto the shaft and secure it with the locking screw.
- Attach the two flexible slow-motion control shafts to the appropriate gears on the Right Ascension (RA) and Declination (DEC) axes of the mount. These allow for fine adjustments.

Image 3.2: A detailed view of the equatorial mount, highlighting the slow-motion control shafts and the counterweight system.
3.3. Optical Tube Installation
- Locate the mounting rings on the optical tube. Open the rings and place the telescope tube onto the equatorial mount's dovetail plate. Close and tighten the rings securely.
- Ensure the telescope is balanced on the mount. Adjust the position of the optical tube within the mounting rings and the counterweight on its shaft until the telescope remains stable when the RA and DEC clutches are disengaged. This prevents strain on the mount and allows for smoother tracking.
3.4. Finderscope and Eyepiece Installation
- Attach the Red-Dot Finder to its designated bracket on the optical tube. Ensure it is securely fastened.
- Insert the 25mm Plössl eyepiece into the focuser. Secure it with the thumbscrew on the focuser.
- If desired, attach the Smartphone Camera Adapter to the eyepiece. Follow the adapter's instructions for securing your smartphone.
4. Operating the Telescope
4.1. Aligning the Red-Dot Finder
The red-dot finder helps you locate objects in the night sky. It must be aligned with the main telescope before use.
- During daylight hours, point the main telescope at a distant, easily identifiable object (e.g., a distant tree or lamppost). Center the object in the telescope's eyepiece.
- Turn on the red-dot finder. Look through the finder and use its adjustment screws to move the red dot until it is centered on the same object you see in the main telescope's eyepiece.
- Once aligned, the red-dot finder will accurately indicate where the main telescope is pointing.
4.2. Polar Alignment (for Equatorial Mount)
For accurate tracking of celestial objects, the equatorial mount must be polar aligned. This means aligning the mount's polar axis with the Earth's rotational axis (towards Polaris in the Northern Hemisphere).
- Set up your telescope in a location with a clear view of the northern sky (if in the Northern Hemisphere).
- Adjust the mount's latitude setting to match your geographical latitude.
- Loosen the azimuth and altitude adjustment knobs on the mount.
- Point the polar axis of the mount towards Polaris (the North Star). Use the altitude adjustment to raise or lower the axis, and the azimuth adjustment to move it left or right.
- Once Polaris is centered in the polar axis (or as close as possible without a polar scope), tighten the azimuth and altitude knobs.
Precise polar alignment is crucial for astrophotography and extended visual observation without constant manual adjustments.
4.3. Locating and Observing Objects
- With the red-dot finder aligned, use it to point the telescope at your desired celestial object.
- Look through the main telescope's eyepiece. The object should be visible, though perhaps not perfectly centered.
- Use the slow-motion control shafts on the RA and DEC axes to center the object in the eyepiece.
- Adjust the focuser knob until the image is sharp and clear.
- As the Earth rotates, objects will drift out of view. Use the RA slow-motion control to track them, keeping them centered in the eyepiece.
4.4. Using the Smartphone Camera Adapter
The included smartphone adapter allows you to capture images through the telescope.
- Attach the adapter to the eyepiece as per its instructions.
- Secure your smartphone to the adapter, ensuring the camera lens is aligned with the eyepiece.
- Open your smartphone's camera app. Adjust the phone's position on the adapter until the telescope's view is centered on your screen.
- Use your phone's camera controls to adjust exposure, focus, and capture images or videos.
5. Maintenance
Proper care will ensure the longevity and performance of your telescope.
5.1. Cleaning Optics
- Dust: Use a soft camel hair brush or a can of compressed air (held upright to prevent propellant discharge) to gently remove loose dust from the primary mirror and eyepiece lenses.
- Smudges/Fingerprints: For stubborn marks, use a specialized optical cleaning solution and lens tissue. Apply a small amount of solution to the tissue, not directly to the lens, and gently wipe in a circular motion from the center outwards. Avoid excessive pressure.
- Never touch optical surfaces with bare fingers.
5.2. General Care
- Store the telescope in a dry, dust-free environment when not in use. Use dust caps for the optical tube and eyepieces.
- Avoid exposing the telescope to extreme temperatures or sudden temperature changes, which can cause condensation.
- Periodically check all screws and bolts for tightness, especially on the mount and tripod. Do not overtighten.
6. Troubleshooting
Here are solutions to common issues you might encounter:
| Problem | Possible Cause | Solution |
|---|---|---|
| Image is blurry or out of focus. | Focuser not adjusted correctly. | Adjust the focuser knob slowly until the image is sharp. Ensure the eyepiece is fully inserted and secured. |
| Cannot find objects. | Red-dot finder is not aligned. | Re-align the red-dot finder with the main telescope during daylight hours (refer to Section 4.1). |
| Objects drift out of view quickly. | Equatorial mount not polar aligned or RA clutch loose. | Perform polar alignment (refer to Section 4.2). Ensure the RA clutch is engaged. Use the RA slow-motion control for tracking. |
| Image appears dim or faint. | Light pollution, atmospheric conditions, or object is inherently faint. | Observe from a dark-sky location. Allow your eyes to adapt to the dark. Some deep-sky objects are naturally faint and require patience. |
7. Specifications
| Feature | Detail |
|---|---|
| Optical Design | Newtonian Reflector |
| Aperture | 130 mm |
| Focal Length | 600 mm |
| Focal Ratio | f/4.6 |
| Focuser | 40mm Draw Tube |
| Eyepiece Included | 25mm Plössl |
| Finderscope | Red-Dot Reflex Finder |
| Mount Type | EXOS Nano EQ3 German Equatorial Mount |
| Tripod | Full-size with accessory tray |
| Counterweight | 2.5 lbs |
| Included Accessories | Smartphone Camera Adapter |
| Item Weight | 13.5 Pounds (approx. 6.12 kg) |
| Dimensions (LxWxH) | 34.45 x 9.45 x 20.08 inches (approx. 87.5 x 24 x 51 cm) |
8. Warranty and Support
8.1. Warranty Information
This Explore Scientific FirstLight 130mm Newtonian Reflector Telescope comes with a Limited USA One Year Warranty. Please retain your proof of purchase for warranty claims. For specific terms and conditions, refer to the warranty card included with your product or visit the official Explore Scientific website.
8.2. Customer Support
For technical assistance, troubleshooting beyond this manual, or warranty service, please contact Explore Scientific customer support. Contact information can typically be found on the manufacturer's website or on the product packaging.


