1. Introduction
This instruction manual provides comprehensive guidance for the deleyCON SAT Mounting Kit, Model MK2056. This 15-piece kit is designed to assist in the installation and maintenance of satellite systems, ensuring secure connections and weather protection for coaxial cables and F-connectors. Please read these instructions carefully before use to ensure proper installation and optimal performance.
2. Kit Components
The deleyCON SAT Mounting Kit (MK2056) includes the following 15 components:
- 8x Gold-Plated F-Connectors (7.0mm): For connecting coaxial cables to satellite components.
- 4x Rubber Grommets: Provide weather protection for F-connector connections.
- 1x Coaxial Cable Stripper: Tool for preparing coaxial cables for F-connector attachment.
- 1x F-Button (Mounting Aid): Assists in screwing F-connectors onto cables.
- 1x F-Mounting Wrench: Facilitates tightening F-connectors onto devices like LNBs or multi-switches.

Image 2.1: Overview of the deleyCON SAT Mounting Kit components.
3. Setup and Installation
3.1. Coaxial Cable Preparation with Stripper
The universal coaxial cable stripper is used to precisely remove the outer jacket and dielectric from coaxial cables, preparing them for F-connector attachment.
- Open the stripper by pressing the 'OPEN' button.
- Insert the coaxial cable into the appropriate slot. Ensure the cable is seated correctly against the guide.
- Close the stripper and rotate it around the cable several times (typically 3-5 rotations) until the outer jacket and shielding are cut.
- Remove the cable from the stripper and carefully pull off the stripped sections, exposing the inner conductor and dielectric.

Image 3.1: Coaxial cable being prepared with the stripper.

Image 3.2: The coaxial cable stripper in its open position, showing the cutting blades.
3.2. Attaching F-Connectors
After stripping the cable, attach the gold-plated F-connector:
- Carefully push the F-connector onto the prepared coaxial cable. The inner conductor should protrude slightly from the connector's end.
- Use the F-button (mounting aid) to screw the F-connector onto the cable. Insert the F-connector into the F-button and rotate the cable to tighten the connector securely. This ensures a firm grip and proper electrical contact.

Image 3.3: The F-button tool used to assist in screwing the F-connector onto the coaxial cable.
3.3. Connecting to Satellite Components with F-Mounting Wrench
Once the F-connector is attached to the cable, use the F-mounting wrench to connect it to satellite devices:
- Align the F-connector on the cable with the F-port on your satellite component (e.g., LNB, multi-switch, satellite receiver).
- Begin to hand-tighten the F-connector.
- Use the F-mounting wrench to fully tighten the F-connector. The wrench provides leverage for a secure, tight connection without over-tightening, which could damage the port.

Image 3.4: The F-mounting wrench being used to tighten an F-connector onto a satellite component.
3.4. Weather Protection with Rubber Grommets
For outdoor installations, use the rubber grommets to protect F-connector connections from environmental elements:
- Before attaching the F-connector to the satellite component, slide a rubber grommet over the coaxial cable.
- After the F-connector is securely tightened, slide the rubber grommet over the connection point, ensuring it covers the F-connector and the port on the satellite component. This creates a seal against moisture and dust.

Image 3.5: A rubber grommet installed over an F-connector for weather protection.
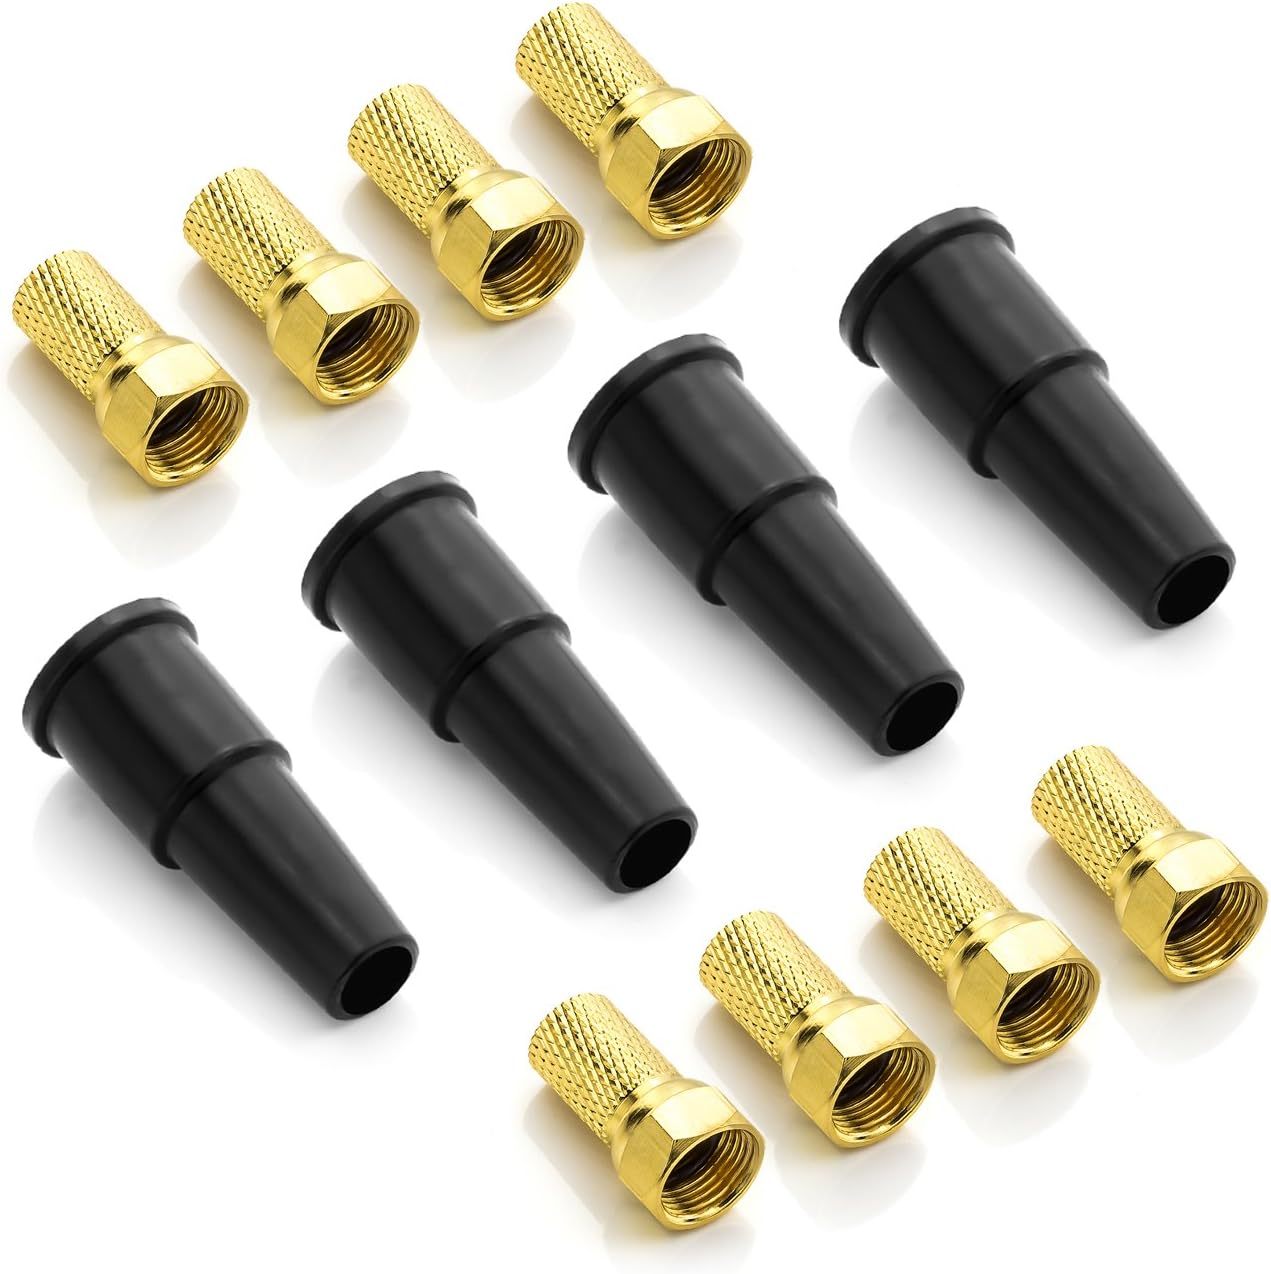
Image 3.6: A selection of gold-plated F-connectors and black rubber grommets.
4. Operating Instructions
The components of this kit are tools and connectors for satellite system installation. Their operation is integrated into the setup process described in Section 3. Each tool serves a specific function to facilitate a correct and secure connection:
- Coaxial Cable Stripper: Used for precise cable preparation.
- Gold-Plated F-Connectors: Provide the physical and electrical connection.
- F-Button: Aids in the initial secure attachment of F-connectors to cables.
- F-Mounting Wrench: Ensures final tightening of F-connectors to devices.
- Rubber Grommets: Applied for environmental protection of connections.
5. Maintenance
To ensure the longevity and effectiveness of your deleyCON SAT Mounting Kit:
- Cleaning: Keep all tools clean and free from dirt or debris. Wipe the coaxial cable stripper blades periodically.
- Storage: Store components in a dry place to prevent corrosion, especially for the F-connectors and metal tools.
- Inspection: Before each use, inspect the tools for any signs of wear or damage. Replace any damaged components.
6. Troubleshooting
If you encounter issues during installation, consider the following:
- Loose F-Connector: Ensure the F-connector is fully screwed onto the cable and tightened to the device using the F-mounting wrench. A loose connection can lead to signal loss.
- Poor Signal Quality: Verify that the coaxial cable is stripped correctly and the inner conductor makes proper contact within the F-connector and the device port. Ensure no stray strands of shielding are touching the inner conductor.
- Cable Damage: Inspect the coaxial cable for any kinks, cuts, or damage that could impede signal transmission.
- Weather Protection: Confirm that rubber grommets are correctly seated over outdoor connections to prevent moisture ingress, which can degrade signal over time.
7. Specifications
| Brand | deleyCON |
| Model Number | MK2056 |
| Number of Items | 15 |
| F-Connector Type | Gold-plated F-connector (7.0mm) |
| Compatible Devices | Satellite system, LNB, multi-switch, head station, satellite receiver |
| Specific Uses | Satellite system installation, weather protection for satellite systems, satellite signal connection |
8. Warranty and Support
Information regarding specific warranty details for the deleyCON SAT Mounting Kit is not available in this manual. For warranty claims, technical support, or further inquiries, please refer to the product packaging or contact deleyCON customer service directly through their official website or authorized retailers.


