1. Introduction
This manual provides detailed instructions for the safe and effective use of your Neewer NWHG-01 3-Axis Handheld Gimbal Stabilizer. This device is designed to capture smooth, stabilized video footage with compatible GoPro cameras and smartphones. Please read this manual thoroughly before operating the product and retain it for future reference.
The NWHG-01 gimbal features a 3-axis brushless motor system, providing stabilization across tilt, roll, and pan axes. It includes a comfortable silica gel handle grip and a removable lithium-ion battery. The kit also comes with a protective carrying case and cleaning accessories.
2. Package Contents
Verify that all items listed below are present in your package:
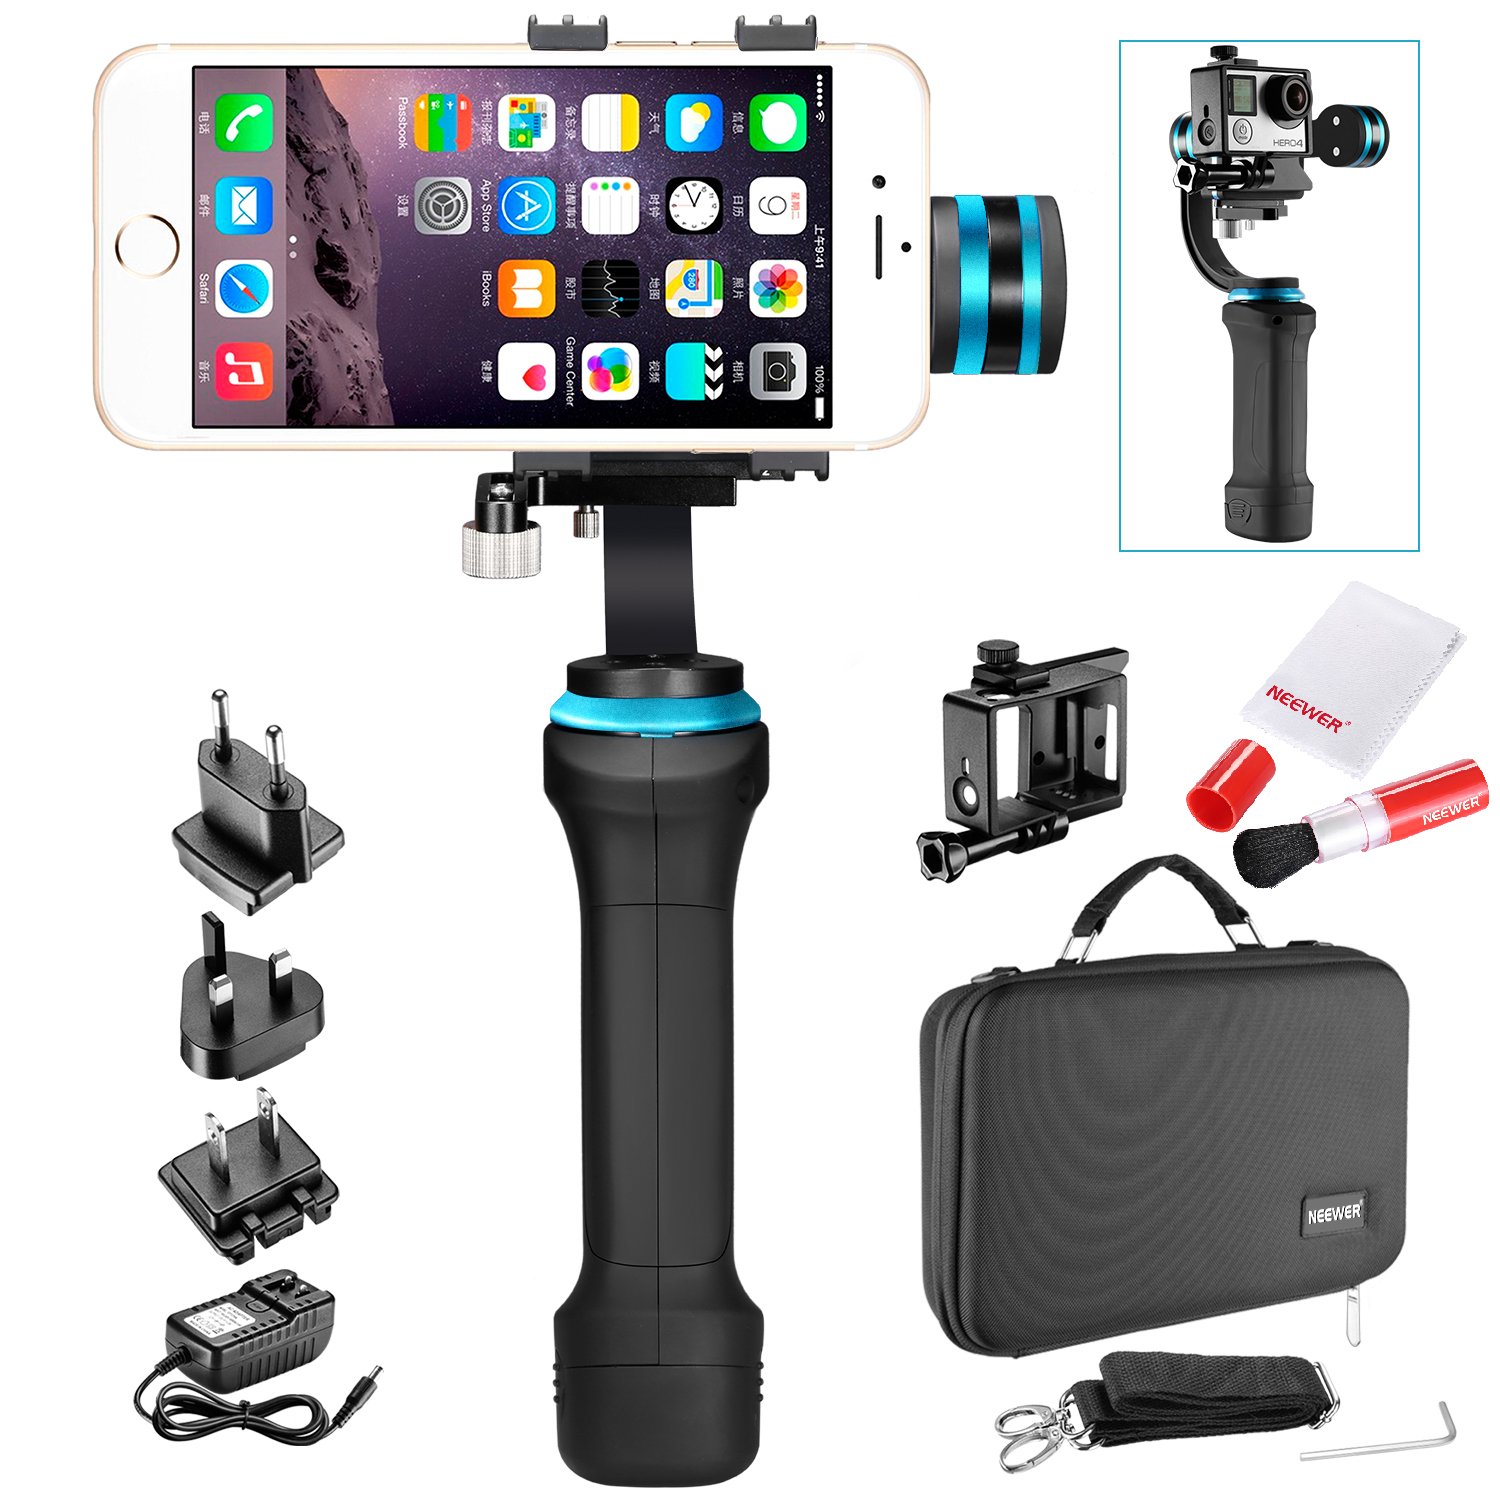
Image 2.1: All components of the Neewer NWHG-01 kit neatly organized within the protective carrying case.
- 1 x NWHG-01 Handheld Gimbal Stabilizer
- 1 x Lithium-Ion Battery
- 1 x Clamp for Regular-Sized Smartphones (width: 2.2-3.0 inches / 56-76 mm)
- 1 x Clamp for Large-Sized Smartphones (width: 2.5-3.6 inches / 64-92 mm)
- 1 x Clamp for GoPro Hero 3+/4
- 1 x Protective Carrying Case
- 1 x Battery Charger with US/UK/EU Plug Adapters
- 2 x Counterweights (for large-sized smartphones to balance pitch direction)
- 1 x Lens Brush
- 1 x Microfiber Cleaning Cloth
3. Product Overview
Familiarize yourself with the main components of the gimbal stabilizer.
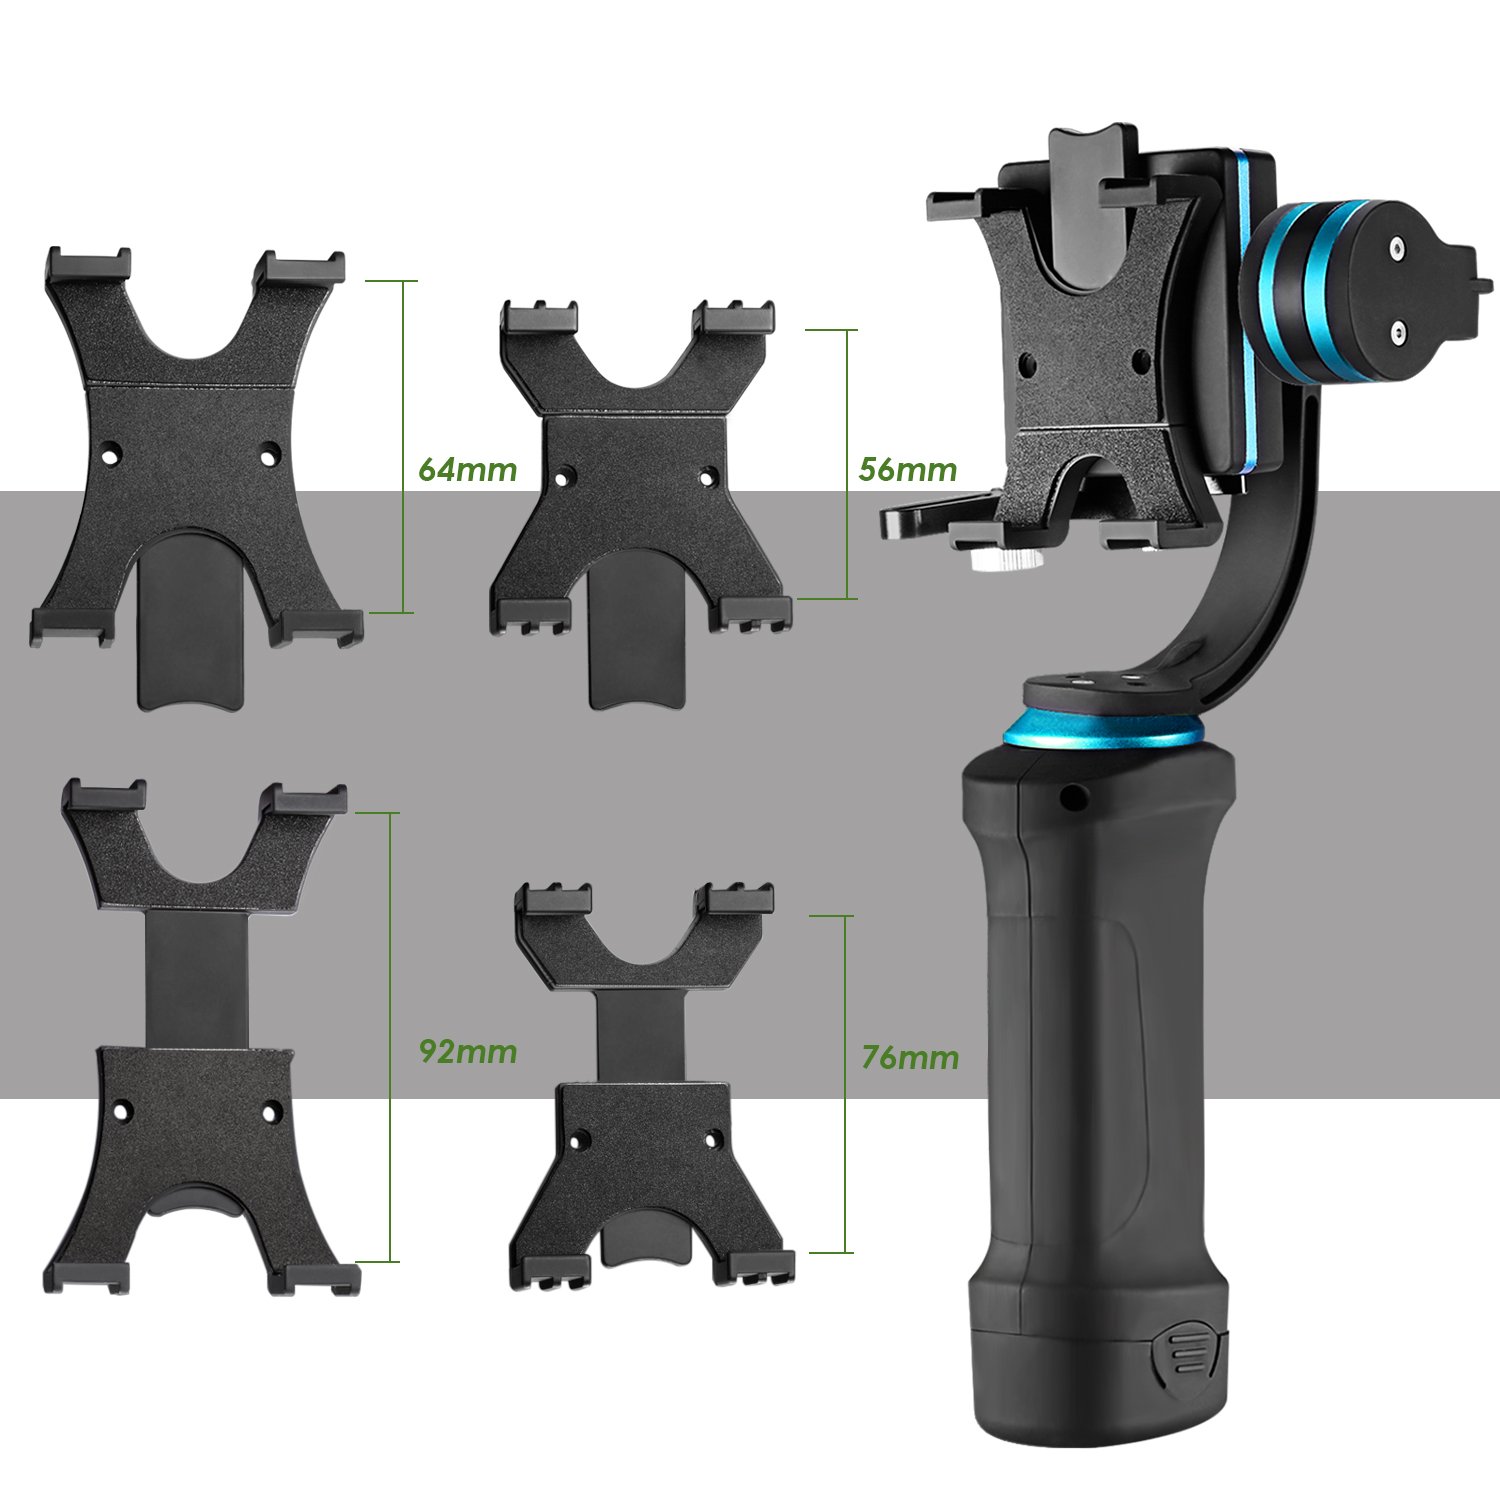
Image 3.1: The gimbal body shown with the three different clamps for smartphones and GoPro cameras, along with their respective width measurements.
- Gimbal Handle: Main body with control buttons and battery compartment.
- Motorized Head: Houses the brushless motors for 3-axis stabilization.
- Device Clamp: Interchangeable clamps to secure your smartphone or GoPro.
- Counterweights: Used for balancing heavier devices.
- Battery: Rechargeable lithium-ion battery.
- Charger: For recharging the battery.

Image 3.2: Close-up view of the gimbal handle, showing the battery insertion point and the DC jack for charging. LED indicators for remaining power are also visible.
4. Setup
4.1. Charging the Battery
- Insert the provided lithium-ion battery into the battery grip at the bottom of the gimbal handle. Ensure it is securely seated.
- Connect the charger to the DC jack located on the battery grip.
- Plug the charger into a suitable power outlet using the appropriate plug adapter (US/UK/EU).
- The LED indicator on the battery grip will show charging status. Charge until the battery is full.
4.2. Attaching Your Device (Smartphone or GoPro)
- Select the appropriate clamp for your device:
- Regular-sized smartphone clamp (2.2-3.0 inches / 56-76 mm width)
- Large-sized smartphone clamp (2.5-3.6 inches / 64-92 mm width)
- GoPro clamp (compatible with Hero 3+/4)
- Attach the selected clamp to the gimbal's mounting plate. Ensure it is firmly secured.
- Carefully place your smartphone or GoPro into the clamp. Ensure the device is centered and securely held.
4.3. Balancing the Gimbal
Proper balancing is crucial for optimal performance and to prevent motor strain. The gimbal must be balanced before powering it on.
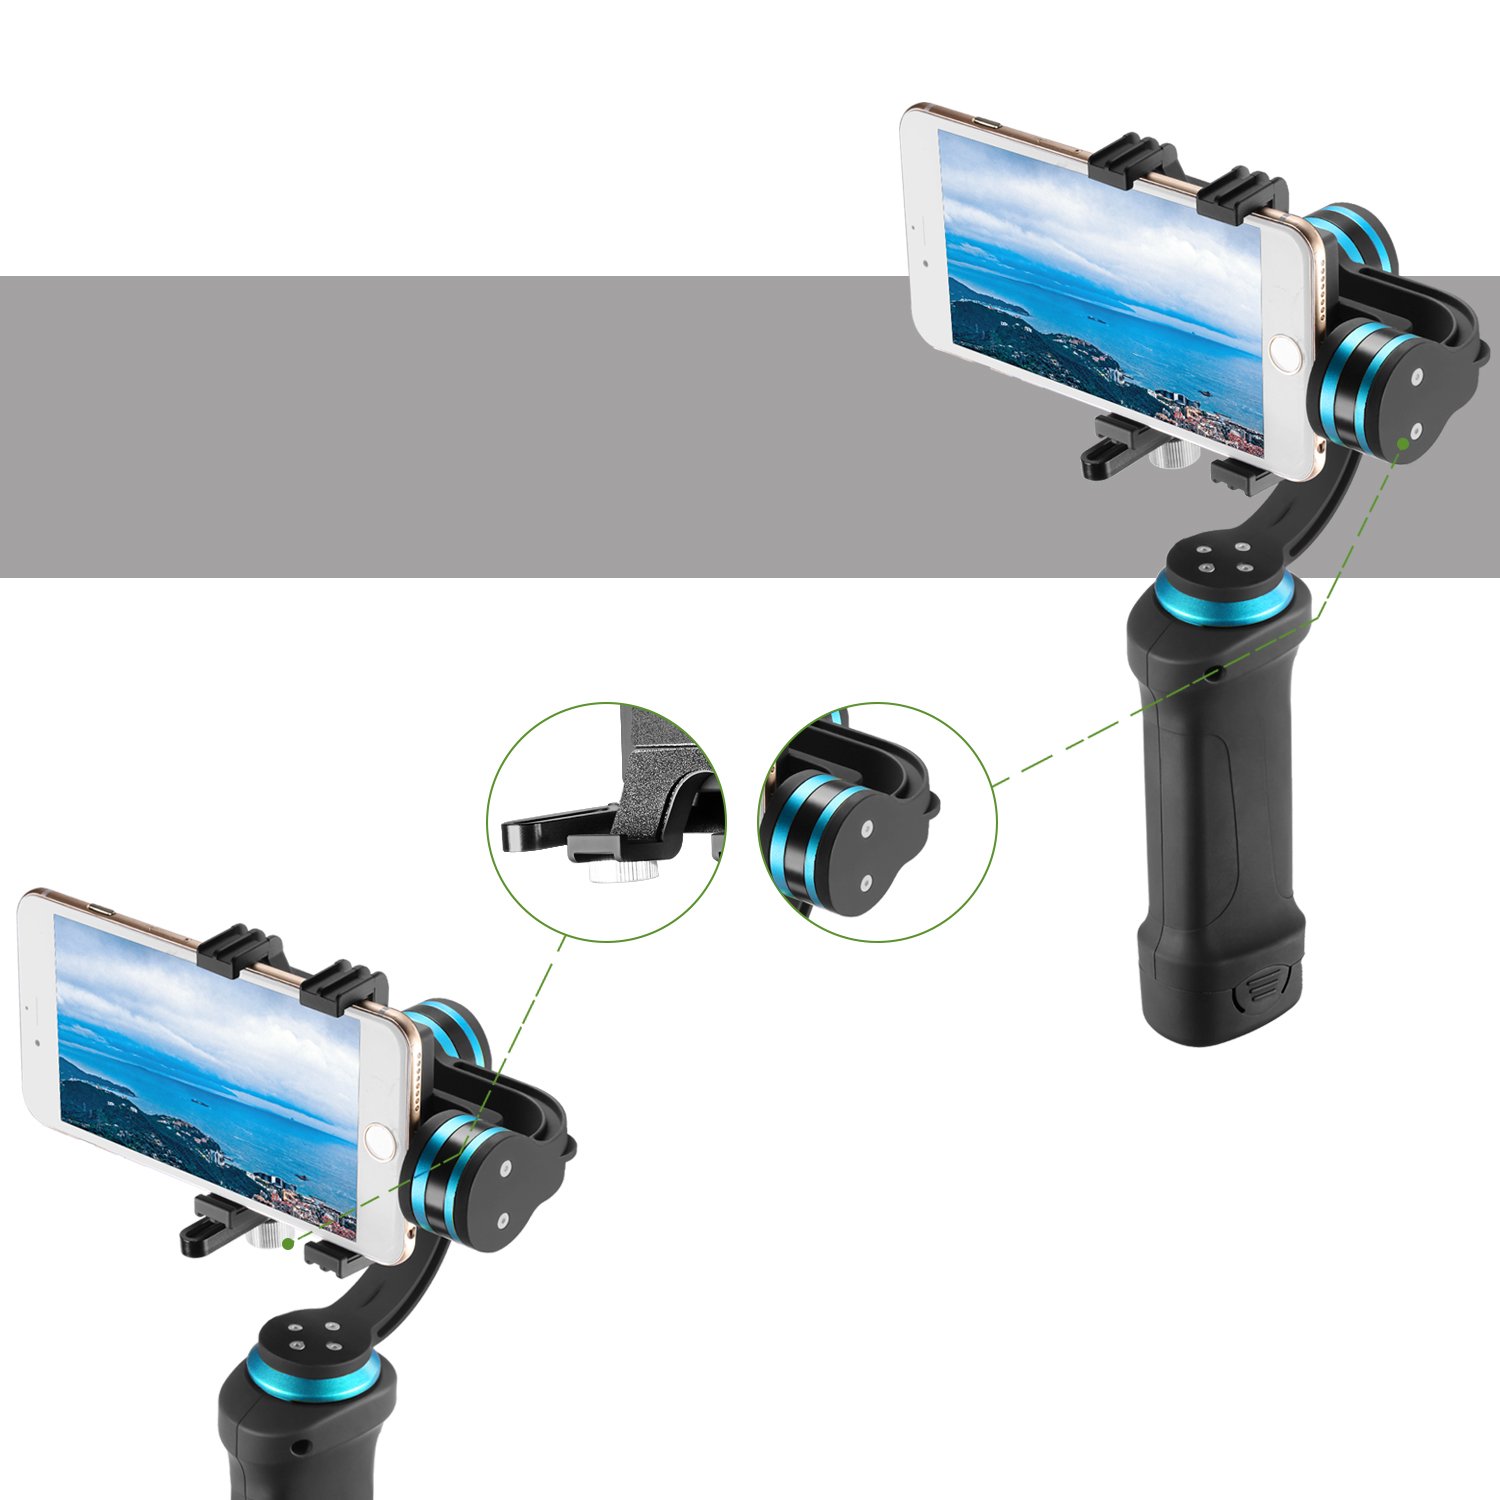
Image 4.1: The gimbal holding a smartphone, illustrating the balancing points and the use of counterweights for proper alignment.
- With your device mounted, hold the gimbal horizontally.
- Adjust the position of the device within the clamp until it remains level without assistance.
- If using a large or heavy smartphone, you may need to attach the provided counterweights to achieve proper balance. Experiment with the placement of the counterweights until the device is stable in all axes (tilt, roll, pan) when the gimbal is off.
- Once balanced, the device should not tilt or roll on its own.
5. Operating Instructions
5.1. Powering On/Off
- To Power On: Press and hold the power button (usually located on the handle) for a few seconds until the indicator light illuminates and the motors activate.
- To Power Off: Press and hold the power button again until the indicator light turns off and the motors cease operation.
Important: Always ensure your device is properly mounted and balanced before powering on the gimbal.
5.2. Basic Operation
Once powered on, the gimbal will automatically stabilize your device. The 3-axis stabilization system will keep your camera level and smooth out movements as you walk, run, or move.
- Pan Following Mode: The gimbal typically defaults to a pan-following mode, where the camera smoothly follows your horizontal (pan) movements while keeping the tilt and roll axes stable.
- Tilt and Roll: The gimbal's motors actively counteract unwanted tilt and roll movements, ensuring your footage remains level.
- Controlling Movement: Gently move the gimbal handle to control the direction of your camera. Avoid sudden, jerky movements.
Refer to the specific button layout on your gimbal for any additional modes or controls (e.g., joystick for manual pan/tilt, mode switch). These functions vary by specific model revisions.
6. Maintenance
6.1. Cleaning
Regular cleaning helps maintain the performance and longevity of your gimbal and accessories.
- Gimbal Body: Wipe the gimbal body with a soft, dry cloth. Avoid using harsh chemicals or abrasive cleaners.
- Lens Brush: Use the provided static-free lens brush to gently remove dust and loose particles from camera lenses or smartphone screens. Do not use on wet surfaces.
- Microfiber Cleaning Cloth: Use the microfiber cloth for streak-free cleaning of lenses, screens, and other delicate surfaces. It is gentle and leaves no scratches.
6.2. Storage
When not in use, store the gimbal in its protective carrying case to prevent damage from dust, impacts, and moisture. Store in a cool, dry place away from direct sunlight.

Image 6.1: The protective carrying case being held by hand and worn over the shoulder, demonstrating its portability and secure storage.
For long-term storage, ensure the battery is partially charged (around 50%) and remove it from the gimbal. Recharge the battery every few months to maintain its health.
7. Troubleshooting
- Gimbal not powering on:
- Ensure the battery is fully charged and correctly inserted.
- Check for any visible damage to the battery or gimbal.
- Gimbal motors vibrating or not stabilizing:
- Power off the gimbal immediately.
- Verify that your device (smartphone/GoPro) is properly mounted and balanced. Re-balance if necessary.
- Ensure no obstructions are interfering with the gimbal's movement.
- Restart the gimbal after re-balancing.
- Device not fitting in clamp:
- Ensure you are using the correct clamp for your device size. Refer to Section 4.2.
- The gimbal supports smartphones with widths between 2.2-3.6 inches (56-92 mm) and GoPro Hero 3+/4. Devices outside this range are not compatible.
- Unresponsive controls:
- Power cycle the gimbal (turn off, then turn on).
- Ensure the battery has sufficient charge.
If problems persist, contact Neewer customer support for assistance.
8. Specifications
| Feature | Detail |
|---|---|
| Model | NWHG-01 |
| Stabilization | 3-Axis (Tilt, Roll, Pan) |
| Motor Type | Brushless |
| Compatible Devices | GoPro Hero 3+/4, Smartphones (width 2.2-3.6 inches / 56-92 mm) |
| Dimensions (Gimbal) | Height: 332mm, Width: 230mm, Depth: 84mm (approximate, as per product description) |
| Product Dimensions (Packaged) | 34.04 x 24.89 x 9.4 cm |
| Item Weight | 1.59 kg (3.5 lbs) |
| Handle Material | Silica Gel |
| Carrying Case Material | Ballistic Nylon |
| UPC | 191073020856 |
9. Warranty and Support
Specific warranty information for the Neewer NWHG-01 Gimbal Stabilizer is not provided in the product details. Please refer to the warranty card included with your purchase or visit the official Neewer website for detailed warranty terms and conditions.
For technical support, troubleshooting assistance, or inquiries regarding your product, please contact Neewer customer service through their official website or the contact information provided in your product packaging.


