1. Introduction
This manual provides detailed instructions for the safe installation, operation, and maintenance of your DLLT 18W Flush Mount LED Ceiling Light. This fixture is a 7.09-inch round, surface-mounted lighting solution designed to provide 6000K cool white light. It is important to note that this product is non-dimmable, not battery operated, and does not include a motion sensor or remote control. Please read these instructions thoroughly before installation and retain them for future reference.
2. Package Contents
Verify that all components are present before beginning installation:
- 1 x DLLT 18W Flush Mount LED Ceiling Light Fixture
- 1 x Mounting Bracket
- 2 x Mounting Screws
- 3 x Wiring Caps
- 1 x Instruction Manual (this document)
3. Specifications
| Feature | Detail |
|---|---|
| Model Number | WS-FPP7-18A |
| Wattage | 18W |
| Voltage | 120 Volts |
| Light Output | 1440 Lumens |
| Color Temperature | 6000K (Cool White) |
| Dimensions | 7.09"L x 7.09"W x 2.16"H |
| Material | Aluminum, Plastic |
| Installation Type | Flush Mount, Surface Mounted |
| Special Features | Non-Dimmable, CRI90+, IP44 Rated |
| Lifespan | 50,000+ hours |
| Indoor/Outdoor Usage | Indoor use only |
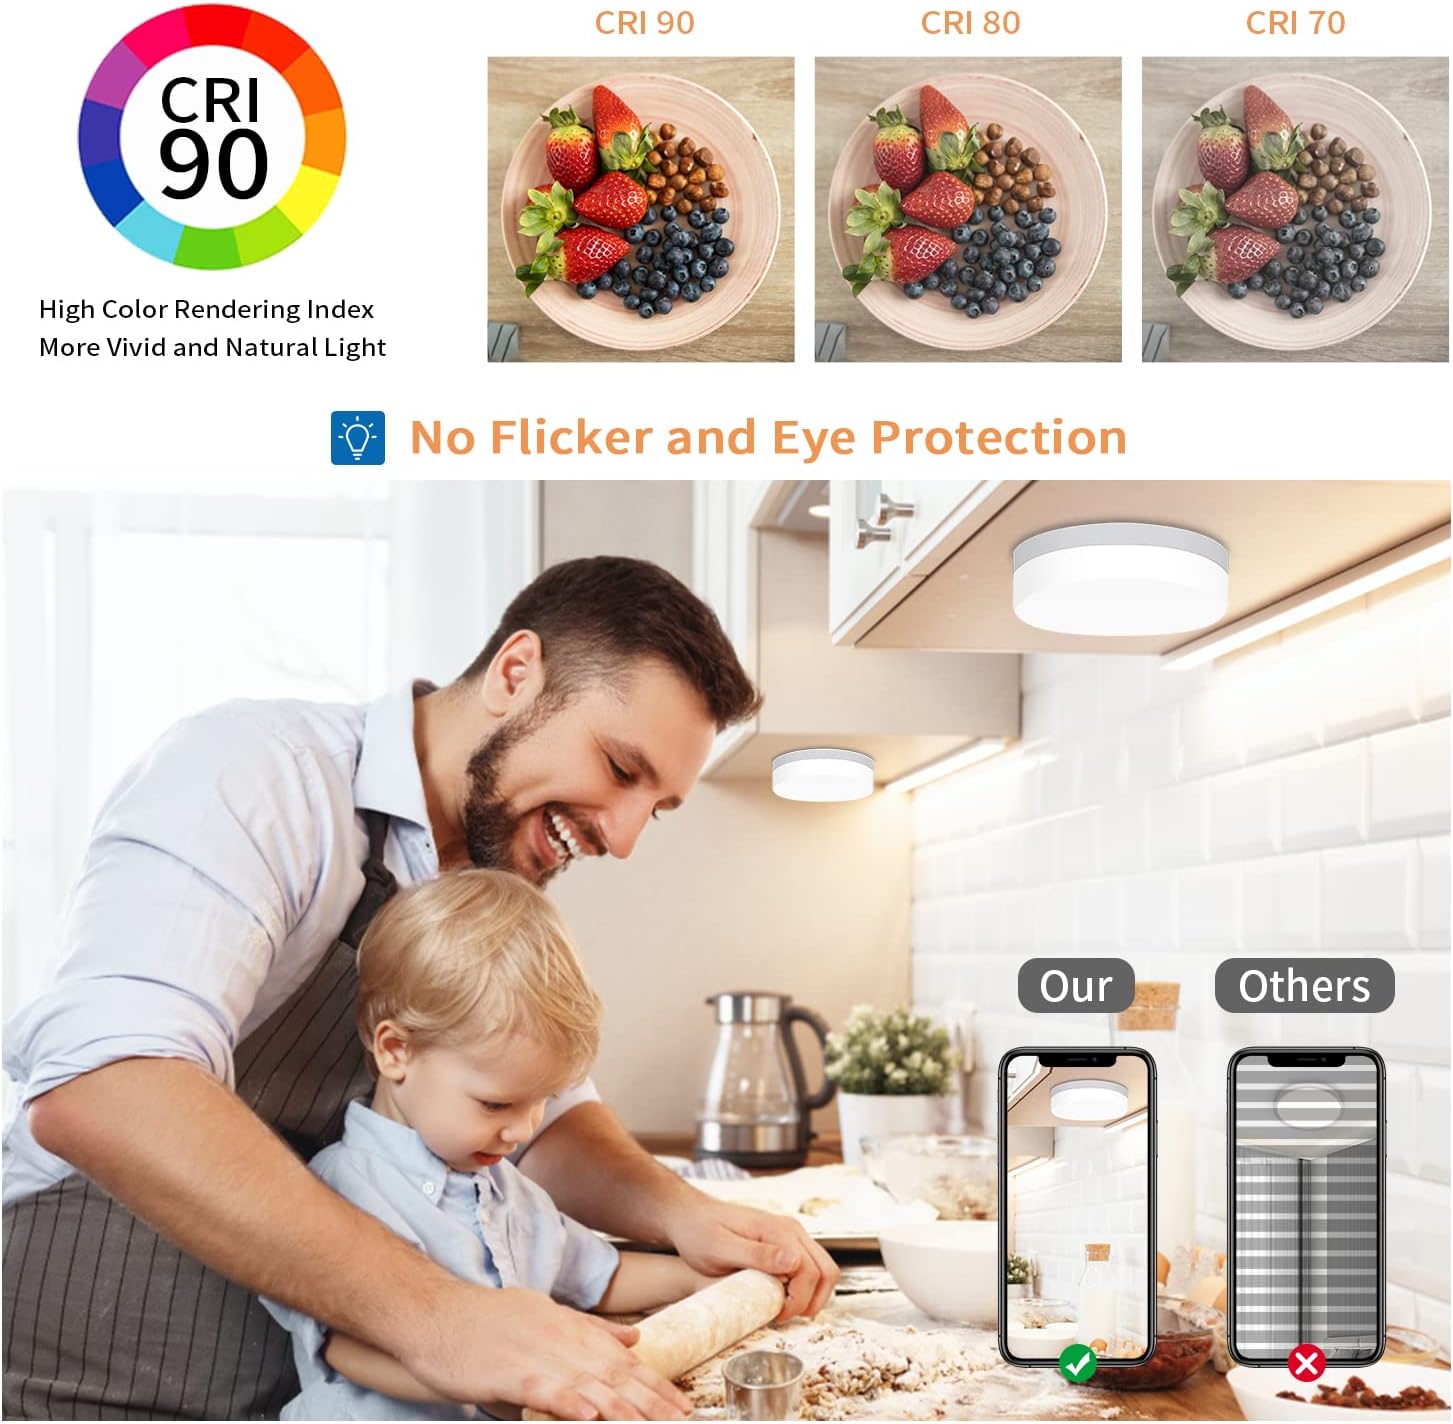
Figure 3.1: Dimensions and Power Type. This image provides the physical dimensions of the DLLT LED ceiling light, indicating a diameter of 7.09 inches and a height of 2.16 inches. It also clarifies that the light is not battery operated, requiring a hardwired connection.
4. Safety Information
Please observe the following safety precautions during installation and operation:
- WARNING: Always turn off the power at the circuit breaker before beginning any electrical work.
- This fixture is designed for 120V electrical systems. Ensure your electrical supply matches this requirement.
- If you are unsure about electrical wiring, consult a qualified electrician.
- Do not attempt to modify the fixture. Any modifications may void the warranty and create a safety hazard.
- This product is non-dimmable. Do not connect it to a dimmer switch, as this may damage the fixture and void the warranty.
- The fixture is IP44 rated, making it suitable for damp locations like bathrooms and kitchens, but it is not waterproof and should not be submerged or exposed to direct water spray.
- The fixture uses high-quality flame-retardant materials and contains no mercury or hazardous substances.
5. Setup and Installation
This fixture is designed for easy surface-mounted installation. Basic wiring knowledge is required. Ensure power is OFF at the circuit breaker before proceeding.

Figure 5.1: Installation Steps. This image illustrates the three main steps for installing the ceiling light. Step 1 shows fixing the mounting bracket to the ceiling with screws. Step 2 depicts connecting the electrical wires from the ceiling to the lamp's power supply using wiring caps. Step 3 demonstrates tightening the screws on the side of the fixture to secure it to the bracket, completing the installation.
Required Tools (Not Included):
- Screwdriver (Phillips head recommended)
- Wire strippers (if needed)
- Electrical tape (optional)
Installation Procedure:
- Turn Off Power: Locate the circuit breaker controlling the light fixture's power supply and turn it OFF. Verify power is off using a voltage tester.
- Attach Mounting Bracket: Secure the provided mounting bracket to the ceiling electrical box using the included screws. Ensure the bracket is firmly attached.
- Connect Wiring: Carefully connect the electrical wires from the ceiling to the wires on the light fixture.
- Connect the brown wire (Live/Hot) from the fixture to the corresponding Live/Hot wire from your ceiling.
- Connect the blue wire (Neutral/Ground) from the fixture to the corresponding Neutral/Ground wire from your ceiling.
- Mount the Fixture: Align the light fixture with the mounting bracket. Push the fixture up towards the ceiling and secure it by tightening the screws on the side of the fixture into the bracket.
- Restore Power: Once the fixture is securely installed, turn the power back ON at the circuit breaker.
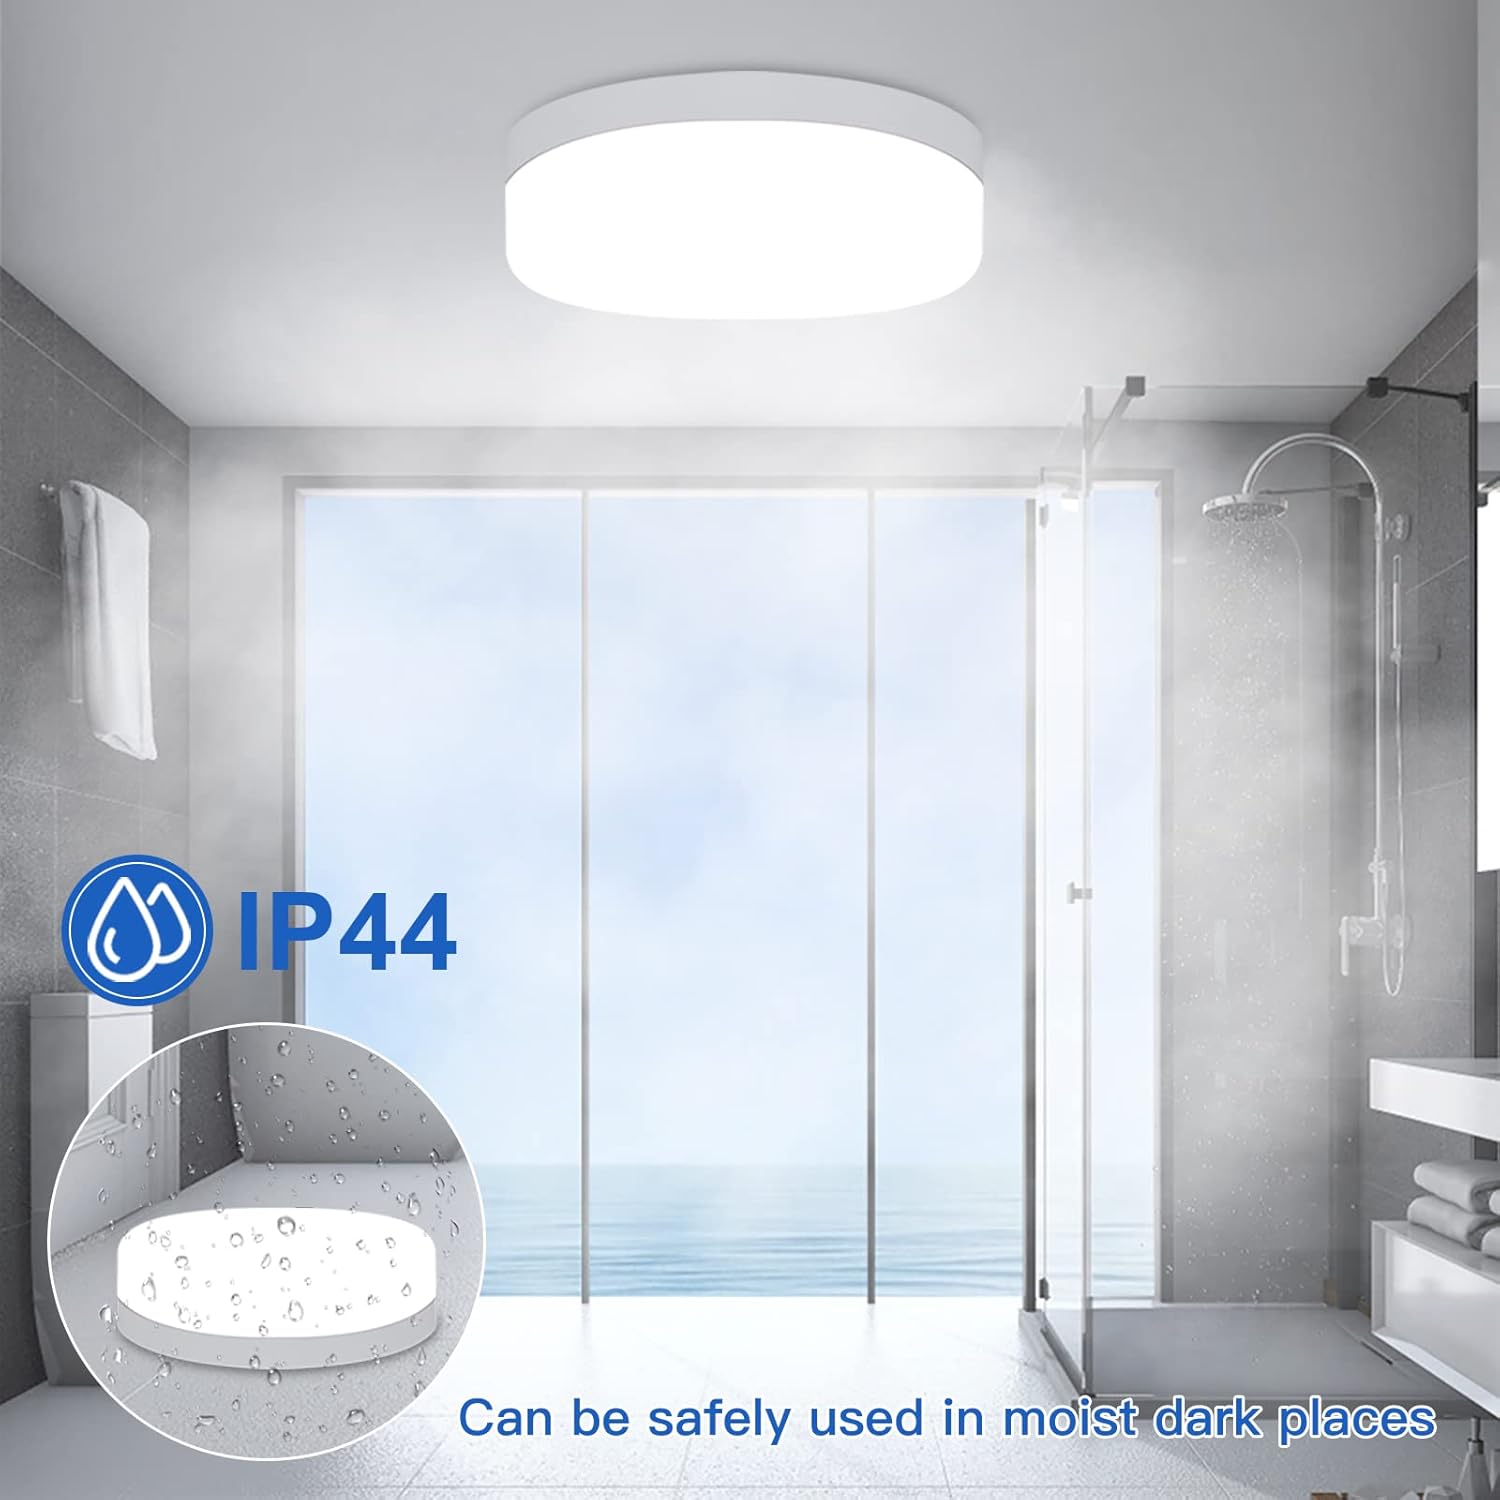
Figure 5.2: Internal Components. This diagram details the internal structure and features of the DLLT LED ceiling light. It points out the LED upgraded driver for energy efficiency, the snap-fastened design for easy installation, the acrylic lampshade for high light transmittance and dust protection, and the painted aluminum die-casting frame for heat dissipation and durability.
6. Operating Instructions
The DLLT 18W Flush Mount LED Ceiling Light operates via a standard wall switch. Simply toggle the wall switch to turn the light ON or OFF.
- Important: This fixture is non-dimmable and should not be connected to a dimmer switch.
- The light provides a consistent 6000K cool white illumination.
- It does not feature a motion sensor or remote control functionality.

Figure 6.1: CRI 90 and No Flicker. This image illustrates the benefits of the light's CRI 90 rating, showing how it renders colors more vividly and naturally compared to lower CRI lights. It also highlights the 'No Flicker and Eye Protection' feature, demonstrating a stable light output without visible flickering.
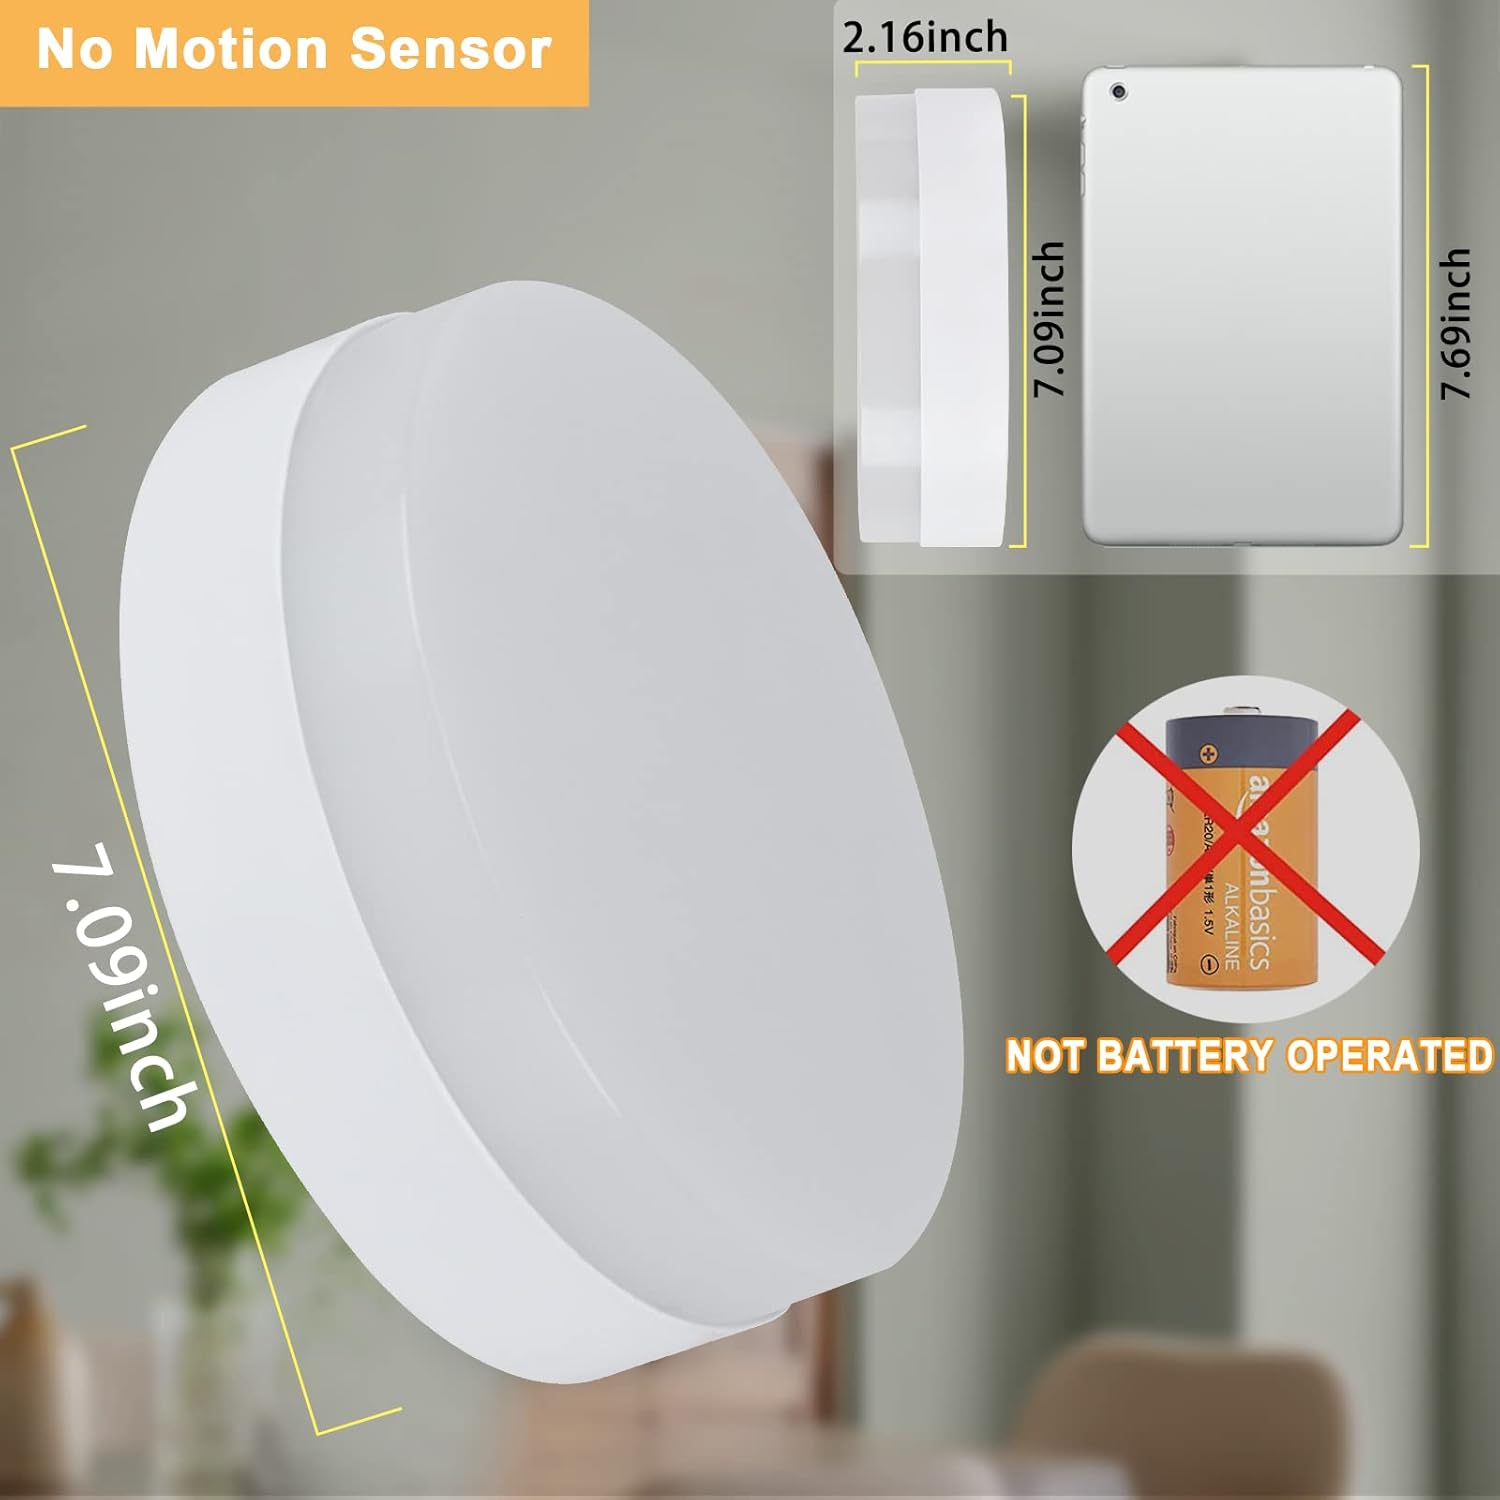
Figure 6.2: IP44 Rating. This image displays the DLLT LED ceiling light installed in a bathroom, emphasizing its IP44 rating. This rating confirms the fixture's suitability for safe use in moist and damp locations such as bathrooms and kitchens.

Figure 6.3: Wide Application. This collage showcases the versatility of the DLLT LED ceiling light, illustrating its use in different indoor spaces such as cloakrooms, bathrooms, kitchens, and hallways. This demonstrates its suitability for a wide range of residential applications.
7. Maintenance
The DLLT LED Ceiling Light requires minimal maintenance.
- Cleaning: Ensure the power is turned off before cleaning. Wipe the fixture with a soft, dry, or slightly damp cloth. Do not use abrasive cleaners or solvents, as these can damage the finish or electrical components.
- Bulb Replacement: The LED chips are integrated into the fixture and are not user-replaceable. The fixture has a long lifespan of over 50,000 hours, reducing the need for frequent replacements.
8. Troubleshooting
If you encounter issues with your ceiling light, refer to the following common problems and solutions:
| Problem | Possible Cause | Solution |
|---|---|---|
| Light does not turn on | No power supply Loose wiring connection Faulty wall switch | Check circuit breaker and ensure power is on. Turn off power, check all wire connections are secure. Test the wall switch with another device or consult an electrician. |
| Light flickers | Loose wiring Incompatible dimmer switch (if mistakenly installed) | Turn off power, check all wire connections. Ensure the fixture is not connected to a dimmer switch. This fixture is non-dimmable. |
| Light is dim or inconsistent | Incorrect voltage supply Fixture damage | Verify the voltage supply is 120V. If the issue persists after checking connections and power, contact customer support. |
If troubleshooting steps do not resolve the issue, please contact DINGLILIGHTING customer support.
9. Warranty Information
The DLLT 18W Flush Mount LED Ceiling Light is covered by a 2-year manufacturer's warranty from the date of purchase. This warranty covers defects in materials and workmanship under normal use. It does not cover damage caused by improper installation, misuse, accidents, or unauthorized modifications. Please retain your proof of purchase for warranty claims.
10. Support
For technical assistance, warranty claims, or any questions regarding your DLLT LED Ceiling Light, please contact DINGLILIGHTING customer support through the retailer where the product was purchased or visit the official DINGLILIGHTING store online. When contacting support, please have your model number (WS-FPP7-18A) and proof of purchase readily available.


