1. Introduction
Thank you for choosing the SENCOR STM 3700WH Food Processor. This appliance is designed to simplify various kitchen tasks, offering versatility with its powerful motor and extensive range of accessories. Please read this manual carefully before first use to ensure safe and efficient operation and to maximize the lifespan of your appliance.

Figure 1: SENCOR STM 3700WH Food Processor with included accessories.
2. Important Safety Instructions
Always follow basic safety precautions when using electrical appliances to reduce the risk of fire, electric shock, and injury.
- Read all instructions before use.
- Do not immerse the motor unit in water or other liquids.
- Keep hands and utensils away from moving parts during operation to prevent injury.
- Ensure the appliance is switched off and unplugged before assembling, disassembling, or cleaning.
- Do not operate the appliance with a damaged cord or plug.
- This appliance is for household use only.
- Supervise children to ensure they do not play with the appliance.
- Do not use attachments not recommended or sold by the manufacturer.
3. Product Components and Accessories
The SENCOR STM 3700WH Food Processor comes with a comprehensive set of accessories to handle various culinary tasks.
- Main Unit: Motor base with speed control dial and attachment ports.
- Stainless Steel Mixing Bowl: 5.5-liter capacity for mixing, kneading, and whisking.
- Splash Guard: Prevents ingredients from splashing out of the bowl during operation.
- Kneading Hook: For heavy doughs like bread and pizza.
- A-Beater: For medium consistency mixtures such as cakes, cookies, and mashed potatoes.
- Balloon Whisk: For whipping egg whites, cream, and light batters.
- Blender Jug: For blending liquids, smoothies, and sauces.
- Meat Grinder: With various plates for fine, medium, and coarse grinding.
- Sausage Stuffer: For making homemade sausages.
- Pasta Maker: With multiple dies for different pasta shapes.
- Grater: For grating vegetables, cheese, and other ingredients.
- Small Grinder/Chopper: For nuts, spices, and small quantities of ingredients.

Figure 2: Main unit with speed control dial.

Figure 3: Balloon Whisk.

Figure 4: Kneading Hook.

Figure 5: Blender Jug.
4. Setup and Assembly
Before first use, clean all parts that will come into contact with food. Ensure the appliance is unplugged during assembly.
- Unpacking: Carefully remove all components from the packaging. Retain packaging for future storage or transport.
- Cleaning: Wash the mixing bowl, splash guard, and all attachments in warm soapy water, then rinse and dry thoroughly. Wipe the main unit with a damp cloth.
- Placing the Unit: Place the main unit on a stable, flat, and dry surface.
- Attaching the Mixing Bowl:
- Lift the mixer head by pressing the release lever.
- Place the stainless steel bowl onto the base and turn it clockwise until it locks into position.
- Lower the mixer head until it clicks into place.
- Attaching Beaters/Whisks/Hooks:
- Ensure the mixer head is in the raised position.
- Align the chosen attachment (kneading hook, A-beater, or balloon whisk) with the shaft and push upwards, then twist slightly to lock it into place.
- Lower the mixer head.
- Attaching Other Accessories (e.g., Meat Grinder, Blender, Grater, Pasta Maker):
- The main unit has different ports for various accessories. Consult the specific accessory's instructions for detailed attachment steps.
- Generally, align the accessory with the corresponding port, insert, and secure it according to the bayonet attachment system.

Figure 6: Food processor with bowl and splash guard.

Figure 7: Meat grinder attachment in place.
5. Operating Instructions
Ensure the appliance is correctly assembled and all safety precautions are observed before operation.
- Power Connection: Plug the power cord into a suitable 230V electrical outlet.
- Adding Ingredients: Add your ingredients to the mixing bowl or the respective accessory. Do not overfill.
- Selecting Speed: Turn the speed control dial to the desired setting (1-10). Start with a low speed and gradually increase as needed. The "P" setting activates the pulse function for short bursts of power.
- Planetary Mixing System: The planetary mixing action ensures thorough mixing by rotating the attachment around its own axis and simultaneously around the edge of the bowl.
- Operation Time: Do not operate the appliance continuously for extended periods. Allow for cooling breaks between uses, especially for heavy-duty tasks.
- Stopping Operation: Turn the speed dial to "0" to stop the appliance. Unplug the appliance from the power outlet after use.
Specific Accessory Usage:
- Mixing/Kneading/Whisking: Use the appropriate attachment (kneading hook for dough, A-beater for batters, balloon whisk for whipping) with the stainless steel bowl. The 5.5-liter bowl can whip up to 12 egg whites.
- Blender: Attach the blender jug to the designated port. Ensure the lid is securely closed before operating.
- Meat Grinder: Attach the meat grinder. Use the pusher to feed meat into the grinder. Select the desired grinding plate.
- Pasta Maker: Attach the pasta maker. Feed dough into the machine and select the desired pasta die.
- Grater: Attach the grater. Feed ingredients into the chute and select the desired grating drum.
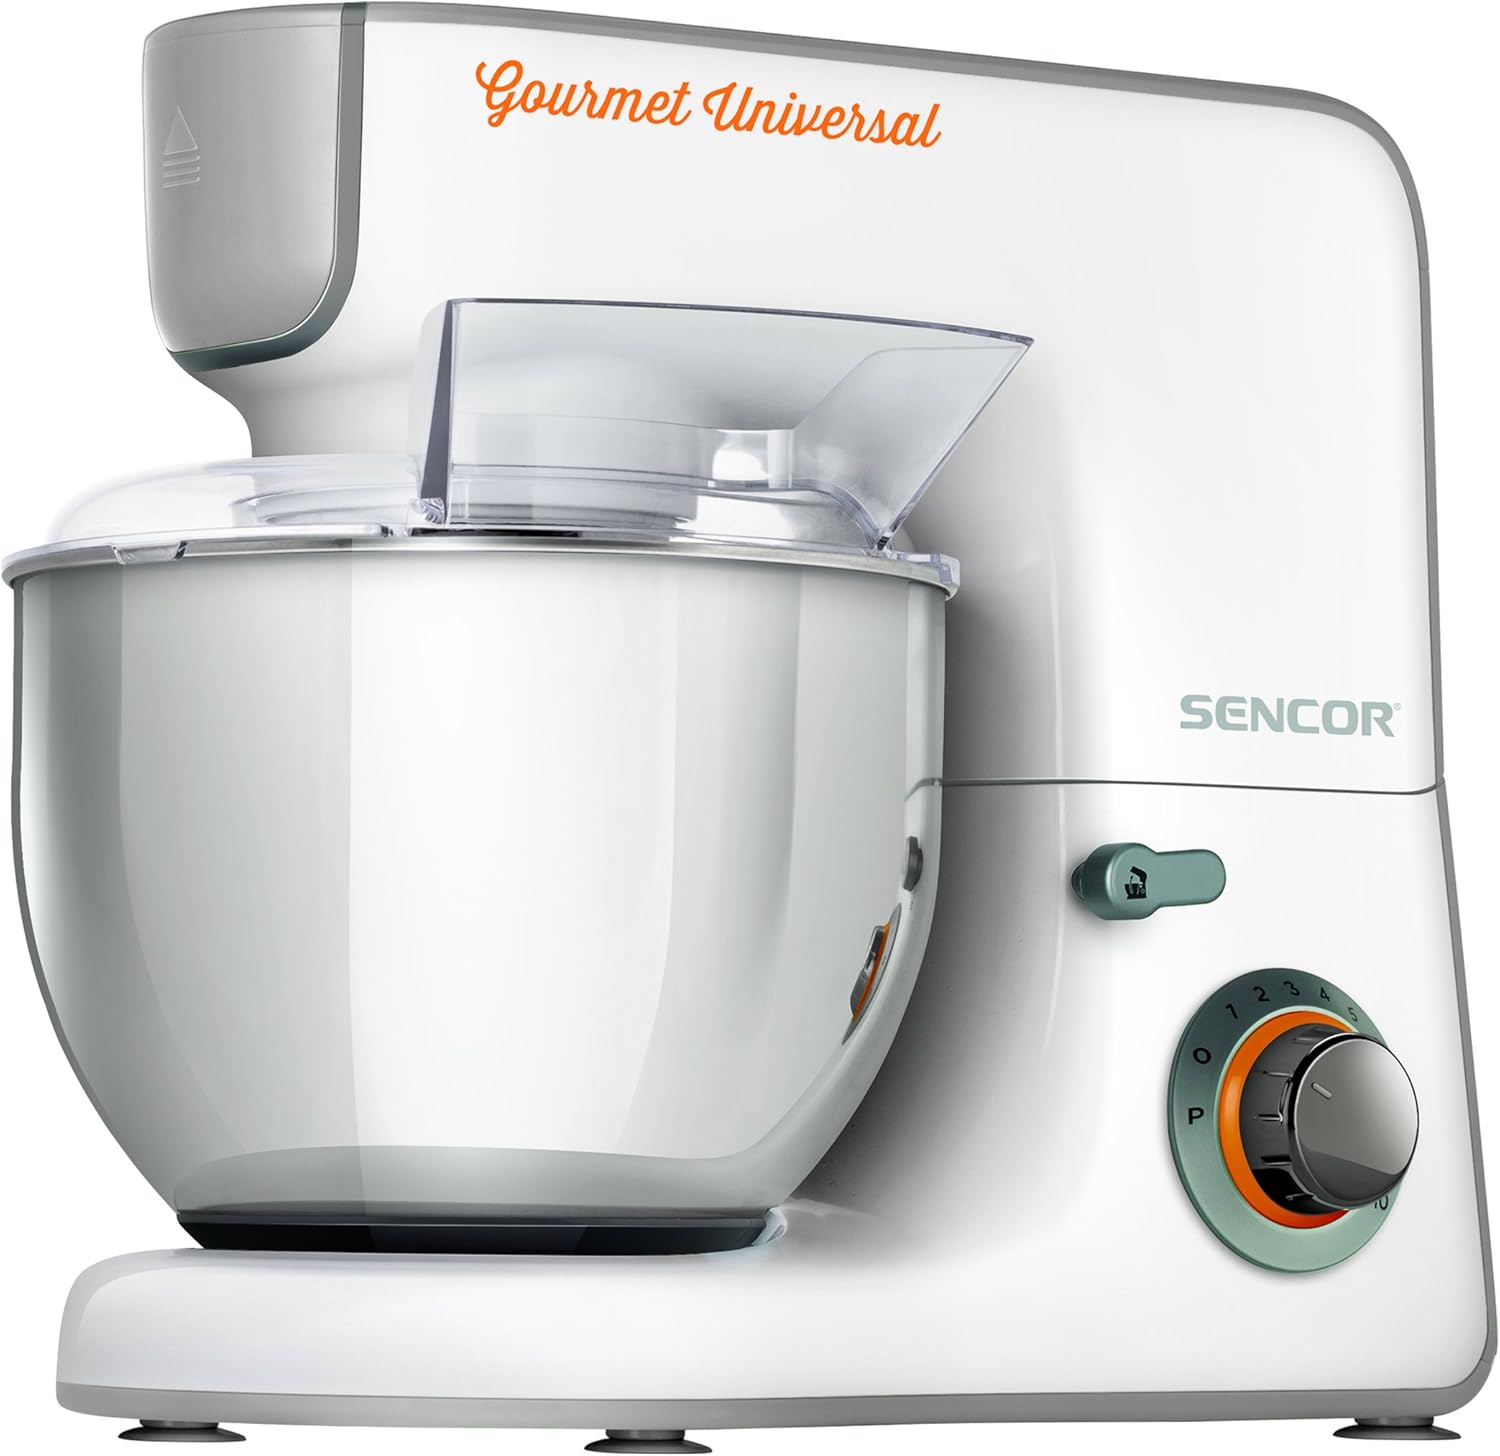
Figure 8: Pasta maker in operation.

Figure 9: Blender attachment in use.
6. Cleaning and Maintenance
Regular cleaning ensures optimal performance and extends the life of your food processor. Always unplug the appliance before cleaning.
- Main Unit: Wipe the motor unit with a soft, damp cloth. Do not immerse the main unit in water or any other liquid.
- Mixing Bowl and Attachments:
- Remove the mixing bowl and all attachments.
- Most removable parts, including the stainless steel bowl, kneading hook, A-beater, and balloon whisk, are dishwasher safe.
- For manual cleaning, fill the mixing bowl halfway with warm water and a drop of dish soap. Attach the beaters and run the mixer on low, then medium speed for a short period. Rinse thoroughly.
- For other accessories like the meat grinder, pasta maker, and grater, disassemble them and wash individual parts in warm soapy water. Use a brush to remove any food residue. Rinse and dry completely.
- Blender Jug: Disassemble the blade assembly from the jug. Wash all parts in warm soapy water.
- Drying: Ensure all parts are completely dry before reassembling or storing.
- Storage: Store the food processor and its accessories in a clean, dry place.
7. Troubleshooting
If you encounter issues with your SENCOR STM 3700WH Food Processor, refer to the following table for common problems and solutions.
| Problem | Possible Cause | Solution |
|---|---|---|
| Appliance does not turn on. | Not plugged in; power switch off; safety lock not engaged. | Ensure power cord is securely plugged in. Turn speed dial to a setting other than "0". Ensure mixer head is fully lowered and locked. |
| Motor stops during operation. | Overload; overheating. | Turn off and unplug the appliance. Reduce the load (e.g., remove some ingredients). Allow the motor to cool down for at least 30 minutes before restarting. |
| Attachments not mixing properly. | Incorrect attachment for task; insufficient quantity of ingredients. | Ensure the correct attachment is used for the specific task. Add more ingredients if the quantity is too small for the bowl/attachment. |
| Loud noise or vibration. | Appliance not on a stable surface; attachment not properly secured. | Place the appliance on a flat, stable surface. Ensure all attachments and the mixing bowl are securely locked in place. |
If the problem persists after trying these solutions, please contact customer support.
8. Technical Specifications
| Feature | Specification |
|---|---|
| Brand | SENCOR |
| Model Number | STM 3700WH |
| Power | 1000 Watts |
| Voltage | 230 Volts |
| Mixing Bowl Capacity | 5.5 Liters |
| Dimensions (L x W x H) | 44 x 31 x 56 cm |
| Weight | 10.14 Kilograms |
| Material | Stainless Steel, Plastic |
| Special Features | Removable Bowl, Planetary Mixing System, Pulse Function |
| Dishwasher Safe Parts | Yes (removable parts) |
9. Warranty and Customer Support
SENCOR products are manufactured to high-quality standards. For warranty information, please refer to the warranty card included with your product or visit the official SENCOR website. In case of technical issues or questions not covered in this manual, please contact SENCOR customer support.
Contact Information: Please refer to your product packaging or the official SENCOR website for the most up-to-date customer service contact details in your region.


