1. Introduction
This manual provides detailed instructions for the installation, operation, and maintenance of your A-Zone 4CH 1080P AHD Home Surveillance Security Camera System. Please read this manual thoroughly before using the product to ensure proper setup and functionality.
Package Contents:
- 1 x 4-Channel 1080P AHD DVR (with pre-installed 2TB Hard Drive)
- 4 x 1080P HD Bullet/IP Cameras
- 4 x 50ft BNC Cables
- 1 x DC 12V/5A Camera Power Adapter
- 2 x 1-to-4 Power Splitter Cable
- 1 x DC 12V/2A DVR Power Adapter
- 1 x Mouse
- 1 x Remote Control
- 4 x Screw Bags (for Camera Mounting)
- 1 x Software CD + Instruction Manual

Figure 1.1: Overview of the A-Zone 4CH 1080P AHD Home Surveillance Security Camera System and its included components.
2. Product Overview
The A-Zone security system offers robust surveillance capabilities with high-definition video and advanced features for home and business security.
Key Features:
- Full 1080P AHD video input support.
- Flexible display with HDMI & VGA output.
- DVR/HVR/NVR 3-in-1 functionality.
- 36 infrared LEDs with 100ft night vision.
- Remote access via smart devices (iPad, iPhone, Android) using QR-Code scans.
- Auto IR-Cut for vivid day and night vision.
- Advanced H.264 video compression for efficient storage.
- Motion detection with instant email alerts.
- Multiple recording modes and playback options.
- IP67 weatherproof cameras for indoor and outdoor use.
- Support for 1 SATA port (up to 4TB) and 2 USB2.0 ports.

Figure 2.1: Detailed dimensions of the A-Zone 1080P HD bullet camera.
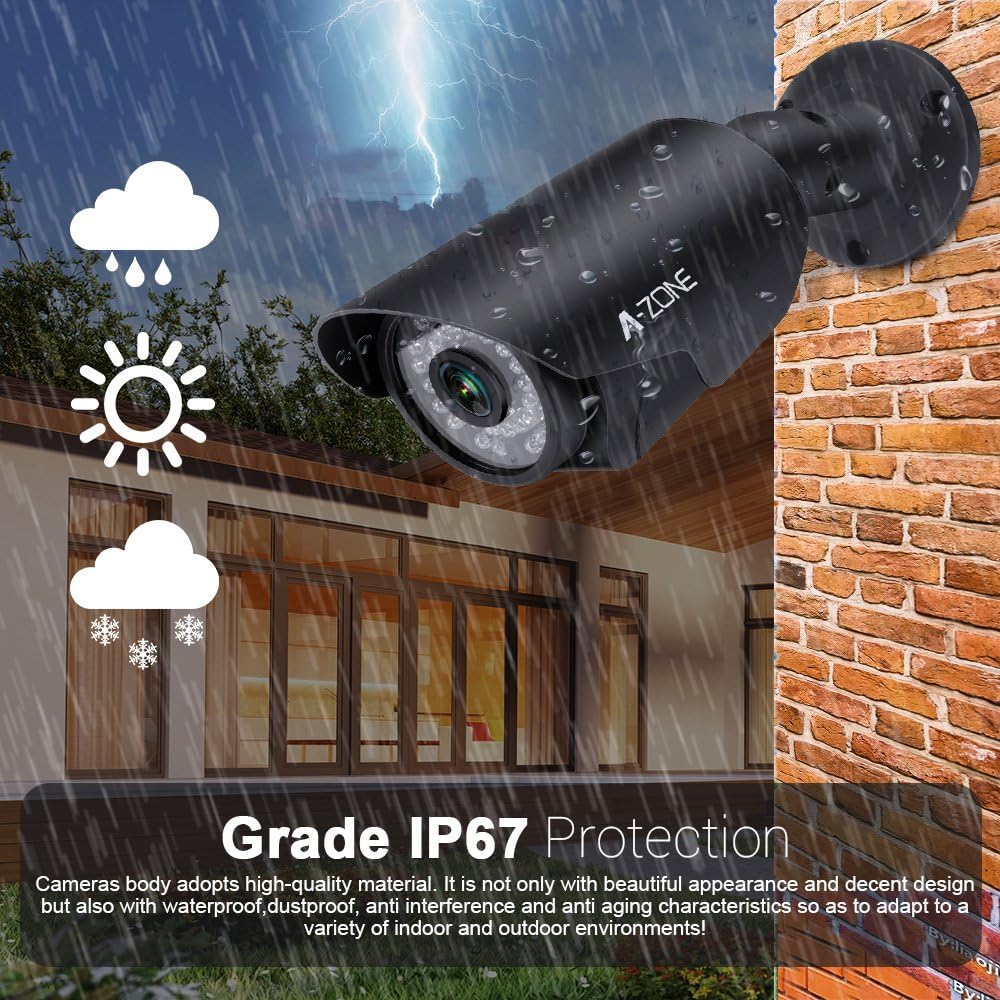
Figure 2.2: The cameras feature IP67 protection, ensuring durability against various weather conditions for both indoor and outdoor installations.

Figure 2.3: The system utilizes 2.0MP (1920x1080P) resolution for clear and detailed video capture, offering superior image quality compared to lower resolutions.
3. Setup Guide
3.1 Initial System Connection
- Connect Cameras: Attach each 1080P HD camera to the DVR using the provided 50ft BNC cables.
- Power Cameras: Use the 12V/5A camera power adapter and the 1-to-4 power splitter cables to power all four cameras.
- Connect DVR to Monitor: Connect the DVR to a monitor or TV using an HDMI or VGA cable. A monitor is required for initial setup and configuration.
- Power DVR: Connect the 12V/2A DVR power adapter to the DVR and plug it into a power outlet. The 2TB hard drive is pre-installed.
- Connect Mouse: Plug the USB mouse into one of the DVR's USB ports for navigation.
- Network Connection (Optional): For remote viewing, connect the DVR to your router using an Ethernet cable.
3.2 Remote Access Setup (P2P)
The system supports P2P (Peer-to-Peer) for easy remote access via smartphones and PCs.
- Download App: Search for and download the official A-Zone mobile application on your iOS (Apple App Store) or Android (Google Play Store) device. For PC access, download the client software from the provided CD or A-Zone's official website.
- Scan QR Code: Open the app and use the QR code scanning feature to add your DVR. The QR code can typically be found on the DVR unit or within its system settings on the connected monitor.
- Live View: Once added, you can view live footage and access playback from your cameras anytime, anywhere, provided the DVR is connected to the internet.
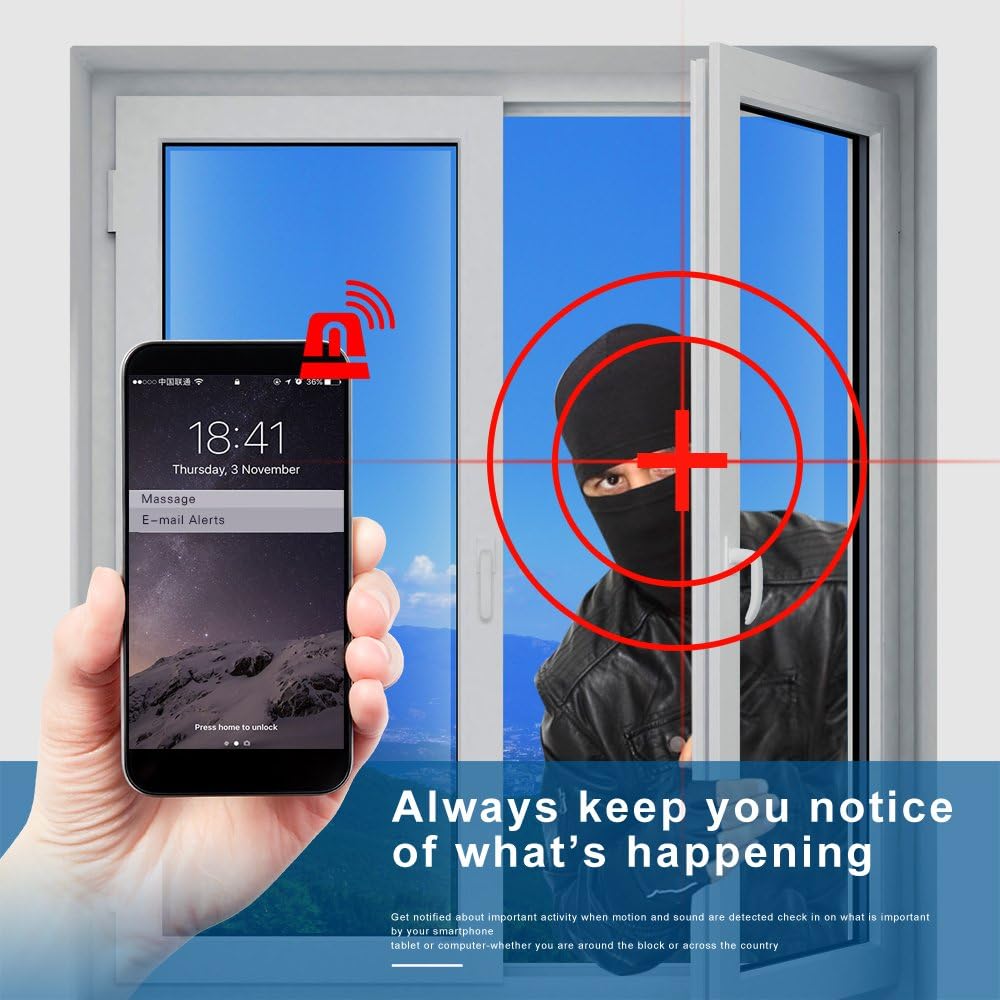
Figure 3.1: P2P technology enables convenient remote access to your security system from Windows PCs, Android, and Apple devices.
4. Operating Instructions
4.1 Recording Modes
The DVR supports various recording modes to suit your surveillance needs:
- Continuous Recording: Records 24/7.
- Scheduled Recording: Records during specified time intervals.
- Motion Detection Recording: Records only when motion is detected, saving storage space.
- Alarm Recording: Records when an alarm event is triggered.
Configure recording schedules and settings through the DVR's on-screen menu using the mouse.
4.2 Playback
Access recorded footage through the DVR's playback menu. You can search by date, time, and event type (e.g., motion detection). The system supports 4-channel simultaneous playback.
4.3 Motion Detection and Alerts
The system features advanced motion detection. When motion is detected in a configured area, the DVR can trigger recording and send instant email alerts to your registered email address.

Figure 4.1: Receive instant notifications on your smartphone when motion is detected, keeping you informed of activity.
4.4 Night Vision
The cameras are equipped with 36 infrared LEDs, providing up to 100ft (30 meters) of night vision. The auto IR-Cut filter automatically switches between day and night modes to ensure clear images in varying light conditions.

Figure 4.2: The cameras provide clear visibility up to 30 meters in low-light or no-light conditions thanks to advanced infrared technology and an IR-CUT filter.
5. Maintenance
Regular maintenance ensures the longevity and optimal performance of your security system.
- Camera Cleaning: Periodically clean the camera lenses with a soft, dry cloth to remove dust and smudges that may affect image clarity.
- Cable Inspection: Check all cables for wear, damage, or loose connections. Ensure BNC and power cables are securely fastened.
- DVR Ventilation: Ensure the DVR is placed in a well-ventilated area to prevent overheating. Keep vents clear of obstructions.
- Firmware Updates: Check the manufacturer's website periodically for firmware updates for your DVR to ensure you have the latest features and security patches.
- Hard Drive Management: The 2TB hard drive provides ample storage. Configure recording settings (e.g., motion detection recording) to optimize storage usage. The DVR will automatically overwrite the oldest footage when the hard drive is full.
6. Troubleshooting
This section addresses common issues you might encounter.
- No Power to DVR/Cameras:
Solution: Check all power connections. Ensure power adapters are securely plugged into the DVR/cameras and a working power outlet. Verify the power adapter is functioning correctly. (Note: A faulty 12V transformer can cause power issues, as noted by some users.) - No Video Output on Monitor:
Solution: Ensure the HDMI/VGA cable is securely connected to both the DVR and the monitor. Verify the monitor input source is correctly selected. Try a different cable or monitor if possible. - Camera Image is Black and White at Day:
Solution: This usually indicates the camera is stuck in night mode. Check the camera's IR-Cut filter settings in the DVR menu. Ensure there is sufficient light in the environment. - Remote Viewing Not Working:
Solution: Ensure the DVR is connected to the internet via an Ethernet cable. Verify network settings on the DVR. Check your router's internet connection. Ensure the mobile app is updated and the QR code/device ID is correctly entered. - Poor Image Quality:
Solution: Clean the camera lens. Ensure the camera is focused correctly (if applicable). Check cable connections for interference. Verify the DVR's resolution settings are set to 1080P.
For further assistance, please refer to the Software CD or contact A-Zone customer support.
7. Specifications
| Component | Specification |
|---|---|
| DVR Channels | 4-Channel |
| Video Input | 1080P AHD |
| Video Output | HDMI, VGA |
| Video Compression | H.264 |
| Hard Drive | 2TB (Pre-installed), Supports 1 SATA port up to 4TB |
| USB Ports | 2 x USB2.0 |
| Camera Resolution | 1080P HD (2.0 MP) |
| Camera Lens | 2.8mm Manual Zoom Focus Lens |
| Camera IR LEDs | 36 pcs |
| Night Vision Distance | 100ft (30 meters) |
| Camera Weatherproof Rating | IP67 |
| Power Source | Corded Electric |
| Item Weight | 6.3 kg (System) |
| Model Number | AZ-SA1080440-N2 |
8. Warranty and Support
A-Zone stands behind the quality of its products.
- Replacement Policy: 45 days replacement guarantee.
- Warranty: 2-Year Warranty on the system.
- Technical Support: Free Lifetime Technical Support is provided for this product.
For warranty claims, technical assistance, or any inquiries, please contact A-Zone customer support through the contact information provided on the product packaging or the official A-Zone website.


