
1. Introduction
This manual provides instructions for the installation, setup, and operation of your Yeelight YLDP06YL Smart LED Bulb. This E27 RGBW bulb offers 16 million colors, adjustable white light from 1700K to 6500K, and Wi-Fi connectivity for smart control.

Image: Two Yeelight Smart LED Bulbs, showcasing their design.
2. Safety Information
- Ensure the power is off before installing or removing the bulb.
- Do not use with standard dimmers; control dimming via the app or compatible smart home systems.
- This bulb is designed for indoor use only.
- Avoid exposing the bulb to water or high humidity.
- Do not disassemble the bulb.
3. Package Contents
- 1 x Yeelight YLDP06YL Smart LED Bulb
4. Specifications
| Brand | Yeelight |
| Model Number | YLDP06YL |
| Bulb Base | E27 |
| Bulb Shape | A19 |
| Power Consumption | 9 Watts |
| Incandescent Equivalent | 60 Watts |
| Luminous Flux | 600 Lumens |
| Color Temperature | 1700K - 6500K |
| Color Range | 16 Million RGB Colors |
| Voltage | 220 Volts |
| Lifespan | Up to 25,000 Hours |
| Connectivity | Wi-Fi |
| Control Method | Application, Remote Control |
| Compatibility | Amazon Alexa, Google Home, IFTTT |

Image: Rear view of the Yeelight Smart LED Bulb showing printed specifications.

Image: Dimensions of the Yeelight Smart LED Bulb.
5. Setup
5.1. Installation
- Ensure the power to the light fixture is turned off at the switch.
- Carefully screw the Yeelight Smart LED Bulb into a standard E27 light socket.
- Turn on the power to the light fixture. The bulb should light up.

Image: Installing the Yeelight Smart LED Bulb into a socket.
5.2. App Pairing
- Download the 'Yeelight' or 'Mi Home' app from your smartphone's app store (available on iOS and Android).
- Open the app and create an account or log in.
- Ensure your smartphone is connected to a 2.4GHz Wi-Fi network.
- In the app, tap the '+' icon to add a new device.
- Follow the on-screen instructions to discover and pair your Yeelight bulb. This typically involves cycling the bulb's power a few times until it starts flashing, indicating it's in pairing mode.
- Once paired, you can rename the bulb and assign it to a room.

Image: Steps for connecting the Yeelight bulb to your smartphone via the app.
6. Operation
6.1. Color Control
Use the Yeelight or Mi Home app to select from 16 million available colors. Navigate to the color selection interface within the app to choose your desired hue.
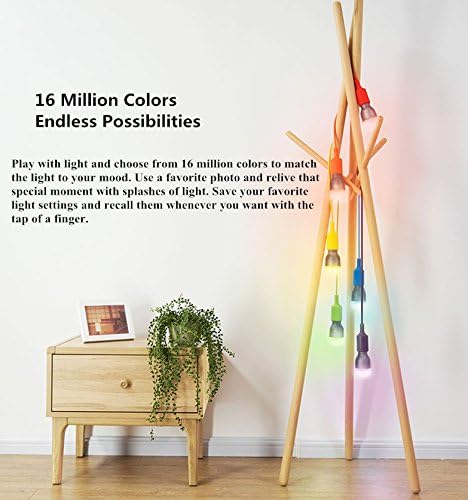
Image: App interface for color selection.

Image: Yeelight LED Bulb showcasing its wide color spectrum.
6.2. Brightness Control
Adjust the brightness of the bulb using the slider in the app. You can set the light intensity from 0% to 100%.
6.3. White Light Adjustment
The bulb supports adjustable white light temperatures from 1700K (warm white) to 6500K (cool white). Use the app to select the desired white light setting to match your environment or mood.

Image: Demonstrating adjustable warm and cool white light settings.
6.4. Smart Home Integration
The Yeelight YLDP06YL bulb is compatible with various smart home platforms, allowing for voice control and automation.
- Amazon Alexa: Link your Yeelight account in the Alexa app to control your bulb with voice commands like "Alexa, turn on the light."
- Google Home: Connect your Yeelight account to Google Home for voice control, e.g., "Hey Google, dim the living room light."
- IFTTT (If This Then That): Create custom automations and integrations with other smart devices and services.

Image: Yeelight bulb compatible with Google Home and Amazon Alexa.

Image: IFTTT integration for advanced automation.
7. Maintenance
The Yeelight Smart LED Bulb requires minimal maintenance. To clean, ensure the power is off and the bulb is cool. Wipe gently with a soft, dry cloth. Do not use liquid cleaners or abrasive materials. There are no user-serviceable parts inside the bulb.
8. Troubleshooting
- Bulb not connecting to Wi-Fi: Ensure your Wi-Fi network is 2.4GHz. Try moving the bulb closer to your Wi-Fi router. Power cycle the bulb (turn off and on 5 times) to reset it to pairing mode.
- Bulb not responding to app commands: Check your internet connection and ensure the bulb is powered on. Verify that the bulb is still paired in the app.
- Flickering: Ensure the bulb is screwed in tightly. Avoid using the bulb with traditional dimmer switches.
- Voice control not working: Confirm that your Yeelight account is correctly linked to your Amazon Alexa or Google Home account. Check your internet connection.
9. Warranty and Support
For warranty information and technical support, please refer to the documentation provided with your purchase or visit the official Yeelight website. Keep your proof of purchase for warranty claims.