1. Introduction
Thank you for choosing the FERM 600W Electric Professional Blower, Model EBM1004P. This compact and powerful tool is designed for efficient blowing and vacuuming tasks, making it ideal for cleaning workspaces, clearing leaves from balconies, or maintaining your vehicle. Please read this manual carefully before operating the device to ensure safe and effective use. Keep this manual for future reference.
2. Safety Instructions
Always observe basic safety precautions when using electrical tools to reduce the risk of fire, electric shock, and personal injury.
- Read All Instructions: Familiarize yourself with the controls and proper use of the tool.
- Wear Eye Protection: Always wear safety goggles to protect your eyes from flying debris.
- Wear Hearing Protection: Prolonged use may require ear protection.
- Dress Properly: Do not wear loose clothing or jewelry that could get caught in moving parts. Keep hair away from air inlets.
- Maintain a Firm Grip: Always hold the blower firmly with both hands during operation.
- Keep Work Area Clear: Ensure the area is free of obstacles and bystanders, especially children and pets.
- Avoid Wet Conditions: Do not operate the blower in rain or damp locations.
- Unplug When Not in Use: Disconnect the power cord from the outlet before making adjustments, changing accessories, or storing the tool.
- Inspect for Damage: Before each use, check the power cord, plug, and the tool itself for any signs of damage. Do not use if damaged.
- Use Correct Power Supply: Ensure the voltage rating on the tool matches your power supply.
3. Product Overview
The FERM 600W Electric Professional Blower is designed for versatility, offering both blowing and vacuuming functions. Below are key components and their descriptions.
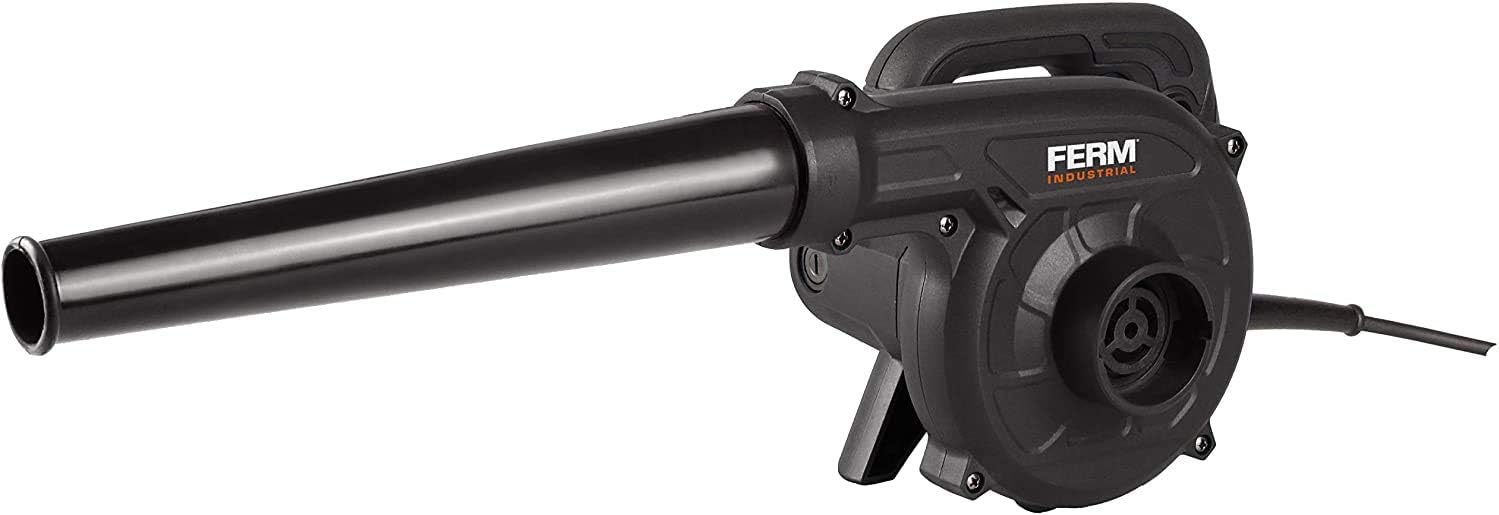
Figure 1: FERM 600W Electric Professional Blower with blowing nozzle attached. This image shows the primary configuration for blowing debris.

Figure 2: FERM 600W Electric Professional Blower configured for vacuuming, with dust collection bag and intake nozzle. This setup allows for collecting light debris.

Figure 3: Close-up view of the variable speed control dial located on the handle. This dial allows for precise adjustment of airflow.

Figure 4: Close-up view of the power trigger and lock-on button for continuous operation. The lock-on button reduces user fatigue during extended use.

Figure 5: Side view of the FERM Blower with the long blowing nozzle extended. This configuration is suitable for reaching distant areas or concentrating airflow.

Figure 6: Angled view of the FERM Blower with a shorter blowing nozzle attached. This provides a more compact setup for closer work.
4. Setup
Before operating the blower, ensure it is correctly assembled for your intended use.
4.1 Attaching the Blowing Nozzle
- Ensure the blower is unplugged from the power source.
- Align the blowing nozzle with the air outlet on the front of the blower housing.
- Push the nozzle firmly onto the outlet until it clicks into place or is securely seated.
4.2 Attaching the Dust Bag (for Vacuum Function)
- Ensure the blower is unplugged from the power source.
- Remove the blowing nozzle if it is attached.
- Attach the dust collection bag to the air intake port (usually on the side or bottom, opposite the blowing outlet).
- Attach the intake nozzle (if provided) to the blowing outlet. The blower will now draw air through the intake nozzle into the dust bag.
5. Operating Instructions
Follow these steps for safe and effective operation of your FERM blower.
5.1 Power Connection
- Ensure the power switch is in the 'OFF' position.
- Plug the power cord into a suitable 240V electrical outlet.
5.2 Starting and Stopping
- To start the blower, press the power trigger.
- For continuous operation, press the lock-on button while the trigger is depressed. Release the trigger, and the blower will continue to run.
- To stop the blower from continuous operation, press the power trigger again and then release it. To stop from momentary operation, simply release the trigger.
5.3 Adjusting Airflow Speed
The blower features a variable speed control dial (refer to Figure 3). Rotate the dial to increase or decrease the airflow speed according to your task requirements.
5.4 Using as a Blower
Direct the nozzle towards the area you wish to clear. Use a sweeping motion to move debris. Start with a lower speed for delicate areas and increase as needed.
5.5 Using as a Vacuum
With the dust bag and intake nozzle attached (as per Section 4.2), position the intake nozzle over the debris you wish to collect. The blower will draw the debris into the dust bag. This function is best suited for light, dry materials.
6. Maintenance
Regular maintenance ensures the longevity and optimal performance of your blower.
- Cleaning: After each use, unplug the blower and wipe the exterior with a damp cloth. Do not use harsh chemicals. Ensure air vents are clear of dust and debris to prevent overheating.
- Dust Bag: Empty the dust bag regularly when using the vacuum function. A full dust bag reduces suction efficiency.
- Storage: Store the blower in a dry, secure place, out of reach of children. Avoid storing in direct sunlight or extreme temperatures.
- Cord Care: Inspect the power cord for cuts or damage before each use. Do not wrap the cord tightly around the tool.
7. Troubleshooting
If you encounter issues with your FERM blower, refer to the following common problems and solutions.
| Problem | Possible Cause | Solution |
|---|---|---|
| Blower does not start | No power supply | Check if the plug is securely inserted into the outlet. Test the outlet with another device. |
| Power cord or plug damaged | Do not use. Have it inspected and repaired by a qualified technician. | |
| Low blowing/suction power | Air inlets/outlets blocked | Unplug the blower and clear any obstructions from the air vents or nozzles. |
| Dust bag full (vacuum mode) | Empty the dust bag. | |
| Excessive vibration or noise | Debris inside the fan housing | Unplug the blower. Carefully inspect and remove any foreign objects. If the problem persists, contact customer support. |
8. Specifications
| Brand | FERM |
| Model Number | EBM1004P |
| Power Source | Corded Electric |
| Voltage | 240 Volts |
| Wattage | 600 watts |
| Product Dimensions | 33.5 x 8 x 20.5 cm |
| Item Weight | 2.3 Kilograms |
| Cord Length | 3 Meters |
| Material | Plastic |
| Color | Black |
| Style | Handheld device |
9. Warranty and Support
FERM products are manufactured to high-quality standards and are guaranteed against manufacturing defects. For warranty claims, technical support, or spare parts, please contact your retailer or the official FERM customer service. Keep your proof of purchase for warranty validation.


