
1. Introduction
This manual provides detailed instructions for the safe and effective use of your Neewer VISION5 400Ws 2.4G TTL Flash Strobe. Designed for professional and enthusiast photographers, this monolight offers powerful illumination, high-speed sync capabilities, and wireless control, making it suitable for various photography scenarios, including studio and outdoor shoots. Please read this manual thoroughly before operating the device to ensure optimal performance and longevity.
2. Safety Information
WARNING: Risk of Electric Shock and Eye Injury.
- Do not disassemble or modify the unit. Repairs should only be performed by authorized service personnel.
- Keep the device away from water, moisture, and flammable gases or liquids.
- Do not touch the flash tube immediately after use, as it can be extremely hot.
- Avoid direct eye exposure to the flash. Do not flash at close range towards people or animals.
- Ensure proper ventilation during operation to prevent overheating.
- Use only the specified battery and charger. Improper use can lead to fire or explosion.
- Keep out of reach of children.
3. Package Contents
Verify that all items listed below are included in your package. If any items are missing or damaged, please contact your retailer.
- 1 x Neewer Vision5 Studio Flash for Nikon
- 1 x Lithium Battery
- 1 x LED Modeling Lamp
- 1 x 110-130V AC Charger
- 1 x Standard Reflector
- 1 x Protective Cover
- 1 x 4-meter 3.5mm Sync Cord
- 1 x Wireless Trigger

Figure 3.1: Neewer VISION5 Package Contents
4. Product Overview
The Neewer VISION5 is a powerful and versatile flash strobe. Familiarize yourself with its main components:
4.1 Main Unit and Controls
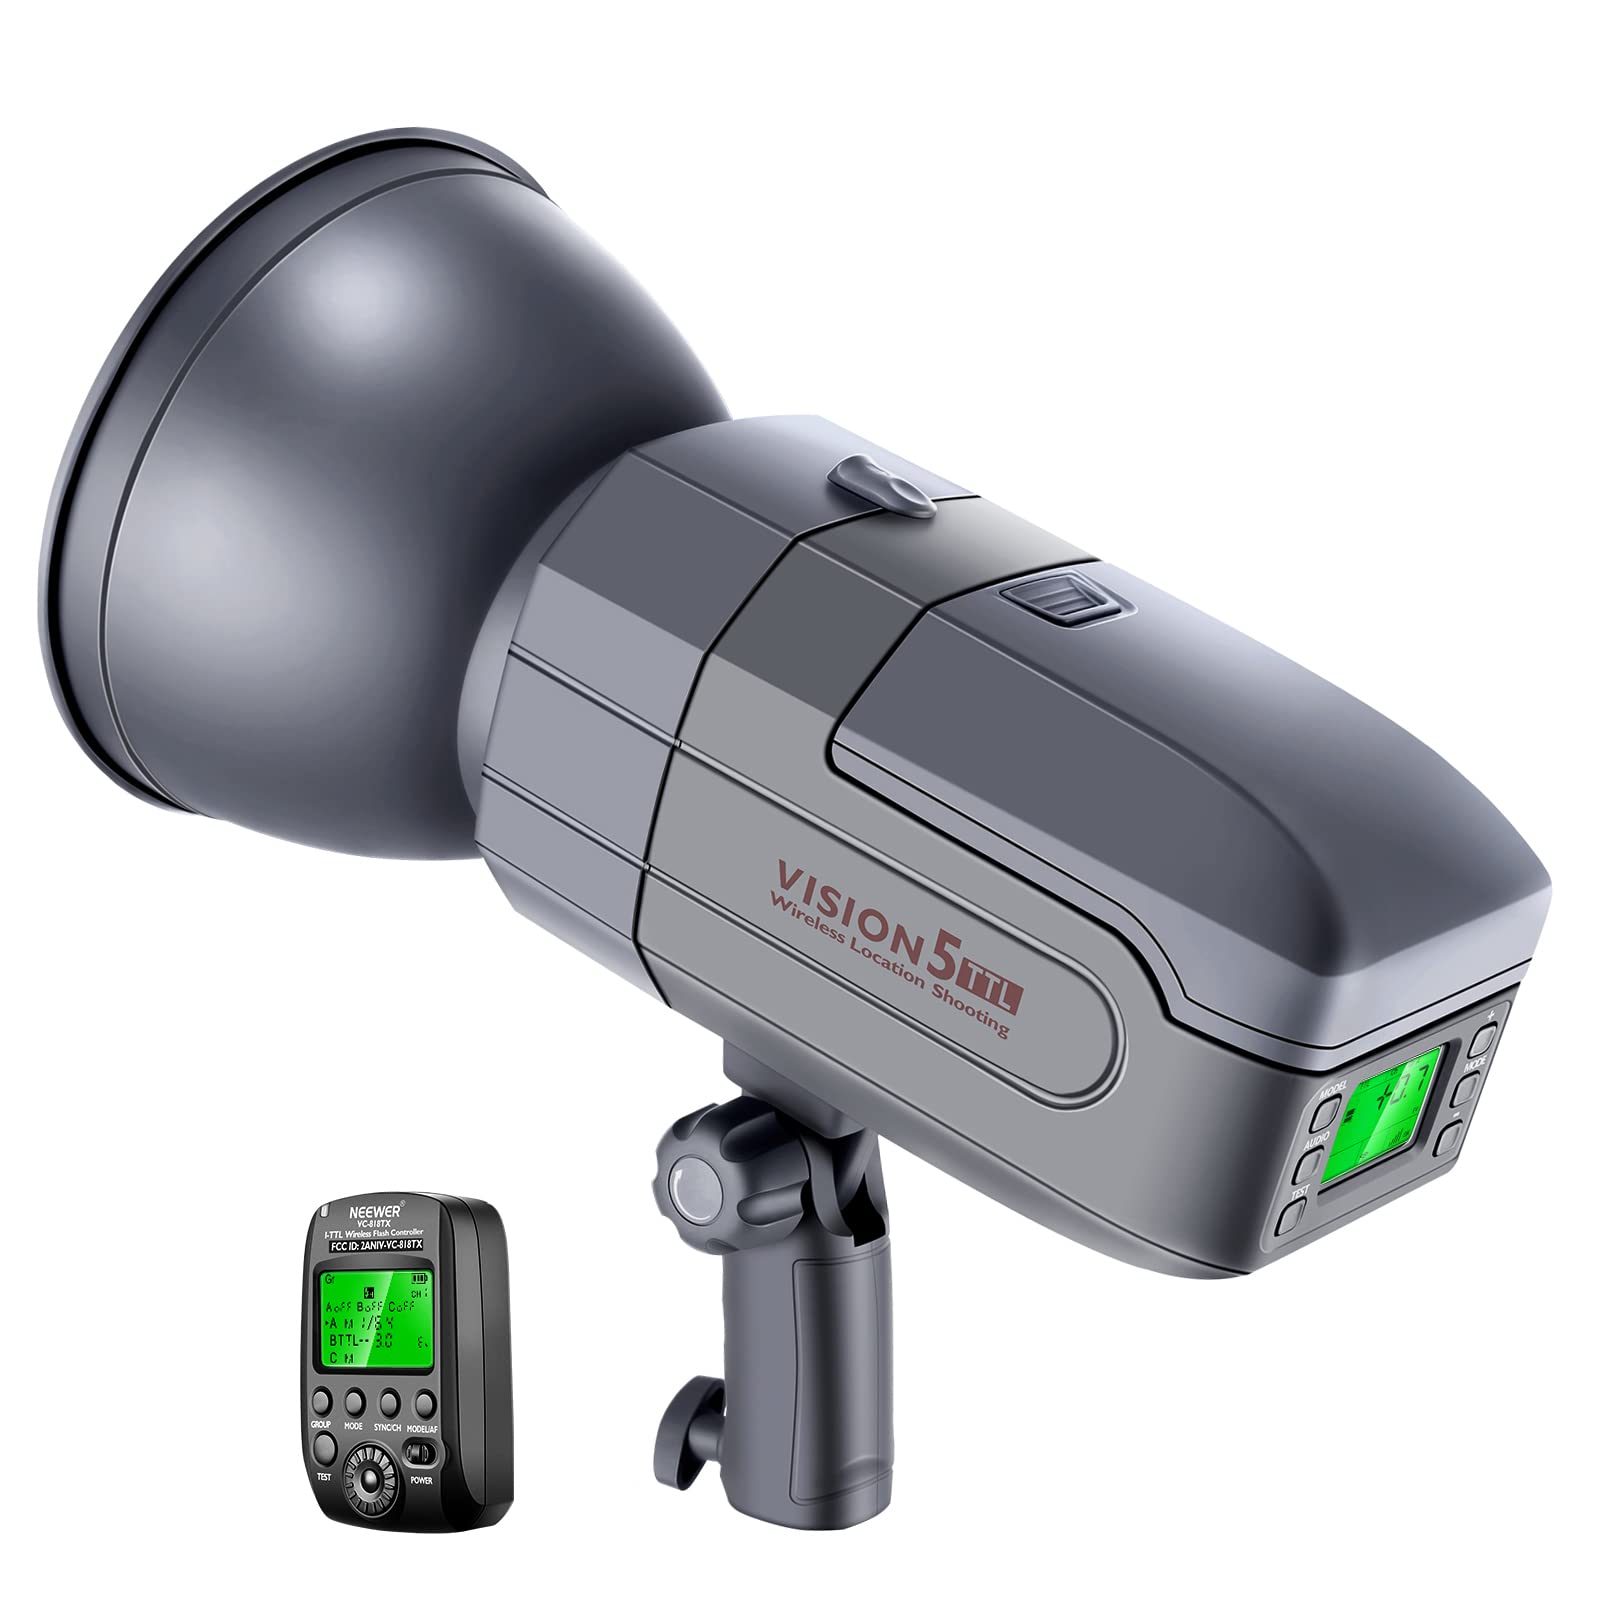
Figure 4.1: Neewer VISION5 Main Unit and Control Panel
- Reflector Releasing Knob: Used to detach and attach light modifiers.
- Battery Locking Knob: Secures the lithium battery in place.
- Replaceable Battery: High-capacity 6000mAh lithium battery.
- Modeling Lamp: Dimmable LED light for previewing lighting effects.
- Audio ON/OFF: Toggles audible flash ready indicator.
- Test Button: Triggers a test flash.
- Increase/Reduce Setting Value: Adjusts flash power, mode settings, etc.
- Function Button: Cycles through various modes and settings.
4.2 Flash Tube and Modeling Lamp

Figure 4.2: Flash Tube and Modeling Lamp
The flash features a user-replaceable 'plug-in' flash tube and a dimmable 13W LED modeling lamp (1370 Lumen) for energy-efficient lighting preview.
4.3 Rear Panel and Connectivity
The rear panel includes ports for synchronization and firmware updates.
- SYNC Port: 3.5mm sync cord connection.
- USB Port: For firmware updates to ensure compatibility with the latest camera technologies.
5. Setup
5.1 Battery Installation and Charging
- Ensure the flash unit is powered off.
- Locate the battery compartment on the side of the unit.
- Insert the 6000mAh lithium battery, ensuring it clicks into place. Secure it with the battery locking knob.
- To charge, connect the AC charger to the battery and a power outlet. The charging indicator will show the status.

Figure 5.1: Battery Installation
5.2 Attaching the Reflector and Modifiers
- Align the standard reflector or other Bowens mount modifiers with the front of the flash head.
- Twist the modifier clockwise until it locks securely into place.
- To remove, press the reflector releasing knob and twist the modifier counter-clockwise.

Figure 5.2: Bowens Mount Compatibility
5.3 Mounting on a Light Stand
- Attach the flash unit to a compatible light stand using the integrated mounting bracket.
- Tighten the locking knob on the bracket to secure the flash.
- Adjust the angle of the flash head as needed. The unit offers 180-degree rotation.

Figure 5.3: Mounting and Angle Adjustment
5.4 Connecting the Wireless Trigger
The VISION5 includes a 2.4G wireless trigger for remote control.
- Mount the wireless trigger onto your Nikon DSLR camera's hot shoe.
- Ensure both the flash strobe and the wireless trigger are powered on.
- Set the flash strobe and trigger to the same channel and group for communication. Refer to the trigger's specific manual for detailed pairing instructions.

Figure 5.4: Wireless Trigger Setup
6. Operating Instructions
6.1 Power On/Off
Press and hold the power button on the flash unit to turn it on or off.
6.2 Flash Modes
The VISION5 supports various flash modes:

Figure 6.1: Flash and Sync Modes
- Manual Flash Mode (M): Allows manual adjustment of flash power from 1/1 to 1/128. Use the increase/reduce setting buttons to adjust.
- Automatic TTL Flash Mode: The flash automatically adjusts its output based on the camera's metering system. Exposure compensation (EV) can be adjusted.
- Multi-Flash Mode (Stroboscopic): Generates a series of rapid flashes within a single exposure, useful for capturing motion sequences. Adjust flash frequency and number of flashes.
6.3 Sync Modes
- High-Speed Sync (HSS): Enables flash synchronization at shutter speeds up to 1/8000s, allowing for wider apertures in bright conditions.
- First Curtain Sync: The flash fires at the beginning of the exposure.
- Second Curtain Sync: The flash fires at the end of the exposure, often used for creating motion trails behind a moving subject.
6.4 Using the Modeling Lamp
Press the dedicated button to turn the LED modeling lamp on or off. Adjust its brightness using the setting buttons to preview your lighting setup.
6.5 Wireless Control
The built-in 2.4G wireless receiver allows control of the flash unit via the included wireless trigger. This system supports 8 channels and 3 groups (A, B, C) with a transmission range of up to 80 meters.
Video 6.1: Overview of Neewer VISION5 features, including portability, high-speed sync, stroboscopic effect, power management, and various sync modes.
7. Maintenance
7.1 Cleaning
- Use a soft, dry cloth to clean the exterior of the flash unit.
- For the flash tube and modeling lamp, use a lens cleaning cloth and solution if necessary, ensuring no residue is left.
- Avoid using harsh chemicals or abrasive materials.
7.2 Battery Care
- Charge the battery fully before first use.
- Store the battery in a cool, dry place when not in use.
- If storing for extended periods, charge the battery to approximately 50% capacity every 3-6 months to maintain its health.
7.3 Flash Tube Replacement
The flash tube is user-replaceable. If the flash tube needs replacement, ensure the unit is powered off and disconnected from any power source. Carefully follow the instructions provided with the replacement flash tube. Handle the flash tube by its base to avoid touching the glass.

Figure 7.1: User-Replaceable Flash Tube
8. Troubleshooting
| Problem | Possible Cause | Solution |
|---|---|---|
| Flash does not fire | Low battery; Unit not powered on; Wireless trigger not paired; Sync cord not connected; Camera settings incorrect. | Charge battery; Power on unit; Pair wireless trigger (same channel/group); Connect sync cord securely; Check camera flash settings. |
| Inconsistent flash output | Low battery; Overheating; Incorrect mode/settings. | Recharge battery; Allow unit to cool down; Verify flash mode and power settings. |
| Wireless trigger not working | Trigger battery low; Incorrect channel/group; Out of range. | Replace trigger battery (AAA); Ensure trigger and flash are on the same channel/group; Move closer to the flash unit. |
| Flash tube not working | Flash tube damaged or expired. | Replace the flash tube. |
9. Specifications
| Feature | Detail |
|---|---|
| Brand | NEEWER |
| Model Number | 10090472 |
| Compatible Mountings | Nikon DSLR Cameras |
| Flash Power | 400Ws |
| Guide Number | 896 |
| Flash Sync Speed | Up to 1/8000s (HSS) |
| Battery Type | Lithium Battery (6000mAh) |
| Full Power Shots | Approx. 500 |
| Recycle Time | 0.01-2.8 seconds |
| Modeling Lamp | LED (13W, 1370 Lumen) |
| Wireless Technology | 2.4G RF (8 Channels, 3 Groups) |
| Mount Type | Hot Shoe Mount (for trigger) / Bowens Mount (for modifiers) |
| Color | Black |
| UPC | 191073017931 |
10. Warranty and Support
Neewer products typically come with a limited warranty. Please refer to the warranty card included with your product or visit the official Neewer website for detailed warranty terms and conditions. For technical support, troubleshooting assistance, or service inquiries, please contact Neewer customer service through their official channels. Keep your purchase receipt as proof of purchase for warranty claims.