1. Product Overview
The Whirlpool W7432P143-60 Range Bake Igniter is a genuine Original Equipment Manufacturer (OEM) replacement part designed for Whirlpool gas ranges. This component is essential for the proper ignition of the oven's bake burner, ensuring your oven heats correctly and efficiently. It is manufactured to the exact specifications of your original part, guaranteeing compatibility and reliable performance.
2. Important Safety Information
WARNING: Before attempting any installation, maintenance, or troubleshooting procedures, always disconnect the appliance from its power source and shut off the gas supply. Failure to do so can result in electric shock, gas leaks, fire, or serious personal injury.
- Always wear appropriate personal protective equipment, such as gloves and eye protection.
- Ensure the work area is well-ventilated.
- If you are unsure about any step, consult a qualified appliance technician.
- Keep children and pets away from the work area.
- Do not modify the igniter or any other appliance components.
3. Installation Instructions
This section provides general instructions for replacing the bake igniter. Specific steps may vary slightly depending on your exact range model. Refer to your appliance's service manual for detailed diagrams and instructions if available.
3.1. Tools Required
- Screwdriver (Phillips and/or flathead)
- Wrench or nut driver (if applicable for burner tube removal)
- Pliers (optional, for wire connections)
- Work gloves
- Flashlight
3.2. Step-by-Step Replacement
- Disconnect Power and Gas: Unplug the range from the electrical outlet and turn off the gas supply valve to the appliance.
- Access the Oven Interior: Open the oven door and remove all oven racks.
- Remove Oven Bottom Panel: Locate and remove the screws holding the oven bottom panel in place. Carefully lift and remove the panel.
- Locate the Bake Burner and Igniter: The bake burner tube is typically at the bottom of the oven cavity. The igniter is usually mounted near the front or side of the burner tube.
- Disconnect Old Igniter:
- Carefully disconnect the wire connector leading to the igniter. This is often a ceramic block connector.
- Remove the screws securing the igniter to the burner tube or oven bracket.
- Gently pull the old igniter and its wires out of the oven cavity. Note how the wires are routed.
- Prepare New Igniter:
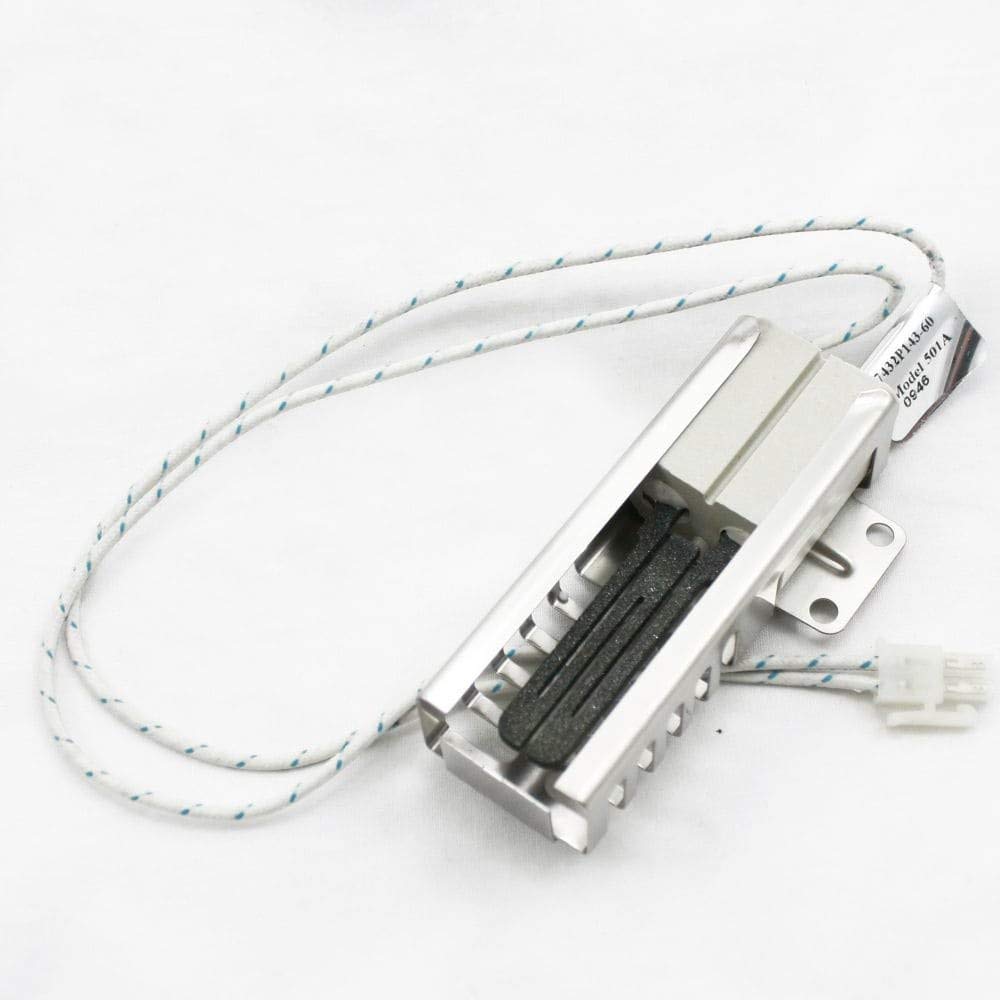
Image 1: The Whirlpool W7432P143-60 Range Bake Igniter. This image shows the ceramic igniter element and its attached wiring, ready for installation.
The new igniter comes with a ceramic wire connector. If your old igniter used a different type of connector, you may need to cut and splice the wires using ceramic wire nuts (not included) to ensure a secure, heat-resistant connection. Ensure the wires are not pulled tightly and are protected from sharp edges within the oven cavity.
- Install New Igniter:
- Route the new igniter wires through the opening, mimicking the path of the old wires.
- Secure the new igniter to the burner tube or bracket using the screws removed earlier. Do not overtighten.
- Connect the igniter wires to the appliance wiring using the ceramic connector. Ensure a firm connection.
- Reassemble Oven:
- Replace the oven bottom panel and secure it with its screws.
- Replace oven racks.
- Restore Power and Gas: Turn on the gas supply valve and plug the range back into the electrical outlet.
4. Operation Verification
After installation, it is crucial to verify the proper function of the new igniter and ensure there are no gas leaks.
- Check for Gas Leaks: Before turning on the oven, apply a soapy water solution to all gas connections you may have disturbed. Bubbles indicate a gas leak. If a leak is detected, immediately shut off the gas supply and tighten connections or seek professional assistance.
- Test Oven Ignition:
- Set the oven to a bake temperature (e.g., 350°F or 175°C).
- Observe the igniter. It should begin to glow orange/red within a few seconds.
- Once the igniter reaches sufficient temperature, the gas valve will open, and the burner should ignite with a soft "poof" sound.
- Allow the oven to run for a few minutes to ensure stable operation.
- Turn off the oven.
If the burner does not ignite or if you smell gas, immediately turn off the oven and gas supply, and re-check your installation or consult a qualified technician.
5. Maintenance
The Whirlpool W7432P143-60 Bake Igniter is a sealed component and does not require routine maintenance. Its lifespan is typically determined by usage and operating conditions. To prolong the life of your oven and its components:
- Keep the oven interior clean to prevent grease and food debris buildup, which can affect burner performance.
- Avoid spilling liquids directly onto the igniter or burner assembly.
- Ensure proper ventilation around the appliance.
6. Troubleshooting Common Issues
If your oven is not heating or igniting properly after replacing the igniter, consider the following:
| Problem | Possible Cause | Solution |
|---|---|---|
| Igniter glows but burner does not ignite. | Insufficient glow from igniter, faulty gas valve, or gas supply issue. | Ensure igniter glows bright orange/red. Check gas supply to the appliance. If igniter glows correctly but no gas, the gas valve may be faulty. |
| Igniter does not glow at all. | No power to the igniter, faulty igniter (unlikely if new), or wiring issue. | Verify power to the range. Check igniter wiring connections for looseness or damage. Ensure the igniter is correctly installed. |
| Oven heats slowly or unevenly. | Partial ignition, weak igniter (if not new), or other oven component issues. | Ensure the burner ignites fully across its length. If the igniter is new, this symptom might indicate another issue with the oven's heating system. |
| Smell of gas. | Gas leak from connections or faulty gas valve. | Immediately shut off gas supply and power. Check all gas connections for leaks using soapy water. Do not operate the appliance until the leak is resolved. |
For issues not resolved by these steps, it is recommended to contact a certified appliance repair technician.
7. Product Specifications
- Part Number: WP7432P143-60
- Brand: Whirlpool
- Type: Range Bake Igniter
- Compatibility: Genuine OEM replacement part for various Whirlpool brand gas ranges. Refer to your appliance's model number for exact compatibility.
- Dimensions: Approximately 5.51 x 6.69 x 151.97 inches (Note: 151.97 inches likely refers to packaging or total wire length. The igniter element is much smaller.)
- Weight: Approximately 5.3 ounces
Note: Product dimensions provided are from manufacturer specifications and may include packaging or total wire length. The igniter element itself is compact.
8. Warranty and Support
As a genuine Original Equipment Manufacturer (OEM) part, the Whirlpool W7432P143-60 Range Bake Igniter typically carries a limited warranty from Whirlpool. Please refer to the warranty documentation included with your purchase or visit the official Whirlpool website for specific warranty terms and conditions.
For technical support, service, or to locate authorized service providers, please visit the official Whirlpool support website or contact their customer service department. When contacting support, have your appliance's full model and serial number ready.
Whirlpool Official Website: www.whirlpool.com


