
Introduction
This manual provides instructions for the installation, maintenance, and specifications of the HQRP Inner & Outer Circular Filter Set. This filter set is designed for use with specific Bissell bagless upright vacuum cleaner models to maintain optimal performance and air filtration.
Model: 884667806161702
Compatible with: Bissell PowerForce Helix 1240, 12401, 1240R, 12406, 1240C, 1240D, 1240Y, 1240U, 1240V, 1240W, 12B1, 12B1C, 12B1D, 12B1E, 12B1R, 12B1U, 12B1V, 12B1W; PowerForce Turbo 68C7 series; PowerGroom Helix Rewind 98N4 series; PowerTrak 2083C, 2083N; CleanView Helix Plus 22C1, 22C12, 32Y7 series.
Setup: Filter Installation
Follow these steps to install the HQRP Circular Filter Set into your compatible Bissell vacuum cleaner.
- Power Off and Unplug: Before attempting any maintenance or installation, ensure your vacuum cleaner is turned off and unplugged from the power outlet to prevent electrical hazards.
- Remove Dirt Cup: Locate and remove the dirt cup from your vacuum cleaner. Refer to your vacuum's original manual for specific instructions on dirt cup removal.
- Access Old Filters: Open the dirt cup to access the existing inner and outer circular filters. These are typically located within the dirt cup assembly.
- Remove Old Filters: Carefully remove the old inner and outer filters. Dispose of them properly.
- Install New Filters: Place the new HQRP inner circular filter into the designated slot within the dirt cup. Then, place the outer foam filter around the inner filter. Ensure both filters are seated correctly and securely.
- Reassemble Dirt Cup: Close the dirt cup and reattach it to the vacuum cleaner. Ensure it clicks into place securely.

Figure 1: Illustration of filter replacement steps. Step 1 shows removing the dirt cup, Step 2 shows accessing the filter, and Step 3 shows installing the new filters.

Figure 2: The HQRP Inner and Outer Circular Filter Set, showing the pleated inner filter and the foam outer filter.
Operating Instructions
Once the new filters are installed, your vacuum cleaner is ready for operation. The HQRP filter set is designed to provide HEPA H12 filtration, capturing 99.97% of particles down to 0.3 microns.
- Ensure the dirt cup is securely attached before operating the vacuum.
- Operate your vacuum cleaner as per its original manufacturer's instructions.
- Regularly check the dirt cup and filters for debris accumulation to maintain optimal suction and filtration.
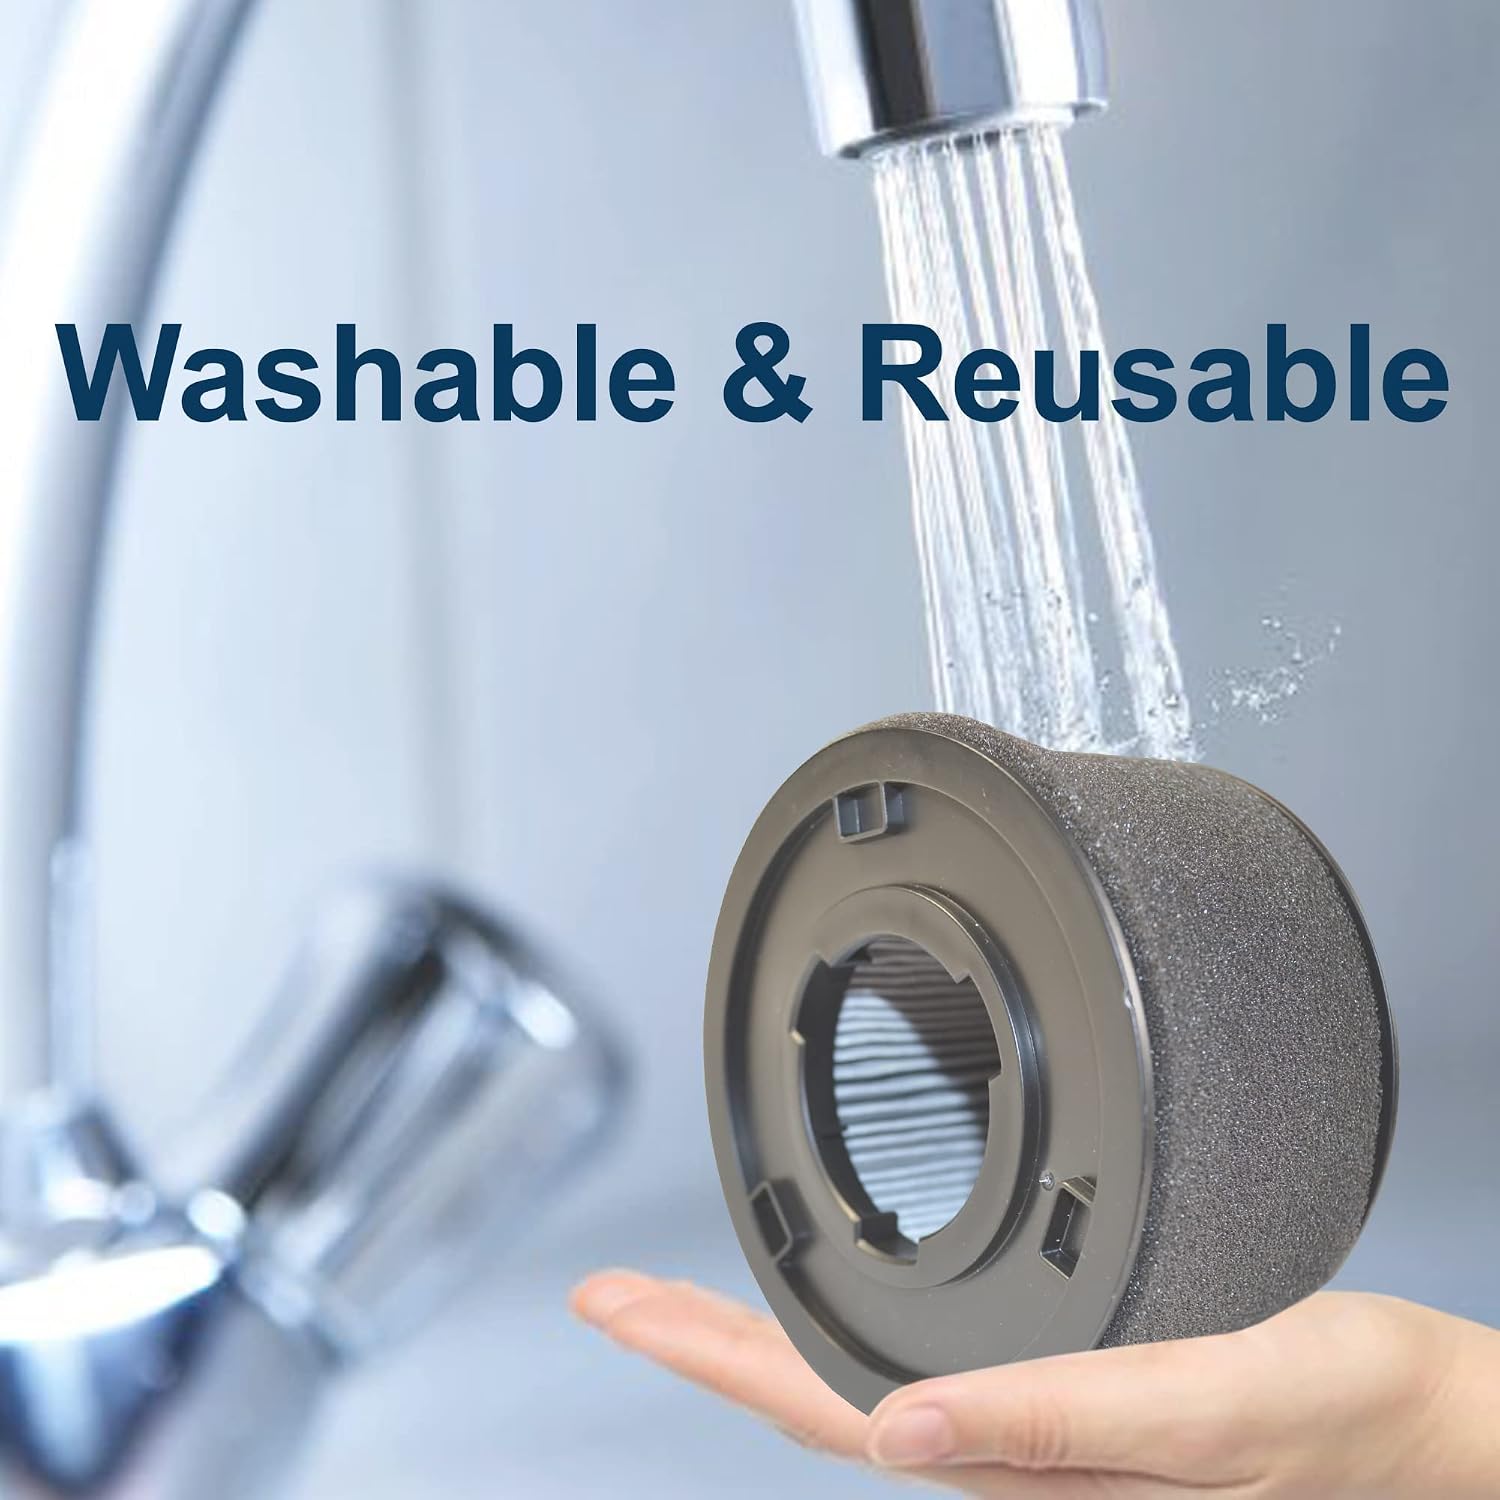
Figure 3: This diagram illustrates the HEPA filtration capability of the filter, showing its effectiveness against various airborne particles such as bacteria, dust, pollen, pet dander, and smoke.
Maintenance: Cleaning and Replacement
To ensure the longevity and effectiveness of your HQRP filters, regular cleaning and timely replacement are essential.
Cleaning Instructions:
- Remove Filters: Follow the "Setup: Filter Installation" steps to remove both the inner and outer filters from the dirt cup.
- Wash Filters: Rinse the filters under cool, running water until the water runs clear. Gently squeeze the foam filter to remove excess water and dirt. Do not twist or wring the filters forcefully.
- Air Dry: Allow both filters to air dry completely for at least 24 hours before reinstallation. Do not use a dryer or other heating elements, as this can damage the filter material. Ensure they are completely dry to prevent mold or mildew growth and maintain vacuum performance.
- Reinstall: Once completely dry, reinstall the filters into the dirt cup as described in the "Setup" section.
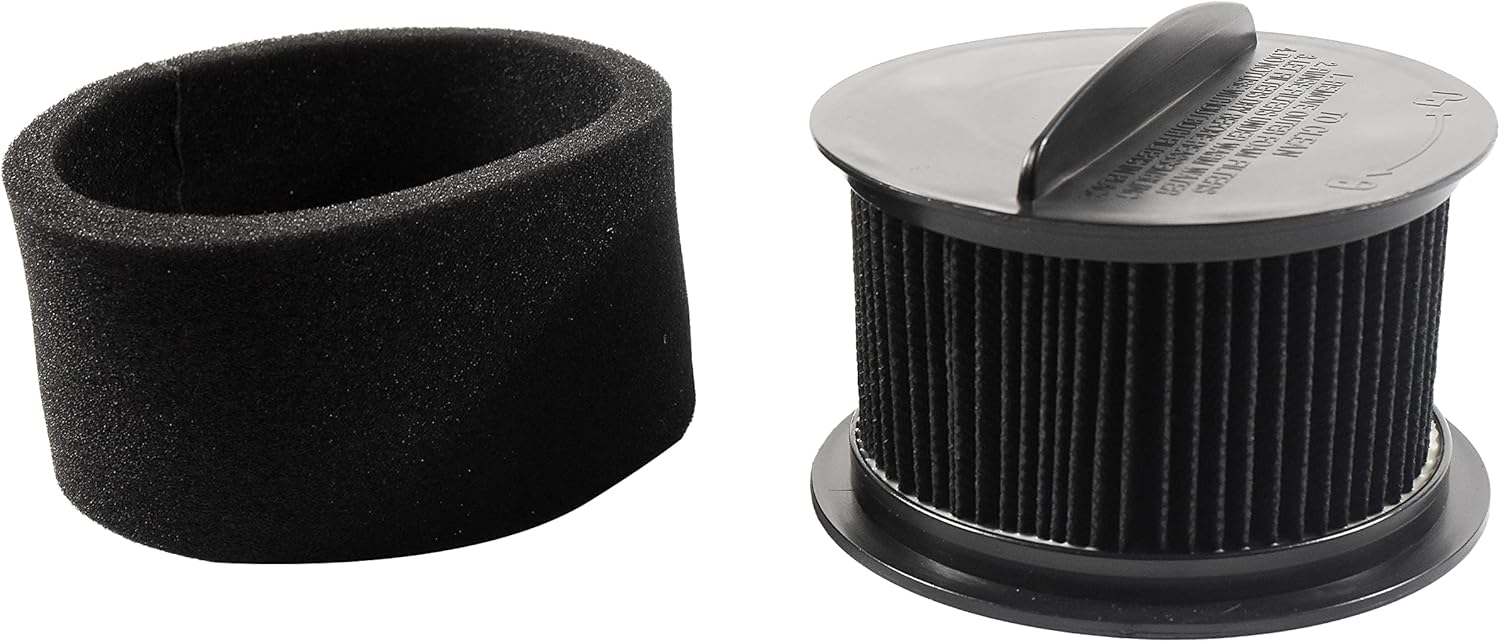
Figure 4: A hand holding the circular filter under running water, demonstrating the washable and reusable nature of the filter.
Replacement Schedule:
It is recommended to clean or replace the filters every 3-6 months, depending on the frequency of use and the amount of debris collected. Regular replacement ensures consistent filtration performance and extends the life of your vacuum cleaner.
Troubleshooting
If you experience issues after installing or cleaning your HQRP filters, consider the following:
- Reduced Suction:
- Check if filters are clogged. Clean or replace them as necessary.
- Ensure filters are completely dry before reinstallation. Wet filters can restrict airflow.
- Verify that the dirt cup is properly sealed and attached to the vacuum.
- Unusual Odor:
- Filters may not have been completely dry after washing, leading to mildew. Ensure thorough drying.
- Consider replacing filters if odors persist after cleaning.
- Filters Don't Fit:
- Double-check the compatibility list in the "Introduction" section to ensure your vacuum model is supported.
- Ensure the filters are oriented correctly during installation.
Specifications
| Feature | Detail |
|---|---|
| Brand | HQRP |
| Model Number | 884667806161702 |
| Material | Foam (Outer Filter), Pleated (Inner Filter) |
| Filtration Class | HEPA H12 |
| Particle Retention | 99.97% of particles down to 0.3 micron |
| Reusability | Washable and Reusable |
| Number of Pieces | 2 (Inner and Outer Filter) |
| Compatible Bissell Parts | 203-7913, 203-2587 (Style 9 / 10 Filter) |
Warranty and Support
Information regarding specific warranty terms for this HQRP product is not provided in the available data. For warranty claims or further support, please refer to the official HQRP website or contact their customer service directly.
Manufacturer: HQRP
UPC: 887774910038