
Introduction
Thank you for purchasing the Vivibright GP8S Portable Micro Projector. This manual provides essential information for setting up, operating, and maintaining your projector. Please read it thoroughly before use to ensure optimal performance and longevity of the device.
The Vivibright GP8S is a compact and portable home theater projector designed to deliver clear images and videos, supporting various input sources including USB, SD, and HDMI.
Product Overview
Projector Components
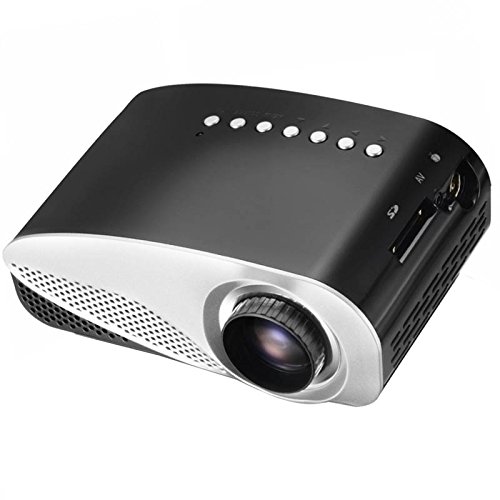
Figure 1: Front and Top View of the Vivibright GP8S Projector. This image displays the projector from a slightly elevated front-right angle, highlighting the main lens, ventilation grilles on the front, and the control buttons located on the top panel. The device features a sleek black and silver design.
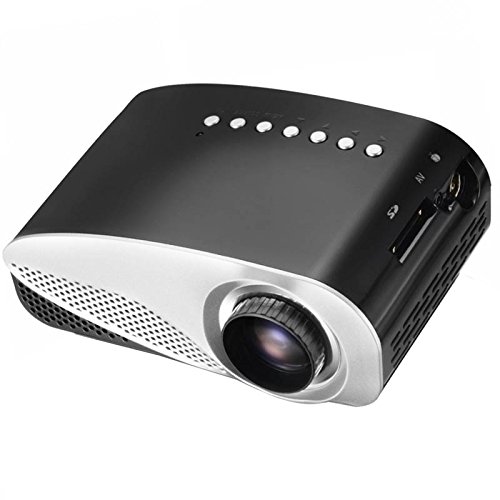
Figure 2: Side View of the Vivibright GP8S Projector. This image shows the projector from a side angle, emphasizing the ventilation grilles on the left side of the device, which are crucial for heat dissipation during operation.
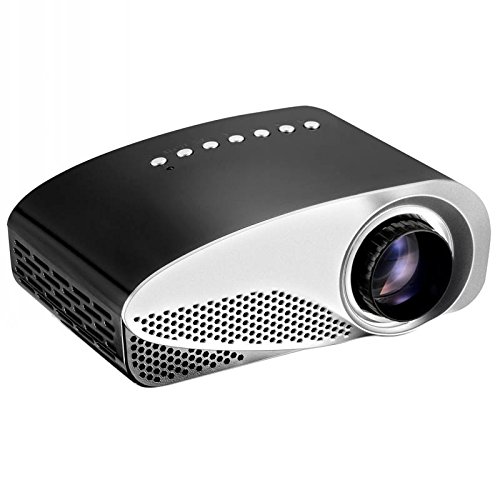
Figure 3: Angled View of the Vivibright GP8S Projector. This image provides another perspective of the projector, showcasing its compact form factor and the design elements from a different angle.
Rear Panel and Connectivity
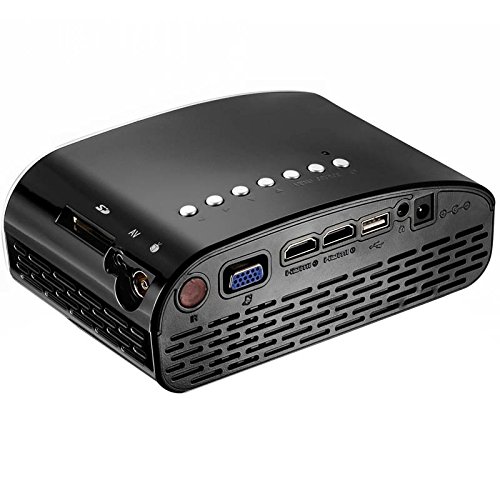
Figure 4: Rear Panel Connectivity of the Vivibright GP8S Projector. This image details the rear panel, displaying various input and output ports including HDMI, USB, SD card slot, AV input, and the power input. These ports allow for versatile connectivity with different media devices.
The Vivibright GP8S features a user-friendly interface with control buttons on the top panel and a comprehensive set of connectivity options on the rear. Key components include:
- Projection Lens: Located at the front for image output.
- Control Buttons: Power, navigation, and source selection buttons on the top.
- Ventilation Grilles: On the sides and rear for heat dissipation.
- Input Ports: HDMI, USB, SD card slot, AV input.
- Power Input: For connecting the power adapter.
- Focus Ring: Manual adjustment for image clarity (typically around the lens).
Setup Guide
1. Placement
Place the projector on a stable, flat surface. Ensure there is adequate space around the ventilation grilles for proper airflow. The distance from the screen or wall will determine the image size. Adjust the projector's position to achieve the desired projection size and angle.
2. Power Connection
- Connect the power adapter to the projector's power input port (refer to Figure 4).
- Plug the power adapter into a suitable electrical outlet.
- The power indicator light on the projector should illuminate.
3. Connecting Input Devices
The Vivibright GP8S supports multiple input sources:
- HDMI: Connect an HDMI cable from your device (e.g., laptop, gaming console, set-top box) to one of the HDMI ports on the projector.
- USB: Insert a USB flash drive into the USB port to play media files directly.
- SD Card: Insert an SD card into the SD card slot to play media files.
- AV: Use an AV cable to connect older devices (e.g., DVD player) to the AV input port.
4. Focus Adjustment
Once the projector is powered on and displaying an image, rotate the focus ring around the lens until the projected image appears sharp and clear.
Operating Instructions
1. Powering On/Off
- To Power On: Press the power button on the projector's top panel or on the remote control. The projector will start up, and the Vivibright logo will appear.
- To Power Off: Press the power button again. A confirmation message may appear; select 'Yes' to shut down. Always allow the projector to cool down properly before unplugging it.
2. Selecting Input Source
After powering on, you may need to select the correct input source:
- Press the 'Source' button on the projector or remote control.
- Use the navigation arrows to highlight the desired input (e.g., HDMI1, USB, SD, AV).
- Press 'OK' or 'Enter' to confirm your selection.
3. Media Playback (USB/SD)
When a USB drive or SD card is inserted and selected as the source:
- The projector's media browser will appear.
- Navigate through folders and files using the remote control's arrow keys.
- Select a file (e.g., video, image, audio) and press 'OK' to play.
4. Remote Control Usage
The included remote control allows for convenient operation from a distance. It typically includes buttons for power, source selection, volume control, menu navigation, and media playback controls.
Maintenance
Regular maintenance ensures the longevity and optimal performance of your Vivibright GP8S projector.
1. Cleaning the Lens
- Use a soft, lint-free cloth specifically designed for optical lenses.
- Gently wipe the lens in a circular motion. Avoid using abrasive cleaners or excessive force.
- For stubborn smudges, a small amount of lens cleaning solution can be applied to the cloth (not directly to the lens).
2. Cleaning Ventilation Grilles
- Periodically check the ventilation grilles for dust accumulation.
- Use a soft brush or a can of compressed air to gently remove dust from the grilles.
- Ensure the projector is powered off and unplugged before cleaning.
3. Storage
When not in use for extended periods, store the projector in a cool, dry, dust-free environment. Consider using the original packaging or a protective case to prevent damage.
Troubleshooting
| Problem | Possible Cause | Solution |
|---|---|---|
| No image projected |
|
|
| Image is blurry |
|
|
| No sound |
|
|
| Remote control not working |
|
|
Specifications
| Brand | Vivibright |
| Model | GP8S |
| Display Technology | LCD |
| Hardware Interface | HDMI, USB |
| Connectivity Technology | HDMI, USB |
| Special Feature | Portable |
| Recommended Uses | Home Cinema |
| Mounting Type | Tabletop Mount |
| Item Weight | 870 g |
| Package Dimensions | 27.4 x 24.3 x 15.7 cm |
| Included Accessories | Remote Control |
Warranty and Support
For information regarding warranty coverage, technical support, or service inquiries, please refer to the warranty card included with your product or contact your retailer. Keep your purchase receipt as proof of purchase.


