1. Introduction
This manual provides comprehensive instructions for the installation, operation, and maintenance of the AUBER HD330 Dual Output Programmable Humidity Controller. The HD330 is designed to accurately measure and control humidity levels, offering two independent on/off control outputs for both humidification and dehumidification.
Please read this manual thoroughly before operating the device to ensure proper function and safety.
2. Safety Information
- Always disconnect power before performing any maintenance or installation.
- Ensure the power supply voltage matches the specifications of the controller.
- Do not expose the controller to water or extreme temperatures beyond its operating range.
- This device is intended for indoor use only.
- Do not attempt to open or repair the unit yourself. Refer all servicing to qualified personnel.
- Keep out of reach of children.
3. Product Overview
The AUBER HD330 is a plug-and-play humidity controller featuring a digital display and robust sensor. It includes two independent control outputs for managing both humidifiers and dehumidifiers.
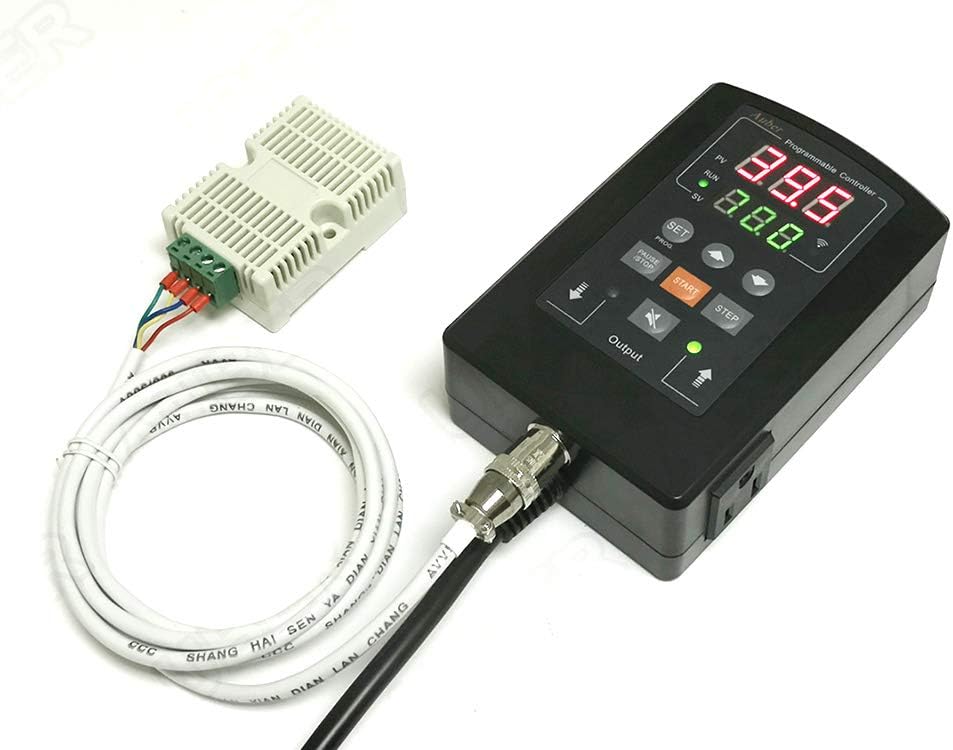
Figure 1: AUBER HD330 Controller and Humidity Sensor. The image displays the main controller unit with its digital display and control buttons, connected to a separate humidity sensor module via a cable.
3.1. Main Components
- Controller Unit: Main unit with digital display, control buttons, and power outlets.
- Humidity Sensor: Robust sensor designed for high humidity and condensing environments.
- Power Cord: For connecting the controller to a power source.
- Output Sockets: Two independent sockets for connecting a humidifier and a dehumidifier.
3.2. Display and Buttons
The digital display shows the current humidity (PV) and set humidity (SV). Control buttons include SET, PROG, PAUSE/STOP, START, and STEP for navigation and parameter adjustment.
4. Setup
- Unpack: Carefully remove the controller and all accessories from the packaging.
- Sensor Connection: Connect the humidity sensor cable to the designated port on the controller unit. Ensure a secure connection.
- Placement: Position the humidity sensor in the area where humidity is to be measured and controlled. Avoid placing it directly in water or in areas with extreme airflow.
- Device Connection: Plug your humidifier into the designated "Humidifier" output socket and your dehumidifier into the "Dehumidifier" output socket on the controller.
- Power On: Plug the controller's power cord into a standard electrical outlet. The display will illuminate.
5. Operating Instructions
5.1. Basic Operation
- Upon power-up, the display will show the current humidity (PV) and the set humidity (SV).
- The controller will automatically activate the humidifier or dehumidifier based on the set humidity and hysteresis (dead band) settings.
5.2. Setting Humidity Parameters
- Press the SET button once to enter the set point adjustment mode. The SV value will flash.
- Use the UP and DOWN arrow buttons to adjust the desired humidity set point.
- Press SET again to confirm the new set point and exit the adjustment mode.
5.3. Advanced Programming (PROG Menu)
The PROG menu allows access to advanced settings such as hysteresis, calibration, and alarm limits. Refer to the detailed programming guide for specific parameter adjustments.
- Press and hold the PROG button for 3 seconds to enter the programming menu.
- Use the STEP button to navigate through different parameters.
- Use the UP and DOWN arrow buttons to change parameter values.
- Press PROG again to save changes and exit the programming menu.
5.4. Alarm Functions
The HD330 features high and low limit alarms with a built-in audio buzzer. These can be configured within the PROG menu to alert users when humidity levels exceed or fall below predefined thresholds.
6. Maintenance
6.1. Cleaning
- Wipe the controller's exterior with a soft, dry cloth. Do not use abrasive cleaners or solvents.
- Ensure the sensor is free from dust and debris. Gently clean with a soft brush if necessary.
6.2. Sensor Care
The robust sensor is designed for high humidity environments. However, prolonged exposure to harsh chemicals or extreme contaminants may affect its accuracy. Regular inspection of the sensor for physical damage or buildup is recommended.
7. Troubleshooting
| Problem | Possible Cause | Solution |
|---|---|---|
| Controller not powering on | No power supply; loose connection | Check power cord connection; verify outlet functionality. |
| Inaccurate humidity reading | Sensor dirty or damaged; calibration needed | Clean sensor; perform sensor calibration (refer to PROG menu instructions). |
| Humidifier/Dehumidifier not activating | Incorrect set point; hysteresis too wide; device not plugged in or faulty | Verify set point and hysteresis settings; check connections to output sockets; test connected device independently. |
| Alarm constantly sounding | Humidity outside alarm limits; alarm limits set too close to operating range | Adjust humidity levels; reconfigure high/low alarm limits in PROG menu. |
8. Specifications
- Model: HD330
- Brand: AUBER
- Voltage: 242 Volts (AC)
- Display Type: Digital
- Product Dimensions: 3.58 x 1.81 x 5.51 inches
- Item Weight: 1.2 pounds
- UPC: 701098738928
- Manufacturer: Auber Instruments
9. Warranty and Support
For warranty information, technical support, or service inquiries, please contact Auber Instruments directly. Refer to the product packaging or the official Auber Instruments website for current contact details.
Note: Unauthorized repairs or modifications may void the product warranty.