
1. Introduction
Thank you for choosing the BLACK+DECKER FX400BMG 400W Food Processor. This versatile kitchen appliance is designed to simplify your food preparation tasks with its powerful motor and multiple attachments. It features a 1.2L food processor bowl, a 1.5L blender jar, mincer, grinder, and various blades for chopping, slicing, shredding, kneading, and whisking. Please read this manual carefully before first use to ensure safe and optimal operation.
Important: This appliance operates on 220 Volts and is not intended for use in regions with 110-120V power supply, such as the USA.

Image 1.1: The BLACK+DECKER FX400BMG Food Processor with its various components, including the main unit, blender, mincer, and grinder attachments.
2. Important Safety Instructions
When using electrical appliances, basic safety precautions should always be followed to reduce the risk of fire, electric shock, and/or injury to persons, including the following:
- Read all instructions before using the appliance.
- Ensure the voltage indicated on the appliance corresponds to your local mains voltage before connecting. This appliance is designed for 220V operation only.
- Do not immerse the motor unit, cord, or plug in water or other liquids.
- Close supervision is necessary when any appliance is used by or near children.
- Unplug from outlet when not in use, before assembling or disassembling parts, and before cleaning.
- Avoid contact with moving parts.
- Do not operate any appliance with a damaged cord or plug, or after the appliance malfunctions or has been dropped or damaged in any manner.
- The use of attachments not recommended or sold by the manufacturer may cause fire, electric shock, or injury.
- Do not use outdoors.
- Do not let cord hang over edge of table or counter, or touch hot surfaces.
- Keep hands and utensils away from moving blades or discs while processing food to prevent severe personal injury and/or damage to the food processor. A scraper may be used but only when the food processor is not running.
- Blades are sharp. Handle with care.
- Always ensure the lid is securely locked in place before operating the appliance.
- Do not attempt to defeat the safety interlock mechanism.
3. Product Components
The BLACK+DECKER FX400BMG Food Processor comes with the following components and accessories:
- Main Motor Unit
- 1.2L Food Processor Bowl
- Food Processor Lid with Feeder Tube and Pusher
- Stainless Steel Chopping Blade
- Slicing and Shredding Disc
- Kneading Blade
- Whisking Attachment
- 1.5L Blender Jar with Detachable Blade System
- Grinder Mill
- Mincer-Chopper Mill
- Spatula

Image 3.1: The 1.2L food processor bowl equipped with the stainless steel chopping blade.
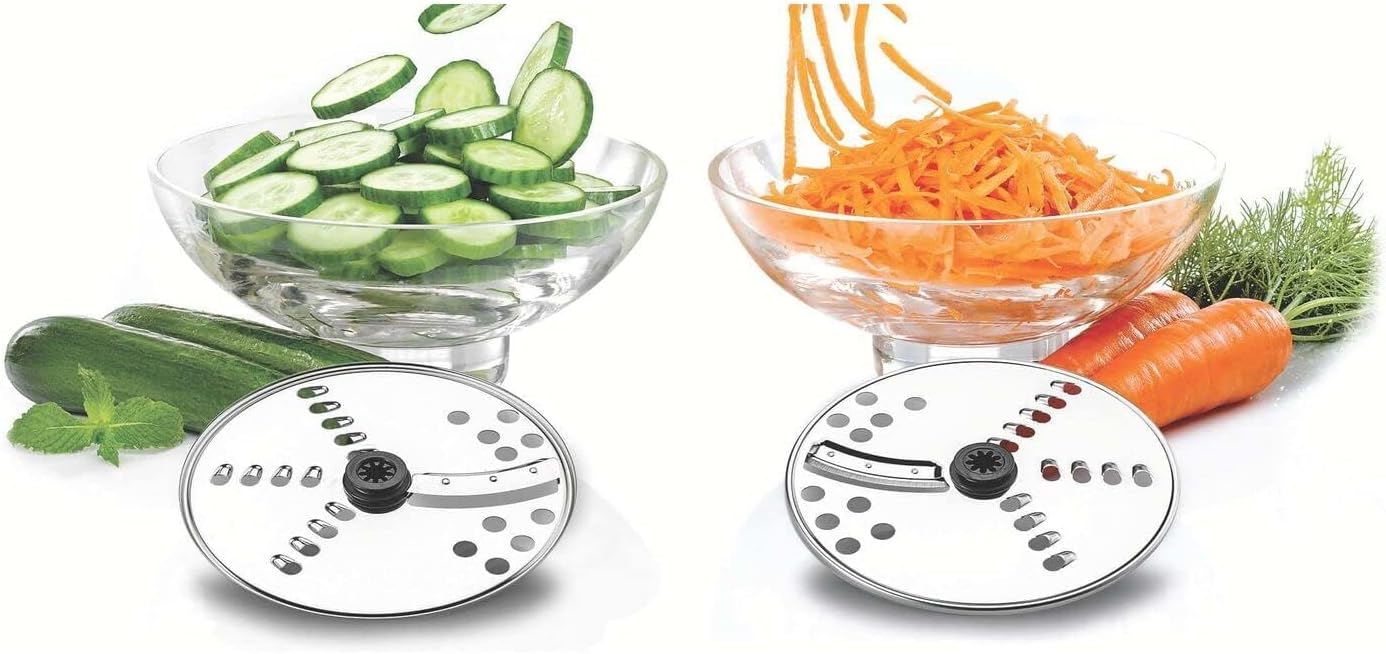
Image 3.2: Interchangeable discs for slicing and shredding vegetables like cucumbers and carrots.

Image 3.3: The mincer-chopper mill, suitable for processing meats and other ingredients.

Image 3.4: The grinder mill, ideal for grinding spices and dry ingredients.
4. Setup and Assembly
Before first use, wash all removable parts in warm soapy water, rinse thoroughly, and dry. Ensure the motor unit is unplugged from the power outlet.
- Place the Motor Unit: Position the main motor unit on a stable, flat, and dry surface.
- Attach the Bowl/Jar: Depending on the task, place either the food processor bowl or the blender jar onto the motor unit. Align the base of the bowl/jar with the motor unit and twist clockwise until it locks securely into place. The safety interlock prevents operation if not correctly assembled.
- Insert Blades/Discs: For the food processor bowl, carefully place the desired blade (chopping, kneading, whisking) or disc (slicing, shredding) onto the central shaft. For the blender, ensure the blade system is securely attached to the bottom of the jar. For the mincer/grinder, attach the mill to the motor unit.
- Secure the Lid: Place the lid onto the food processor bowl or blender jar. Align the lid with the handle and twist clockwise until it locks. The appliance will not operate if the lid is not properly secured.
- Add Ingredients: Once assembled, add your ingredients. For the food processor, use the feeder tube and pusher for continuous processing.
5. Operating Instructions
The FX400BMG features a control dial with two speed settings and a pulse function.
- Speed 1 (Low): Suitable for lighter tasks, mixing, and softer ingredients.
- Speed 2 (High): Ideal for heavier loads, harder ingredients, and faster processing.
- Pulse (P): Provides short bursts of power at maximum speed. Use for controlled chopping, blending, or when you need quick bursts of power.
5.1. Using the Food Processor Bowl
- Assemble the food processor bowl with the desired blade (chopping, kneading, whisking) or disc (slicing, shredding) as described in Section 4.
- Add ingredients to the bowl or through the feeder tube. Do not overfill.
- Secure the lid and plug the appliance into a 220V power outlet.
- Turn the control dial to Speed 1, Speed 2, or Pulse, depending on your processing needs.
- For slicing/shredding, use the pusher to guide ingredients through the feeder tube.
- Once finished, turn the dial to '0' (off) and unplug the appliance before disassembling.
5.2. Using the Blender Jar

Image 5.1: The detachable blade system for the 1.5L blender jar.
- Ensure the blender blade system is securely attached to the bottom of the 1.5L blender jar.
- Add liquids and solid ingredients to the jar. Do not exceed the maximum fill line.
- Place the lid securely on the blender jar and attach the jar to the motor unit.
- Plug into a 220V power outlet.
- Select Speed 1 or Speed 2 for continuous blending, or use the Pulse function for controlled mixing or ice crushing.
- After blending, turn the dial to '0' and unplug before removing the jar.
5.3. Using the Mincer-Chopper Mill

Image 5.2: The mincer-chopper mill shown with cubes of meat, ready for processing.
- Place the ingredients (e.g., small pieces of meat, garlic, herbs) into the mincer-chopper mill cup.
- Attach the blade assembly and then the mill cup onto the motor unit, twisting to lock.
- Plug into a 220V power outlet.
- Use the Pulse function for short bursts or Speed 1 for continuous mincing/chopping.
- Turn off and unplug before carefully disassembling and removing processed ingredients.
5.4. Using the Grinder Mill
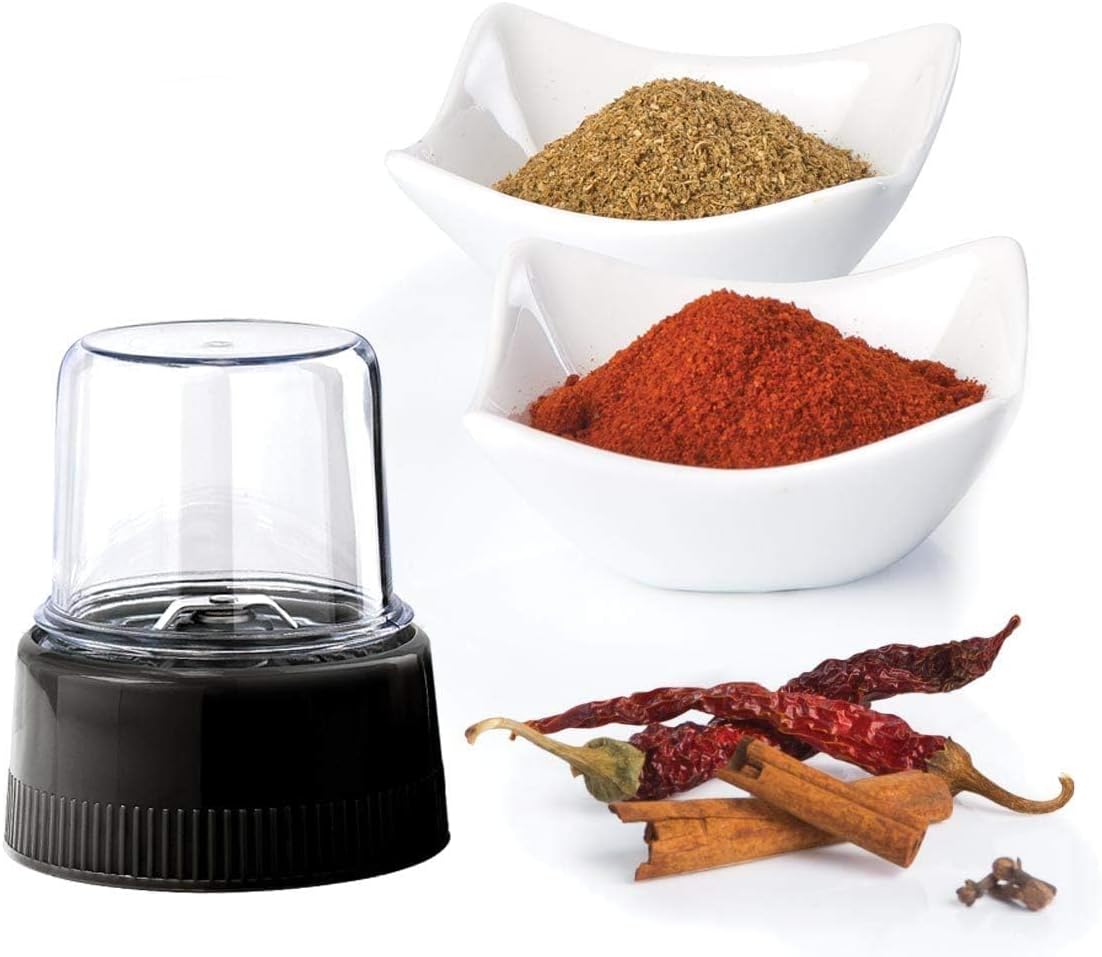
Image 5.3: The grinder mill with whole spices, demonstrating its function for fine grinding.
- Place dry ingredients (e.g., coffee beans, spices, nuts) into the grinder mill cup.
- Attach the blade assembly and then the mill cup onto the motor unit, twisting to lock.
- Plug into a 220V power outlet.
- Use Speed 2 or the Pulse function for grinding until desired consistency is achieved.
- Turn off and unplug before carefully disassembling and removing ground ingredients.
6. Maintenance and Cleaning
Proper cleaning and maintenance will extend the life of your appliance.
- Always unplug the appliance from the power outlet before cleaning.
- Motor Unit: Wipe the motor unit with a damp cloth. Do not immerse it in water or any other liquid.
- Bowls, Jars, Lids, and Blades: All removable parts (bowls, jars, lids, blades, discs, mills) should be hand washed in warm soapy water. Rinse thoroughly and dry immediately.
- Dishwasher Safety: The manufacturer states that this product is not dishwasher safe. Hand washing is recommended for all components.
- Handle Blades with Care: The blades are very sharp. Always handle them by the plastic hub.
- Stubborn Stains: For stubborn stains on plastic parts, a non-abrasive cleaner can be used.
- Storage: Store the assembled appliance or its components in a dry, safe place away from children.
7. Troubleshooting
If you encounter any issues with your food processor, refer to the table below for common problems and solutions.
| Problem | Possible Cause | Solution |
|---|---|---|
| Appliance does not turn on. | Not plugged in; Bowl/lid not correctly assembled; Power outage. | Ensure plug is firmly in a 220V outlet. Check that the bowl/jar and lid are securely locked. Verify power supply. |
| Motor stops during operation. | Overload; Overheating. | Unplug, remove some ingredients, and allow motor to cool for 15-20 minutes before restarting. Do not overfill. |
| Ingredients not processing evenly. | Too many ingredients; Ingredients too large; Incorrect speed. | Process in smaller batches. Cut ingredients into smaller, uniform pieces. Use the Pulse function for better control or a higher speed if needed. |
| Leakage from bowl/jar. | Lid not sealed properly; Overfilling; Damaged seal. | Ensure lid is securely locked. Do not exceed maximum fill line. Check seals for damage and replace if necessary. |
| Unusual noise or odor. | Foreign object; Motor issue. | Immediately turn off and unplug. Check for any foreign objects. If the issue persists, discontinue use and contact customer support. |
8. Technical Specifications
| Feature | Specification |
|---|---|
| Model Number | FX400BMG |
| Power | 400W |
| Voltage | 220V (Not for USA) |
| Food Processor Bowl Capacity | 1.2 Liters |
| Blender Jar Capacity | 1.5 Liters |
| Number of Speeds | 2 + Pulse |
| Blade Material | Stainless Steel |
| Product Dimensions | 10.24 x 9.06 x 14.96 inches |
| Item Weight | 8.25 pounds |
| Care Instructions | Hand Wash (Not Dishwasher Safe) |
9. Warranty and Support
For warranty information, please refer to the warranty card included with your product packaging. If you have any questions, require technical assistance, or need to order replacement parts, please contact BLACK+DECKER customer support in your region. You can typically find contact details on the official BLACK+DECKER website or on the product packaging.
Please have your model number (FX400BMG) and purchase date ready when contacting support.


