
1. Introduction
This manual provides detailed instructions for the safe and effective use of your Godox TT350o Mini Thinklite TTL Flash Speedlite. Please read this manual thoroughly before use to ensure optimal performance and to prevent damage to the product or your camera equipment. The Godox TT350o is a compact and versatile flash unit designed for Olympus and Panasonic cameras, offering advanced features such as TTL autoflash, manual control, high-speed sync, and 2.4G wireless transmission.

Figure 1.1: Godox TT350o Flash Speedlite and accessories, including the flash unit, mini stand, diffuser, and carrying pouch.
2. Product Overview and Components
2.1 Main Features
- Multi-Function: Guide Number (GN) 36, 22 steps of power output (1/1-1/128).
- Recycle Time: Approximately 0.1-2.2 seconds.
- Full Power Flashes: Up to 210 flashes using 2500 mAh Ni-MH batteries.
- Zoom Range: 24-105mm auto/manual zooming.
- 2.4G Wireless Transmission: Offers all-in-one functions with a transmission range of up to 100 meters.
- Advanced Flash Modes: Supports TTL autoflash, Manual Flash, 1/8000 high-speed sync (HSS), flash exposure compensation (FEC), front & rear curtain sync, and multi flash.
- Master and Slave Capability: Can act as a master unit to control other Godox flashes or as a slave unit controlled by compatible Godox triggers.
- Compact Design: Features an LCD panel for clear operation and four function buttons for settings adjustment.
2.2 Included Components
The Godox TT350o package typically includes the following items:
- Godox TT350o Flash Unit
- Mini Stand
- Diffuser
- Carrying Pouch
- Instruction Manual (this document)
- Color Gels Kit (may vary by package)

Figure 2.1: Unboxed Godox TT350o with its standard accessories.
2.3 Parts Identification

Figure 2.2: Labeled diagram of the Godox TT350o flash unit.
- Zoom Selection Button
- Mode Selection Button
- Custom Function Setting Button (reusable button, long press for 2 seconds)
- Test Button/Flash Ready Indicator
- LCD Panel
- High-Speed Sync Button
- S1/S2 Optic Slave Triggering Selection Button (in non-wireless mode)
- Group/Channel Button (reusable button, in wireless mode)
- Power Switch
- Lock Ring
- Wireless Selection Button (reusable button, long press for 2 seconds)
- Hotshoe
- Set Button
- Select Dial
- Battery Compartment
- Optic Control Sensor
- Focus Assist Beam
- Flash Head
- Catchlight Panel
- Built-in Wide Panel
3. Setup
3.1 Battery Installation
The Godox TT350o requires two AA batteries for operation. For best performance and recycle times, use high-quality Ni-MH rechargeable batteries.
- Open the battery compartment door located on the side of the flash unit.
- Insert two AA batteries according to the polarity indicators (+/-) inside the compartment.
- Close the battery compartment door securely.

Figure 3.1: Battery compartment for two AA batteries.
3.2 Mounting the Flash on Camera
To attach the TT350o to your camera's hotshoe:
- Ensure the flash unit is powered off.
- Slide the hotshoe of the flash into your camera's hotshoe mount.
- Rotate the lock ring clockwise until it is securely tightened. Do not overtighten.

Figure 3.2: Detail of the flash hotshoe for camera mounting.
4. Operating Modes and Functions
4.1 TTL Autoflash Mode
In TTL (Through-The-Lens) autoflash mode, the flash output is automatically adjusted by the camera to achieve optimal exposure. This mode is ideal for quick shooting and changing light conditions.
- Press the MODE button until 'TTL' appears on the LCD panel.
- The flash will automatically determine the appropriate output.

Figure 4.1: TTL Auto Flash in operation.
4.2 Manual Flash Mode (M)
Manual mode allows you to set the flash output power manually from 1/1 (full power) to 1/128 in 1/3 stop increments. This provides precise control over lighting.
- Press the MODE button until 'M' appears on the LCD panel.
- Rotate the Select Dial to adjust the flash output power.
4.3 Multi (Stroboscopic) Flash Mode
Multi flash mode fires a series of rapid flashes within a single exposure, useful for capturing multiple stages of movement in one image.
- Press the MODE button until 'MULTI' appears on the LCD panel.
- Use the Select Dial and function buttons to set the flash frequency (Hz) and number of flashes.

Figure 4.2: Visual representation of different flash modes.
4.4 High-Speed Sync (HSS)
HSS allows the flash to synchronize with shutter speeds faster than the camera's native flash sync speed (up to 1/8000s), enabling wider apertures in bright conditions or freezing fast motion.
- Press the SYNC button to activate HSS. The HSS icon will appear on the LCD.
4.5 Front & Rear Curtain Sync
These functions control when the flash fires relative to the shutter curtains, allowing for creative motion blur effects.
- Front Curtain Sync: Flash fires at the beginning of the exposure.
- Rear Curtain Sync: Flash fires at the end of the exposure, often used to create a trail of light behind a moving subject.

Figure 4.3: Examples of Front and Rear Curtain Sync.
4.6 Flash Exposure Compensation (FEC)
FEC allows you to fine-tune the flash output in TTL mode, making the flash brighter or darker than the camera's automatic setting.
- In TTL mode, press the FEC button (often combined with another function button).
- Rotate the Select Dial to adjust the compensation value (e.g., -3 to +3 stops).

Figure 4.4: Effect of TTL Exposure Compensation.
4.7 Zoom Function
The flash head's zoom position can be set automatically or manually to match the lens focal length, optimizing light coverage.
- Press the ZOOM button to cycle between auto and manual zoom.
- In manual zoom, rotate the Select Dial to adjust the focal length (24-105mm).
4.8 Wireless Transmission (Master/Slave)
The TT350o features a built-in 2.4G wireless X system, allowing it to function as a master or slave unit for remote flash control.
- As a Master Unit: The TT350o can control slave flash models such as AD600Pro, AD600Pro II, AD300Pro, AD400Pro, AD200 Pro, AD200Pro II, AD200, V860III-O, TT685IIO, TT600.
- As a Slave Unit: The TT350o can be controlled by master flash models/triggers like X2T-O, XPro-O, XProII-O, X3O, V860III-O, V100O, V1 Pro O, TT600.

Figure 4.5: Wireless control setup with the Godox TT350o.
4.9 Bounce Flash and Wide Panel
The flash head can be tilted and rotated to bounce light off surfaces, creating softer and more natural illumination. The built-in wide panel can be pulled out to spread light over a wider area for fill light.

Figure 4.6: Flash head tilted for bounce.

Figure 4.7: Flash head rotation for bounce direction.
5. Controls and Display
The TT350o features an intuitive LCD panel and a set of buttons and a dial for easy operation.
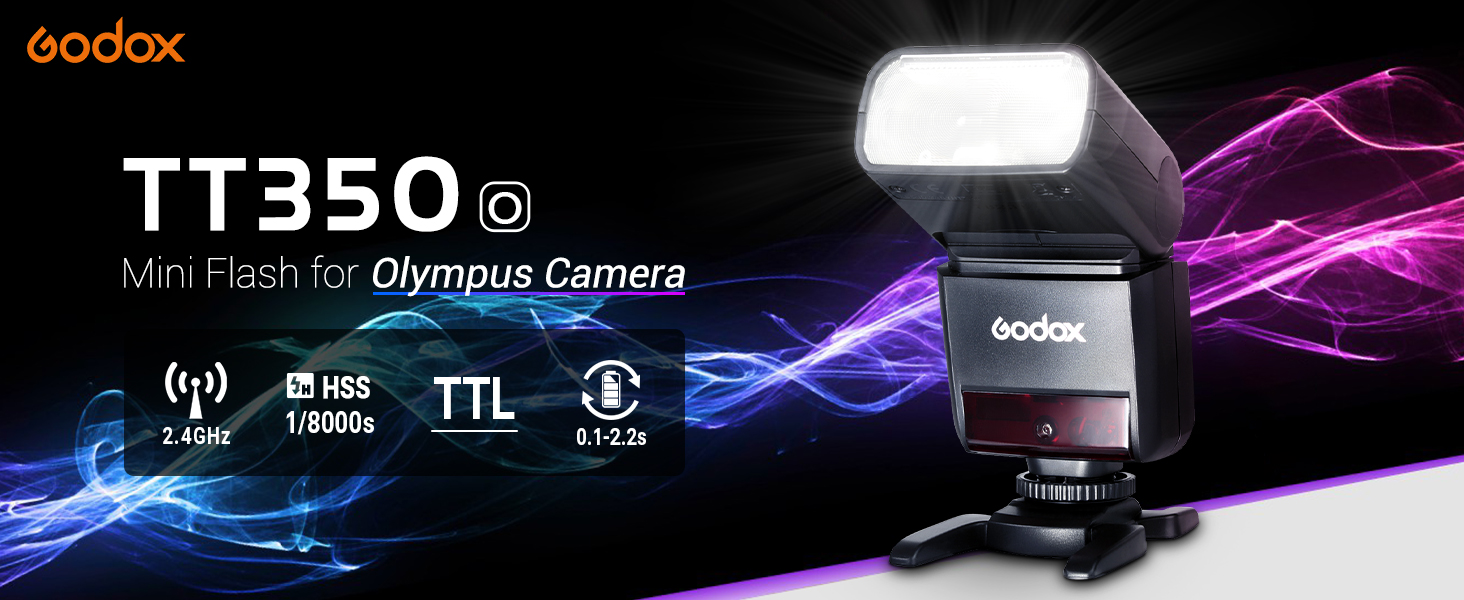
Figure 5.1: LCD panel and control buttons.
- LCD Panel: Displays current mode, power output, zoom setting, wireless channel/group, and other relevant information.
- MODE Button: Cycles through TTL, Manual, and Multi flash modes.
- ZOOM Button: Adjusts the flash head's zoom coverage.
- SYNC Button: Activates High-Speed Sync (HSS) or other sync modes.
- SLAVE / GR/CH Button: Used for wireless slave mode or setting group/channel in master mode.
- SET Button: Confirms selections or enters custom function settings.
- Select Dial: Adjusts values such as power output, zoom focal length, or compensation.
- Power Switch: Turns the unit on or off.
6. Maintenance
Proper maintenance ensures the longevity and reliable performance of your Godox TT350o flash unit.
- Cleaning: Use a soft, dry cloth to clean the flash body. For stubborn dirt, a slightly damp cloth can be used, followed by a dry one. Do not use solvents or abrasive cleaners.
- Flash Tube: Avoid touching the flash tube directly with bare hands. If touched, clean with a soft cloth moistened with alcohol to remove oils that can cause uneven light or premature aging.
- Battery Care: Remove batteries when the flash is not in use for extended periods to prevent leakage. Use only recommended battery types (AA).
- Storage: Store the flash in a cool, dry place, away from direct sunlight and extreme temperatures. Use the provided carrying pouch for protection during transport.
- Avoid Impact: The flash unit contains delicate electronic components. Avoid dropping or subjecting it to strong impacts.
7. Troubleshooting
If you encounter issues with your Godox TT350o, refer to the following common problems and solutions:
| Problem | Possible Cause | Solution |
|---|---|---|
| Flash does not fire. | Low battery, incorrect mode, flash not securely mounted, camera settings. | Check battery level and replace if necessary. Ensure flash is in an appropriate mode (TTL/M). Securely mount the flash on the camera hotshoe. Verify camera flash settings. |
| Long recycle time. | Low battery power, high power output setting. | Replace batteries with fresh or fully charged ones. Reduce flash power output. |
| Flash output is too bright/dark. | Incorrect FEC setting, incorrect manual power, subject distance. | Adjust Flash Exposure Compensation (FEC) in TTL mode. Adjust manual power output in M mode. Consider subject distance and adjust accordingly. |
| Wireless triggering fails. | Incorrect channel/group, distance, interference, master/slave unit incompatibility. | Ensure master and slave units are set to the same channel and group. Check distance and line of sight. Verify compatibility of all wireless units. |
| Flash head does not zoom. | Flash in auto zoom mode, mechanical obstruction. | Switch to manual zoom mode using the ZOOM button. Check for any physical obstructions. |
If the problem persists after attempting these solutions, please contact Godox customer support or your retailer for further assistance.
8. Specifications
Detailed technical specifications for the Godox TT350o Mini Thinklite TTL Flash Speedlite:
| Feature | Specification |
|---|---|
| Product Dimensions | 5.91 x 2.76 x 1.97 inches |
| Item Weight | 8.8 ounces |
| Item Model Number | TT350-O |
| Batteries Required | 2 AA batteries |
| Brand | GODOX |
| Compatible Mountings | Olympus, Panasonic |
| Camera Flash Type | Shoe Mount, Slave |
| Flash Sync Speed | 1/8000s (High-Speed Sync) |
| Included Components | Color gels kit (may vary), Mini Stand, Diffuser, Carrying Pouch |
| Guide Number | GN36 |
| Power Output | 1/1 to 1/128 (22 steps) |
| Recycle Time | Approx. 0.1-2.2s |
| Full Power Flashes | Approx. 210 (using 2500mAh Ni-MH batteries) |
| Zoom Range | 24-105mm (Auto/Manual) |
| Wireless Transmission | 2.4G, up to 100 meters |
9. Warranty and Support
Godox products are manufactured to high-quality standards. For information regarding warranty coverage, please refer to the warranty card included with your product or visit the official Godox website. Keep your purchase receipt as proof of purchase.
For technical support, troubleshooting assistance beyond this manual, or service inquiries, please contact Godox customer service or your authorized dealer. Contact information can typically be found on the Godox website or on your product packaging.
Important: Unauthorized repairs or modifications may void your warranty.