
JideTech JD-41UA
JideTech 4-Port VGA KVM Switch User Manual
Model: JD-41UA
1. Introduction
The JideTech 4-Port VGA KVM Switch with USB Hub and Audio allows you to control up to four computers using a single set of keyboard, mouse, and monitor. This device is designed for efficiency, enabling seamless switching between systems, making it ideal for home, office, and professional environments. It supports high-definition video output and offers plug-and-play functionality without the need for external power.

Figure 1.1: JideTech 4-Port VGA KVM Switch and included cables.
2. Product Features
- 4-Port KVM Functionality: Control up to four computers with one set of USB keyboard, USB mouse, and VGA monitor.
- Integrated USB 2.0 Hub: Share USB peripherals like external hard drives, printers, and scanners among connected computers.
- Audio and Microphone Support: Switch speaker and microphone output between computers.
- High Definition Output: Supports resolutions up to 2048 x 1536, with DDC support and automatic identification for high-quality display.
- Plug-and-Play: No software installation required. The device is bus-powered via USB, eliminating the need for an external power adapter.
- Wide Compatibility: Compatible with Windows 98SE/ME/2000/XP/2003 Server/Vista, Linux, and Mac OS.
- Wireless Device Support: Supports wireless keyboard and mouse (excluding multimedia keyboards and mice).
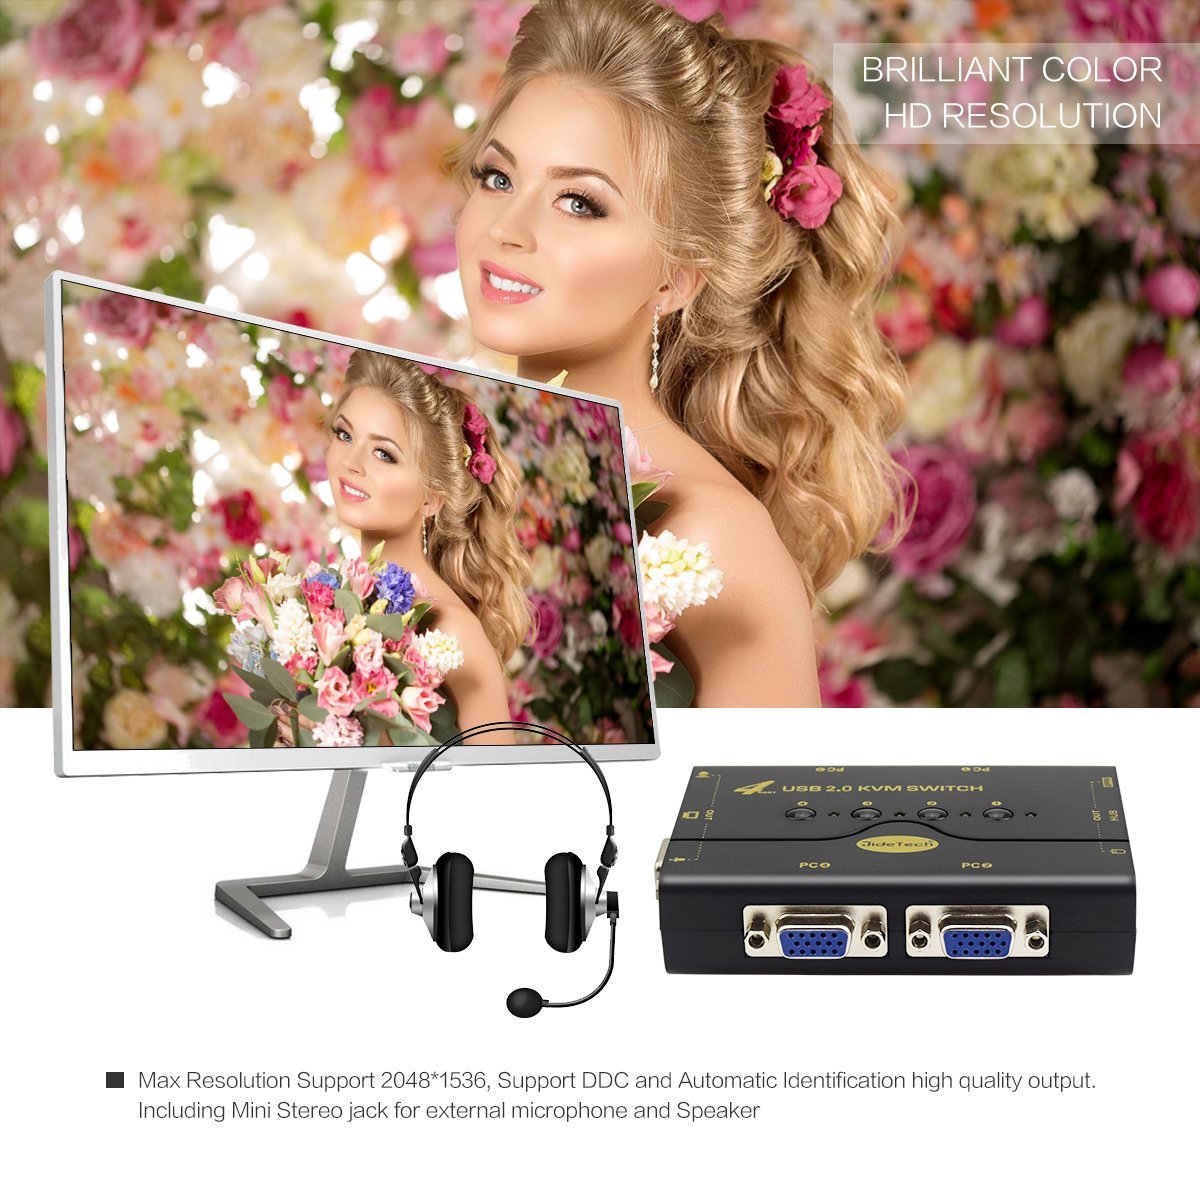
Figure 2.1: High-definition output capability of the KVM switch.

Figure 2.2: Versatile application scenarios for the KVM switch.
3. Package Contents
Verify that all items are present in your package:
- 1 x JideTech 4-Port USB 2.0 KVM Switch (Model: JD-41UA)
- 4 x 1.2M VGA KVM Cables (integrated USB and audio connectors)
- 1 x User Manual and Warranty Card

Figure 3.1: Package contents of the JideTech KVM Switch.
4. Setup Instructions
Follow these steps to connect your JideTech KVM Switch:
- Power Off All Devices: Ensure all computers, monitors, and peripherals are powered off before making connections.
- Connect Monitor: Connect your VGA monitor to the "VGA Output" port on the KVM switch.
- Connect Keyboard and Mouse: Connect your USB keyboard to the "USB Port (Keyboard)" and your USB mouse to the "USB Port (Mouse)" on the KVM switch.
- Connect Audio (Optional): Connect your speakers to the "Audio Port (Output)" and your microphone to the "Audio Port (Input)" on the KVM switch.
- Connect Computers: Use the provided KVM cables to connect each computer to the KVM switch.
- Connect the VGA end of the KVM cable to the VGA output of your computer.
- Connect the USB end of the KVM cable to a USB port on your computer.
- Connect the audio (speaker and microphone) jacks of the KVM cable to the corresponding audio ports on your computer.
- Repeat for all computers (PC1, PC2, PC3, PC4) to their respective VGA Input ports on the KVM switch.
- Connect USB Peripherals (Optional): Connect any additional USB devices (e.g., printer, USB drive) to the "HUB Interface" USB ports on the KVM switch.
- Power On Devices: Power on your monitor first, then your computers. The KVM switch will draw power from the USB connection.

Figure 4.1: Detailed connection diagram for the KVM switch.
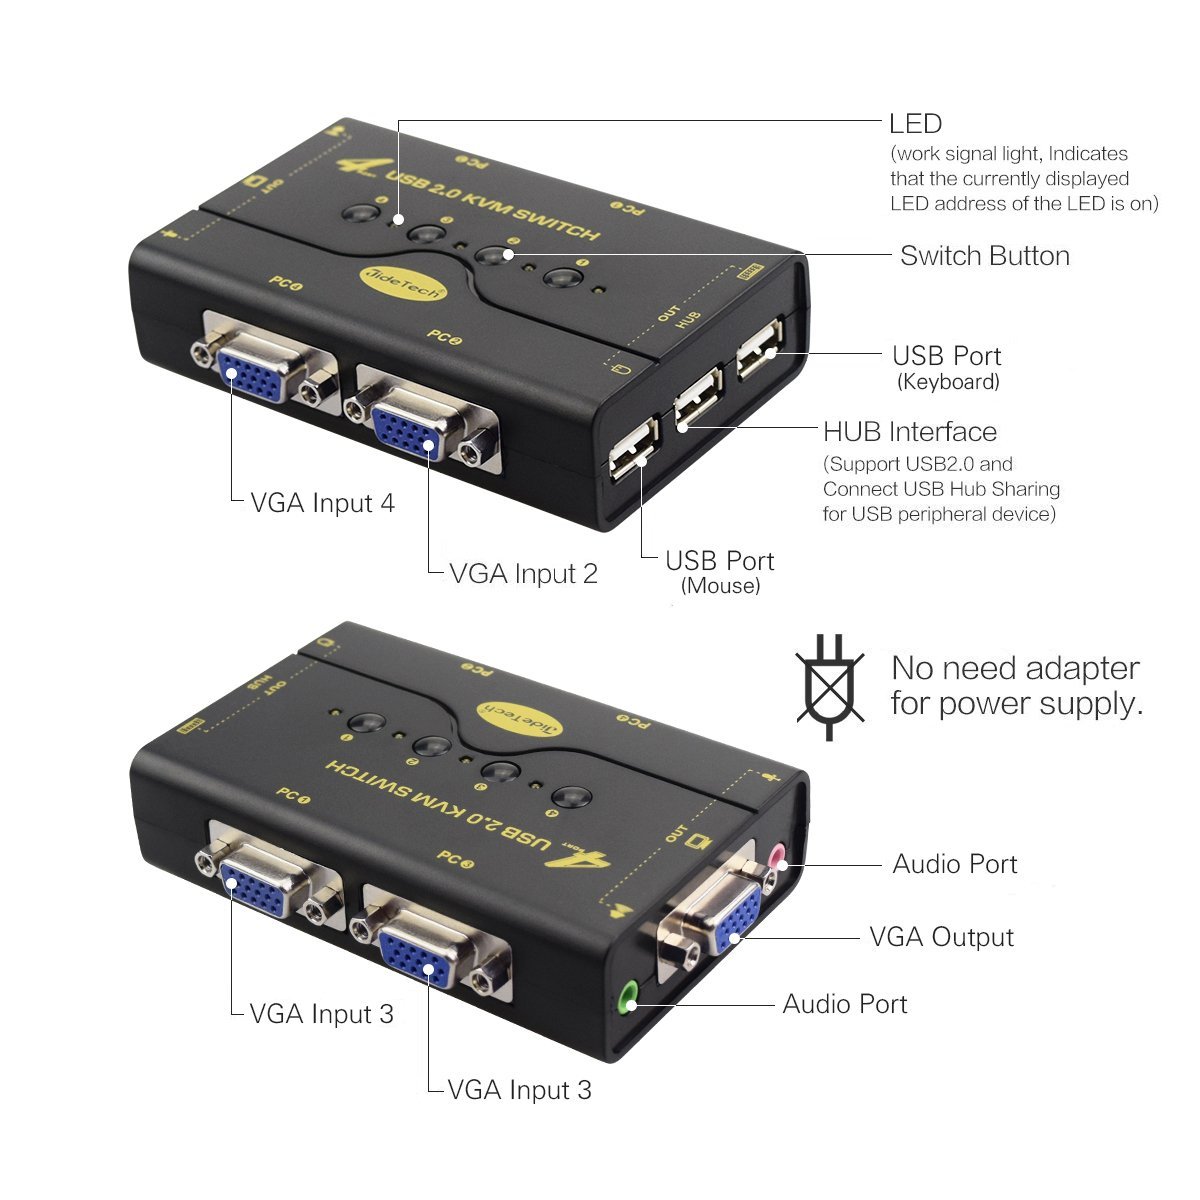
Figure 4.2: Overview of KVM switch ports and indicators.
5. Operating Instructions
The JideTech KVM Switch offers simple push-button switching between connected computers.
- Switching Computers: To switch between the connected computers, gently press the corresponding numbered "Switch Button" on the top of the KVM device. Each press will cycle through the active ports (PC1, PC2, PC3, PC4).
- LED Indicators: The LED indicators above each switch button will illuminate to show which computer is currently selected and active.
- USB Hub Usage: Any USB devices connected to the "HUB Interface" ports will be accessible by the currently selected computer.
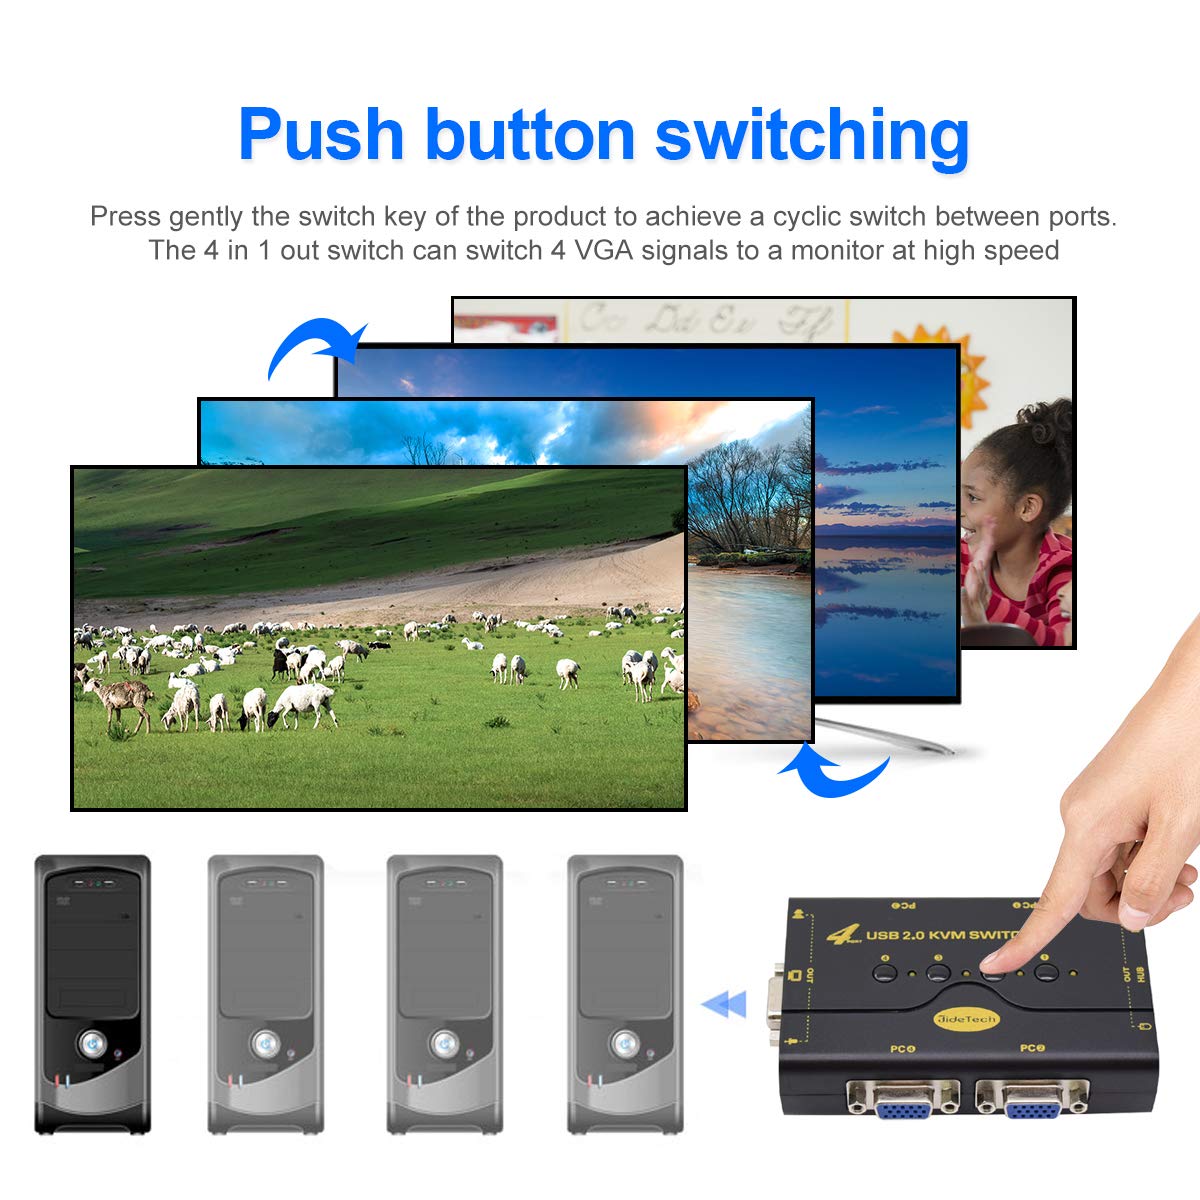
Figure 5.1: Push-button switching operation.

Figure 5.2: The KVM switch's integrated USB hub allows sharing of peripherals like printers, USB drives, and scanners.
6. Maintenance
To ensure the longevity and optimal performance of your KVM switch, follow these maintenance guidelines:
- Cleaning: Use a soft, dry cloth to clean the exterior of the device. Avoid using liquid cleaners or aerosols, which may damage the unit.
- Ventilation: Ensure the KVM switch is placed in a well-ventilated area to prevent overheating. Do not block any ventilation openings.
- Cable Management: Keep cables organized and untangled to prevent damage and ensure stable connections.
- Storage: If storing the device for an extended period, disconnect all cables and store it in a cool, dry place away from direct sunlight and extreme temperatures.
7. Troubleshooting
If you encounter issues with your JideTech KVM switch, refer to the following common troubleshooting steps:
- No Display/Flickering Screen:
- Ensure all VGA cables are securely connected to both the KVM switch and the computers/monitor.
- Verify that the monitor is powered on and set to the correct input source.
- Try reducing the display resolution on the computer if it's set too high for the KVM switch's capabilities.
- Restart the connected computers.
- Keyboard/Mouse Not Responding:
- Ensure the USB cables from the KVM switch are securely connected to the USB ports on the computers.
- Check that the keyboard and mouse are connected to the correct dedicated USB ports on the KVM switch.
- For wireless keyboards/mice, ensure they are compatible (multimedia keyboards/mice may not be fully supported). Try a wired keyboard/mouse to isolate the issue.
- Reconnect the KVM cables to the computers.
- No Audio:
- Verify that the audio cables are correctly connected to the KVM switch and the computers' audio ports.
- Check the audio settings on the active computer to ensure the correct output device is selected and volume is not muted.
- KVM Switch Not Powering On:
- The KVM switch is bus-powered. Ensure at least one connected computer is powered on and its USB cable is properly connected to the KVM switch.
8. Specifications
| Feature | Specification |
|---|---|
| Model Number | JD-41UA |
| Brand | JideTech |
| Product Dimensions (L x W x H) | 4.98 x 8 x 8 cm (50 x 80 x 80 mm) |
| Item Weight | 272.16 grams |
| Video Resolution | Up to 2048 x 1536 |
| USB Hub | USB 2.0 |
| Power Supply | Bus-powered (no external adapter needed) |
| Operating System Support | Windows 98SE/ME/2000/XP/2003 Server/Vista, Linux, Mac OS |
| Material | Plastic |

Figure 8.1: Physical dimensions of the KVM switch.
9. Warranty and Support
JideTech is committed to providing high-quality products and customer satisfaction.
- 1-Year Replacement: JideTech offers a 1-year replacement policy for product defects, with no repair service.
- 24/7 Online Support: Dedicated one-to-one online support is available around the clock.
- 30-Day Money Back Guarantee: If you are not satisfied with your purchase, you may be eligible for a refund within 30 days.
- No Monthly Fees: There are no recurring fees associated with the use of this product.
- Lifetime Technical Support: JideTech provides lifetime technical assistance for this product.
For technical support or warranty claims, please refer to the contact information provided on the warranty card included in your package or visit the official JideTech website.

Figure 9.1: JideTech customer support and warranty benefits.
Related documentsJD-41UA


Ask a question about this manual
Ask about setup, troubleshooting, compatibility, parts, safety, or missing instructions. Manuals+ will review the question and use this page’s manual context to help answer it.