1. Introduction
This manual provides comprehensive instructions for the safe and effective use of your Neoteck Digital Turntable Stylus Force Gauge, model NTK042. This precision instrument is designed to accurately measure the tracking force of your turntable's stylus, which is crucial for optimal audio playback quality and to prevent premature wear of your records and stylus.
Proper stylus force adjustment ensures accurate tracking, reduces distortion, and extends the lifespan of your vinyl collection and phono cartridge.
2. Safety Information
- Keep the device away from water and moisture.
- Avoid dropping the device or subjecting it to strong impacts.
- Do not attempt to disassemble or repair the device yourself. Refer to qualified personnel for service.
- Store the device in a cool, dry place when not in use.
- Dispose of batteries according to local regulations.
3. Package Contents
Please verify that all items listed below are included in your package:
- 1 x Neoteck Digital Stylus Force Gauge (Model NTK042)
- 1 x 5g Calibration Weight
- 4 x LR44 Button Batteries (pre-installed or included separately)
- 1 x Leather Sheath/Pouch
- 1 x User Manual (this document)

Image: Contents of the Neoteck Digital Stylus Force Gauge package.
4. Product Overview
The Neoteck Digital Stylus Force Gauge features a compact design with an orange LCD backlight for clear readings. It is equipped with a high-quality aluminum sensor and a high-performance chipset for accurate and fast measurements.

Image: Front view of the Neoteck Digital Stylus Force Gauge.
Components:
- Display: Orange LCD backlight for clear readings.
- "M" Button (Mode): Used to switch between weight units (g, oz, ozt, dwt, ct, gn, TL).
- Power Button: Turns the device on or off.
- "T" Button (Tare): Used to re-zero the scale.
- Measurement Platform: Area where the stylus is placed for measurement. Features a retro tray design.
- Battery Compartment: Located on the underside, holds 4 LR44 batteries.
- Protective Cover: Slides over the measurement platform for protection when not in use.

Image: Internal components of the stylus force gauge, illustrating the sensor and chipset.
5. Setup
5.1 Battery Installation
- Locate the battery compartment on the underside of the device.
- Open the battery cover.
- Insert the 4 LR44 button batteries, ensuring correct polarity (+/-).
- Close the battery cover securely.
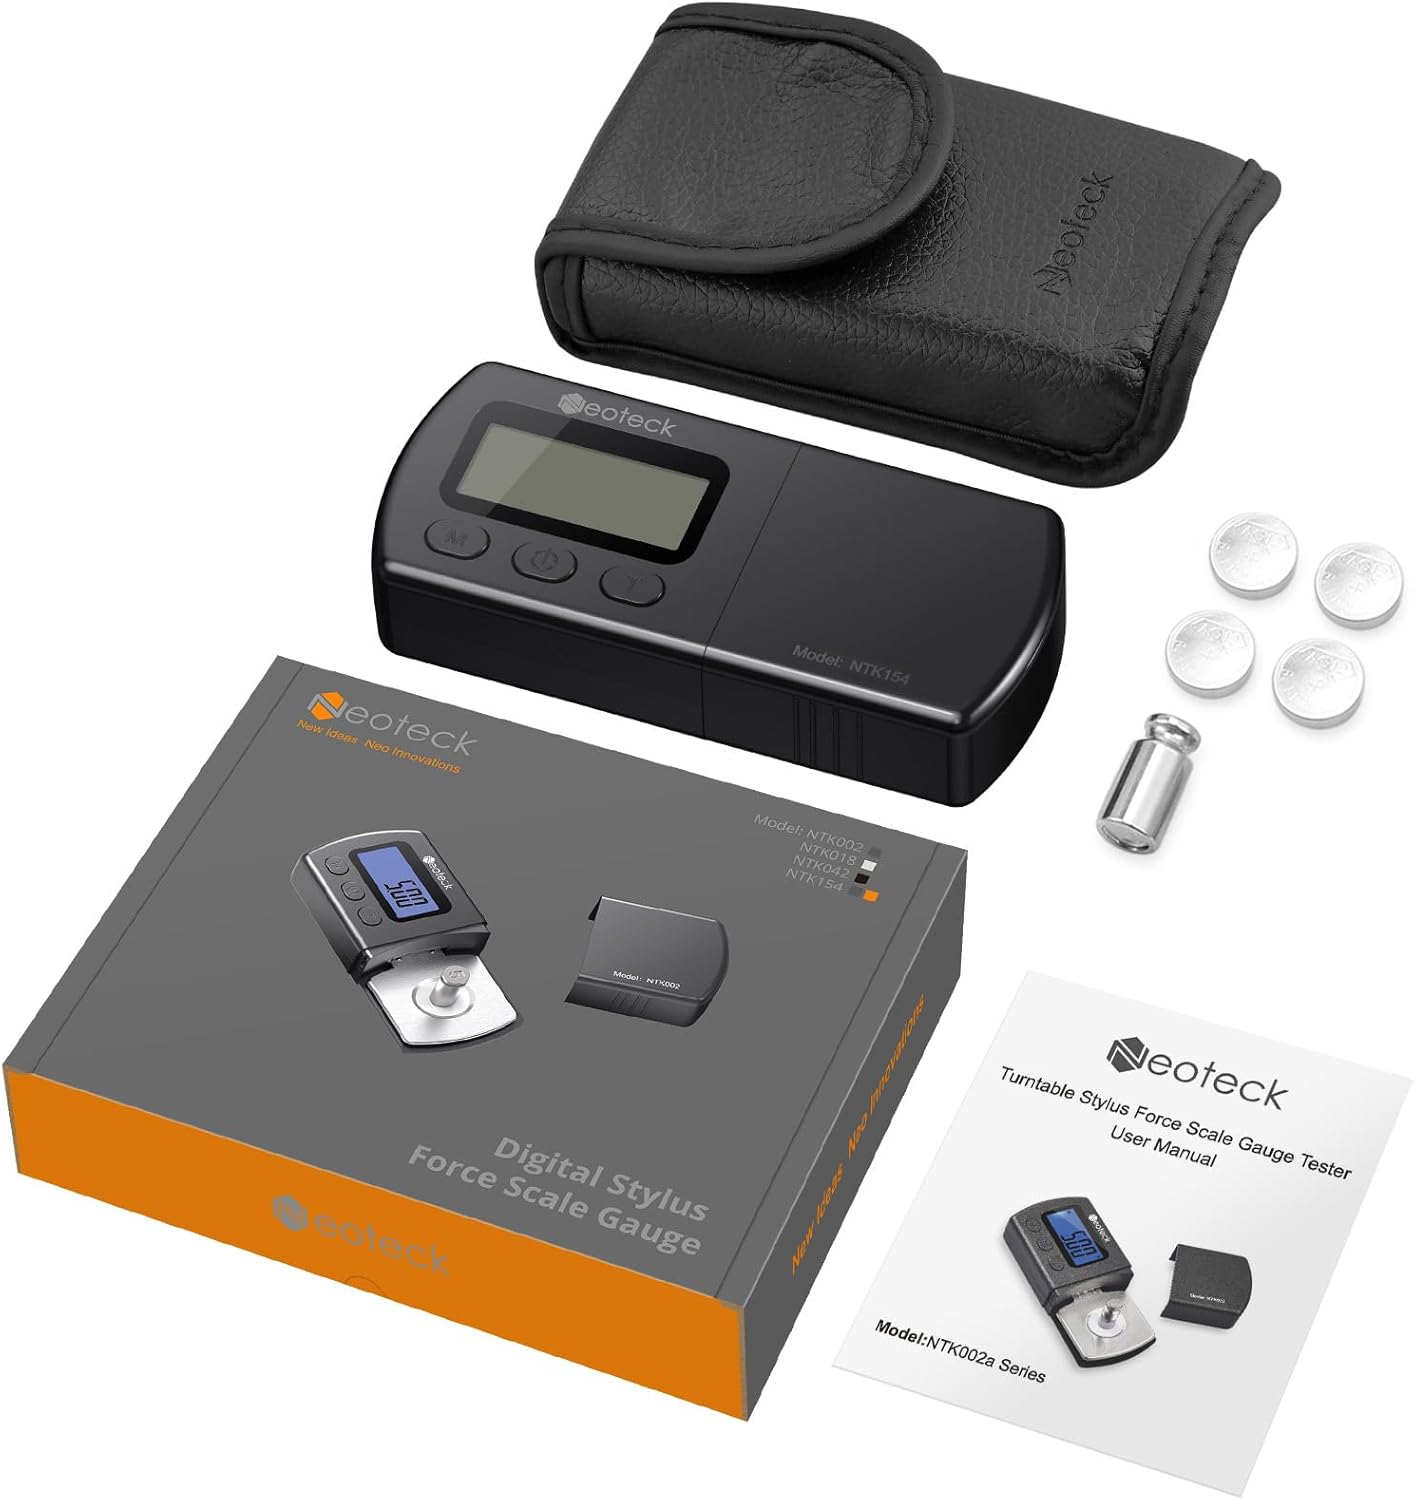
Image: Battery compartment on the underside of the device.
5.2 Calibration
It is recommended to calibrate the gauge periodically to ensure accuracy. A 5g calibration weight is included for this purpose.
- Place the gauge on a stable, level surface.
- Press the Power button to turn it on. Wait for the display to show "0.00g".
- Gently place the 5g calibration weight onto the center of the measurement platform.
- The display should read "5.00g". If it does not, press and hold the "M" button until "CAL" appears, then release.
- Press the "M" button again. The display will flash "5.00g".
- Wait for the display to show "PASS" and then return to "0.00g". The calibration is complete.
- Remove the calibration weight.
6. Operating Instructions
6.1 Measuring Stylus Tracking Force
- Place the stylus force gauge on the turntable platter, ensuring it is level with the record surface. If necessary, use a spare record or mat to achieve the correct height.
- Press the Power button to turn on the gauge. Wait for the display to show "0.00g".
- Carefully lower the turntable's tonearm so that the stylus rests gently on the center of the gauge's measurement platform (the target dot).
- Read the tracking force displayed on the screen.
- Adjust your turntable's counterweight or anti-skate settings as needed to achieve the recommended tracking force for your cartridge.
- Lift the tonearm from the gauge.
- Press the Power button to turn off the gauge, or it will automatically shut off after a period of inactivity.

Image: Step-by-step guide for measuring stylus force.
6.2 Unit Conversion
Press the "M" button repeatedly to cycle through the available weight units: grams (g), ounces (oz), troy ounces (ozt), pennyweights (dwt), carats (ct), grains (gn), and taels (TL).

Image: Examples of different weight units displayed on the gauge.
6.3 Tare Function
If you need to measure the weight of an item placed on the platform after another item, or if the display does not show "0.00g" when empty, press the "T" button to re-zero the scale.
7. Maintenance
- Cleaning: Use a soft, dry cloth to clean the device. Do not use abrasive cleaners or immerse the device in water.
- Storage: When not in use, store the gauge in its protective leather sheath to prevent dust and damage. Keep it in a dry environment.
- Battery Replacement: If the display becomes dim or the device does not power on, replace all four LR44 batteries.
8. Troubleshooting
| Problem | Possible Cause | Solution |
|---|---|---|
| Device does not turn on. | Dead or incorrectly installed batteries. | Check battery polarity or replace with new LR44 batteries. |
| Inaccurate readings. | Not calibrated, unstable surface, or external interference. | Perform calibration (Section 5.2). Ensure the gauge is on a stable, level surface. Avoid vibrations or air currents during measurement. |
| Display shows "Lo". | Low battery power. | Replace all LR44 batteries. |
| Display shows "O-Ld". | Overload. | Remove the item from the platform immediately. The maximum capacity is 5.00g. |
9. Specifications
- Model: NTK042
- Measurement Range: 0.01g to 5.00g
- Accuracy: ±0.01g
- Units: g, oz, ozt, dwt, ct, gn, TL
- Display: Orange LCD Backlight
- Power: 4 x LR44 Button Batteries (included)
- Auto Off: Yes (after a period of inactivity)
- Product Dimensions: 6.2 x 4.1 x 0.9 inches (15.7 x 10.4 x 2.3 cm)
- Item Weight: 3.2 ounces (90.7 grams)
- Material: High-quality stainless scale, aluminum sensor
10. Warranty and Support
This Neoteck product is covered by an 18-month warranty from the date of purchase. This warranty covers manufacturing defects and workmanship under normal use.
For technical support, warranty claims, or any questions regarding your product, please contact Neoteck customer service through the retailer where the product was purchased or visit the official Neoteck website for contact information.
Please retain your proof of purchase for warranty service.