
1. Introduction
The DBPOWER D104 Dash Cam is a compact and reliable vehicle video recorder designed to capture high-definition footage of your journeys. Featuring a 1.5-inch screen, 120-degree wide-angle lens, G-Sensor for emergency recording, and loop recording functionality, it provides essential documentation for your driving experience. This manual provides detailed instructions for the proper installation, operation, and maintenance of your dash cam.
2. Package Contents
Please check the box for the following items:
- DBPOWER Dash Camera
- Suction Cup Mount
- Car Charger
- USB Cable
- User Manual
- Quick Installation Guide
Note: A 32GB Class 10 Micro SD card is required for operation and is not included in the package.
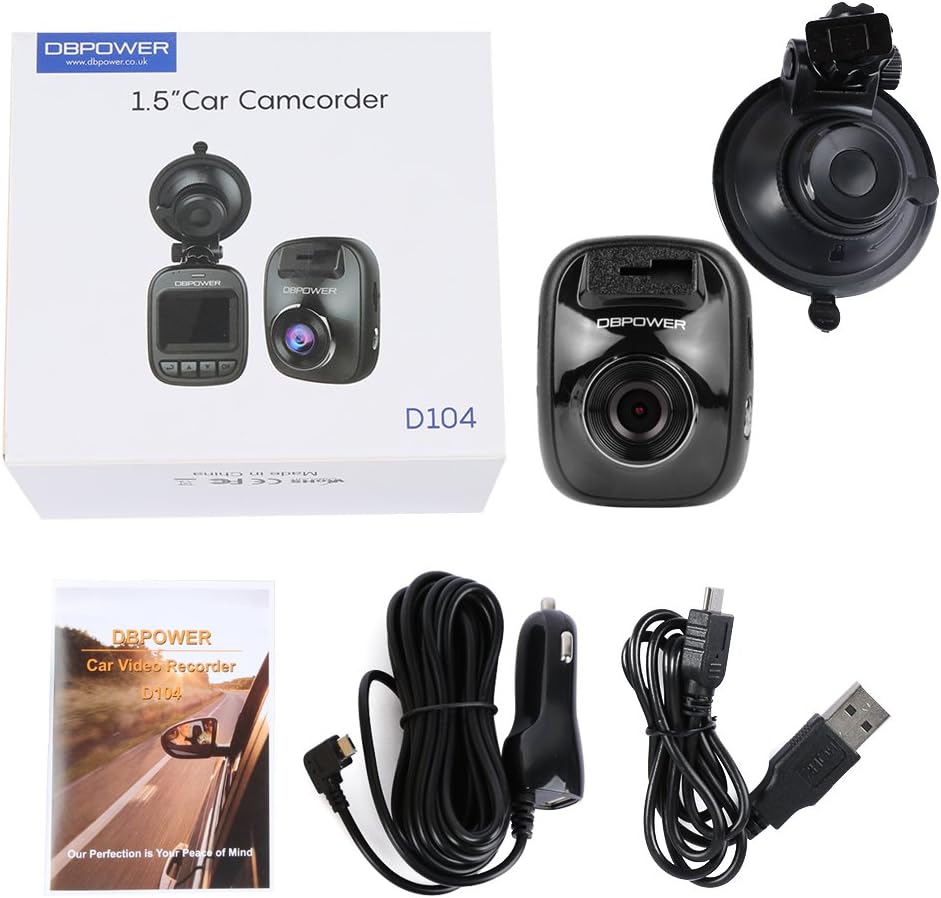
Figure 2.1: Contents of the DBPOWER D104 Dash Cam package.
3. Product Overview
Familiarize yourself with the physical components and dimensions of your DBPOWER D104 Dash Cam.

Figure 3.1: DBPOWER D104 Dash Cam dimensions.

Figure 3.2: Front, side, and top views of the DBPOWER D104 Dash Cam with labeled components.
- SD card slot
- Power on/off button
- Menu button
- Up button
- Down button
- OK button
- USB interface
- Reset button
- Holder slot
- Lens
4. Setup Instructions
- Insert Micro SD Card: Insert a Class 10 or higher Micro SD/TF card (up to 32GB, not included) into the SD card slot (1). Ensure it is inserted correctly until it clicks into place.
- Format SD Card: It is recommended to format the SD card before first use to ensure smooth operation. This can typically be done through the camera's menu settings.
- Mount the Dash Cam: Attach the suction cup mount to the windshield, ideally behind the rearview mirror to avoid obstructing your view. Secure the dash cam into the holder slot (9) on the mount.
- Connect Power: Connect the car charger to the USB interface (7) on the dash cam and plug the other end into your vehicle's 12V power outlet.
- Adjust Lens Angle: Adjust the lens (10) to ensure it captures the road ahead clearly. The 120-degree wide viewing angle covers a broad area.
- Set Date and Time: Power on the device and navigate through the menu to set the correct date, time, and any other desired settings like license ID.
Note: The battery is primarily for saving files in emergencies. Always connect the dash cam to your car charger while in use.
5. Operating Instructions
5.1 Automatic On/Off Recording
The DBPOWER D104 Dash Cam features an automatic on/off function. Once the vehicle powers on, the dash cam will automatically turn on and begin recording. It will automatically shut off when the vehicle is turned off.
5.2 Manual Operation
- Power On/Off: Press and hold the Power on/off button (2) to manually turn the device on or off.
- Menu Navigation: Use the Menu button (3) to access settings. Use the Up (4) and Down (5) buttons to navigate through options, and the OK button (6) to confirm selections.
- Quick Snapshot: While recording, press a designated button (refer to Quick Installation Guide if not explicitly labeled on device diagram) to take a high-definition picture.
5.3 Playback
To view recorded footage or pictures:
- On Device: Use the menu and navigation buttons to access the playback mode and select files.
- On TV: Connect your DBPOWER Dash Cam to any TV via an HDMI cable (not included) to view your video footage or pictures on a larger screen.
- On Computer: Remove the Micro SD card and insert it into a card reader connected to your computer to transfer and view files.
6. Key Features Explained
6.1 G-Sensor (Emergency Lock)
The G-Sensor function detects sudden movements or impacts, such as those from a collision. When activated, it automatically locks the current video file, preventing it from being overwritten by loop recording. These files are typically saved in a dedicated "Event" folder for easy retrieval as evidence.

Figure 6.1: G-Sensor activation during an impact event.
6.2 Loop Recording
Loop recording ensures continuous recording by overwriting the oldest footage with the newest when the memory card reaches its capacity. You can set the loop recording duration to 1, 3, or 5 minutes through the camera's settings. This eliminates the need to manually clear the memory card.

Figure 6.2: Visual representation of the loop recording function.
6.3 Motion Detection
When enabled, motion detection allows the dash cam to automatically start recording if it detects movement in front of the vehicle while parked. This feature helps capture incidents that occur when you are not in the car. Ensure the dash cam has a continuous power supply for this feature to work effectively.
6.4 Low Voltage Alert
The dash cam is equipped with a low voltage alert system. It will automatically power off and save current video files if the voltage drops below 3.65V. The camera will also prompt you to recharge if the working voltage falls below 3.7V, preventing unexpected shutdowns and loss of recordings due to insufficient power.
6.5 Wide Viewing Angle
The 120-degree wide viewing angle captures a broad perspective of the road, ensuring that important details, such as license plates and surrounding traffic, are recorded. This wide coverage enhances the effectiveness of the dash cam as an incident recorder.

Figure 6.3: The 120-degree wide field of vision.

Figure 6.4: Dash Cam view from inside a vehicle, demonstrating 1080P HD recording.
7. Official Product Video
Watch the official product video for a visual guide on the DBPOWER D104 Dash Cam's features and operation.
Video 7.1: Official DBPOWER D104 Dash Cam overview and feature demonstration.
8. Specifications
| Feature | Detail |
|---|---|
| Brand | DBPOWER |
| Model Number | D104 |
| Screen Size | 1.5 Inches |
| Display Type | LCD |
| Video Capture Resolution | 1080p |
| Real Angle of View | 120 Degrees |
| Special Features | G-Sensor, Night Vision, Parking Monitor (Motion Detection) |
| Connectivity Technology | HDMI, USB |
| Flash Memory Type | MicroSD (Supports up to 32GB Class 10) |
| Mounting Type | Suction Mount |
| Item Weight | 0.55 Pounds |
| Are Batteries Included | No (Internal battery for emergency file saving) |
9. Troubleshooting
- Camera not turning on: Ensure the car charger is properly connected and the vehicle's power outlet is functioning. The internal battery is for emergency file saving, not primary operation.
- Recording stops unexpectedly:
- Check if the Micro SD card is Class 10 or higher. Lower class cards may not keep up with the recording speed.
- Format the SD card regularly (e.g., monthly) to prevent data corruption and ensure optimal performance.
- Ensure the card is not full. Loop recording should prevent this, but check if G-Sensor events are filling the card.
- Video quality is poor:
- Clean the camera lens.
- Ensure the protective film has been removed from the lens.
- Check the video resolution settings in the menu.
- G-Sensor is too sensitive/not sensitive enough: Adjust the G-Sensor sensitivity setting in the camera's menu.
- Dash cam gets hot: It is normal for the dash cam to become warm during operation. If it becomes excessively hot or emits smoke, disconnect power immediately and contact support.
10. Warranty and Support
For warranty information and technical support, please refer to the official DBPOWER website or contact their customer service directly. Details are typically provided in the Quick Installation Guide or on the product packaging.
You can also visit the DBPOWER Store on Amazon for more product information and support resources.
