
1. Introduction
This manual provides essential information for the safe and efficient operation of your Atomos Sumo 19 HDR High Bright Monitor. Please read this manual thoroughly before using the device to ensure proper setup, operation, and maintenance. Retain this manual for future reference.
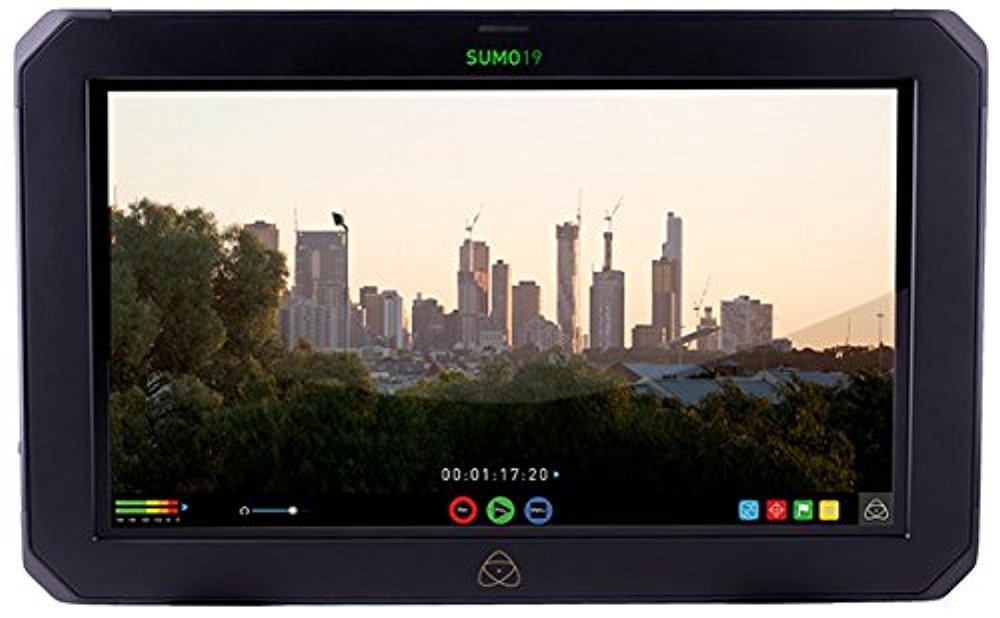
Figure 1.1: Front view of the Atomos Sumo 19 HDR High Bright Monitor, showcasing its large display and robust casing.
2. Safety Information
Observe the following safety precautions to prevent damage to the device and ensure user safety:
- Power Source: Use only the specified power adapter. Incorrect voltage can damage the unit.
- Ventilation: Do not block ventilation openings. Ensure adequate airflow to prevent overheating.
- Water and Moisture: Keep the device away from water, rain, and high humidity. Do not operate with wet hands.
- Impact: Avoid dropping or subjecting the device to strong impacts.
- Cleaning: Disconnect power before cleaning. Use a soft, dry cloth. Do not use liquid or aerosol cleaners.
- Servicing: Do not attempt to service the device yourself. Refer all servicing to qualified personnel.
- Proposition 65 Warning: This product may contain chemicals known to the State of California to cause cancer and birth defects or other reproductive harm.
3. Setup
3.1. Package Contents
Verify that all items are present in the package:
- Atomos Sumo 19 HDR High Bright Monitor
- AC Power Adapter
- Quick Start Guide
- SSD/HDD Caddy (for recording media)
3.2. Mounting the Monitor
The Sumo 19 can be mounted using standard VESA mounts or a dedicated C-stand mounting bracket (sold separately). Ensure the mounting solution is robust enough to support the monitor's weight (approximately 11.99 pounds).
- Attach the appropriate mounting plate to the rear of the monitor using the provided screws.
- Secure the monitor to your desired stand or rig.
Figure 3.1: Illustration of the rear panel with VESA mounting points. Ensure secure attachment to a compatible mount.
3.3. Connecting Power
Connect the AC power adapter to the DC input port on the monitor and then to a suitable power outlet.
- Locate the DC input port on the side or rear of the monitor.
- Plug the power adapter into the monitor, then into a wall socket.
3.4. Connecting Video Inputs
The Sumo 19 accepts video signals via HDMI or SDI. It features dual 12/6/3G-SDI inputs and HDMI input.
- HDMI: Connect an HDMI cable from your source device to the HDMI input port on the monitor.
- SDI: Connect SDI cables from your source devices to the SDI input ports. The monitor supports up to 4Kp60 or HDp240 over SDI.
Figure 3.2: Diagram illustrating the location of HDMI and SDI input/output ports for video signal connection.
3.5. Inserting Recording Media
To enable recording, insert a compatible SSD or HDD into the provided caddy, then slide the caddy into the monitor's media slot.
- Open the SSD/HDD caddy and securely place your recording media inside.
- Slide the loaded caddy into the designated slot on the monitor until it clicks into place.
4. Operating the Monitor
4.1. Powering On/Off
Press and hold the power button located on the monitor's frame until the screen illuminates or shuts down.
4.2. Navigating the User Interface
The Sumo 19 features a touchscreen interface for menu navigation and control.
- Tap: Select an option or activate a function.
- Swipe: Navigate through menus or adjust parameters.
- Pinch/Zoom: (If supported) Magnify parts of the image.
Figure 4.1: Example of the touchscreen user interface, showing main menu options and monitoring tools.
4.3. Input Selection
To switch between connected video sources:
- Tap the 'Input' icon on the screen.
- Select the desired HDMI or SDI input from the list.
4.4. HDR and SDR Monitoring
The Sumo 19 supports both HDR (High Dynamic Range) and SDR (Standard Dynamic Range) monitoring. It provides real-time exposure tools for Log footage.
- Access the 'Display' settings from the main menu.
- Select 'HDR' or 'SDR' mode based on your workflow.
- Adjust HDR settings such as brightness and contrast as needed.
4.5. Loading Custom LUTs
You can load custom Look Up Tables (LUTs) onto the Sumo 19 via the HDD/SSD slot to preview different looks on set.
- Save your .cube LUT files to the root directory of your recording media (SSD/HDD).
- Insert the media into the monitor.
- Navigate to the 'LUT' section in the monitor's menu.
- Select 'Load LUT' and choose your desired LUT from the list.
4.6. Recording Functions
The Sumo 19 is capable of recording video directly to SSD/HDD media.
- Ensure recording media is properly inserted and formatted.
- Select your desired recording codec and resolution in the 'Record' menu.
- Press the 'Record' button on the touchscreen to start and stop recording.
5. Maintenance
5.1. Cleaning the Monitor
To maintain optimal performance and appearance:
- Always power off and disconnect the monitor from power before cleaning.
- Use a soft, lint-free cloth to gently wipe the screen and body.
- For stubborn marks, slightly dampen the cloth with water. Avoid harsh chemicals or abrasive materials.
5.2. Firmware Updates
Atomos periodically releases firmware updates to improve performance and add features. Check the official Atomos website for the latest firmware for your Sumo 19.
- Download the firmware file to a formatted SSD/HDD.
- Insert the media into the monitor.
- Navigate to the 'Settings' menu and select 'Firmware Update'.
- Follow the on-screen instructions to complete the update. Do not power off the monitor during this process.
5.3. Storage
When not in use, store the monitor in a cool, dry place, protected from dust and extreme temperatures. Use a protective case for transport.
6. Troubleshooting
If you encounter issues with your Atomos Sumo 19, refer to the following common problems and solutions:
| Problem | Possible Cause | Solution |
|---|---|---|
| Monitor does not power on. | No power, faulty power adapter, loose connection. | Check power cable connections. Ensure power adapter is functional and plugged into a live outlet. |
| No video signal displayed. | Incorrect input selected, faulty cable, source device off/incorrect output. | Verify correct input is selected on the monitor. Check video cables for damage and ensure they are securely connected. Confirm source device is outputting a signal. |
| Screen is too dark or too bright. | Display settings are incorrect. | Adjust brightness, contrast, and HDR/SDR settings in the 'Display' menu. |
| Recording not starting. | No media, unformatted media, media full, incorrect recording settings. | Ensure SSD/HDD is inserted, formatted, and has sufficient space. Check recording codec and resolution settings. |
If the problem persists, please contact Atomos customer support.
7. Specifications
| Feature | Detail |
|---|---|
| Model Number | ATOMSUMO19 |
| Display Size | 19 inches |
| Resolution | 1920x1200 |
| Aspect Ratio | 16:9 native |
| Brightness | 1200 nit (High Bright) |
| Color Depth | 10-bit HDR |
| Video Inputs | HDMI, Dual 12/6/3G-SDI |
| Max Input Resolution/Framerate | 4Kp60 (HDMI/SDI), HDp240 (SDI) |
| Recording Media | SSD/HDD via caddy |
| Product Dimensions | 14.96 x 12.99 x 19.84 inches |
| Item Weight | 11.99 pounds |
| Manufacturer | Atomos |
8. Warranty Information
The Atomos Sumo 19 HDR High Bright Monitor comes with a 1-Year Manufacturer's Limited Warranty. This warranty covers defects in materials and workmanship under normal use. For full terms and conditions, please refer to the warranty card included with your product or visit the official Atomos website.
Keep your proof of purchase for warranty claims.
9. Customer Support
For technical assistance, product inquiries, or warranty claims, please visit the official Atomos support website:
You may also find FAQs, firmware downloads, and additional resources on their website.


